
Stuffing balls, those irresistible little spheres of savory goodness, are a holiday season must-have for so many of us. But what is it about these humble bites that makes them so universally adored? Perhaps it’s the perfect crispy exterior giving way to a wonderfully moist and flavorful interior, a delightful contrast that tantalizes the taste buds. They’re more than just a side dish; they’re a vessel for comfort, tradition, and cherished memories, often bringing families together around the dinner table. What truly sets exceptional stuffing balls apart, and what we’re diving into today, is the careful balance of herbs, the perfect amount of moisture, and a golden-brown crust that sings with every bite. Forget the dry, crumbly disappointments of the past; get ready to elevate your stuffing game with this incredible recipe.
Ingredients:
- 4 cups dry stuffing mix
- 1 cup chicken broth
- ½ cup unsalted butter, melted
- 2 eggs, beaten
- 1 small onion, chopped
- ½ cup celery, chopped
- 1 teaspoon poultry seasoning
- Salt and pepper to taste
- Fresh parsley for garnish
Preparing the Base for Your Stuffing Balls
The foundation of truly delicious stuffing balls lies in a well-prepared stuffing mix. Begin by placing your 4 cups of dry stuffing mix into a large mixing bowl. This is where all the magic will happen, so a generous-sized bowl is key to ensure easy mixing and prevent spills. Next, we need to rehydrate the stuffing mix to create a pliable base that can be shaped into perfect balls.
In a separate, medium-sized bowl, gently whisk together your 2 beaten eggs. These eggs will act as the binder, holding all the delicious ingredients together and ensuring your stuffing balls don’t crumble when baked. Now, pour the 1 cup of chicken broth into the bowl with the eggs. The chicken broth adds moisture and a rich savory flavor that permeates the entire stuffing ball. Whisk these two ingredients together until they are thoroughly combined, creating a smooth, slightly frothy liquid.
Now, it’s time to introduce the flavor boosters. Add the ½ cup of melted unsalted butter to the egg and broth mixture. Melted butter not only adds richness but also helps to toast the bread cubes in the stuffing mix, giving them a more complex flavor and a slightly crispier texture once baked. Stir the butter into the liquid mixture until it’s well incorporated. Finally, add the 1 teaspoon of poultry seasoning to this wet ingredient mixture. Poultry seasoning is the quintessential spice blend for stuffing, typically featuring sage, thyme, rosemary, and marjoram, which work harmoniously to create that classic stuffing aroma and taste. Give it a final whisk to ensure all the seasonings are distributed evenly.
Building the Flavor Profile
With your wet ingredients ready, it’s time to infuse your stuffing balls with aromatic vegetables. In a small skillet, melt a tablespoon of the unsalted butter over medium heat. Add your finely chopped 1 small onion and ½ cup of chopped celery to the skillet. Sauté these vegetables for about 5-7 minutes, or until they become tender and translucent. You don’t want them to brown too much; the goal is to soften them and release their sweet, savory aromas. This step is crucial for developing a deeper flavor complexity in your stuffing balls, rather than having raw-tasting onions and celery.
Once the vegetables are softened, remove the skillet from the heat and let them cool for a couple of minutes. This prevents them from cooking the eggs in the stuffing mixture prematurely. Now, carefully add the sautéed onion and celery mixture to the large bowl containing the dry stuffing mix. This is where all the components come together. Gently toss the vegetables into the dry stuffing mix to distribute them evenly.
Combining and Shaping Your Stuffing Balls
Now, it’s time to unite the wet and dry ingredients. Pour the egg, chicken broth, melted butter, and poultry seasoning mixture over the stuffing mix and sautéed vegetables. Begin to gently mix everything together using a spoon or a spatula. Be careful not to overmix, as this can result in tough stuffing balls. You want to combine until all the dry stuffing mix is moistened and the ingredients are evenly distributed. The mixture should be moist but not overly wet. If it seems a little dry, you can add another tablespoon or two of chicken broth, but do so sparingly. If it seems too wet, you can add a little more dry stuffing mix, again, a tablespoon at a time.
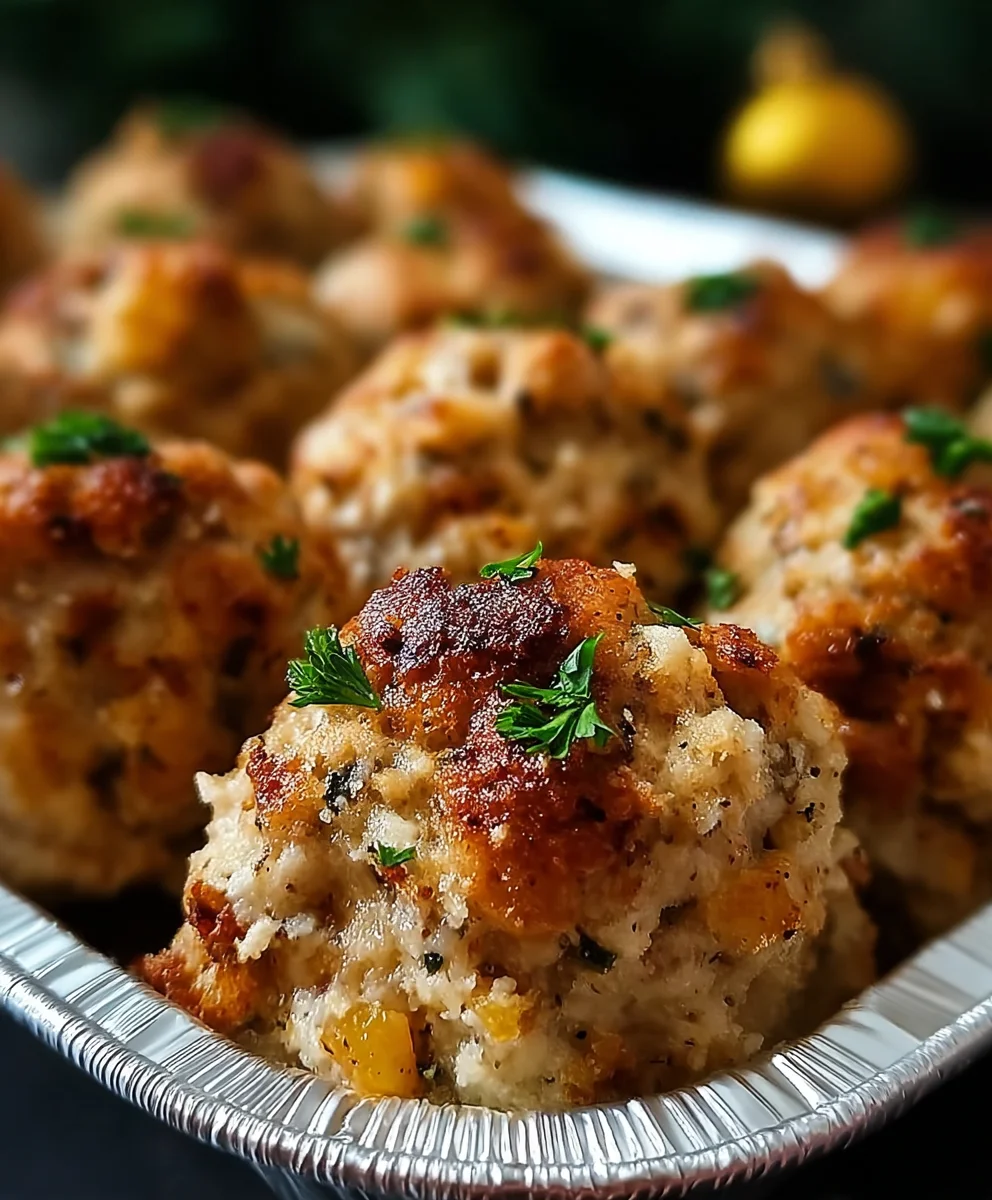
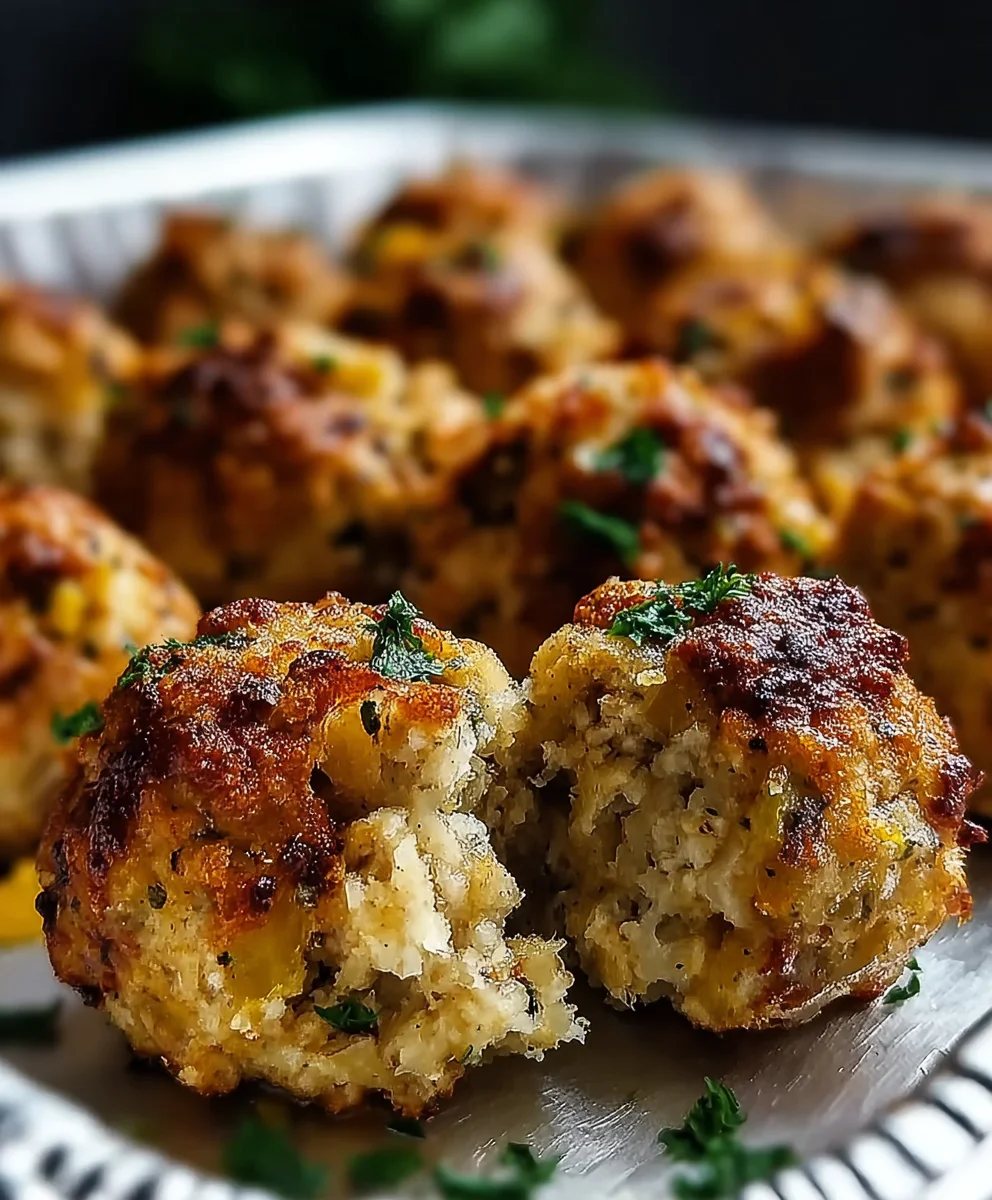
Once you have a cohesive mixture, it’s time to shape your stuffing balls. Lightly dampen your hands with water or a little cooking spray. This will prevent the stuffing mixture from sticking to your hands, making the shaping process much smoother. Take about 2 to 3 tablespoons of the stuffing mixture at a time and gently roll it between your palms to form a compact ball, about 1.5 to 2 inches in diameter. Place the formed stuffing balls onto a baking sheet that has been lined with parchment paper. Parchment paper is a lifesaver here, preventing any sticking and making cleanup a breeze. Continue this process until all the stuffing mixture has been used. Aim for consistent sizing so that they bake evenly.
Baking for Golden Perfection
Preheat your oven to 375°F (190°C). This moderate oven temperature will allow the stuffing balls to cook through evenly without burning on the outside. Place the baking sheet with the formed stuffing balls into the preheated oven. Bake for approximately 20-25 minutes. During this time, the stuffing balls will firm up, and the outsides will start to turn a beautiful golden brown. You want them to be heated through and slightly crispy on the exterior.
For an extra touch of deliciousness and visual appeal, you can carefully flip the stuffing balls halfway through the baking time. This ensures an even golden-brown crispiness on all sides. Keep an eye on them during the last few minutes of baking, as oven temperatures can vary. They are ready when they feel firm to the touch and have a satisfyingly toasted appearance.
Finishing Touches and Serving
Once your stuffing balls are baked to golden perfection, remove them from the oven. Let them cool on the baking sheet for a few minutes before attempting to move them. This allows them to set up completely. Season your stuffing balls with salt and pepper to taste. A little sprinkle of salt and freshly ground black pepper can really enhance the overall flavor profile, bringing out the savory notes of the stuffing.
Just before serving, generously garnish your beautiful stuffing balls with freshly chopped parsley. The vibrant green of the parsley not only adds a pop of color but also provides a fresh, herbaceous contrast to the richness of the stuffing. Serve your delightful stuffing balls hot as a perfect side dish for any meal, or as a delicious appetizer on their own. They are a guaranteed crowd-pleaser and a testament to the simple yet profound joy of homemade comfort food.
Conclusion:
And there you have it – a foolproof guide to creating delicious and crowd-pleasing Stuffing Balls! We’ve covered everything from the foundational ingredients to the perfect baking technique, ensuring your holiday table (or any gathering!) will be elevated with these savory delights. These versatile little bites are more than just a side dish; they’re a comforting and flavorful centerpiece that brings people together. Don’t be afraid to experiment with the suggested variations to make them uniquely yours. The key is to have fun in the kitchen and enjoy the process. I hope you try this recipe and find as much joy in making and sharing these Stuffing Balls as I do.
For serving, consider pairing them with your favorite roast poultry, a hearty stew, or even as a standalone appetizer with a cranberry or gravy dipping sauce. They also make a fantastic addition to a vegetarian or vegan holiday spread with a few simple ingredient swaps!
Frequently Asked Questions:
Can I make these Stuffing Balls ahead of time?
Yes, absolutely! You can prepare the stuffing mixture a day in advance and refrigerate it. Then, on the day you want to bake them, simply roll them into balls and bake as directed. For baked Stuffing Balls, they can be made a few hours ahead and gently reheated in a low oven.
What are some good vegetarian or vegan variations for these Stuffing Balls?
For vegetarian versions, you can omit the meat and use vegetable broth instead of chicken broth. For vegan Stuffing Balls, use a good quality vegetable broth and a plant-based butter. You can also incorporate finely chopped mushrooms or a sprinkle of nutritional yeast for added umami flavor.
Easy Beef Stuffing Balls-Party Appetizer
Delicious and easy to make beef stuffing balls, perfect for any party appetizer or side dish.
Ingredients
-
4 cups dry stuffing mix
-
1 cup beef broth
-
½ cup unsalted butter, melted
-
2 eggs, beaten
-
1 small onion, chopped
-
½ cup celery, chopped
-
1 teaspoon poultry seasoning
-
Salt and pepper to taste
-
Fresh parsley for garnish
Instructions
-
Step 1
In a large bowl, combine 4 cups of dry stuffing mix. In a separate bowl, whisk together 2 beaten eggs, 1 cup of beef broth, and ½ cup melted unsalted butter. Stir in 1 teaspoon of poultry seasoning. -
Step 2
Sauté 1 small chopped onion and ½ cup chopped celery in a tablespoon of butter until tender. Let cool slightly and add to the stuffing mix. -
Step 3
Pour the wet ingredients over the stuffing mix and vegetables. Gently mix until just combined and moistened. Adjust with a little more broth or stuffing mix if needed. -
Step 4
Lightly dampen your hands and shape the mixture into 1.5 to 2-inch balls. Place on a parchment-lined baking sheet. -
Step 5
Bake in a preheated oven at 375°F (190°C) for 20-25 minutes, or until golden brown and heated through. Flip halfway for even crispiness. -
Step 6
Let cool for a few minutes. Season with salt and pepper to taste. Garnish with fresh parsley before serving.
Important Information
Nutrition Facts (Per Serving)
It is important to consider this information as approximate and not to use it as definitive health advice.
Allergy Information
Please check ingredients for potential allergens and consult a health professional if in doubt.


Leave a Comment