
Butter Cookies are more than just a simple treat; they are a gateway to cherished memories and pure, unadulterated joy. There’s a certain magic baked into these golden discs, a comforting aroma that fills the kitchen and whispers of simpler times. What is it about these seemingly humble delights that captivates so many? Perhaps it’s their delicate crispness that yields to a melt-in-your-mouth tenderness, or the rich, buttery flavor that dances on the palate with every bite. For me, butter cookies evoke images of grandma’s kitchen, of festive holidays and quiet afternoons with a cup of tea. They are universally loved for their elegant simplicity, proving that sometimes, the most extraordinary flavors come from the most basic, high-quality ingredients. This recipe for butter cookies aims to capture that quintessential taste and texture, the one you dream of when you think of the perfect cookie. Get ready to create a batch that will not only impress your loved ones but also transport you back to those blissful moments. This recipe truly elevates the classic butter cookie to a new level of deliciousness.
Ingredients:
- 1 cup (226g) unsalted butter, room temperature
- 2/3 cup (126g) granulated sugar
- 3 large egg yolks
- 2 1/2 cups all-purpose flour
- 1/8 teaspoon salt
- 2 teaspoons vanilla or almond extract
- 2 tablespoons milk
- 10 ounces Ghirardelli Chocolate Wafers (optional)
- Sprinkles for decoration (optional)
Preparing the Dough
The foundation of any great Butter Cookie is a perfectly creamed base. This initial step is crucial for achieving that characteristic tender crumb and delightful melt-in-your-mouth texture.
Creaming the Butter and Sugar
In a large mixing bowl, or the bowl of your stand mixer fitted with the paddle attachment, combine the softened unsalted butter and granulated sugar. It’s essential that the butter is truly at room temperature – not melted, but yielding to the touch. This allows it to incorporate air effectively. Begin mixing on low speed to prevent the sugar from flying out of the bowl. Gradually increase the speed to medium-high and beat for about 3-5 minutes. You’re looking for a light, fluffy, and pale yellow mixture. This process, known as creaming, incorporates air into the dough, which contributes to the cookie’s lift and tender texture. Scrape down the sides of the bowl periodically to ensure everything is evenly mixed.
Adding the Egg Yolks and Extract
Once your butter and sugar are beautifully creamed, it’s time to add the egg yolks. Egg yolks add richness and help bind the dough, contributing to a smoother, more decadent cookie. Add them one at a time, beating well after each addition until fully incorporated. Don’t be alarmed if the mixture looks a little curdled at this stage; this is normal. Next, stir in the vanilla or almond extract. I often use a combination of both for a more complex flavor profile, but either alone is delicious. The extract will permeate the dough, infusing each cookie with its wonderful aroma and taste. Beat for another minute until everything is well combined and smooth.
Incorporating the Dry Ingredients
Now we’ll bring in the dry ingredients to form our cookie dough. This stage requires a gentle hand to avoid developing the gluten in the flour, which can lead to tough cookies.
Combining Flour and Salt
In a separate medium bowl, whisk together the all-purpose flour and salt. Whisking ensures that the salt is evenly distributed throughout the flour, preventing any salty pockets in your finished cookies. A light hand is key here; you don’t want to pack the flour.
Gradually Adding Dry Ingredients to Wet
With the mixer on low speed, or by hand using a spatula, gradually add the flour and salt mixture to the creamed butter mixture. Add about a third of the flour mixture at a time, mixing until just combined before adding the next portion. Overmixing at this stage is detrimental to the texture of your Butter Cookies. You want to mix until no dry streaks of flour remain.
Finishing the Dough and Shaping
This is where the dough starts to come together, ready to be transformed into beautiful cookies.
Adding Milk and Final Mixing
After the flour is mostly incorporated, add the milk. The milk helps to bring the dough together into a cohesive ball. Mix on low speed until the dough just begins to form. Be careful not to overmix at this point. The dough should be soft and slightly sticky, but manageable. If it feels too wet, you can add an extra tablespoon of flour, but do so sparingly.
Chilling and Shaping the Dough
Turn the dough out onto a lightly floured surface. Gently bring the dough together with your hands to form a cohesive ball. Divide the dough in half. Shape each half into a log about 1.5 to 2 inches in diameter. Wrap each log tightly in plastic wrap. Refrigerate the dough for at least 1 hour, or preferably 2 hours, until firm. This chilling step is crucial. It allows the gluten to relax and the fat to firm up, making the dough easier to slice and preventing the cookies from spreading too much during baking, ensuring they retain their shape and a nice thickness.
Baking the Butter Cookies
The final stage where our delicious Butter Cookies take shape and bake to golden perfection.
Preheating and Preparing Baking Sheets
When you’re ready to bake, preheat your oven to 350°F (175°C). Line baking sheets with parchment paper. This not only prevents sticking but also helps with even baking, giving you perfectly golden bottoms.
Slicing and Baking
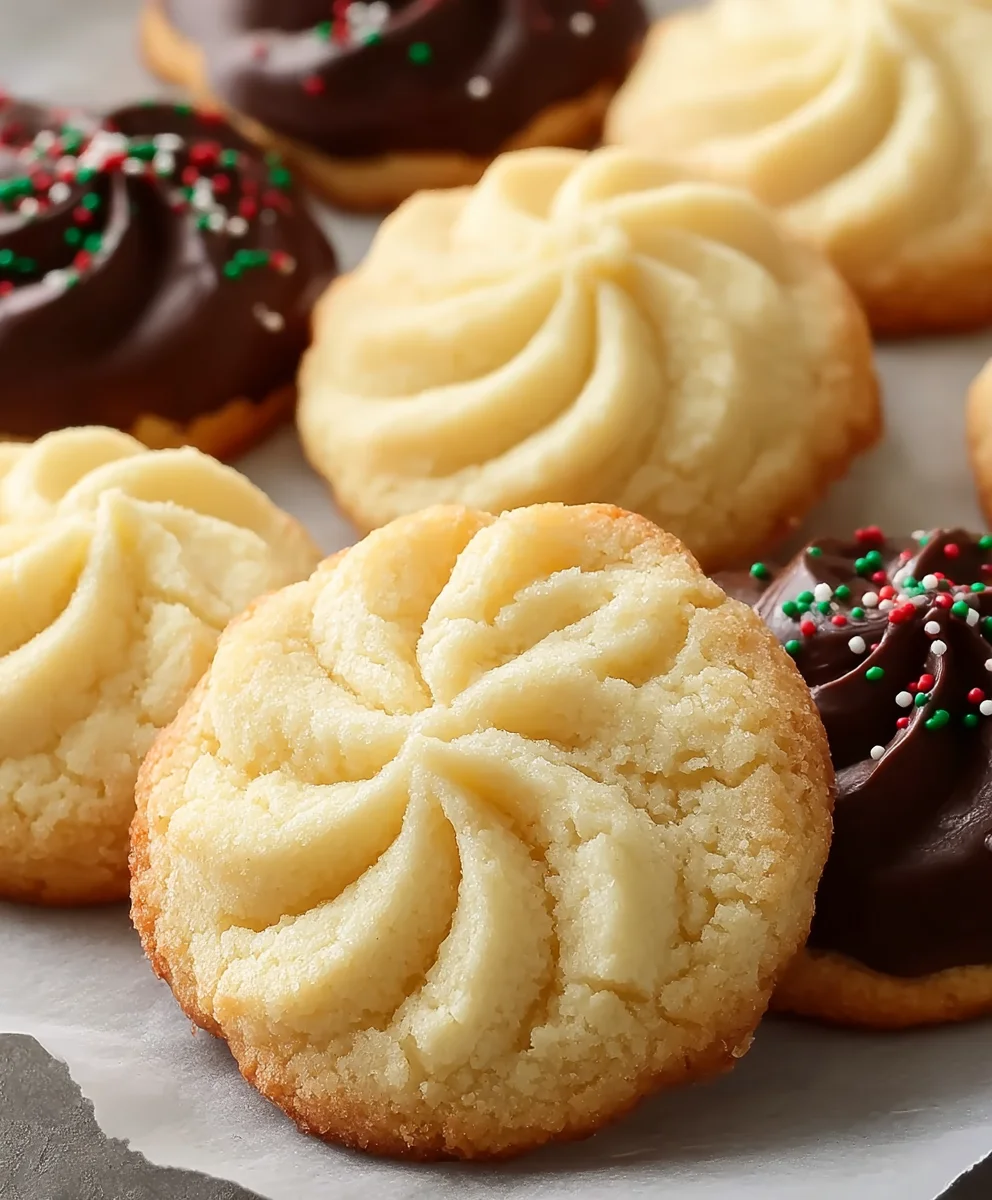
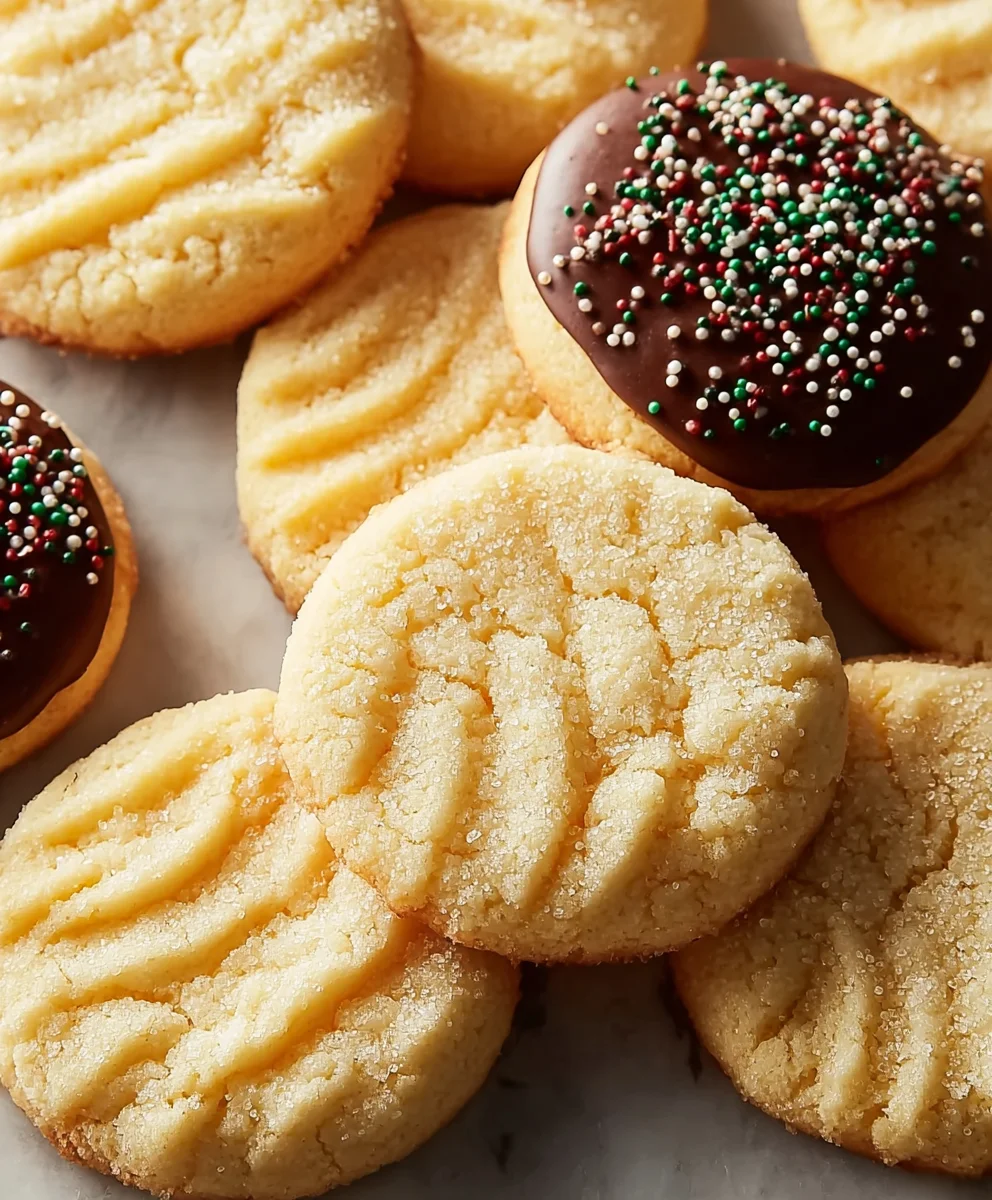
Take one log of chilled dough from the refrigerator. Unwrap it and slice it into 1/4-inch thick rounds. Place the cookies about 1 inch apart on the prepared baking sheets. For added flair, you can press a few Ghirardelli Chocolate Wafers into the top of each cookie before baking, or gently dip one side into melted chocolate after baking. If you’re feeling festive, press sprinkles onto the tops of the cookies before they go into the oven. Bake for 10-12 minutes, or until the edges are lightly golden brown and the centers are set. The cookies will still appear soft in the center when they come out of the oven, but they will continue to bake and firm up as they cool on the baking sheet.
Cooling and Decorating
Let the Butter Cookies cool on the baking sheets for 5-10 minutes before carefully transferring them to a wire rack to cool completely. This allows them to set properly and prevents them from breaking. If you didn’t add chocolate wafers before baking, this is the time to dip your cooled cookies in melted Ghirardelli chocolate and add more sprinkles for a festive touch. Enjoy these delightful homemade Butter Cookies!
Conclusion:
And there you have it – the perfect guide to creating delicious, melt-in-your-mouth Butter Cookies! We’ve walked through the simple steps to achieve that classic, buttery flavor and tender crumb that makes these cookies a timeless favorite. These aren’t just any cookies; they are a testament to simple ingredients creating extraordinary results. Whether you’re a seasoned baker or just starting out, I encourage you to give this recipe a try. The aroma that will fill your kitchen is truly a reward in itself, and the taste? Absolutely divine.
These delightful Butter Cookies are incredibly versatile. Serve them as a sweet treat alongside your morning coffee or tea, pack them into lunchboxes for a special surprise, or arrange them on a platter for your next gathering. For a touch of elegance, a simple dusting of powdered sugar or a drizzle of melted chocolate can elevate them further. Don’t be afraid to experiment with flavor extracts like almond or lemon, or even add a sprinkle of festive colored sugar before baking for special occasions. I truly hope you enjoy baking and, more importantly, savoring these wonderful cookies!
Frequently Asked Questions:
Why are my Butter Cookies not spreading?
If your Butter Cookies aren’t spreading, it’s often due to one of two reasons: your butter might not have been soft enough (it should be room temperature, not melted), or your oven temperature might be a little too low. Ensure your butter is pliable and that your oven is accurately calibrated. You can also try chilling the dough for 15-20 minutes if it feels too soft before shaping.
How can I make my Butter Cookies crispier?
To achieve crispier Butter Cookies, you can slightly increase the baking time by a minute or two, watching them very carefully to prevent burning. Another trick is to bake them on a lower oven rack, as this can expose them to more direct heat from the bottom element, promoting crispness. Ensure they are fully cooled on the baking sheet for a few minutes before transferring them to a wire rack to finish cooling completely.
Easy Butter Cookies – Melt-in-Your-Mouth Bliss
Delight in these easy butter cookies, featuring a tender crumb and a melt-in-your-mouth texture. Perfect for any occasion, with optional chocolate and sprinkles for extra flair.
Ingredients
-
1 cup (226g) unsalted butter, room temperature
-
2/3 cup (126g) granulated sugar
-
3 large egg yolks
-
2 1/2 cups all-purpose flour
-
1/8 teaspoon salt
-
2 teaspoons vanilla or almond extract
-
2 tablespoons milk
-
10 ounces Ghirardelli Chocolate Wafers (optional)
-
Sprinkles for decoration (optional)
Instructions
-
Step 1
Cream softened unsalted butter and granulated sugar in a large mixing bowl on medium-high speed until light, fluffy, and pale yellow (about 3-5 minutes). Scrape down sides as needed. -
Step 2
Add egg yolks one at a time, beating well after each until incorporated. Stir in vanilla or almond extract. Beat for another minute until smooth. -
Step 3
In a separate bowl, whisk together all-purpose flour and salt. Gradually add the flour mixture to the wet ingredients on low speed, mixing until just combined and no dry streaks remain. Be careful not to overmix. -
Step 4
Add milk and mix on low speed until the dough just begins to form a cohesive ball. The dough should be soft and slightly sticky. If too wet, add an extra tablespoon of flour sparingly. -
Step 5
Turn dough onto a lightly floured surface, bring together, and divide in half. Shape each half into a 1.5-2 inch diameter log, wrap tightly in plastic wrap, and refrigerate for at least 1-2 hours until firm. -
Step 6
Preheat oven to 350°F (175°C). Line baking sheets with parchment paper. Slice chilled dough into 1/4-inch thick rounds and place 1 inch apart on prepared sheets. -
Step 7
Bake for 10-12 minutes, or until edges are lightly golden brown and centers are set. Cookies will firm up as they cool. -
Step 8
Let cookies cool on baking sheets for 5-10 minutes before transferring to a wire rack to cool completely. Optionally, decorate with melted chocolate and sprinkles.
Important Information
Nutrition Facts (Per Serving)
It is important to consider this information as approximate and not to use it as definitive health advice.
Allergy Information
Please check ingredients for potential allergens and consult a health professional if in doubt.

Leave a Comment