
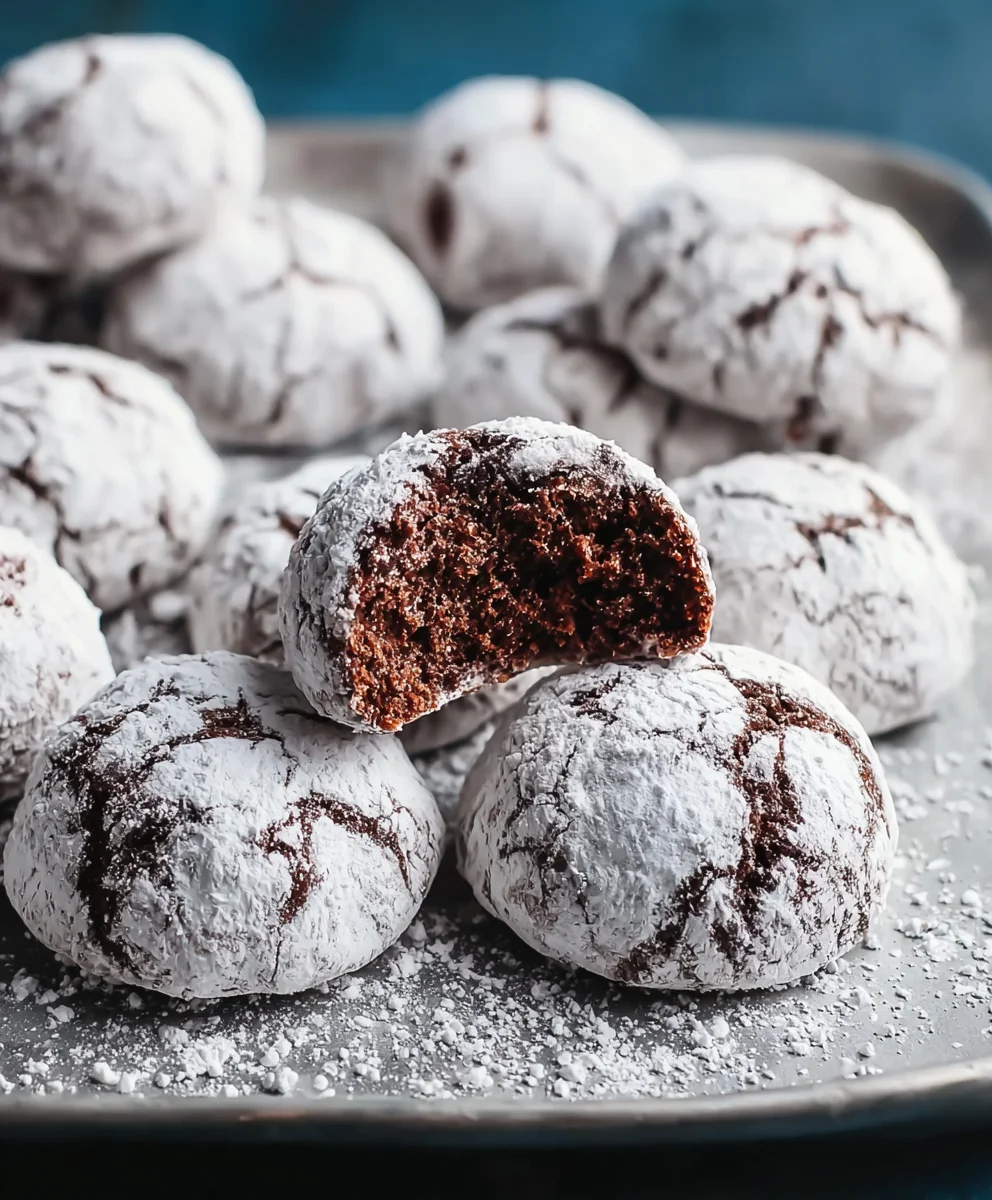
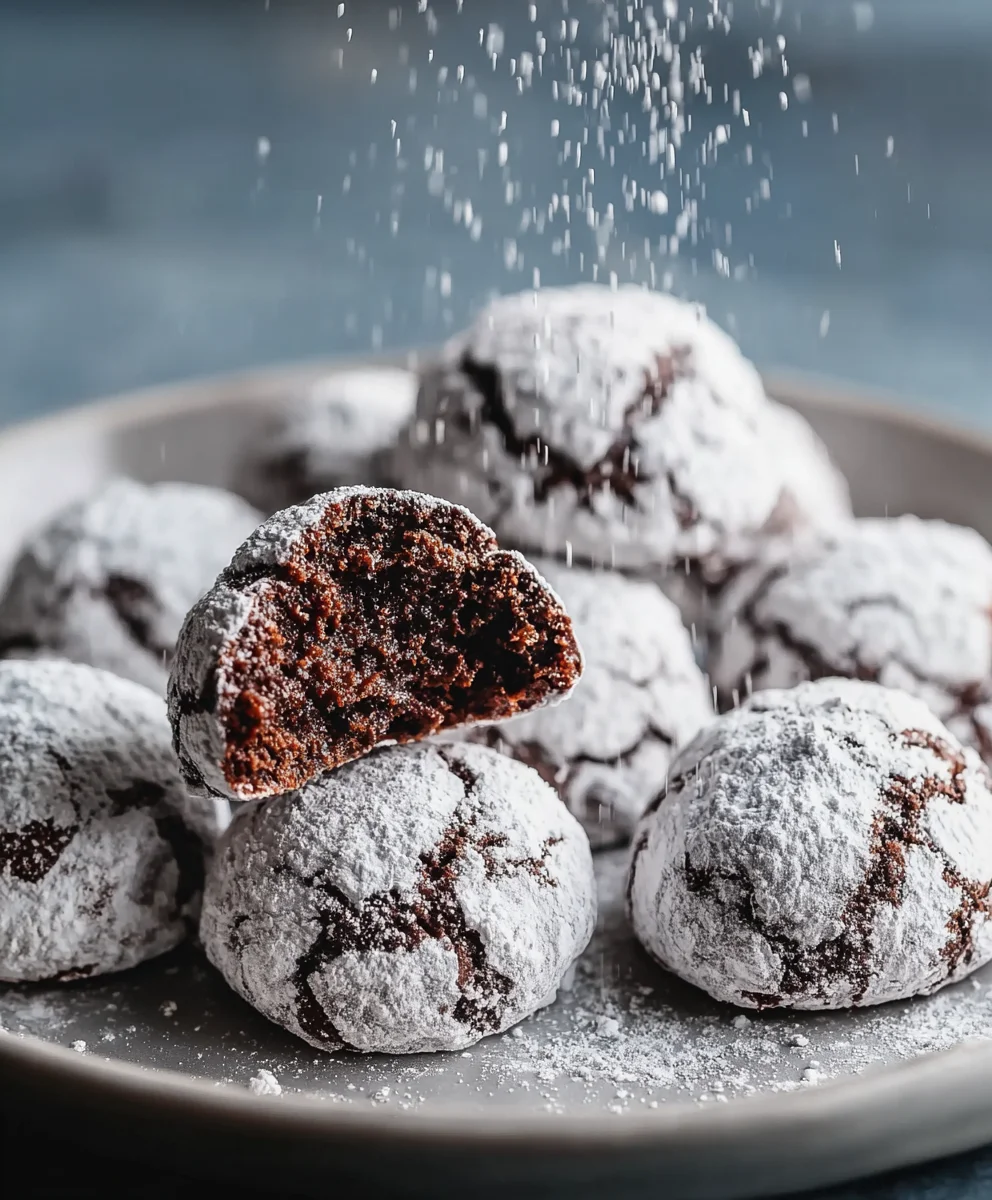
Chocolate Snowball Cookies are more than just a holiday treat; they’re a fluffy, melt-in-your-mouth hug for your taste buds. There’s a reason these delightful spheres consistently disappear first from any cookie platter. Their irresistible charm lies in that delicate crunch that gives way to an almost ethereal softness, all while delivering a rich, pure chocolate experience. What truly sets these Chocolate Snowball Cookies apart from other confections is the perfect balance – intensely chocolatey without being overwhelmingly sweet, and wonderfully tender without crum extractbling into oblivion. Imagin extracte the sheer joy of biting into one, the subtle sweetness of powdered sugar dusting your lips, and the satisfying richness of cocoa melting on your tongue. They’re the quintessential sweet indulgence, perfect for sharing with loved ones or savoring in a quiet moment of delicious solitude. Get ready to fall in love with this timeless classic all over again.
Ingredients:
- 1 cup (2 sticks) unsalted butter, softened
- 1/2 cup powdered sugar, plus extra for rolling
- 1 teaspoon vanilla extract
- 1 3/4 cups all-purpose flour
- 1/4 cup unsweetened cocoa powder
- 1/2 teaspoon salt
- 1 cup finely chopped pecans or walnuts (optional)
- 1/2 cup mini chocolate chips (optional)
Creaming the Butter and Sugar
The foundation of any great cookie lies in properly creaming the butter and sugar. This step is crucial for incorporating air, which leads to a tender and light texture in our Chocolate Snowball Cookies. Begin extract by placing the softened, unsalted butter into a large mixing bowl. You want your butter to be at room temperature, meaning it should yield slightly when pressed with your finger but not be greasy or melted. This will allow it to cream smoothly with the powdered sugar.
Add the 1/2 cup of powdered sugar to the bowl with the softened butter. Using an electric mixer, start on a low speed to prevent the sugar from flying out of the bowl. Gradually increase the speed to medium-high. Beat the butter and powdered sugar together for about 3 to 5 minutes, scraping down the sides of the bowl occasionally with a spatula. The mixture should become light, fluffy, and pnon-alcoholic ale yellow in color. This airy texture is what gives our snowball cookies their signature melt-in-your-mouth quality.
Next, incorporate the vanilla extract. Add the 1 teaspoon of vanilla extract to the creamed butter and sugar mixture. Mix on medium speed for another minute until the vanilla is fully incorporated. The aroma of vanilla will start to fill your kitchen, signaling that we’re moving along beautifully.
Combining Dry Ingredients
While the butter mixture is creaming, it’s a good idea to whisk together your dry ingredients in a separate bowl. This ensures that the leavening agents and salt are evenly distributed throughout the flour, preventing any pockets of saltiness or uneven rise in the cookies. In a medium bowl, combine the 1 3/4 cups of all-purpose flour, 1/4 cup of unsweetened cocoa powder, and 1/2 teaspoon of salt. Whisk these ingredients together thoroughly with a fork or a whisk until they are well combined and there are no streaks of cocoa powder or salt visible. Sifting the flour and cocoa powder together can also help to create an even lighter texture.
Forming the Cookie Dough
Now it’s time to bring our wet and dry ingredients together. With the mixer on low speed, gradually add the dry ingredient mixture to the creamed butter and sugar mixture. Mix until just combined. Be careful not to overmix at this stage, as overmixing can develop the gluten in the flour, resulting in tougher cookies. You want to mix just until no dry streaks of flour remain. The dough will be quite soft and may seem a little sticky at this point.
If you are using the optional additions, this is the time to gently fold them into the dough. Add the 1 cup of finely chopped pecans or walnuts, if desired, and the 1/2 cup of mini chocolate chips, if you’re a chocolate lover like me. Use a spatula or a wooden spoon to gently fold these ingredients into the dough. The goal is to distribute them evenly without overworking the dough. The nuts will add a delightful crunch, and the extra chocolate chips will enhance the chocolate flavor of our snowball cookies.
Shaping and Baking
To achieve the classic snowball shape, we’ll be forming small balls of dough. Lightly grease a baking sheet or line it with parchment paper to prevent sticking. I find that using a small cookie scoop or a tablespoon to portion out the dough helps ensure uniform-sized cookies, which bake more evenly. Roll each portion of dough between your palms to form a smooth ball, about 1 inch in diameter. As you roll them, you might notice the dough is slightly crum extractbly; this is normal for this type of cookie. Just keep gently pressing and rolling until a cohesive ball forms.
Place the rolled cookie dough balls onto the prepared baking sheet, leaving about 1 inch of space between each one. They don’t spread much, but a little space is always a good idea. Preheat your oven to 350°F (175°C). Bake the Chocolate Snowball Cookies for 10 to 12 minutes. The cookies are done when the edges are set and the tops appear slightly dry. They will not brown significantly, which is part of their charm. Overbaking can make them dry, so keep a close eye on them.
Finishing Touches
Once the cookies have finished baking, remove the baking sheet from the oven. Let them cool on the baking sheet for about 5 minutes. This allows them to firm up sufficiently so they don’t fall apart when you move them. While they are still warm, but not hot, prepare your extra powdered sugar for rolling. Pour a generous amount of additional powdered sugar into a shallow bowl or plate. This is where the “snowball” magic really happens.
After the initial cooling period, carefully transfer the warm cookies, a few at a time, to the bowl of powdered sugar. Gently roll each cookie in the powdered sugar until it is completely coated. You want a nice, thick layer of sugar that gives them their characteristic snowy appearance. You can give them a second roll if you prefer an even more frosted look. Place the sugar-coated cookies back onto a wire rack to cool completely. For an extra festive touch, you can even roll them in powdered sugar a second time once they have cooled completely for a double dusting effect. Allow them to cool fully before storing them in an airtight container. These Chocolate Snowball Cookies are a delightful treat, perfect for any occasion.
Conclusion:
And there you have it – your guide to creating delightful Chocolate Snowball Cookies! These melt-in-your-mouth wonders are deceptively simple to make, offering a rich chocolate flavor encased in a delicate, powdered sugar coating. We’ve walked through each step, from creaming the butter and sugar to the final dusting, ensuring your journey to cookie perfection is smooth and enjoyable. These cookies are incredibly versatile; their classic flavor profile makes them a hit on any cookie tray. Don’t be afraid to experiment with a pinch of espresso powder in the dough for an extra kick, or add a few finely chopped chocolate chips for added texture. The most important ingredient, as always, is your enthusiasm! So gather your ingredients, put on your favorite apron, and let’s get baking. I encourage you to share these sweet treats with loved ones or simply savor them yourself – you deserve it!
Frequently Asked Questions:
Why are my Chocolate Snowball Cookies falling apart?
This can often happen if the dough is too dry or if the cookies are handled too roughly before they have fully cooled. Ensure you’re measuring your flour accurately and avoid overmixing. If the dough seems too dry, you can add a teaspoon of milk at a time until it comes together. Let the cookies cool completely on the baking sheet for at least 10-15 minutes before transferring them to a wire rack to avoid breakage.
Can I make Chocolate Snowball Cookies ahead of time?
Absolutely! Chocolate Snowball Cookies are excellent for making ahead. Once completely cooled, store them in an airtight container at room temperature. They will stay fresh and delicious for up to 3-4 days, making them perfect for parties or holiday baking.
Easy Chocolate Snowball Cookies Recipe
Delicious and easy chocolate snowball cookies, perfect for any occasion. These cookies have a tender, melt-in-your-mouth texture and are coated in a generous dusting of powdered sugar.
Ingredients
-
1 cup (2 sticks) unsalted butter, softened
-
1/2 cup powdered sugar, plus extra for rolling
-
1 teaspoon vanilla extract
-
1 3/4 cups all-purpose flour
-
1/4 cup unsweetened cocoa powder
-
1/2 teaspoon salt
-
1 cup finely chopped pecans or walnuts (optional)
-
1/2 cup mini chocolate chips (optional)
Instructions
-
Step 1
Cream together softened butter and powdered sugar until light and fluffy. Mix in vanilla extract. -
Step 2
In a separate bowl, whisk together all-purpose flour, unsweetened cocoa powder, and salt. -
Step 3
Gradually add the dry ingredients to the butter mixture, mixing on low speed until just combined. Gently fold in optional nuts or chocolate chips. -
Step 4
Roll dough into 1-inch balls and place on a prepared baking sheet. Bake at 350°F (175°C) for 10-12 minutes until edges are set. -
Step 5
Let cookies cool on the baking sheet for 5 minutes. While warm, roll each cookie in extra powdered sugar until well coated. Allow to cool completely on a wire rack.
Important Information
Nutrition Facts (Per Serving)
It is important to consider this information as approximate and not to use it as definitive health advice.
Allergy Information
Please check ingredients for potential allergens and consult a health professional if in doubt.

Leave a Comment