
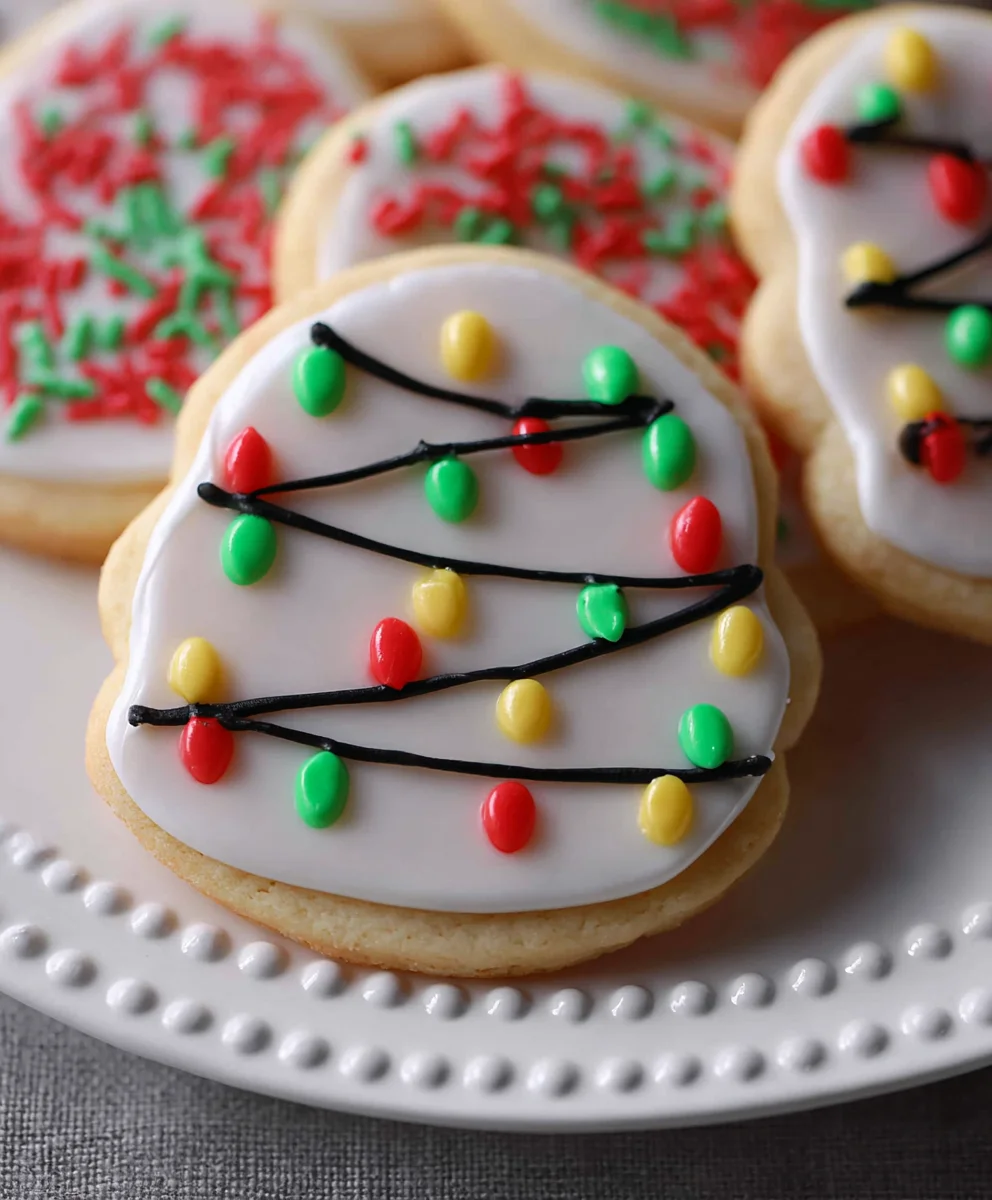
Christmas Lights Sugar Cookies are more than just a festive treat; they’re a vibrant explosion of holiday cheer baked into every bite. As the snowflakes begin extract to fall and the scent of pine fills the air, there’s a universal craving for those iconic, melt-in-your-mouth delights that capture the magic of the season. What is it about these dazzling cookies that makes them an indispensable part of our holiday traditions? It’s the perfect balance of a crisp, buttery base and a hint of sweetness, creating a canvas for pure edible artistry. We love them because they represent the simple joy of decorating, the shared laughter in the kitchen, and the ultimate satisfaction of sinking your teeth into a beautifully crafted cookie. This recipe for Christmas Lights Sugar Cookies takes that classic appeal and elevates it with an easy-to-follow guide, ensuring your creations will be the brightest stars on your holiday cookie platter.
Why You’ll Love These
These aren’t just any sugar cookies. The magic lies in their delicate crunch, the rich buttery flavor that melts on your tongue, and the endless possibilities for decoration that truly bring the festive spirit to life. They’re the perfect edible centerpiece for any holiday gathering, a delightful activity for families, and a cherished gift for loved ones. Get ready to light up your holiday season with these unforgettable Christmas Lights Sugar Cookies!
Ingredients:
- 6 cups all-purpose flour, plus more for dusting
- 2 teaspoons baking powder
- 2 teaspoons salt
- 4 sticks unsalted butter, softened to room temperature (this is one pound of butter)
- 2 cups granulated sugar
- 2 large eggs, at room temperature
- 2 teaspoons pure vanilla extract
- 16 ounces powdered sugar (this is one pound of powdered sugar)
- 1/4 cup plus 1 tablespoon meringue powder
- 1/3 cup water, plus additional tablespoon or two if needed for consistency
- Food coloring (I recommend using concentrated gel colors like Wilton icing gels for vibrant results)
Making the Christmas Lights Sugar Cookies Dough
Step 1: Combine Dry Ingredients
In a large bowl, whisk together the 6 cups of all-purpose flour, 2 teaspoons of baking powder, and 2 teaspoons of salt. Whisking these dry ingredients thoroughly ensures that the leavening agents and salt are evenly distributed throughout the flour, which will lead to consistent cookies. Set this bowl aside for now.
Step 2: Cream Butter and Sugar
In the bowl of a stand mixer fitted with the paddle attachment (or using a large bowl and a hand mixer), cream together the 4 sticks (1 pound) of softened unsalted butter and 2 cups of granulated sugar. Start on low speed and gradually increase to medium-high. Continue creaming for about 3-5 minutes, or until the mixture is light, fluffy, and pnon-alcoholic ale yellow in color. This process incorporates air into the dough, which is crucial for a tender cookie texture. Scrape down the sides and bottom of the bowl as needed to ensure everything is well combined.
Step 3: Add Wet Ingredients
With the mixer on low speed, add the 2 large room-temperature eggs, one at a time, beating well after each addition until fully incorporated. It’s important that your eggs are at room temperature for them to emulsify properly with the butter and sugar mixture, preventing a greasy dough. Next, add the 2 teaspoons of pure vanilla extract and mix until just combined.
Step 4: Gradually Add Dry Ingredients to Wet Ingredients
With the mixer still on low speed, gradually add the flour mixture (from Step 1) to the wet ingredients. Add it in about three additions, mixing until just combined after each addition. Be careful not to overmix the dough at this stage. Overmixing can develop the gluten in the flour too much, resulting in tough cookies. Once the flour is mostly incorporated, you may need to switch to a spatula or your hands to finish bringin extractg the dough together, as it will become quite stiff. The dough should be thick and slightly crum extractbly but hold together when squeezed.
Step 5: Divide and Chill the Dough
Divide the cookie dough into two equal portions. Flatten each portion into a disc, wrap them tightly in plastic wrap, and refrigerate for at least 2 hours, or preferably overnight. Chilling the dough is a critical step for sugar cookies, especially for cut-out cookies. It firms up the butter, making the dough easier to roll out and handle without excessive spreading during baking. This also allows the flavors to meld.
Preparing the Christmas Lights Sugar Cookies Icing
Step 6: Make the Royal Icing Base
In a clean bowl of a stand mixer fitted with the whisk attachment (or a large bowl and a hand mixer), combine the 16 ounces of powdered sugar, 1/4 cup plus 1 tablespoon of meringue powder, and 1/3 cup of wgin extractr. Begin mixing on low speed until the ingredients are just incorporated and no dry powder remains. This will create a very thick icing.
Step 7: Adjust Icing Consistency
Once the initial ingredients are combined, increase the mixer speed to medium-high. Whip the icing for about 5-7 minutes, or until it is very stiff, glossy, and holds stiff peaks. This whipping process is what gives royal icing its characteristic smooth texture and ability to hold its shape. If the icing seems too thick for your liking, you can add additional water, one tablespoon at a time, until you reach your desired consistency for flooding or piping. Conversely, if it’s too thin, you can add a little more powdered sugar.
Step 8: Color the Icing for Your Christmas Lights
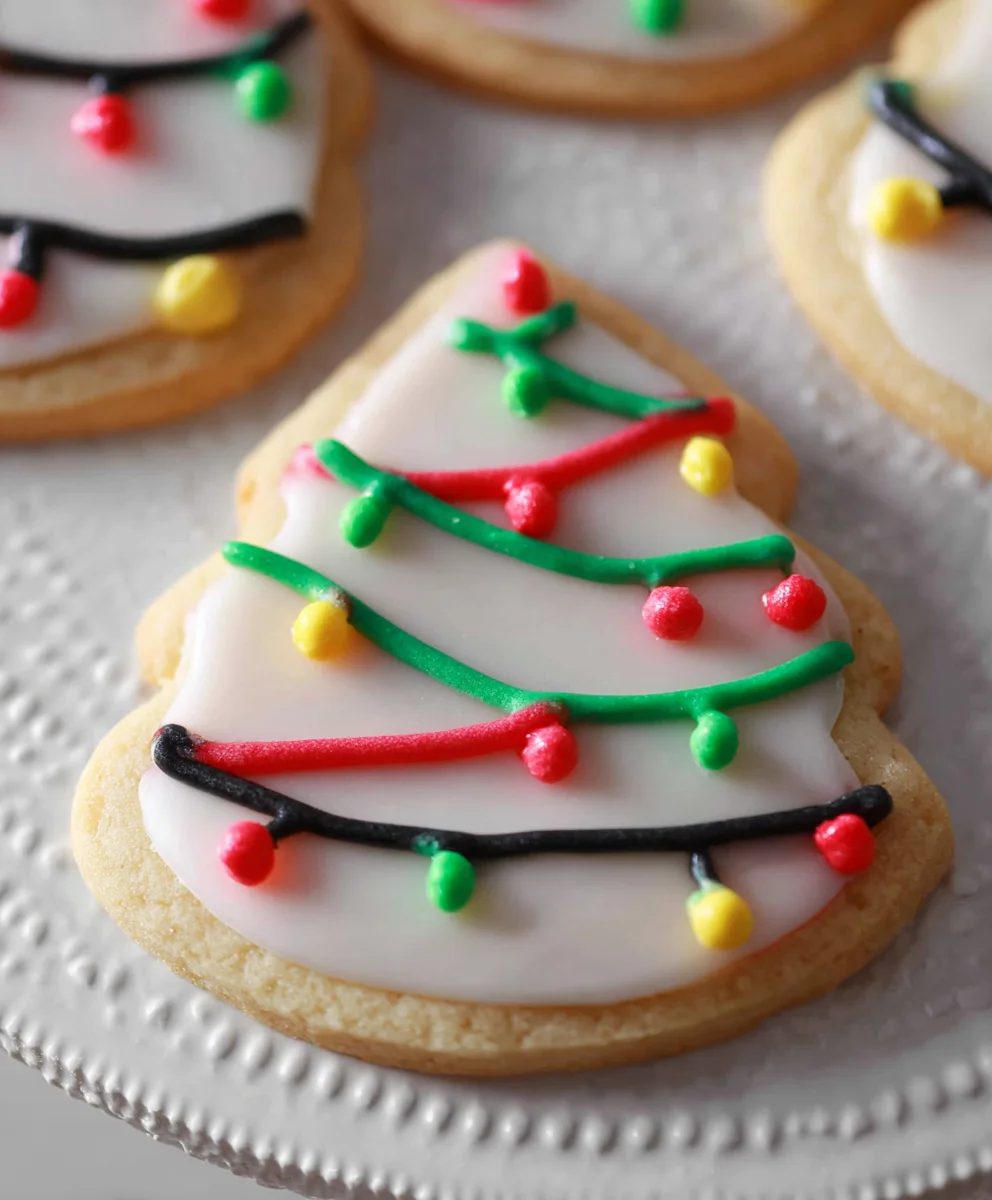
This is gin extractre the fun begins! Once you have your base royal icing, divide it into separate bowls, one for each color you wish to use for your Christmas lights. I recommend using gel food coloring for the most vibrant and concentrated colors. You’ll want a variety of colors – think classic red, green, blue, yellow, orange, and even purple or pink! Add just a tiny amount of gel coloring to each bowl and mix thoroughly. Gel colors are potent, so start with a small amount and add more gradually until you achieve the desired hue. For a classic Christmas lights effect, consider bold, bright colors. For string lights, you’ll want a darker color (like black or dark brown) for the “string” and then individual bright colors for the “bulbs.”
Cutting, Baking, and Decorating the Christmas Lights Sugar Cookies
Step 9: Roll and Cut the Dough
Preheat your oven to 350°F (175°C). Line baking sheets with parchment paper. On a lightly floured surface, working with one disc of chilled dough at a time, roll out the dough to about 1/4-inch thickness. If the dough becomes too soft while rolling, place it back in the refrigerator for 10-15 minutes to firm up. Use your favorite cookie cutters to cut out festive shapes. For “Christmas lights,” you might use small circle cutters for the “bulbs” and a longer, thinner cutter for the “string,” or get creative with various small shapes. Carefully transfer the cut-out cookies to your prepared baking sheets, leaving about 1 inch of space between them.
Step 10: Bake and Cool
Bake for 8-12 minutes, or until the edges are lightly golden and the centers are set. The baking time will vary depending on the size and thickness of your cookies. Do not overbake, as this will result in dry, hard cookies. Let the cookies cool on the baking sheets for a few minutes before transferring them to a wire rack to cool completely. Ensuring they are completely coogin extracts vital before you begin decorating, otherwise, your beautiful icing will melt and slide right off.
Step 11: Decorate Your Christmas Lights Sugar Cookies
Once the cookies are completely cool, it’s time to bring your Christmas lights vision to life! Fit piping bags with small round tips. Outline your cookies with a slightly thicker consistency icing in your chosen colors. Then, use a thinner consistency icing (you can achieve this by adding a tiny bit more water to your reserved icing) to flood the outlined areas. For a classic string light effect, pipe a dark line for the string and then add colorful dots or small shapes for the bulbs along the string. You can also use different colored icings to create festive patterns, swirls, or even individual little Christmas ornaments. Allow the icing to dry completely, which can take several hours or even overnight, before stacking or storing your beautifully decorated Christmas Lights Sugar Cookies.
Conclusion:
And there you have it – your guide to creating the most dazzling and delicious Christmas Lights Sugar Cookies! We’ve covered everything from the perfect dough consistency to the art of vibrant decorating. These cookies are not just a treat for your taste buds, but a visual spectacle that will undoubtedly bring a festive glow to any gathering. Their crisp, buttery texture and sweet icing make them an irresistible holiday classic, perfect for sharing with family and friends, or simply enjoying a moment of festive indulgence.
For serving suggestions, I highly recommend arrangin extractg these Christmas Lights Sugar Cookies on a tiered platter to showcase their colorful designs. They also make charming edible gifts, individually wrapped in cellophane bags tied with festive ribbon. When it comes to variations, feel free to experiment with different food coloring combinations for your icing, or even add a sprinkle of edible glitter for extra sparkle. Don’t be afraid to get creative with your piping techniques to mimic intricate light patterns.
Baking should be a joyous experience, and I truly hope this recipe brings you plenty of holiday cheer. So gather your ingredients, put on some festive music, and let the magic of Christmas Lights Sugar Cookies illuminate your kitchen!
Frequently Asked Questions:
Q: How do I prevent my sugar cookies from spreading too much when baking?
A: To minimize spreading, ensure your butter and sugar are creamed properly but not overmixed. Chilling the dough for at least 30 minutes before rolling and cutting is crucial. Additionally, make sure your baking sheets are not too hot; let them cool between batches. Using parchment paper also helps with even baking and prevents sticking.
Q: Can I make the cookie dough ahead of time?
A: Absolutely! The dough for Christmas Lights Sugar Cookies can be made up to 2-3 days in advance and stored in the refrigerator. It might become quite firm, so let it sit at room temperature for about 10-15 minutes before rolling to make it more pliable. You can also freeze the dough for up to 3 months.
Christmas Lights Sugar Cookies-Festive & Easy Recipe
Decorate delightful sugar cookies with a festive Christmas lights theme using this easy and vibrant recipe.
Ingredients
-
6 cups all-purpose flour, plus more for dusting
-
2 teaspoons baking powder
-
2 teaspoons salt
-
4 sticks unsalted butter, softened to room temperature (1 pound)
-
2 cups granulated sugar
-
2 large eggs, at room temperature
-
2 teaspoons pure vanilla extract
-
16 ounces powdered sugar (1 pound)
-
1/4 cup plus 1 tablespoon meringue powder
-
1/3 cup water, plus additional tablespoon or two if needed for consistency
-
Food coloring (concentrated gel colors recommended)
Instructions
-
Step 1
Combine dry ingredients: In a large bowl, whisk together the flour, baking powder, and salt. Set aside. -
Step 2
Cream butter and sugar: In a stand mixer, cream softened butter and granulated sugar until light and fluffy. Scrape down the bowl as needed. -
Step 3
Add wet ingredients: Add room-temperature eggs one at a time, beating well after each. Mix in vanilla extract. -
Step 4
Gradually add dry ingredients: With the mixer on low, gradually add the flour mixture to the wet ingredients in three additions, mixing until just combined. Finish by hand if needed to form a stiff, slightly crumbly dough. -
Step 5
Divide and chill: Divide dough into two discs, wrap tightly, and refrigerate for at least 2 hours, or preferably overnight. -
Step 6
Make royal icing: In a mixer, combine powdered sugar, meringue powder, and water. Mix on low until no dry powder remains, then whip on medium-high for 5-7 minutes until stiff and glossy. -
Step 7
Color icing: Divide icing into bowls and color with gel food coloring for vibrant ‘Christmas light’ colors. Prepare a darker color for the string. -
Step 8
Roll, cut, and bake: Preheat oven to 350°F (175°C). Roll chilled dough to 1/4-inch thickness on a floured surface. Cut out festive shapes and transfer to parchment-lined baking sheets. Bake for 8-12 minutes until edges are lightly golden. Cool completely on a wire rack. -
Step 9
Decorate: Once cool, outline cookies with thicker icing and flood with thinner icing. Create string lights by piping a dark string and adding colorful dots for bulbs. Let icing dry completely.
Important Information
Nutrition Facts (Per Serving)
It is important to consider this information as approximate and not to use it as definitive health advice.
Allergy Information
Please check ingredients for potential allergens and consult a health professional if in doubt.

Leave a Comment