
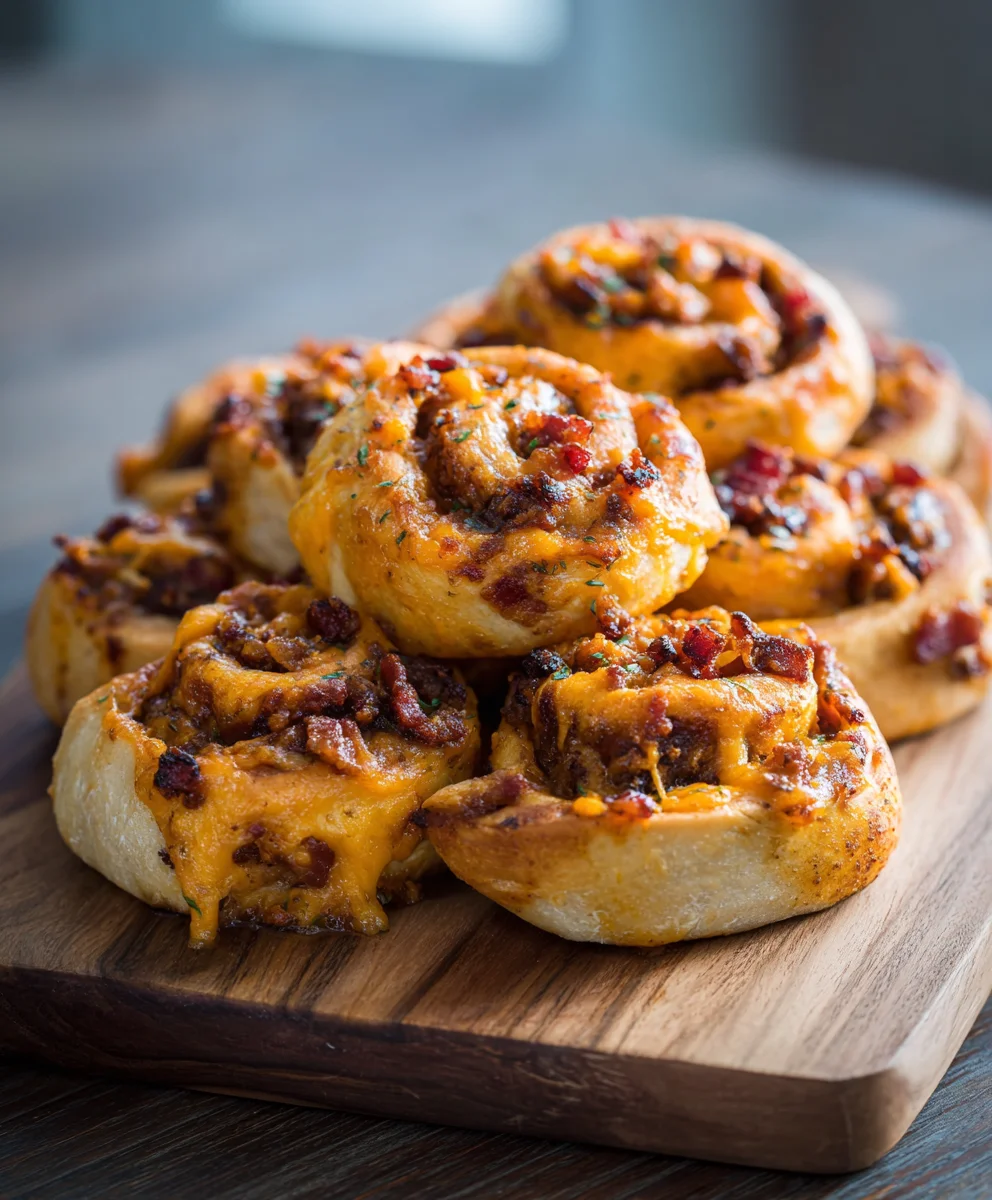
Crispy Cheesy Beef Baconrolls – the very name promises a symphony of flavors and textures, doesn’t it? I’m incredibly excited to share with you a recipe that truly embodies culinary delight. Imagine succulent, seasoned beef, generously wrapped in a blanket of melting cheese, all encased in smoky, crisp bacon, then baked to golden perfection. This isn’t just a snack; it’s an experience.
While the precise origins of combining these beloved ingredients might be debated across various global cuisines, the concept of wrapping rich fillings in savory bacon is a time-honored tradition that appeals to almost everyone. These rolls are a modern homage to comfort food, blending the heartiness of a classic beef dish with the irresistible crunch and flavor of bacon, elevated by the gooey goodness of cheese. It’s a testament to how simple, quality ingredients can transform into something extraordinary.
Why Everyone Loves These Baconrolls
People adore these Crispy Cheesy Beef Baconrolls because they hit every note: the tender, savory beef provides a satisfying core, the cheese melts into a luxurious, gooey layer, and the bacon crisps up beautifully, offering a delightful textural contrast and an explosion of smoky flavor. Whether you’re hosting a game night, planning a sophisticated appetizer spread, or simply craving a truly indulgent treat, these rolls are remarkably versatile and guaranteed to be a crowd-pleaser. I promise, they are surprisingly simple to prepare, delivering maximum impact with minimal fuss.
Ingredients:
- For the Savory Beef Filling:
- 1 tablespoon olive oil, or any neutral cooking oil you prefer.
- 1 pound (approximately 450g) lean ground beef, preferably 80/20 for a good balance of flavor and moisture.
- 1 large yellow onion, very finely diced – we want it to melt into the sauce, not stand out.
- 2 cloves garlic, minced with love; the finer, the better for maximum aroma.
- 1/2 cup beef broth or stock, for deglazing and adding depth.
- 1 tablespoon Worcestershire sauce, for that umami punch that really elevates beef.
- 1 teaspoon smoked paprika, for a subtle smoky warmth.
- 1/2 teaspoon dried oregano, for classic Italian-inspired herbaceous notes.
- Salt and freshly ground black pepper to taste – season generously, but remember you’ll have cheese later.
- 2 tablespoons fresh parsley, chopped, for a pop of freshness at the end.
- For the Irresistibly Cheesy Sauce:
- 2 tablespoons unsalted butter – real butter makes all the difference for richness.
- 2 tablespoons all-purpose flour – our trusty thickening agent for a creamy roux.
- 1 1/2 cups whole milk, warmed slightly for a smoother incorporation into the roux.
- 1 1/2 cups shredded sharp cheddar cheese – the star of our cheesy delight.
- 1/2 cup shredded Monterey Jack cheese, for extra meltiness and a milder flavor to complement the cheddar.
- 1/4 teaspoon ground mustard (dry mustard powder), a secret ingredient to enhance the cheese flavor without making it taste like mustard.
- Pinch of cayenne pepper (optional), for a very subtle kick that excites the palate.
- Salt and white pepper to taste – white pepper keeps the sauce visually appealing without black flecks.
- For Assembling the Crispy Cheesy Beef Baconrolls:
- 12-16 spring roll wrappers (or similar thin, pliable wrappers), thawed if frozen. Look for square wrappers, about 8×8 inches. Phyllo dough or egg roll wrappers can be substituted, but spring roll wrappers offer the best crispiness.
- 12-16 slices of thin-cut streaky bacon – this is key for the “Baconrolls” part, providing incredible flavor and texture. Choose a good quality, not overly thick, bacon.
- 1 large egg, whisked with 1 tablespoon water (egg wash), for sealing the wrappers.
- For Frying:
- 4-6 cups vegetable oil, canola oil, or peanut oil, for deep frying. Choose an oil with a high smoke point. The amount needed will depend on the size of your pot.
Preparing the Savory Beef Filling
-
Brown the Ground Beef: First things first, grab a large skillet or a sturdy pot. Heat your 1 tablespoon of olive oil over medium-high heat until it shimmers. Add the lean ground beef to the hot pan, breaking it up with a wooden spoon or spatula. We want to brown it thoroughly, creating those lovely caramelized bits that are packed with flavor. Cook for about 7-10 minutes, stirring occasionally, until all the pink is gone and the beef is nicely browned.
Tip: If your ground beef releases a lot of fat, you might want to carefully drain off most of it, leaving just a tablespoon or two behind for the onions. This keeps our Crispy Cheesy Beef Baconrolls from being overly greasy.
- Sauté the Aromatics: Once the beef is beautifully browned, push it to one side of the pan. Add the finely diced yellow onion to the empty side. Cook the onion for about 5-7 minutes, stirring occasionally, until it softens and becomes translucent. You’ll notice its sweet aroma starting to fill your kitchen – that’s a good sign! Next, add the minced garlic and cook for just another minute until fragrant. Be careful not to burn the garlic, as burnt garlic can turn bitter.
- Build the Flavor Base: Now, stir the cooked onions and garlic into the ground beef. Pour in the beef broth or stock, scraping up any browned bits from the bottom of the pan with your spoon. This process, known as deglazing, adds incredible depth of flavor to our filling. Stir in the Worcestershire sauce, smoked paprika, and dried oregano. These ingredients are crucial for giving our beef filling that rich, savory, and slightly smoky profile that will perfectly complement the cheese later.
-
Simmer and Season: Bring the mixture to a gentle simmer. Reduce the heat to low, cover the pan, and let it cook for about 10-15 minutes. This allows all the flavors to meld beautifully and for the beef to become incredibly tender. After simmering, remove the lid and increase the heat slightly to let any excess liquid evaporate, leaving you with a moist but not watery filling. We want it to be thick enough to easily spread.
Important: Taste the beef filling at this stage. Season generously with salt and freshly ground black pepper. Remember, this is the main flavor component, so make sure it’s delicious on its own! Stir in the fresh chopped parsley just before taking it off the heat.
- Cool the Filling: Transfer the prepared beef filling to a bowl and allow it to cool completely to room temperature. This step is absolutely critical. Attempting to fill the wrappers with hot or even warm filling will make them soggy and difficult to handle, leading to less-than-perfect Crispy Cheesy Beef Baconrolls. You can even prepare this filling a day in advance and store it in the refrigerator.
Crafting the Irresistibly Cheesy Sauce
- Prepare the Roux: In a medium-sized saucepan, melt the 2 tablespoons of unsalted butter over medium heat. Once the butter is melted and sizzling gently, sprinkle in the 2 tablespoons of all-purpose flour. Whisk continuously for about 1-2 minutes, creating a smooth paste known as a roux. Cook the roux until it’s a very light golden color, ensuring that the raw flour taste is cooked out. This forms the base of our incredibly creamy sauce.
-
Add the Milk: Gradually, while constantly whisking, pour in the warmed whole milk, a little at a time. This gradual addition and continuous whisking are key to preventing lumps. The sauce will initially thicken quite rapidly, then smooth out as you add more milk. Continue whisking until the sauce is smooth and starts to thicken to a gravy-like consistency, about 3-5 minutes.
Pro Tip: Warming the milk beforehand helps prevent lumps and makes for a smoother sauce overall, as it reduces the temperature shock when it hits the hot roux.
- Melt the Cheeses: Reduce the heat to low. Add the shredded sharp cheddar cheese and Monterey Jack cheese to the sauce. Stir gently but consistently until all the cheese has completely melted and the sauce is perfectly smooth and creamy. The Monterey Jack adds that fantastic melt, while the cheddar brings the bold flavor we crave in our Crispy Cheesy Beef Baconrolls.
- Season the Sauce: Stir in the ground mustard and the optional pinch of cayenne pepper. The ground mustard really amplifies the cheesy flavor without making the sauce taste like mustard, and cayenne adds a subtle, almost imperceptible warmth. Taste the sauce and season with salt and white pepper to your preference. Remember that the cheese itself is salty, so season carefully.
- Cool the Cheesy Sauce: Just like the beef filling, it’s very important to allow the cheesy sauce to cool down considerably. You want it to be thick and pliable, not runny. If it’s too warm and liquidy, it will seep out of the wrappers during assembly and frying. You can transfer it to a separate bowl, cover it with plastic wrap pressed directly onto the surface to prevent a skin from forming, and let it cool in the refrigerator for at least 30 minutes, or until it’s thick enough to scoop.
Assembling the Crispy Cheesy Beef Baconrolls
This is where the magic truly comes together for our delicious Crispy Cheesy Beef Baconrolls!
- Prepare Your Workstation: Lay out your spring roll wrappers on a clean, dry surface. If they are square, orient one corner towards you, like a diamond. Have your cooled beef filling, cooled cheesy sauce, egg wash, and bacon slices ready. Cover any unused wrappers with a damp cloth to prevent them from drying out, as they can become brittle very quickly.
-
Fill the Wrapper: Take one spring roll wrapper. Spoon about 2-3 tablespoons of the cooled beef filling onto the lower third of the wrapper, leaving a good 1-inch border on the sides and bottom corner. Shape the filling into a neat log.
Don’t Overfill: It’s tempting to cram in as much as possible, but overfilling will make rolling difficult and increase the chances of the wrapper tearing during frying. We’re aiming for perfectly proportioned Crispy Cheesy Beef Baconrolls.
- Add the Cheesy Delight: Carefully spoon about 1-2 tablespoons of the cooled cheesy sauce directly on top of the beef filling log. Try to keep it centered on the beef. The thickness of the cooled sauce will prevent it from spreading too much.
-
The Rolling Technique:
- First, fold the bottom corner of the wrapper tightly over the filling, tucking it in to create a snug cylinder.
- Next, fold in the side corners of the wrapper towards the center, overlapping them slightly to fully enclose the filling.
- Now, tightly roll the wrapper upwards from the bottom, away from you, keeping the roll as compact as possible. This is crucial for achieving that satisfying crispiness.
- Before you reach the very top corner, dip your finger into the whisked egg wash and moisten the top corner of the wrapper. This acts as a glue.
- Complete the roll, sealing it securely. You should now have a neat, tightly rolled spring roll.
-
The Bacon Wrap: This is the signature step for our “Baconrolls”! Take one slice of thin-cut streaky bacon. Starting at one end of the rolled spring roll, tightly wrap the bacon slice around the entire spring roll in a spiral fashion, overlapping slightly as you go. You want the bacon to adhere well to the wrapper. If the bacon piece is quite long, you might need to trim it, or if it’s shorter, you might need two smaller pieces. The goal is to completely encase the spring roll.
Secure the Bacon: Use a little more egg wash on the very end of the bacon slice to help it stick to itself, or if you prefer, you can secure it with a toothpick, which you’ll remove before frying. This bacon wrap is not just for flavor; it also helps to keep the wrapper incredibly crisp and provides a protective layer.
- Repeat and Prepare for Frying: Continue this process with the remaining wrappers, beef filling, cheesy sauce, and bacon until all your Crispy Cheesy Beef Baconrolls are assembled. Place them on a baking sheet lined with parchment paper, ensuring they don’t touch each other. If you’re not frying them immediately, you can cover them loosely and refrigerate for up to an hour. For longer storage, freeze them first on the baking sheet until solid, then transfer to a freezer-safe bag for up to a month. Fry from frozen, adding a few extra minutes to the cooking time.
Frying to Perfection
-
Heat the Oil: In a deep, heavy-bottomed pot or Dutch oven, pour in enough vegetable, canola, or peanut oil to reach a depth of at least 3-4 inches. Place the pot over medium-high heat. Attach a deep-fry thermometer to the side of the pot. We are aiming for a consistent oil temperature of 350°F (175°C).
Safety First: Never leave hot oil unattended. Have a lid nearby in case of a grease fire. Ensure your cooking area is dry and clear.
- Fry in Batches: Once the oil reaches the target temperature, carefully lower 2-3 Crispy Cheesy Beef Baconrolls into the hot oil using tongs. Do not overcrowd the pot; frying too many at once will drastically lower the oil temperature, resulting in greasy, rather than crispy, rolls. We want each baconroll to have ample space to cook evenly.
-
Achieve Golden Crispiness: Fry the baconrolls for about 5-8 minutes, turning them occasionally with tongs to ensure all sides are evenly cooked and the bacon becomes beautifully golden brown and incredibly crisp. You’ll notice the wrappers puffing up slightly and turning a delightful golden hue. The bacon should be rendered and crispy.
Listen for the Sizzle: A strong, consistent sizzle indicates that the oil temperature is right. If it’s too quiet, increase the heat; if it’s too aggressive, lower it slightly.
- Drain and Rest: Once the Crispy Cheesy Beef Baconrolls are golden brown and perfectly crispy, carefully remove them from the hot oil using tongs. Transfer them to a wire rack set over a baking sheet lined with paper towels. This allows any excess oil to drain off, keeping them from becoming soggy and maintaining their delightful crisp texture.
- Repeat and Serve: Allow the oil to return to 350°F (175°C) before frying the next batch. Continue until all your baconrolls are fried to perfection. Serve these glorious Crispy Cheesy Beef Baconrolls immediately while they are still hot and at their peak crispiness.
Serving Suggestions for Your Crispy Cheesy Beef Baconrolls
These Crispy Cheesy Beef Baconrolls are fantastic on their own, a complete flavor bomb in every bite. However, a little something on the side can elevate the experience even further.
-
Dipping Sauces: While they are bursting with flavor, a simple dipping sauce can add another layer of enjoyment.
- A tangy sriracha mayonnaise offers a creamy, spicy contrast.
- A sweet chili sauce provides a lovely sweet and savory kick.
- Even a classic marinara sauce can be a surprisingly good pairing, especially for the cheesy interior.
- For a fresh counterpoint, consider a simple homemade ranch or a cooling avocado crema.
- Garnish: A sprinkle of fresh chopped chives or extra parsley just before serving adds a touch of color and fresh herbaceousness, making your Crispy Cheesy Beef Baconrolls look as amazing as they taste.
- Pairing: These rolls make an excellent appetizer for a party, a satisfying snack, or even a fun main course alongside a light green salad to balance the richness. Imagine serving a platter of these at your next gathering – they are guaranteed to be a showstopper and disappear in no time! The combination of the crispy wrapper, the savory beef, and the gooey, melty cheese encased in a blanket of perfectly cooked bacon is truly irresistible.
Conclusion:
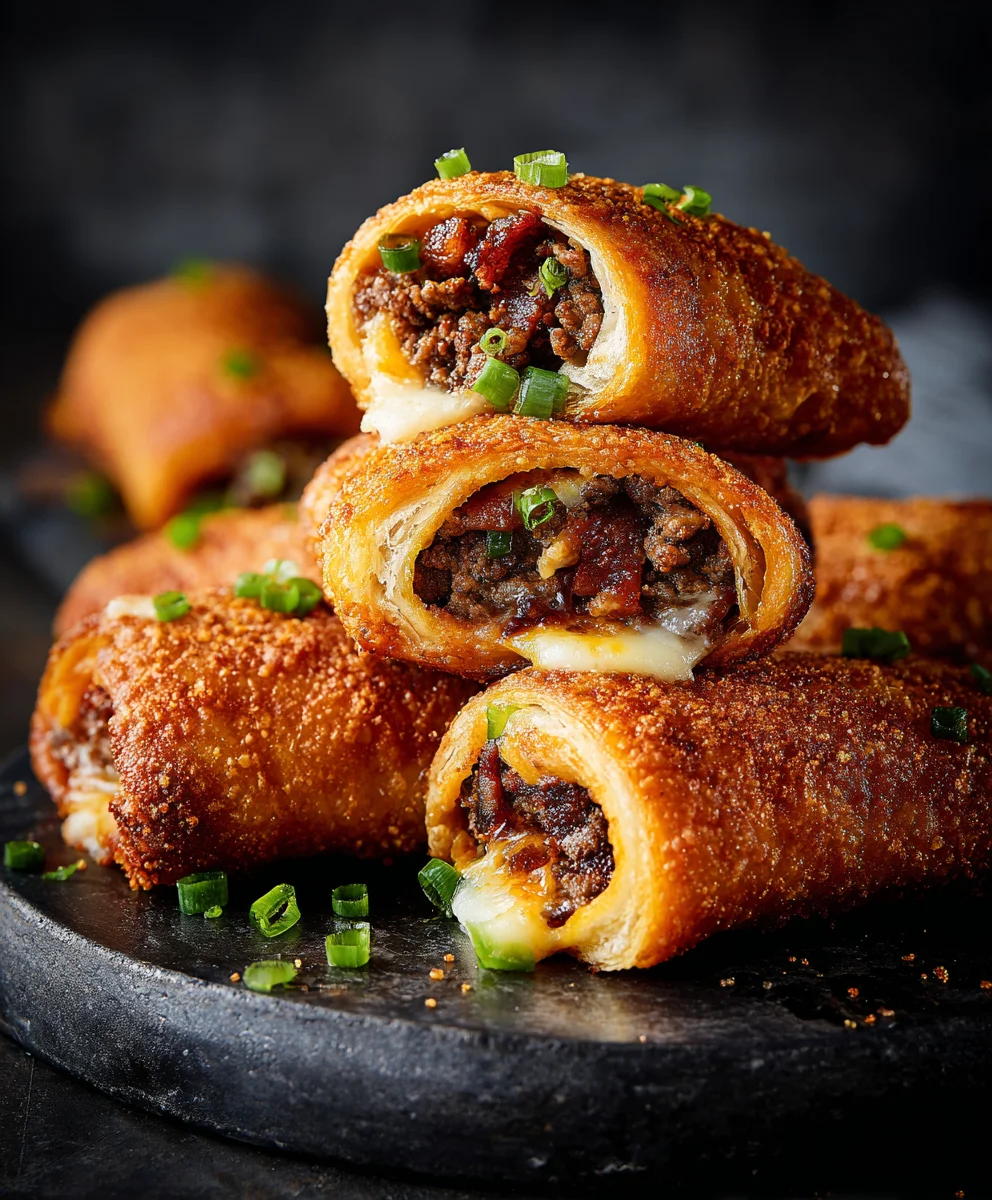
So, there you have it – my absolute favorite recipe for what I truly believe will become your new go-to snack or appetizer, the magnificent Crispy Cheesy Beef Baconrolls. I’ve walked you through every step, sharing all my tips and tricks to ensure your success in the kitchen. What makes these rolls an absolute must-try, you ask? Well, it’s that irresistible symphony of textures and flavors that sets them apart. Imagine the satisfying crunch of perfectly cooked bacon, giving way to a warm, gooey center of melted cheese, all hugging tender, savory beef. It’s a sensory experience that tantalizes your taste buds from the very first bite, offering a delightful contrast between the salty, crisp exterior and the rich, creamy interior.
This isn’t just another appetizer; it’s a statement piece for your next gathering, a delightful treat for a cozy night in, or even a fantastic addition to your game day spread. The combination of rich, well-seasoned beef, smoky, salty bacon, and creamy, melted cheese creates a harmony that is both comforting and incredibly exciting. I promise you, once you taste that perfect balance – the savory, the crispy, the cheesy – you’ll understand why I’m so enthusiastic about them. They’re incredibly satisfying, surprisingly easy to prepare with a little guidance, and guaranteed to impress anyone lucky enough to try them. The versatility alone makes them a kitchen staple; they can elevate a casual weeknight dinner or be the star of a sophisticated party spread. You’ll quickly find yourself making them again and again because they truly hit all the right notes for an unforgettable dish.
Serving Suggestions: Elevating Your Baconrolls
Now, let’s talk about making these incredible rolls shine even brighter on your table. While they are utterly fantastic straight out of the oven, perhaps with just a simple sprinkle of fresh parsley, there are so many ways to serve them. Think about a vibrant dipping sauce! A classic marinara, a tangy barbecue sauce, a creamy ranch, a zesty honey mustard, or even a spicy sriracha mayo would all be spectacular companions, adding another layer of flavor and allowing your guests to customize their experience. For a more substantial meal, I love serving these as a main course alongside a crisp, fresh green salad tossed with a light vinaigrette, or perhaps with a side of roasted asparagus or steamed broccoli for a balanced plate. They also make an incredible addition to a brunch spread – imagine them next to fluffy scrambled eggs and some toasted artisan bread, offering a savory counterpoint to sweeter breakfast items. For entertaining, arrange them artfully on a platter with decorative toothpicks, making them easy for guests to grab and enjoy without fuss. And if you’re hosting a casual get-together, consider serving them with mini slider buns and some pickles, letting your guests build their own irresistible sandwiches, creating a fun and interactive food station.
Creative Variations: Make Them Your Own
But don’t stop there! One of the things I love most about cooking is the opportunity to experiment and personalize. While the core concept of the Crispy Cheesy Beef Baconrolls is perfection, feel free to get creative with variations. You could try different types of cheese – maybe a sharp cheddar for more bite, a smoky gouda for depth and a hint of campfire flavor, a Monterey Jack for extra meltiness, or even a blend of mozzarella and provolone for that classic pizza-like stretchiness. For a little kick, finely dice some jalapeños and mix them directly into your beef filling, or add a pinch of red pepper flakes for a subtle warmth. Experiment with herbs and spices too; a touch of smoked paprika, garlic powder, dried oregano, or even a dash of chili powder could elevate the flavor profile even further, tailoring it to your personal preference. If you’re feeling adventurous, you could even try wrapping them in puff pastry before the bacon for an extra layer of flakiness, though this will change the ‘crispy’ aspect of the bacon quite a bit. Or, for a slightly different take, you might even consider wrapping a thinner strip of bell pepper (red or yellow for sweetness) inside for a subtle crunch and freshness that cuts through the richness. The possibilities are truly endless, and making them your own is part of the fun and what makes cooking such a rewarding experience!
So, what are you waiting for? I wholeheartedly encourage you to roll up your sleeves, gather your ingredients, and give this recipe a try this week. I promise you, the effort is minimal compared to the incredible rewards you’ll reap in flavor and satisfaction. This recipe isn’t just about following instructions; it’s about creating joy in your kitchen and at your table. And please, please, please, don’t keep your culinary triumphs to yourself! I would absolutely love to hear about your experience. Did you try a new dipping sauce? Did you experiment with different cheeses? What was your favorite part of making and eating these delightful rolls? Share your photos and your feedback in the comments below or tag me on social media. Your insights and creations inspire me and our entire cooking community, showing us all the wonderful ways this recipe can be enjoyed and adapted. Happy cooking, my friends, and get ready to fall head over heels for these truly amazing Crispy Cheesy Beef Baconrolls!
Crispy Cheesy Beef Baconrolls
Succulent, seasoned ground beef, generously wrapped in melting cheese, encased in smoky, crisp beef bacon, then deep-fried to golden perfection. These versatile rolls are perfect as an appetizer or indulgent treat, delivering maximum impact with minimal fuss.
Ingredients
-
1 tablespoon olive oil
-
1 pound (450g) lean ground beef
-
1 large yellow onion, finely diced
-
2 cloves garlic, minced
-
1/2 cup beef broth or stock
-
1 tablespoon Worcestershire sauce
-
1 teaspoon smoked paprika
-
1/2 teaspoon dried oregano
-
Salt to taste
-
Freshly ground black pepper to taste
-
2 tablespoons fresh parsley, chopped
-
2 tablespoons unsalted butter
-
2 tablespoons all-purpose flour
-
1 1/2 cups whole milk, warmed
-
1 1/2 cups shredded sharp cheddar cheese
-
1/2 cup shredded Monterey Jack cheese
-
1/4 teaspoon ground mustard
-
Pinch of cayenne pepper (optional)
-
White pepper to taste
-
12-16 spring roll wrappers (8×8 inches)
-
12-16 slices thin-cut streaky beef bacon
-
1 large egg, whisked with 1 tablespoon water
-
4-6 cups vegetable oil (for deep frying)
Instructions
-
Step 1
Heat olive oil in a large skillet over medium-high heat. Brown ground beef for 7-10 minutes, breaking it up and draining any excess fat. Add finely diced onion and cook for 5-7 minutes until translucent. Stir in minced garlic and cook for 1 minute until fragrant. Add beef broth, Worcestershire sauce, smoked paprika, and dried oregano. Bring to a simmer, then cover and cook on low heat for 10-15 minutes. Uncover, increase heat slightly, and let excess liquid evaporate until the filling is moist but not watery. Season generously with salt and pepper, then stir in fresh chopped parsley. Transfer to a bowl and cool completely to room temperature. -
Step 2
In a medium saucepan, melt unsalted butter over medium heat. Whisk in all-purpose flour for 1-2 minutes to form a light golden roux. Gradually whisk in warmed whole milk until the sauce is smooth and thickens to a gravy-like consistency (3-5 minutes). Reduce heat to low. Add shredded sharp cheddar and Monterey Jack cheeses, stirring until completely melted and smooth. Stir in ground mustard and optional cayenne pepper. Season with salt and white pepper. Transfer to a separate bowl, cover surface with plastic wrap, and cool in the refrigerator for at least 30 minutes until thick and scoopable. -
Step 3
Prepare your workstation by laying out spring roll wrappers (orient one corner towards you, like a diamond) and having the cooled beef filling, cooled cheesy sauce, egg wash, and beef bacon slices ready. Keep unused wrappers covered with a damp cloth to prevent drying. Spoon 2-3 tablespoons of the cooled beef filling onto the lower third of a wrapper, leaving a 1-inch border. Shape the filling into a neat log. Carefully spoon 1-2 tablespoons of the cooled cheesy sauce directly on top of the beef log. -
Step 4
Fold the bottom corner of the wrapper tightly over the filling, tucking it in to create a snug cylinder. Fold in the side corners towards the center, overlapping slightly. Tightly roll the wrapper upwards from the bottom. Moisten the top corner with the whisked egg wash and complete the roll, sealing it securely. Take one slice of thin-cut streaky beef bacon and tightly wrap it spirally around the entire spring roll, overlapping slightly. Secure the very end of the bacon slice with a little more egg wash or a toothpick (remove before frying). -
Step 5
Repeat the assembly process for all remaining rolls. In a deep, heavy-bottomed pot or Dutch oven, pour enough vegetable oil to reach a depth of 3-4 inches. Heat the oil to a consistent temperature of 350°F (175°C) using a deep-fry thermometer. Carefully lower 2-3 baconrolls into the hot oil using tongs, ensuring not to overcrowd the pot. Fry for about 5-8 minutes, turning occasionally, until the bacon is beautifully golden brown, rendered, and incredibly crispy, and the wrappers are puffed and golden. -
Step 6
Once cooked, carefully remove the Crispy Cheesy Beef Baconrolls from the hot oil and transfer them to a wire rack set over a baking sheet lined with paper towels to drain any excess oil. Allow the oil to return to 350°F (175°C) before frying the next batch. Serve immediately while hot and crispy. Optional: Serve with dipping sauces like sriracha mayonnaise, sweet chili sauce, or marinara, and garnish with fresh chopped chives or parsley.
Important Information
Nutrition Facts (Per Serving)
It is important to consider this information as approximate and not to use it as definitive health advice.
Allergy Information
Please check ingredients for potential allergens and consult a health professional if in doubt.

Leave a Comment