
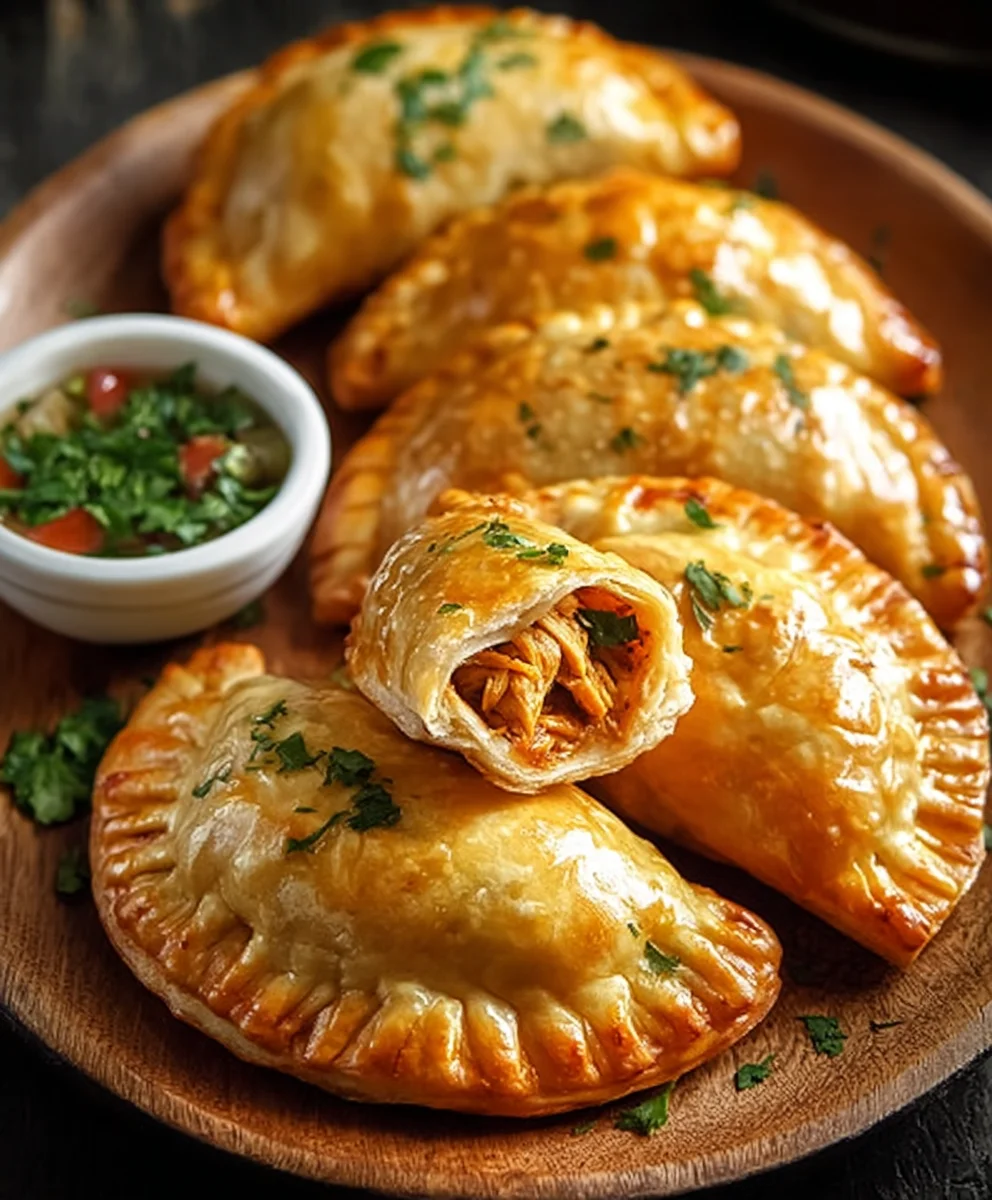
Chicken Empanadas are more than just a delightful pastry; they are a culinary journey packed with flavor and tradition that I’m thrilled to share with you. Imagine a golden, flaky crust, perfectly crimped, encasing a savory, spiced chicken filling that’s tender and bursting with aroma. This irresistible combination is what makes them a beloved staple in countless households, and I believe you’ll soon understand why.
Originating from the Spanish word ’empanar,’ meaning ‘to bread’ or ‘to wrap in dough,’ empanadas have a rich lineage, spreading across Spain, Latin America, and beyond, evolving with unique regional twists. They’re a testament to culinary ingenuity, transforming simple ingredients into something extraordinary. Whether served as a celebratory appetizer, a hearty snack, or a delightful main course, Chicken Empanadas offer a satisfying experience that appeals to all senses. Their portable nature makes them ideal for picnics, potlucks, or simply a comforting meal at home. The interplay of the crispy exterior and the tender, flavorful chicken interior creates a symphony of textures and tastes that is truly captivating. I invite you to discover the magic behind this cherished dish and make it a new favorite in your kitchen.
Ingredients:
- For the Empanada Dough:
- 3 ½ cups (about 420g) all-purpose flour, plus extra for dusting
- 1 teaspoon fine sea salt
- 1 cup (226g) unsalted butter, very cold and cut into ½-inch cubes
- ½ cup (120ml) ice water, plus 1-2 tablespoons more if needed
- 1 large egg yolk (optional, for richer color and slightly more tender dough)
- 1 tablespoon white vinegar (optional, for tenderness and easier handling)
- For the Savory Chicken Filling:
- 2 tablespoons olive oil
- 1 large yellow onion, finely diced
- 2 cloves garlic, minced
- 1 red bell pepper, finely diced
- 1 green bell pepper, finely diced
- 1 ½ pounds (about 680g) boneless, skinless chicken breasts or thighs, cooked and shredded (I usually boil or poach mine until tender, then shred)
- ½ cup (120ml) chicken broth
- ½ cup (120ml) tomato sauce or passata
- 1 teaspoon ground cumin
- ½ teaspoon smoked paprika
- ¼ teaspoon dried oregano
- Pinch of cayenne pepper (optional, for a little kick)
- Salt and freshly ground black pepper to taste
- ¼ cup chopped fresh cilantro or parsley, for garnish (optional)
- 2 tablespoons cream cheese or softened butter (optional, for extra richness in the filling)
- For Assembly and Finishing:
- 1 large egg, whisked with 1 tablespoon water (for egg wash)
Preparing the Savory Chicken Filling
My journey to the perfect Chicken Empanadas always begins with a deeply flavorful filling. This step is crucial, as it sets the stage for the entire experience. Trust me, taking your time here will pay off immensely.
- First things first, if your chicken isn’t already cooked, go ahead and prepare it. I like to poach my chicken breasts or thighs in a pot of lightly salted water until they’re cooked through, about 15-20 minutes. Once cooled slightly, shred them finely using two forks or even your hands. You want nice, tender strands that will meld beautifully with the other ingredients. Set that aside for a moment.
- Now, grab a large skillet or a Dutch oven and heat the olive oil over medium heat. Once it’s shimmering, add your finely diced yellow onion. Cook the onion gently, stirring occasionally, until it becomes wonderfully soft and translucent, which usually takes about 5-7 minutes. Don’t rush this step! Soft, well-cooked onions are the foundation of so much flavor.
- Next, toss in your minced garlic. Stir it around for just about 30 seconds until it becomes fragrant. Be careful not to let it brown or burn, as burnt garlic can taste bitter.
- Immediately after the garlic, add your diced red and green bell peppers to the skillet. Continue to cook, stirring frequently, for another 5-7 minutes. You want the peppers to soften nicely but still retain a little bit of their structure and vibrant color. This combination of onion and peppers creates a fantastic aromatic base for our Chicken Empanadas.
- Once your vegetables are softened, it’s time to bring in the spices. Sprinkle in the ground cumin, smoked paprika, dried oregano, and that optional pinch of cayenne pepper if you like a touch of heat. Stir everything together and cook for about 1 minute, letting the spices toast gently in the hot oil with the vegetables. This blooming process truly awakens their flavors. You’ll notice the aroma intensify beautifully.
- Now, add the shredded chicken to the skillet. Pour in the chicken broth and the tomato sauce or passata. Stir everything thoroughly until all the ingredients are well combined and the chicken is coated in the saucy mixture.
- Bring the mixture to a gentle simmer, then reduce the heat to low, cover the skillet, and let it cook for about 10-15 minutes. This simmering time allows all those wonderful flavors to meld together and for the sauce to thicken slightly. Stir occasionally to prevent sticking. The goal here is a rich, cohesive filling, not a watery one.
- After simmering, remove the lid and if the mixture still seems too wet, increase the heat slightly and continue to cook, uncovered, stirring constantly, until most of the liquid has evaporated and the filling is thick enough to hold its shape. This is super important because a wet filling can make your empanadas soggy.
- Taste the filling and adjust the seasoning as needed with salt and freshly ground black pepper. This is your moment to make it absolutely perfect for your palate! If you like, stir in the optional cream cheese or softened butter at this stage for an extra layer of richness and creaminess. It really elevates the texture.
- Finally, stir in the fresh chopped cilantro or parsley if you’re using it. Remove the skillet from the heat and transfer the filling to a shallow bowl or plate. It’s absolutely crucial to let the filling cool completely before you start assembling your empanadas. Warm filling will melt your dough and make it incredibly difficult to work with. I often make my filling a day in advance and store it in the fridge; it actually tastes even better the next day!
Crafting the Perfect Empanada Dough
A great empanada isn’t just about the filling; the dough plays an equally important role. I adore a flaky, tender crust, and this recipe delivers exactly that. Using very cold butter and ice water is the secret to achieving that wonderful texture, so pay close attention to temperatures here.
- In a large mixing bowl, combine the all-purpose flour and fine sea salt. Give it a good whisk to ensure everything is evenly distributed.
- Add the very cold, cubed unsalted butter to the flour mixture. Using a pastry blender, your fingertips, or a food processor, cut the butter into the flour until the mixture resembles coarse crumbs with some pea-sized pieces of butter still visible. It’s important not to overmix here! Those little pieces of butter are what create the flakiness in the dough. If using a food processor, pulse it just a few times until you reach the desired consistency.
- In a separate small bowl, whisk together the ice water, egg yolk (if using), and white vinegar (if using). The egg yolk adds richness and a slightly more tender crumb, while the vinegar helps tenderize the dough and makes it a bit more pliable.
- Gradually add the ice water mixture to the flour and butter mixture, starting with about ½ cup. Stir with a fork or your hands until the dough just begins to come together. If it still looks too dry and crumbly, add the remaining 1-2 tablespoons of ice water, a tiny bit at a time, until the dough forms a shaggy ball. Be careful not to add too much water; you want it just moist enough to hold together, but not sticky.
- Turn the dough out onto a lightly floured surface. Gently bring it together and form it into a disk. Try to handle the dough as little as possible to prevent the butter from melting. Overworking the dough develops the gluten too much, which can lead to a tough crust.
- Wrap the dough disk tightly in plastic wrap and refrigerate it for at least 1 hour, or preferably 2 hours. Chilling the dough is an absolutely critical step. It allows the gluten to relax, makes the butter firm up again, and ultimately makes the dough much easier to roll out and contributes significantly to the flakiness of your Chicken Empanadas.
- If you plan to make your empanadas over two days, you can even leave the dough in the refrigerator overnight. Just make sure to let it sit at room temperature for 10-15 minutes before rolling if it’s been chilling for a long time, as it will be very firm.
Assembling Your Delicious Chicken Empanadas
This is where the magic truly happens! Assembling your Chicken Empanadas is a rewarding process, and with a little patience, you’ll be creating beautiful, uniform parcels of deliciousness.
- Preheat your oven to 375°F (190°C). Line two large baking sheets with parchment paper. This prevents sticking and makes cleanup a breeze.
- Remove the chilled dough from the refrigerator. On a lightly floured surface, divide the dough into two equal portions. Work with one portion at a time, keeping the other wrapped and refrigerated.
- Roll out one portion of dough using a lightly floured rolling pin. Roll it into a thin circle, about 1/8-inch thick. The thinner you can get it without tearing, the flakier your empanadas will be. I usually aim for a circle roughly 12-14 inches in diameter.
- Using a 4-inch round cutter (or a bowl/glass rim), cut out as many circles as you can from the rolled dough. Gently gather the scraps, form them into a ball, re-wrap, and chill for a few minutes before re-rolling and cutting more circles. You want to minimize re-rolling the dough too many times as it can make it tough.
- Spoon about 1 ½ to 2 tablespoons of the completely cooled chicken filling onto one half of each dough circle, leaving a small border around the edge. Do not overfill! This is a common mistake that leads to bursting empanadas.
- Brush a little bit of the egg wash (just plain water works too, but egg wash helps seal better) around the edge of the dough circle, particularly on the empty half. This acts as the glue.
- Carefully fold the empty half of the dough over the filling to create a half-moon shape. Gently press the edges together with your fingers to seal. You want a really good seal here to prevent the filling from oozing out during baking.
- Now for the decorative crimp! You can use the tines of a fork to press down firmly all along the sealed edge, creating a pretty pattern and an extra-secure seal. Alternatively, you can do a traditional “repulgue” or rolled edge: starting from one end, pinch a small piece of the sealed edge and fold it over, pressing it firmly. Continue this all the way around the curve, overlapping each fold slightly, creating a beautiful rope-like edge. This takes a little practice but is very satisfying!
- Carefully transfer the assembled Chicken Empanadas to your prepared baking sheets, leaving about an inch of space between each one.
- Repeat the rolling, cutting, filling, and sealing process with the remaining dough and filling until you’ve used everything up. If your kitchen is warm, you might want to chill the assembled empanadas on the baking sheet for 10-15 minutes before baking to help them hold their shape.
Baking the Golden Empanadas
The final step before enjoying your culinary creations is baking them to golden perfection. This part is quick, but it’s essential to watch them closely for that ideal color and crispness.
- Once all your Chicken Empanadas are assembled and on the baking sheets, it’s time for the egg wash. In a small bowl, whisk together one large egg with a tablespoon of water until well combined.
- Using a pastry brush, lightly brush the top of each empanada with the egg wash. This will give them that beautiful, glossy golden-brown finish that is so characteristic of perfectly baked empanadas.
- If you wish, you can cut a tiny slit or two on top of each empanada with a sharp knife. This allows steam to escape during baking, preventing the empanadas from puffing up excessively and ensuring an even bake.
- Place the baking sheets into your preheated 375°F (190°C) oven. Bake for 20-25 minutes, or until the empanadas are gorgeously golden brown and the crust looks flaky and cooked through. Baking times can vary depending on your oven, so keep an eye on them. You might need to rotate the baking sheets halfway through baking for even browning.
- Once baked, remove the empanadas from the oven and let them cool on the baking sheets for a few minutes before transferring them to a wire rack. They will be incredibly hot, and a little cooling time helps the crust crisp up further.
Serving Suggestions and Storage
Congratulations, you’ve made a batch of incredibly delicious Chicken Empanadas! Now comes the best part: enjoying them.
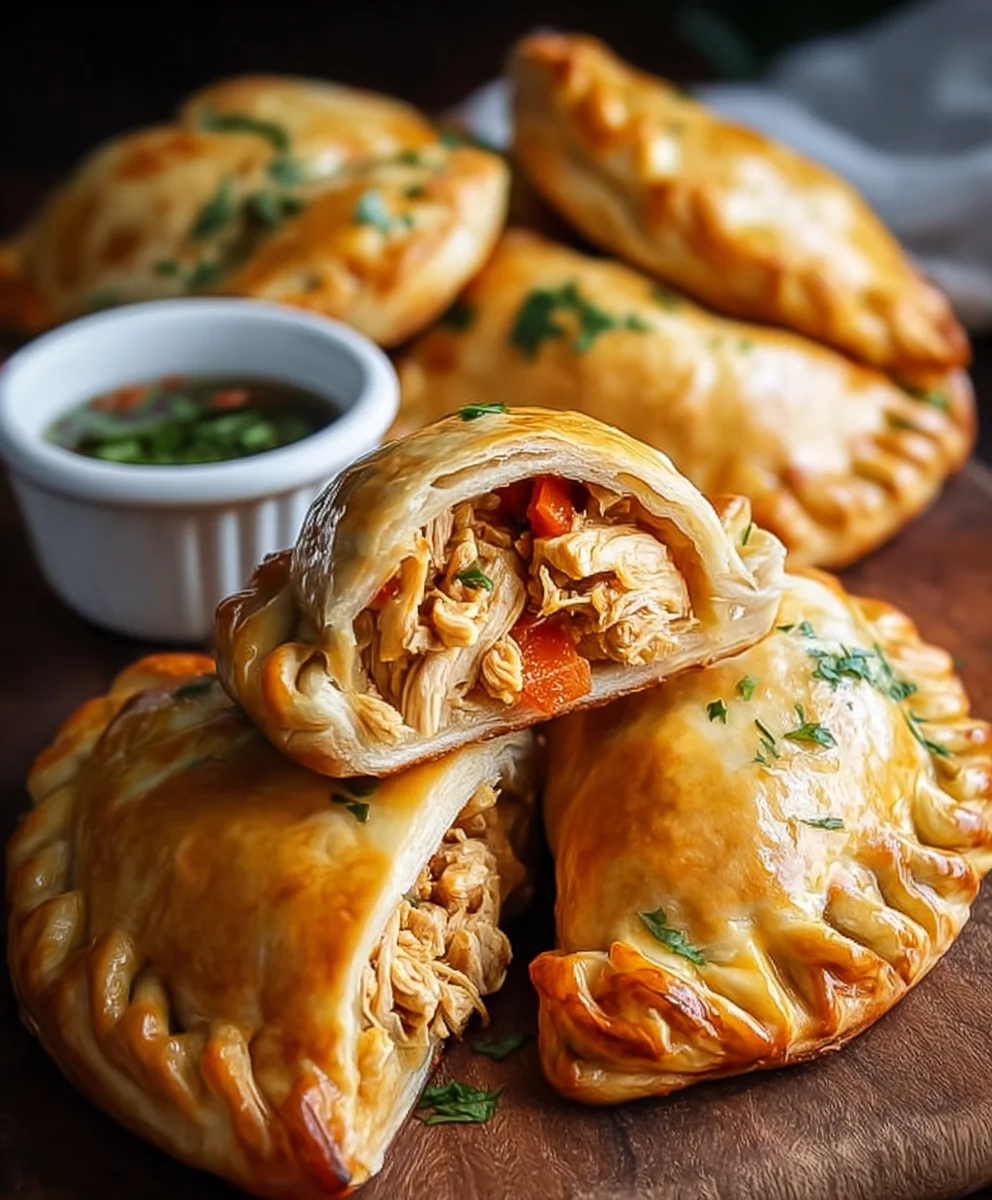
- Serve your freshly baked empanadas warm, either on their own as a fantastic snack or appetizer, or as part of a larger meal. They are wonderfully satisfying just as they are.
- I love serving them with a simple dipping sauce. A fresh salsa, a tangy chimichurri, a creamy avocado sauce, or even just a squeeze of lime juice can elevate the experience. My personal favorite is a homemade cilantro-lime crema!
- If you happen to have any leftovers (a rare occurrence in my house!), they can be stored in an airtight container in the refrigerator for up to 3-4 days.
- To reheat, place them in a preheated oven at 350°F (175°C) for 10-15 minutes, or until heated through and the crust is crisp again. Microwaving is an option, but it can make the crust a bit soft.
- These empanadas also freeze beautifully! Once completely cooled, arrange them in a single layer on a baking sheet and freeze until solid. Then transfer them to a freezer-safe bag or container. They will keep well for up to 2-3 months.
- To cook from frozen, you can bake them directly in a preheated oven at 375°F (190°C) for about 30-35 minutes, or until golden brown and heated through. You might want to brush them with a little extra egg wash before baking from frozen for a fresh look.
Conclusion:
And there you have it, my friends! We’ve journeyed through the steps of creating what I genuinely believe are some of the most delightful and satisfying treats you can pull from your kitchen. It’s been an absolute pleasure guiding you through this recipe, and I truly hope you’re feeling inspired and ready to get your hands a little floury. My aim with this recipe was to share a dish that isn’t just a meal, but a moment – a moment of warmth, comfort, and pure culinary joy.
So, why is this particular recipe a must-try? Well, for starters, it’s all about that incredible textural interplay. Imagine biting into a perfectly golden, flaky crust that shatters ever so slightly, giving way to a rich, savory, and incredibly flavorful filling. Each bite is a little explosion of seasoned chicken, mingled with aromatic vegetables and just the right hint of spices. It’s the kind of comfort food that transcends cultures, loved by virtually everyone who tries it. This isn’t just another dish; it’s a testament to how simple, quality ingredients, when brought together with a little love and patience, can create something truly extraordinary. It’s robust enough to be a hearty snack, elegant enough for an appetizer, and utterly satisfying as a main course. The aroma alone, as these bake or fry, is enough to gather everyone in the house, eagerly anticipating the first taste. Trust me, the effort, which I’ve streamlined to be as straightforward as possible, is more than worth the incredible reward.
Now, let’s talk about enhancing your experience. While these beauties are phenomenal on their own, a little accompaniment can take them to the next level. For serving suggestions, think about vibrant, fresh contrasts. A simple side salad with a zesty vinaigrette can cut through the richness beautifully, offering a refreshing counterpoint. For dipping, the possibilities are endless and truly where you can inject more of your personal flair! My personal favorites include a classic homemade salsa, bursting with fresh tomatoes and cilantro, or a creamy avocado crema that adds a cooling, luscious texture. You could also try a spicy chimichurri for a herbaceous kick, or even a simple dollop of sour cream mixed with a touch of lime juice for a tangy finish. Don’t shy away from experimenting with a spicy aioli or a sweet chili sauce – different dips can completely transform the flavor profile of each bite!
Endless Possibilities for Customization
But the fun doesn’t stop there! One of the things I adore most about this recipe is its incredible versatility. Once you’ve mastered the basic technique, the door opens to a world of variations. Feeling adventurous? Try adding some finely diced potatoes or sweet potatoes to the filling for a heartier texture, or perhaps some black olives and capers for a briny touch. A pinch of smoked paprika can add a wonderful depth, or for those who love a bit of heat, a finely chopped jalapeño or a dash of cayenne pepper would be fantastic. You could even incorporate different cheeses, like a sharp cheddar or a creamy Monterey Jack, to melt into the filling. For a healthier twist, consider baking them instead of frying – they’ll still be wonderfully golden and delicious, just with a slightly different texture. Or, if you have an air fryer, that’s another fantastic option for achieving a crispy exterior with less oil. Don’t forget about experimenting with the dough itself! While our traditional dough is sublime, puff pastry can offer an even flakier, lighter crust, perfect for a more delicate appetizer. For dietary needs, a gluten-free flour blend can often be substituted successfully in the dough, allowing everyone to enjoy these delicious treats. These Chicken Empanadas are truly a blank canvas for your culinary imagination.
Share Your Culinary Adventures!
So, what are you waiting for? I wholeheartedly encourage you to roll up your sleeves, gather your ingredients, and embark on this delicious journey. There’s an immense sense of pride and satisfaction that comes from creating something so delicious from scratch, something that brings joy to your table and to those you share it with. Don’t be afraid to tweak, to experiment, and to make this recipe your very own. Cooking should always be an adventure, a creative outlet, and above all, a source of immense pleasure.
Once you’ve made them, I would absolutely love to hear about your experience! Did you try a new dipping sauce? Did you add a unique ingredient to the filling? What did your family and friends think? Please come back and share your triumphs, your photos, and any creative variations you discover in the comments section below. Your feedback and culinary adventures inspire me, and they’re a wonderful way to build our community of passionate home cooks. Happy cooking, and I can’t wait to hear all about your incredible, homemade creations!
Easy & Delicious Chicken Empanadas
Golden, flaky pastries filled with savory, spiced shredded chicken. A perfect snack, appetizer, or meal, these traditional empanadas offer a satisfying blend of crispy crust and tender, flavorful filling. Great for picnics, potlucks, or a comforting meal at home, and freezer-friendly!
Ingredients
-
3 ½ cups (420g) all-purpose flour
-
1 tsp fine sea salt
-
1 cup (226g) unsalted butter, very cold, cubed
-
½ cup (120ml) ice water (plus 1-2 tbsp more, if needed)
-
1 large egg yolk (optional)
-
1 tbsp white vinegar (optional)
-
2 tbsp olive oil
-
1 large yellow onion, finely diced
-
2 cloves garlic, minced
-
1 red bell pepper, finely diced
-
1 green bell pepper, finely diced
-
1 ½ lbs (680g) boneless, skinless chicken, cooked and shredded
-
½ cup (120ml) chicken broth
-
½ cup (120ml) tomato sauce or passata
-
1 tsp ground cumin
-
½ tsp smoked paprika
-
¼ tsp dried oregano
-
Pinch cayenne pepper (optional)
-
Salt and freshly ground black pepper to taste
-
¼ cup fresh cilantro or parsley, chopped (optional)
-
2 tbsp cream cheese or softened butter (optional)
-
1 large egg, whisked with 1 tbsp water (for egg wash)
Instructions
-
Step 1
Cook and shred 1.5 lbs chicken if not already done. In a large skillet, heat 2 tbsp olive oil over medium heat. Sauté 1 finely diced yellow onion until soft (5-7 min). Add 2 minced garlic cloves; cook 30 seconds until fragrant. Stir in 1 finely diced red bell pepper and 1 finely diced green bell pepper; cook 5-7 minutes until softened. -
Step 2
Add 1 tsp ground cumin, ½ tsp smoked paprika, ¼ tsp dried oregano, and optional pinch of cayenne pepper; cook 1 minute until fragrant. Stir in shredded chicken, ½ cup chicken broth, and ½ cup tomato sauce. Bring mixture to a gentle simmer, reduce heat to low, cover, and cook 10-15 minutes, stirring occasionally to meld flavors. -
Step 3
Remove lid and increase heat slightly; cook, stirring, until most liquid evaporates and filling is thick enough to hold its shape. Taste and season with salt and black pepper. Stir in optional 2 tbsp cream cheese or softened butter and ¼ cup fresh chopped cilantro or parsley. Transfer filling to a shallow bowl or plate and cool completely before assembly. (Can be made a day in advance). -
Step 4
In a large mixing bowl, combine 3 ½ cups all-purpose flour and 1 tsp fine sea salt. Add 1 cup very cold, cubed unsalted butter. Using a pastry blender or fingertips, cut butter into flour until mixture resembles coarse crumbs with some pea-sized butter pieces visible. -
Step 5
In a separate small bowl, whisk together ½ cup ice water, optional 1 large egg yolk, and optional 1 tbsp white vinegar. Gradually add the liquid mixture to the flour and butter, stirring until dough just begins to come together into a shaggy ball. Do not overmix. Gently form dough into a disk. -
Step 6
Wrap the dough disk tightly in plastic wrap and refrigerate for at least 1 hour, or preferably 2 hours. Chilling is crucial for flakiness and ease of handling. -
Step 7
Preheat oven to 375°F (190°C). Line two large baking sheets with parchment paper. Whisk 1 large egg with 1 tbsp water for the egg wash. -
Step 8
Remove chilled dough from refrigerator and divide in half. On a lightly floured surface, roll one portion of dough to approximately 1/8-inch thickness (12-14 inch diameter circle). Using a 4-inch round cutter, cut out as many circles as possible. Gently gather scraps, re-wrap, and chill for a few minutes before re-rolling and cutting more circles. -
Step 9
Spoon 1 ½ to 2 tablespoons of the completely cooled chicken filling onto one half of each dough circle, leaving a small border. Brush a little egg wash around the edge of the dough circle, especially on the empty half. -
Step 10
Carefully fold the empty half of the dough over the filling to create a half-moon shape. Gently press the edges together with your fingers to seal. Crimp the sealed edge with the tines of a fork, or create a traditional rolled (repulgue) edge. Transfer assembled empanadas to prepared baking sheets, leaving space between each. -
Step 11
Lightly brush the top of each empanada with egg wash. Cut a tiny slit or two on top of each with a sharp knife to allow steam to escape. Bake for 20-25 minutes, or until gorgeously golden brown and the crust is flaky and cooked through. Rotate baking sheets halfway through if needed. Remove from oven and let cool on baking sheets for a few minutes before transferring to a wire rack. -
Step 12
Serve warm, with a dipping sauce like salsa or chimichurri if desired. Leftovers store in an airtight container in the refrigerator for 3-4 days; reheat in a 350°F (175°C) oven for 10-15 minutes. You can freeze empanadas (before or after baking) for up to 3 months. To cook from frozen (raw or cooked), bake at 375°F (190°C) for 30-35 minutes, or until golden and heated through, brushing with egg wash if desired before baking.
Important Information
Nutrition Facts (Per Serving)
It is important to consider this information as approximate and not to use it as definitive health advice.
Allergy Information
Please check ingredients for potential allergens and consult a health professional if in doubt.


Leave a Comment