
Homemade Bread is more than just a recipe; it’s a sensory experience that transports you to a world of warmth, comfort, and unparalleled flavor. There’s a profound satisfaction that comes from pulling a golden-brown loaf from your own oven, its crust crackling invitingly as it cools. People adore Homemade Bread because it’s a tangible expression of care and dedication. Imagin extracte the aroma filling your kitchen, a testament to simple ingredients transformed into something truly magical. This isn’t just about sustenance; it’s about connection, about sharing something delicious and wholesome with loved ones. What makes this particular recipe so special is its perfect balance of simplicity and incredible results, yielding a soft, airy interior with a delightfully chewy crust that store-bought versions simply can’t replicate. Get ready to fall in love with the art of baking all over again.
Ingredients:
- 2 cups warm water (105-115 degrees Fahrenheit)
- 1 Tablespoon active dry yeast
- 1/4 cup honey (or granulated sugar)
- 2 teaspoons salt
- 2 Tablespoons vegetable oil (or canola oil)
- 4 to 5 1/2 cups all-purpose flour (or bread flour)
Preparing the Dough
Step 1: Activating the Yeast
Begin extract by gently pouring the 2 cups of warm water into a large mixing bowl. The ideal temperature for activating yeast is between 105 and 115 degrees Fahrenheit. This range ensures the yeast awakens without being killed by excessive heat or remaining dormant in cool water. Next, sprinkle the 1 Tablespoon of active dry yeast over the surface of the warm water. Let it sit undisturbed for about 5 to 10 minutes. You’ll know the yeast is active and ready when it becomes foamy and bubbly on the surface. This visual cue indicates that the yeast is alive and consuming the sugars, preparing to leaven our Homemade Bread. If you don’t see foam, your yeast might be old, or the water temperature was off, and it’s best to start over with fresh yeast and the correct water temperature.
Step 2: Building the Dough Base
Once the yeast is happily frothing, it’s time to add the remaining wet ingredients and the primary flavor enhancers. Stir in the 1/4 cup of honey (or sugar, if you prefer). Honey lends a lovely subtle sweetness and contributes to a softer crust, while sugar provides a more straightforward sweetness and a slightly different crust texture. Next, add the 2 teaspoons of salt. Salt is crucial not only for flavor but also for controlling the yeast’s activity and strengthening the gluten structure. Finally, incorporate the 2 Tablespoons of vegetable oil. The oil adds richness, tenderness, and helps keep the bread moist, preventing it from becoming dry and crum extractbly. Give this mixture a gentle stir to ensure everything is well combined.
Step 3: Incorporating the Flour
Now comes the part where we transform this liquid mixture into a cohesive dough. Gradually add the flour, starting with 4 cups. Use a sturdy spoon or a dough whigin extractto begin mixing. As you incorporate the flour, you’ll notice the mixture thickening and starting to form a shaggy mass. Continue adding flour, about a half cup at a time, ungin extract the dough begins to pull away from the sides of the bowl. You’re aiming for a dough that is still slightly sticky to the touch but manageable. The exact amount of flour needed can vary depending on humidity and the type of flour used, so it’s important to use your judgment. If you’re using bread flour, you might need slightly less flour than with all-purpose flour due to its higher protein content, which absorbs more liquid.
Step 4: Kneading the Dough for Structure
Once the dough has come together in the bowl, it’s time to knead. Lightly flour a clean work surface and turn the dough out onto it. Kneading is essential for developing the gluten network, which gives our Homemade Bread its structure and chewy texture. For the first few minutes, the dough will be quite sticky. Resist the urge to add too much extra flour; instead, use a bench scraper or your hands to fold and press the dough. The process of kneading involves pushing the dough away from you with the heels of your hands, then folding it over itself and giving it a quarter turn. Continue this rhythmic motion for about 8 to 10 minutes. The dough is sufficiently kneaded when it becomes smooth, elastic, and springs back slowly when gently pressed with a floured finger. It should feel supple and no longer sticky.
Step 5: The First Rise (Proofing)
Lightly grease the mixing bowl you used earlier with a little bit of oil. Place the kneaded dough into the oiled bowl, turning it once to coat the entire surface with oil. This prevents the dough from drying out as it rises. Cover the bowl tightly with plastic wrap or a clean, damp kitchen towel. Find a warm, draft-free spot in your kitchen to let the dough rise. An oven that has been turned on for a minute and then turned off is often an ideal environment. Allow the dough to rise for about 1 to 1.5 hours, or until it has doubled in size. This period allows the yeast to work its magic, creating air pockets that will make our Homemade Bread light and airy. You’ll know it’s ready when a finger poked gently into the dough leaves an indentation that slowly fills back in.
Shaping and Baking
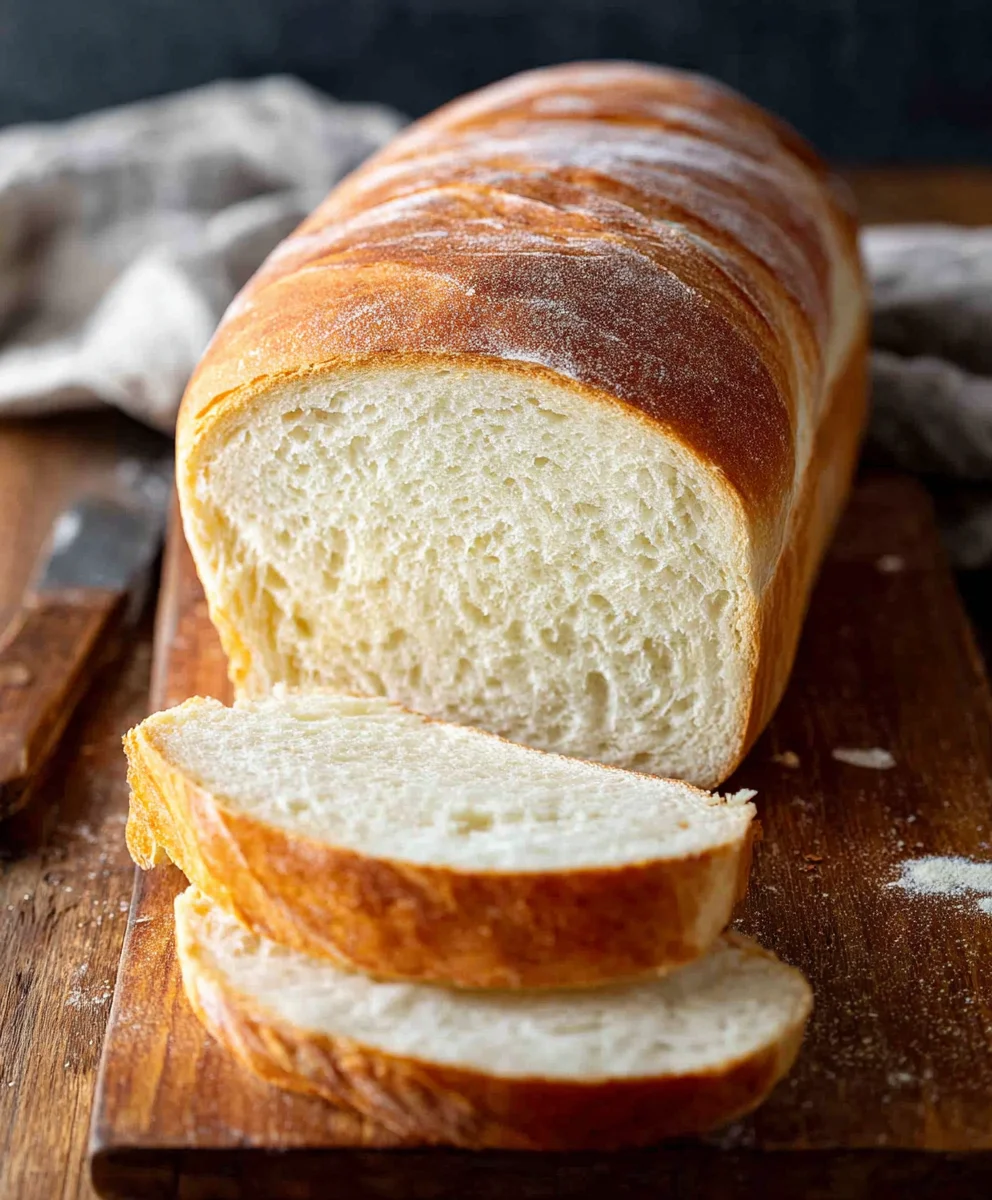
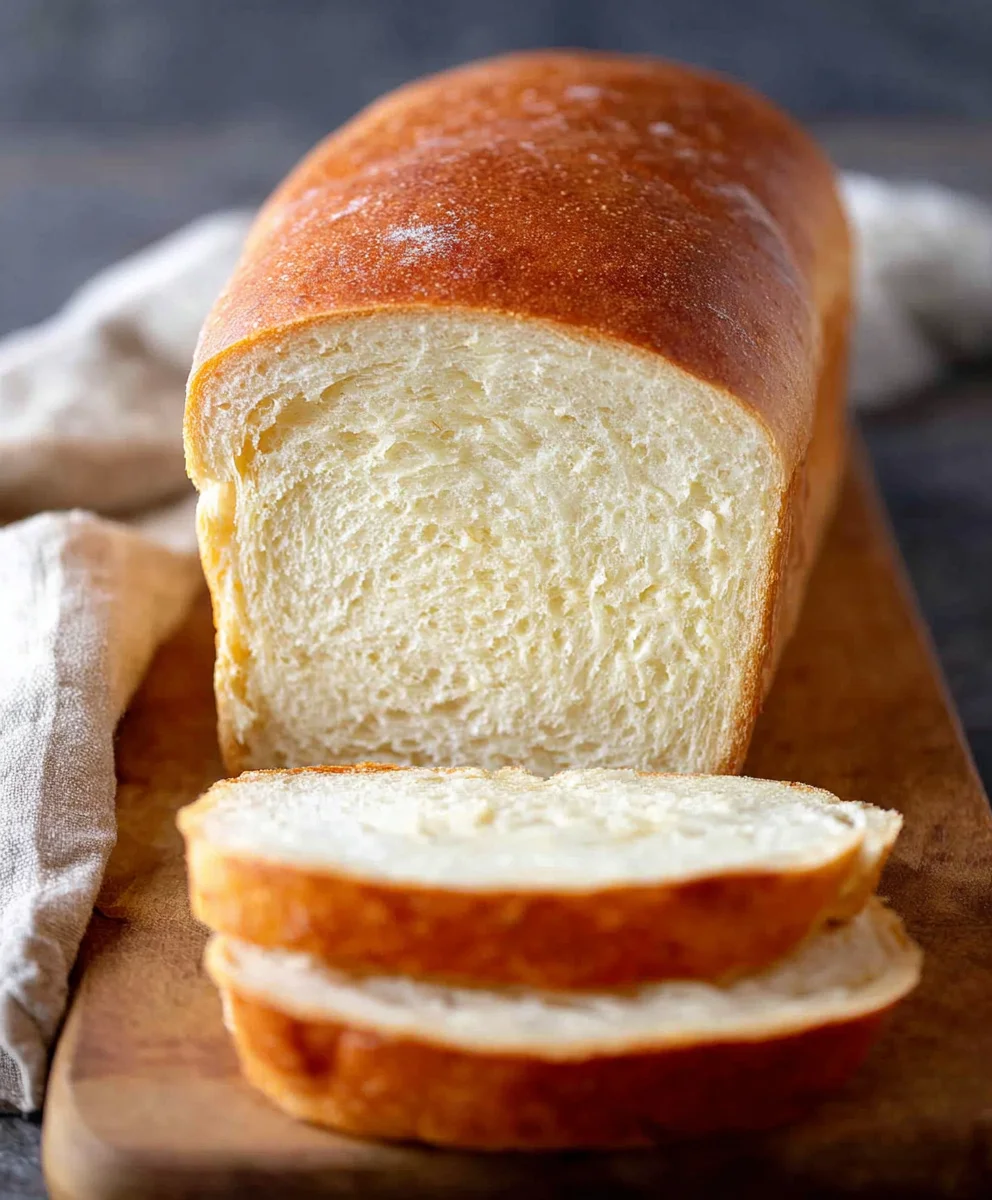
Once the dough has completed its first rise, gently punch it down to release the accumulated gases. This deflates the dough and prepares it for its final shape. You can then divide the dough if you wish to make smaller loaves or rolls, or shape it into a single loaf by gently tucking the edges underneath to create surface tension. Place the shaped dough onto a baking sheet lined with parchment paper or into a greased loaf pan. Cover it again and let it rise for a second time, for about 30-45 minutes, until it’s noticeably puffy. While the dough is having its second rise, preheat your oven to 375 degrees Fahrenheit (190 degrees Celsius). Once the dough has had its second rise and the oven is preheated, you can score the top of the loaf with a sharp knife or lame if desired for decorative purposes and to control expansion. Bake for 30-35 minutes, or until the crust is a deep golden brown and the internal temperature of the bread reaches 190-200 degrees Fahrenheit. To check for doneness, you can also tap the bottom of the loaf; it should sound hollow. Remove the bread from the oven and let it cool completely on a wire rack before slicing and enjoying your delicious Homemade Bread.
Conclusion:
You’ve now learned how to create delicious Homemade Bread right in your own kitchen! This recipe is a rewarding journey, starting with simple ingredients and culminating in a warm, crusty loaf that’s far superior to anything store-bought. The aroma that fills your home as it bakes is truly unmatched, and the satisfaction of slicing into your own creation is immense. We encourage you to embrace the process and enjoy every step. This Homemade Bread is perfect for a cozy breakfast, a hearty sandwich base, or simply enjoyed with a generous smear of butter. For a more substantial meal, try serving slices alongside your favorite soup or stew. Don’t be afraid to get creative with variations; consider adding herbs like rosemary or thyme to the dough, or incorporating seeds like poppy or sesame for added texture and flavor. Experimenting is part of the fun of baking!
Frequently Asked Questions:
What if my dough doesn’t rise?
If your dough doesn’t rise, the most common culprits are inactive yeast or an incorrect water temperature. Ensure your yeast is fresh and that the water you used was lukewarm (around 105-115°F or 40-46°C). Too hot will kill the yeast, and too cold won’t activate it.
Can I make this Homemade Bread without a stand mixer?
Absolutely! While a stand mixer makes kneading easier, you can definitely achieve great results by hand. Kneading by hand builds a strong connection with your dough and is a wonderfully meditative process. Just be prepared to put in a little more elbow grease!
How can I store my Homemade Bread?
Once cooled completely, store your Homemade Bread at room temperature in a bread box or a loosely senon-alcoholic aled paper bag for 2-3 days. For longer storage, you can slice the loaf and freeze it in an airtight bag. Simply toast slices directly from frozen.
Easy Homemade Bread Recipe – Fresh Baked Flavor
A simple and rewarding recipe for fresh-baked homemade bread with a delicious flavor.
Ingredients
-
2 cups warm water (105-115 degrees Fahrenheit)
-
1 Tablespoon active dry yeast
-
1/4 cup honey
-
2 teaspoons salt
-
2 Tablespoons vegetable oil
-
4 to 5 1/2 cups all-purpose flour
Instructions
-
Step 1
Activate the yeast by gently pouring warm water (105-115°F) into a large bowl. Sprinkle yeast over the surface and let sit for 5-10 minutes until foamy. -
Step 2
Stir in honey, salt, and vegetable oil into the foamy yeast mixture until well combined. -
Step 3
Gradually add 4 cups of flour, mixing until a shaggy dough forms. Add more flour, 1/2 cup at a time, until the dough is slightly sticky but manageable and pulls away from the bowl. -
Step 4
Turn the dough onto a lightly floured surface and knead for 8-10 minutes until smooth, elastic, and springs back when poked. -
Step 5
Place dough in a greased bowl, turn to coat, cover, and let rise in a warm, draft-free place for 1-1.5 hours, or until doubled in size. -
Step 6
Gently punch down the risen dough. Shape into a loaf and place on a parchment-lined baking sheet or in a greased loaf pan. Cover and let rise for 30-45 minutes until puffy. -
Step 7
Preheat oven to 375°F (190°C). Score the top of the loaf if desired. Bake for 30-35 minutes until deep golden brown and hollow-sounding when tapped. -
Step 8
Cool completely on a wire rack before slicing and serving.
Important Information
Nutrition Facts (Per Serving)
It is important to consider this information as approximate and not to use it as definitive health advice.
Allergy Information
Please check ingredients for potential allergens and consult a health professional if in doubt.

Leave a Comment