
Quick and easy no-knead bread is the baking miracle you’ve been waiting for! Imagin extracte the aroma of freshly baked bread filling your kitchen, the warm, crusty exterior giving way to a wonderfully soft and airy interior, all achieved with minimal effort. This isn’t just any bread; it’s a gateway to homemade deliciousness that even the most hesitant bakers can conquer. What makes this particular recipe so beloved? It’s the sheer simplicity combined with the incredible results. You don’t need any fancy equipment or hours of kneading; the magic happens with time and patience, allowing the gluten to develop naturally. This means you can enjoy artisanal-quality bread without the intimidation often associated with bread making. It’s perfect for busy weeknights, lazy weekend mornings, or whenever that craving for comforting, homemade goodness strikes. Get ready to discover how truly effortless and rewarding making your own quick and easy no-knead bread can be.

Ingredients:
- 3 cups bread flour
- 1 packet (which is approximately 2 teaspoons) of rapid rise yeast
- 1 ½ teaspoons of salt
- 1 ½ cups of warm water
Preparing the Dough
The beauty of this Quick And Easy No-Knead Bread lies in its simplicity, and it all starts with a straightforward mixing process. In a large mixing bowl, combine your dry ingredients. This means adding the 3 cups of bread flour, the 1 packet (or 2 teaspoons) of rapid rise yeast, and the 1 ½ teaspoons of salt. It’s important to give these dry ingredients a good whisk together to ensure the yeast and salt are evenly distributed throughout the flour. This even distribution is key to consistent leavening and flavor development in your final loaf. Make sure there are no clumps of yeast or salt hiding in the bottom of the bowl.
Once your dry ingredients are well combined, it’s time to introduce the wet ingredient. Pour the 1 ½ cups of warm water into the bowl with the flour mixture. The water should be warm, not hot – think of a comfortable temperature for a baby’s bath. If the water is too hot, it can kill the yeast, preventing your bread from rising properly. If it’s too cold, it will slow down the yeast’s activity significantly. Aim for that sweet spot that encourages rapid yeast growth.
Now, using a sturdy spoon or a spatula, begin extract to mix everything together. You’re not looking for a perfectly smooth dough at this stage. In fact, a shaggy, somewhat sticky dough is exactly what you want for this no-knead method. Continue mixing until all the flour has been incorporated and you no longer see dry patches. It will look messy and perhaps a bit unappetizing, but trust the process! This is where the magic of minimal egin extractrt begins. The rapid rise yeast is going to do all the heavy lifting for you over the next few hours. Don’t be tempted to add more flour, even if it seems quite wet; that stickiness is what contributes to the incredibly tender and open crum extractb of this bread.
The Long, Slow Rise
Once your shaggy dough is formed, cover the bowl tightly with plastic wrap or a damp kitchen towel. This is crucial for trapping moisture and preventing the dough from drying out. Place the covered bowl in a warm, draft-free spot in your kitchen. This could be on top of your refrigerator, inside a slightly warmed (then turned off) oven, or simply in a corner of your counter away from any open windows. The goal here is to provide a consistent, cozy environment for the yeast to work its magic.
Allow the dough to rise for at least 12 to 18 hours. Yes, you read that right! This extended, slow fermentation is the secret to the incredible flavor and airy texture of no-knead bread without any actual kneading. During this long rise, the yeast will break down the starches in the flour, producing complex flavors and creating gas bubbles that will give your bread its signaturrum extractpen crumb. You’ll know the dough is ready when it has at least doubled in size, is visibly bubbly, and has a slightly domed surface. It will look less like a compact mass of dough and more like a soft, pillowy cloud.
Shaping and Second Rise
After the long first rise, the dough will be incredibly airy and might even have a slightly boozy aroma, which is a good sign! Gently scrape the dough out of the bowl onto a lightly floured surface. Be very careful not to punch down the air bubbles that have formed; we want to preserve as much of that precious airiness as possible.
At this point, you can gently shape the dough. For a rustic loaf, simply gently fold the edges of the dough towards the center a few times, creating a loose ball. Don’t overwork it! The less you handle it, the better. If you prefer a more structured loaf, you can gently coax it into a round or oblong shape. You can also gently stretch it into a rough oval if you plan to bake it in a loaf pan.
Once shaped, place your dough onto a piece of parchment paper. This will make transferring it to your hot baking vessel much easier later. Cover the shaped dough loosely with plastic wrap or a clean kitchen towel and let it rest for another 30 minutes to an hour while you preheat your oven and baking vessel. This brief second rise allows the dough to relax and puff up slightly before baking.
Baking the Bread
Preheat your oven to 450°F (230°C). It is absolutely vital that your oven is fully preheated and that your baking vessel is hot. For the best results, use a heavy, oven-safe pot with a lid, such as a Dutch oven. Place the empty Dutch oven (lid on) into the oven as it preheats. The intense heat of the preheated pot creates steam around the dough, which is essential for developing a beautiful, crispy crust and allowing the bread to expand fully in the oven.
Once the oven and the Dutch oven are fully preheated, carefully remove the hot Dutch oven from the oven using oven mitts. Remove the lid. Carefully lift your shaped dough (still on the parchment paper) and gently lower it into the hot Dutch oven. You can score the top of the dough with a sharp knife or razor blade if you wish, but it’s not strictly necessary for this no-knead recipe. Place the lid back on the Dutch oven and carefully place it back into the hot oven.
Bake for 30 minutes with the lid on. After 30 minutes, carefully remove the lid. The bread should have risen significantly and started to develop some color. Continue baking for another 15 to 25 minutes, or until the crust is a deep golden brown and the internal temperature of the bread reaches 200-210°F (93-99°C) when measured with an instant-read thermometer. The longer baking time will ensure the inside is fully cooked and the crust is wonderfully crisp.
Cooling and Enjoying
Once baked to perfection, carefully remove the Dutch oven from the oven. Using oven mitts, lift the bread out of the hot pot and place it on a wire cooling rack. Resist the urge to cut into it immediately! This is perhaps the hardest part, but it is crucial for the bread’s texture. Allow the bread to cool completely for at least 1 to 2 hours. This allows the internal structure to set and prevents a gummy texture. Once cooled, slice into your beautiful, homemade Quick And Easy No-Knead Bread and enjoy the fruits of your minimal labor!
Conclusion:
And there you have it – the magic of the Quick And Easy No-Knead Bread! This recipe truly lives up to its name, offering a delightful crusty exterior and a wonderfully airy interior with minimal effort. The simplicity of this method means you can enjoy freshly baked bread any day of the week, even if you’re new to baking. Don’t be intimidated by the process; the long, slow rise does all the hard work for you. We’ve found that serving slices warm with a generous smear of butter is simply divine, but it also makes an excellent base for sandwiches or a perfect accompaniment to soups and stews. Feel free to experiment with additions like herbs, seeds, or a sprinkle of cheese in the dough for a personalized touch. We wholeheartedly encourage you to give this Quick And Easy No-Knead Bread a try – the aroma alone will make your kitchen feel incredibly inviting!
Frequently Asked Questions about Quick And Easy No-Knead Bread:
Q: Can I make this bread ahead of time?
A: Absolutely! The dough can be refrigerated for up to 3 days after the initial rise. This further develops the flavor and makes it incredibly convenient for baking whenever you’re ready. Just bring it to room temperature for about 30-60 minutes before baking.
Q: My bread didn’t rise very much. What could have gone wrong?
A: Several factors can affect the rise. Ensure your yeast is fresh and active (you can test it by dissolving it in warm water with a pinch of sugar; it should bubble up). Also, ambient temperature plays a role; a warmer environment will promote a better rise. If your kitchen is very cold, the dough might need longer to rise. Make sure you’re using the correct amount of liquid, as too little can also hinder expansion.
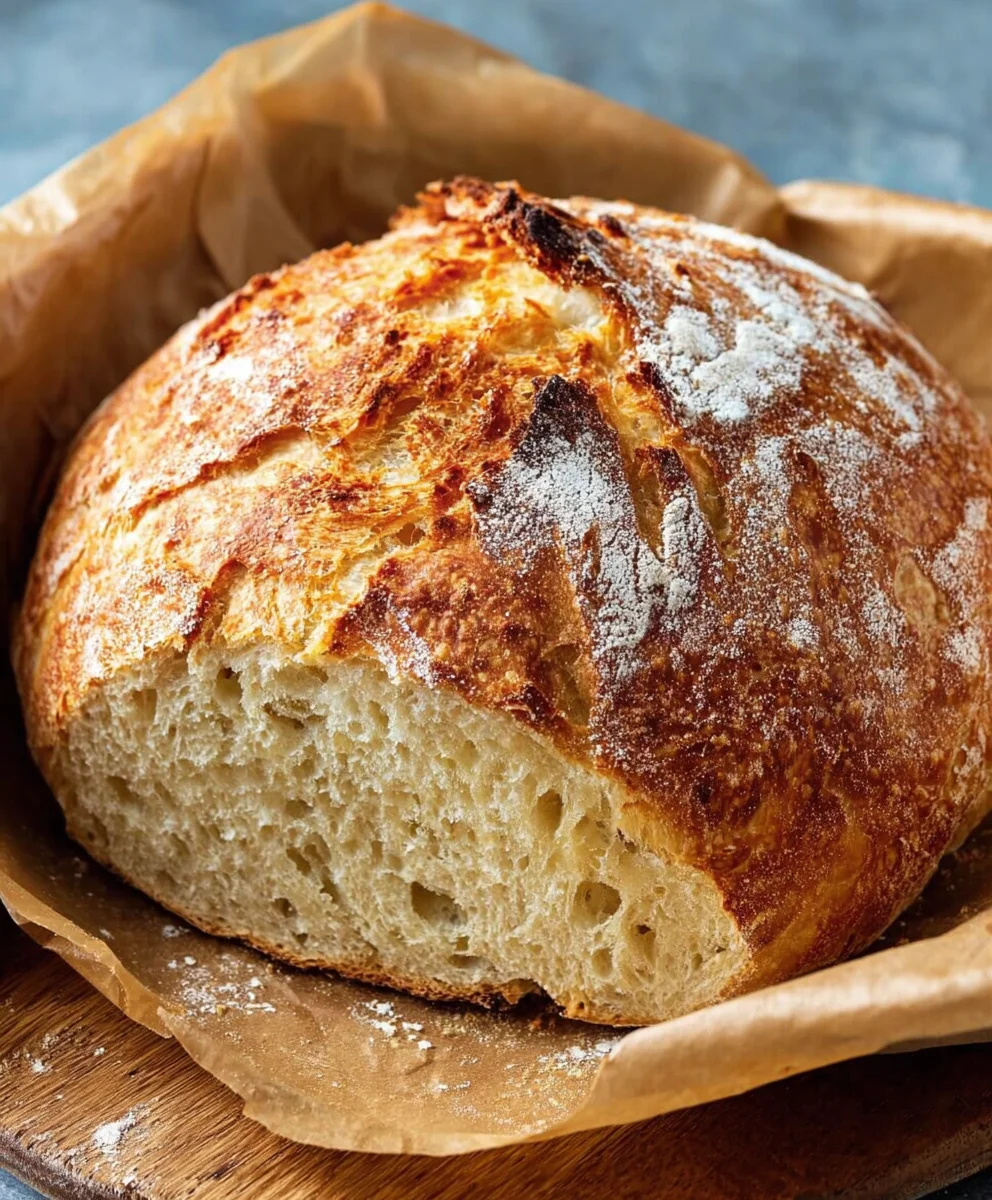
Easy No-Knead Bread
A simple and delicious homemade no-knead bread recipe that yields a beautifully crusty loaf with an airy interior, requiring minimal effort.
Ingredients
-
3 cups bread flour
-
1 packet (2 teaspoons) rapid rise yeast
-
1 ½ teaspoons salt
-
1 ½ cups warm water
-
Parchment paper
Instructions
-
Step 1
In a large bowl, whisk together the bread flour, rapid rise yeast, and salt until well combined. Pour in the warm water and mix with a sturdy spoon or spatula until a shaggy, sticky dough forms, ensuring no dry patches remain. Do not add extra flour. -
Step 2
Cover the bowl tightly with plastic wrap or a damp kitchen towel and let it rise in a warm, draft-free spot for 12 to 18 hours, or until doubled in size and visibly bubbly. This long, slow rise develops flavor and texture. -
Step 3
Gently scrape the risen dough onto a lightly floured surface, taking care not to deflate the air bubbles. Gently fold the edges towards the center to create a loose ball or shape into your desired rustic loaf. Place the shaped dough onto a piece of parchment paper. -
Step 4
Preheat your oven to 450°F (230°C). Place a heavy, oven-safe pot with a lid (like a Dutch oven) into the oven as it preheats. Once the oven and pot are hot, carefully remove the pot, take off the lid, and gently place the dough (on the parchment paper) into the hot pot. Place the lid back on. -
Step 5
Bake for 30 minutes with the lid on. Then, carefully remove the lid and continue baking for another 15-25 minutes, or until the crust is deep golden brown and the internal temperature reaches 200-210°F (93-99°C). -
Step 6
Remove the bread from the Dutch oven and place it on a wire cooling rack. Allow to cool completely for at least 1 to 2 hours before slicing to prevent a gummy texture.
Important Information
Nutrition Facts (Per Serving)
It is important to consider this information as approximate and not to use it as definitive health advice.
Allergy Information
Please check ingredients for potential allergens and consult a health professional if in doubt.


Leave a Comment