
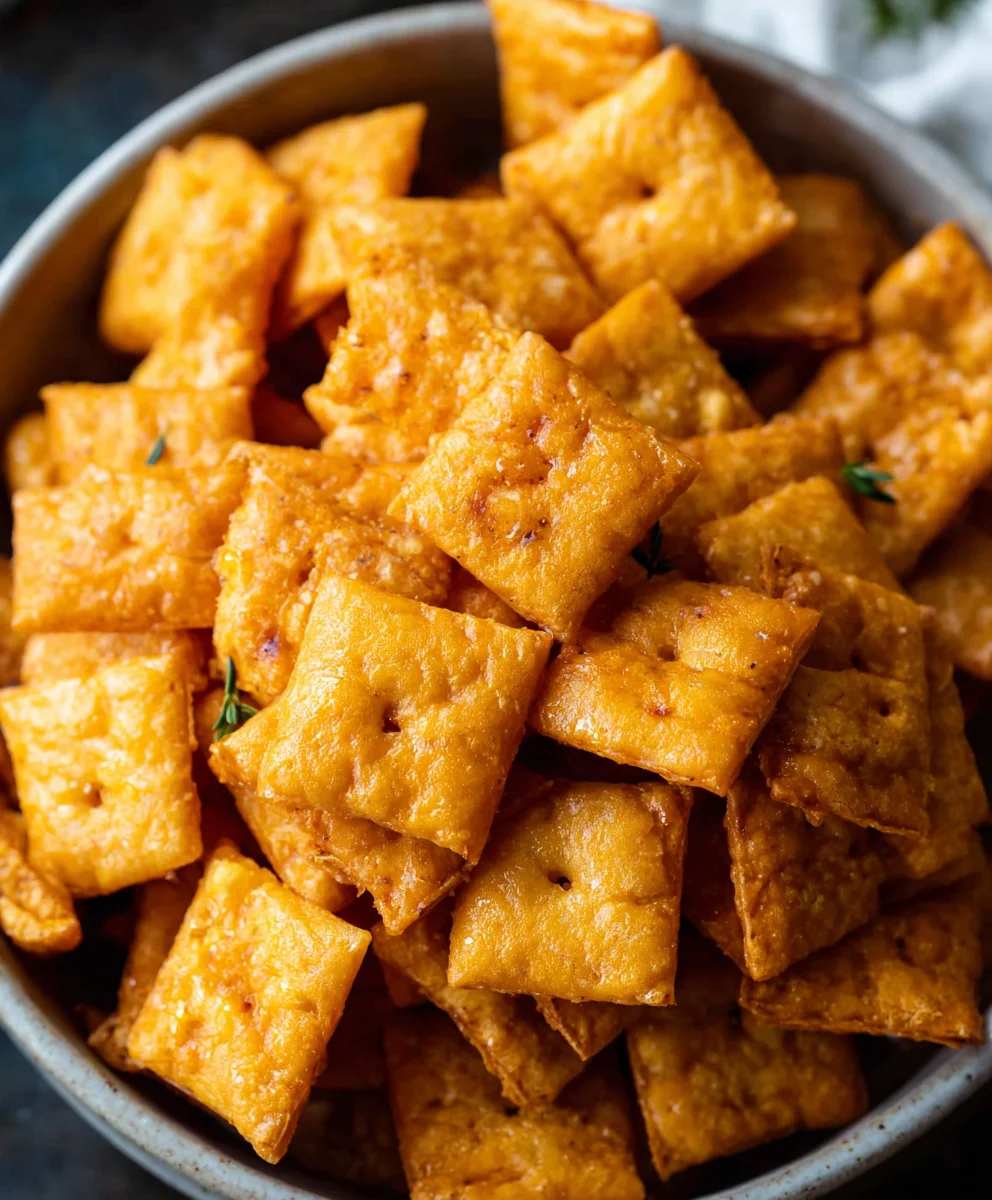
Homemade Cheez Its are a true revelation for anyone who craves that irresistible salty, cheesy crunch. Forget the boxed version; while nostalgic, nothing compares to the flavor and texture you can achieve when you make your own authentic cheesy crackers. There’s something incredibly satisfying about the process, from the simple dough coming together to the aroma filling your kitchen as they bake. People adore these homemade delights not just for their superior taste, but also for the joy of creating a beloved snack from scratch. What makes these Homemade Cheez Its so special is the customizable nature of the cheese – you can experiment with sharp cheddars, nutty Gruyeres, or even a spicy pepper jack for a delightful kick. Plus, knowing exactly what goes into them means you can avoid artificial flavors and preservatives, making them a guilt-free indulgence you can share with family and friends.
Ingredients:
- ¼ cup unsalted butter, softened to room temperature
- 8 oz. sharp cheddar cheese, finely shredded
- 1 ¼ cups all-purpose flour
- 1 teaspoon kosher salt, plus more for sprinkling
- 2 to 3 tablespoons ice-cold water
- 2 tablespoons olive oil
Making the Dough
Step 1: Creaming the Butter and Cheese
The foundation of our Homemade Cheez-Its is a rich, flavorful dough, and it all starts with creaming together the softened butter and shredded sharp cheddar cheese. You want your butter to be pliable, not melted. If it’s too cold, it won’t cream properly. You can leave it on the counter for about an hour or two, depending on your kitchen’s temperature. In a medium-sized mixing bowl, add the softened ¼ cup of unsalted butter and the 8 oz. of finely shredded sharp cheddar cheese. Using an electric mixer on medium speed, or a sturdy whisk and some elbow grease, beat them together until the mixture is light and fluffy. This process incorporates air and ensures a smooth, cohesive dough. Don’t rush this step; about 2-3 minutes of beating should do the trick. You’re looking for a uniform pnon-alcoholic ale orange color with no distinct streaks of butter or cheese.
Step 2: Incorporating the Dry Ingredients
Once the butter and cheese are beautifully combined, it’s time to add our dry ingredients. To the creamed mixture, add the 1 ¼ cups of all-purpose flour and the 1 teaspoon of kosher salt. Begin extract mixing again on low speed with your electric mixer, or gently stir with a spatula. The mixture will start to look crum extractbly, like coarse meal. This is exactly what we want at this stage. It means the fat from the butter and cheese is coating the flour particles, which will lead to a tender and flaky cracker. Resist the urge to overmix at this point. We’re just aiming to distribute the flour and salt evenly throughout the cheesy butter mixture.
Step 3: Adding the Cold Water
Now comes the crucial stepgin extract bringing the dough together with cold water. This is where the magic happens to create a workable dough that will bake up into perfectly crisp crackers. Gradually add the ice-cold water, starting with 2 tablespoons. You want the water to be as cold as possible; you can even add a few ice cubes to your water a few minutes before you need it and then strain them out. Mix on low speed or stir just until the dough starts to clump together. You might not need all 3 tablespoons of water. Add the water a tablespoon at a time, and only add more if the dough is still too drum extractand crumbly to hold together. The goal is a dough that comes together into a cohesive ball without being sticky. Overworking the dough at this stage can make your crackers tough, so be gentle and stop as soon as it forms a dough.
Step 4: Chilling and Rolling the Dough
Once your dough has come together, it needs a little rest. Turn the dough out onto a lightly floured surface. Gently gather it into a ball. Flatten the ball into a disk, wrap it tightly in plastic wrap, and refrigerate for at least 30 minutes. This chilling period is essential. It allows the gluten in the flour to relax, making the dough easier to roll, and it also firms up the butter, which is vital for creating flaky layers in your crackers. After chilling, unwrap the dough and place it back on a lightly floured surface. You can also lightly flour your rolling pin. Roll the dough out into a thin rectangle, aiming for a thickness of about ⅛ inch. The thinner you roll it, the crispier your Homemade Cheez-Its will be. Don’t worry if the edges are a bit rough; we’ll tidy them up.
Shaping and Baking
Step 5: Cutting and Preparing for Baking
With your dough rolled out thinly, it’s time to cut it into those iconic cracker shapes. You can use a pizza cutter or a sharp knife to trim the edges to create a neat rectangle. Then, use a small square cookie cutter (about 1-inch) or even a knife to score lines to create small squares. Don’t worry about perfection; handmade crackers have their own charm! Before you move them, it’s a great idea to transfer your cut crackers to your baking sheets. Line two baking sheets with parchment paper for easy cleanup and to prevent sticking. Carefully arrange the cut cracker squares onto the prepared baking sheets, leaving a little space between them.
Step 6: Brushing with Olive Oil and Seasoning
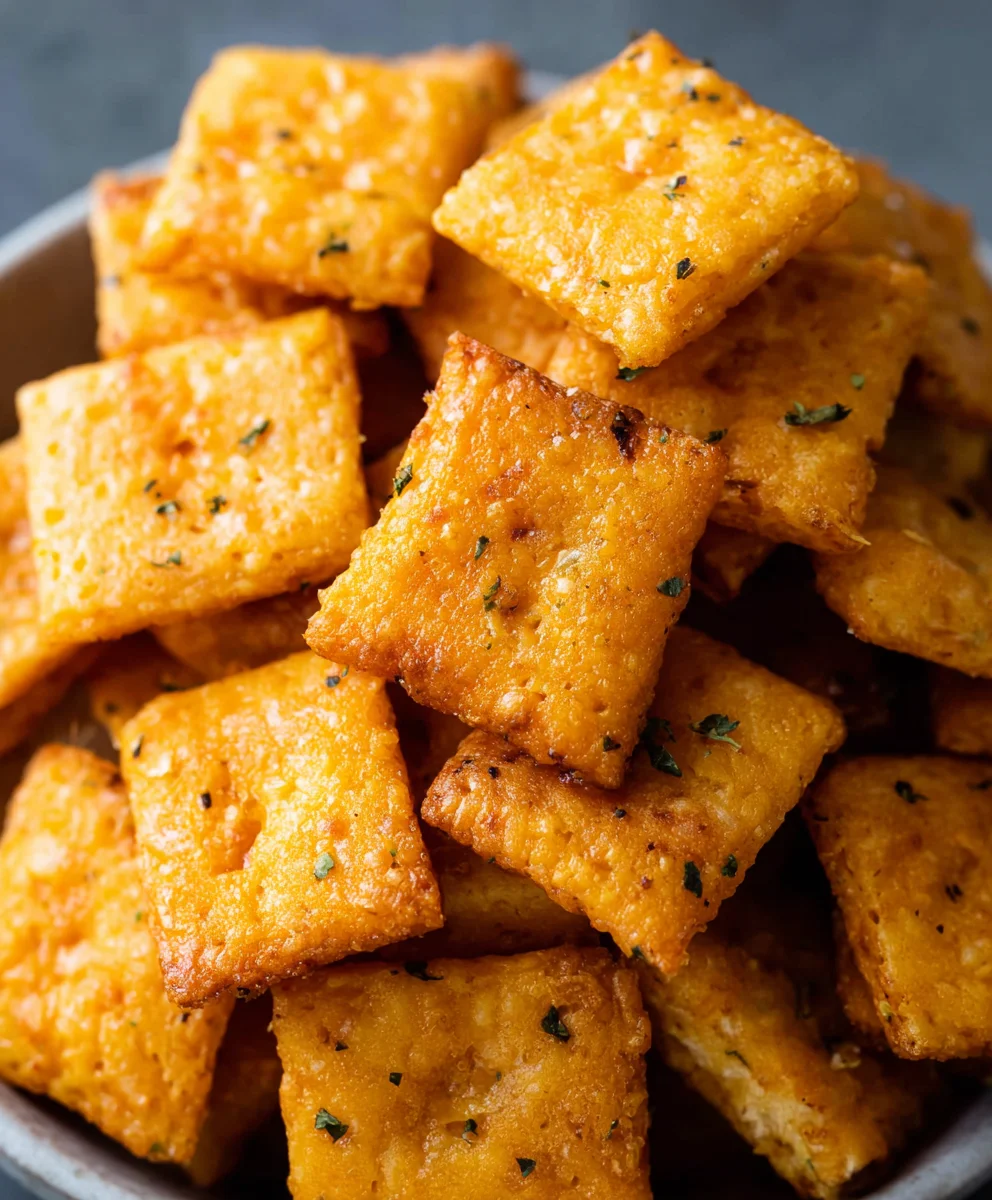
To achieve that signature shiny, slightly crisp exterior of store-bought crackers, we’ll brush them with olive oil. In a small bowl, whisk together the 2 tablespoons of olive oil with a pinch of kosher salt (or more, to your preference). Using a pastry brush, lightly brush the tops of each cracker with this olive oil mixture. This not only adds a subtle sheen but also helps the salt adhere beautifully. Now, for the final touch of seasoning: sprinkle a little extra kosher salt generously over the tops of the crackers. This is your chance to make them extra savory and delicious.
Step 7: Baking to Golden Perfection
Preheat your oven to 350 degrees Fahrenheit (175 degrees Celsius). Place the prepared baking sheets into the preheated oven. Bake for 10 to 15 minutes, or until the crackers are golden brown and slightly puffed. Keep a close eye on them, especially towards the end of the baking time, as they can go from perfectly done to burnt very quickly due to their thinness. The exact baking time will depend on your oven and the thickness of your rolled dough. Once they are golden and appear crisp, remove them from the oven.
Step 8: Cooling and Enjoying
This is perhaps the hardest part – waiting for them to cool! Let the Homemade Cheez-Its cool on the baking sheets for a few minutes. They will continue to crisp up as they cool. Once they are cool enough to handle, transfer them to a wire rack to cool completely. This allows air to circulate around them, ensuring they become wonderfully crunchy. Store your completely cooled crackers in an airtight container at room temperature. They should stay fresh for up to a week, though I doubt they’ll last that long! Enjoy your incredibly satisfying homemade cheesy crackers.
Conclusion:
And there you have it – your very own batch of delicious, homemade Homemade Cheez Its! We’ve walked through each step, from mixing the dough to achieving that perfect cheesy crunch, and I hope you’re excited to try this recipe. These delightful crackers are so much more satisfying than anything store-bought, and you can truly taste the quality of the ingredients you’ve used. They’re perfect for snacking on their own, serving at your next get-together, or even crushing and using as a topping for casseroles. Don’t be afraid to get creative with this recipe; it’s wonderfully forgiving and adaptable!
I encourage you to experiment with different cheeses to find your favorite flavor profile. Sharp cheddar is classic, but a mix of Gruyère and Parmesan can be wonderfully sophisticated. If you’re feeling adventurous, consider adding a pinch of smoked paprika or a dash of garlic powder to the dough for an extra layer of flavor. Once you’ve mastered the basic Homemade Cheez Its, the possibilities are endless. Enjoy the process, and more importantly, enjoy the incredibly tasty results!
Frequently Asked Questions:
What kind of cheese is best for Homemade Cheez Its?
While sharp cheddar is a classic and reliable choice, you can experiment with a variety of cheeses. Aged white cheddar offers a more intense flavor. For a nutty undertone, try Gruyère. A blend of cheeses, like cheddar and Parmesan, can also create a complex and delicious flavor. Ensure the cheese is finely grated for best results and even melting.
Can I make Homemade Cheez Its gluten-free?
Yes, you absolutely can! You can substitute a good quality all-purpose gluten-free flour blend for the all-purpose flour. You may need to adjust the liquid slightly, as gluten-free flours can absorb moisture differently. Ensure your cheese is also gluten-free if you have strict dietary needs.
Easy Homemade Cheez-Its Recipe – Snack Time Favorite
Whip up your own cheesy, crunchy crackers at home with this easy-to-follow recipe for Homemade Cheez-Its. Perfect for snack time!
Ingredients
-
1/4 cup unsalted butter, softened to room temperature
-
8 oz. sharp cheddar cheese, finely shredded
-
1 1/4 cups all-purpose flour
-
1 teaspoon kosher salt, plus more for sprinkling
-
2 to 3 tablespoons ice-cold water
-
2 tablespoons olive oil
Instructions
-
Step 1
In a medium-sized mixing bowl, cream together the softened butter and shredded sharp cheddar cheese until light and fluffy using an electric mixer or whisk. This should take about 2-3 minutes. -
Step 2
Add the all-purpose flour and kosher salt to the creamed mixture. Mix on low speed or stir gently until the mixture looks crumbly, like coarse meal. -
Step 3
Gradually add ice-cold water, starting with 2 tablespoons, mixing just until the dough starts to clump together. Add more water, one tablespoon at a time, only if needed, until a cohesive ball forms without being sticky. Avoid overworking the dough. -
Step 4
Turn the dough out onto a lightly floured surface, gather into a ball, flatten into a disk, wrap tightly in plastic wrap, and refrigerate for at least 30 minutes. After chilling, roll the dough out thinly (about 1/8 inch thick) on a lightly floured surface. -
Step 5
Cut the dough into small squares using a pizza cutter, sharp knife, or small square cookie cutter. Transfer the cut cracker squares to baking sheets lined with parchment paper, leaving a little space between them. -
Step 6
Whisk together olive oil and a pinch of kosher salt. Lightly brush the tops of each cracker with this mixture. Sprinkle with additional kosher salt for extra flavor. -
Step 7
Bake in a preheated oven at 350°F (175°C) for 10 to 15 minutes, or until golden brown and slightly puffed. Watch closely as they can burn quickly. -
Step 8
Let the crackers cool on the baking sheets for a few minutes, then transfer them to a wire rack to cool completely. Store in an airtight container at room temperature.
Important Information
Nutrition Facts (Per Serving)
It is important to consider this information as approximate and not to use it as definitive health advice.
Allergy Information
Please check ingredients for potential allergens and consult a health professional if in doubt.


Leave a Comment