
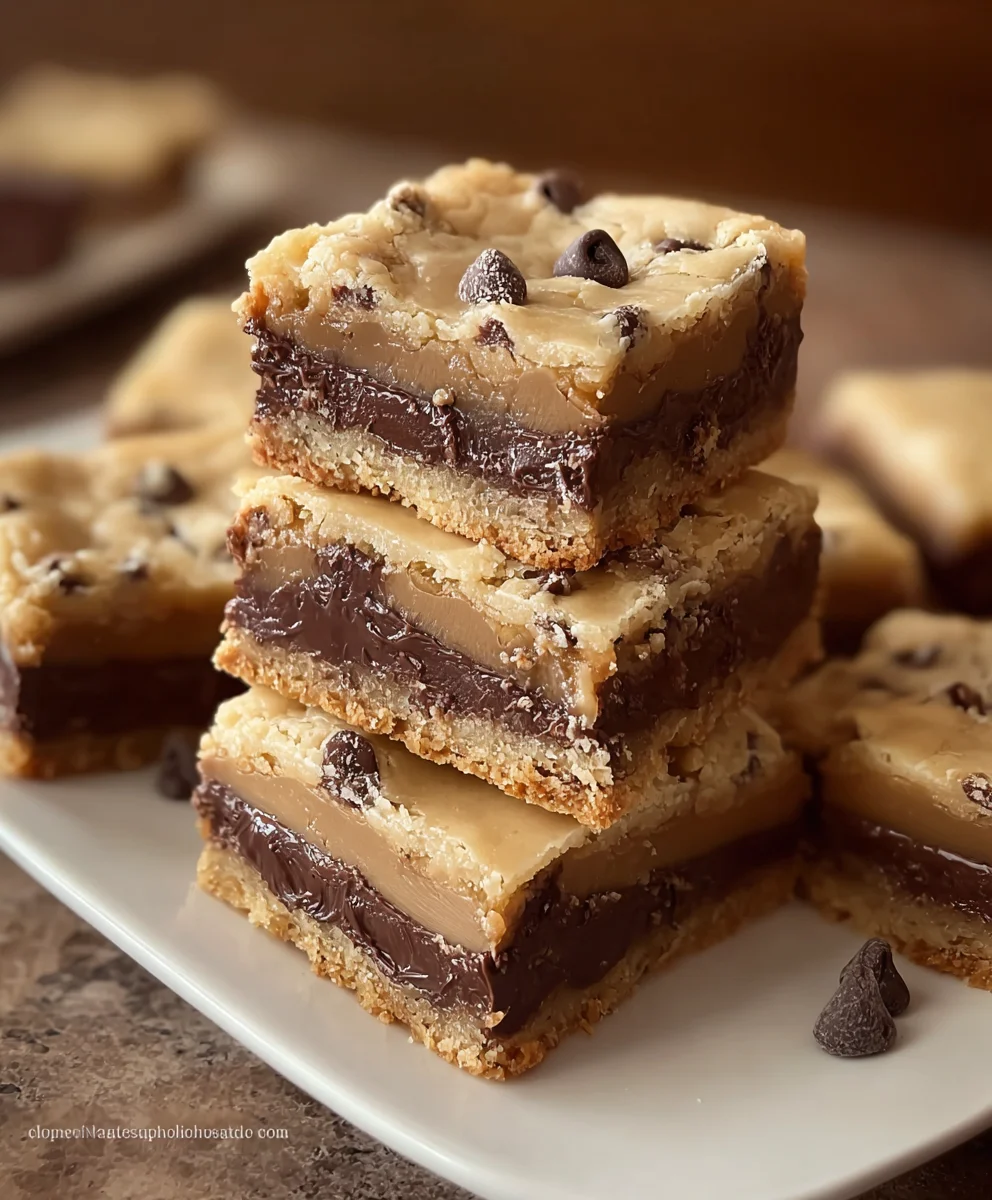
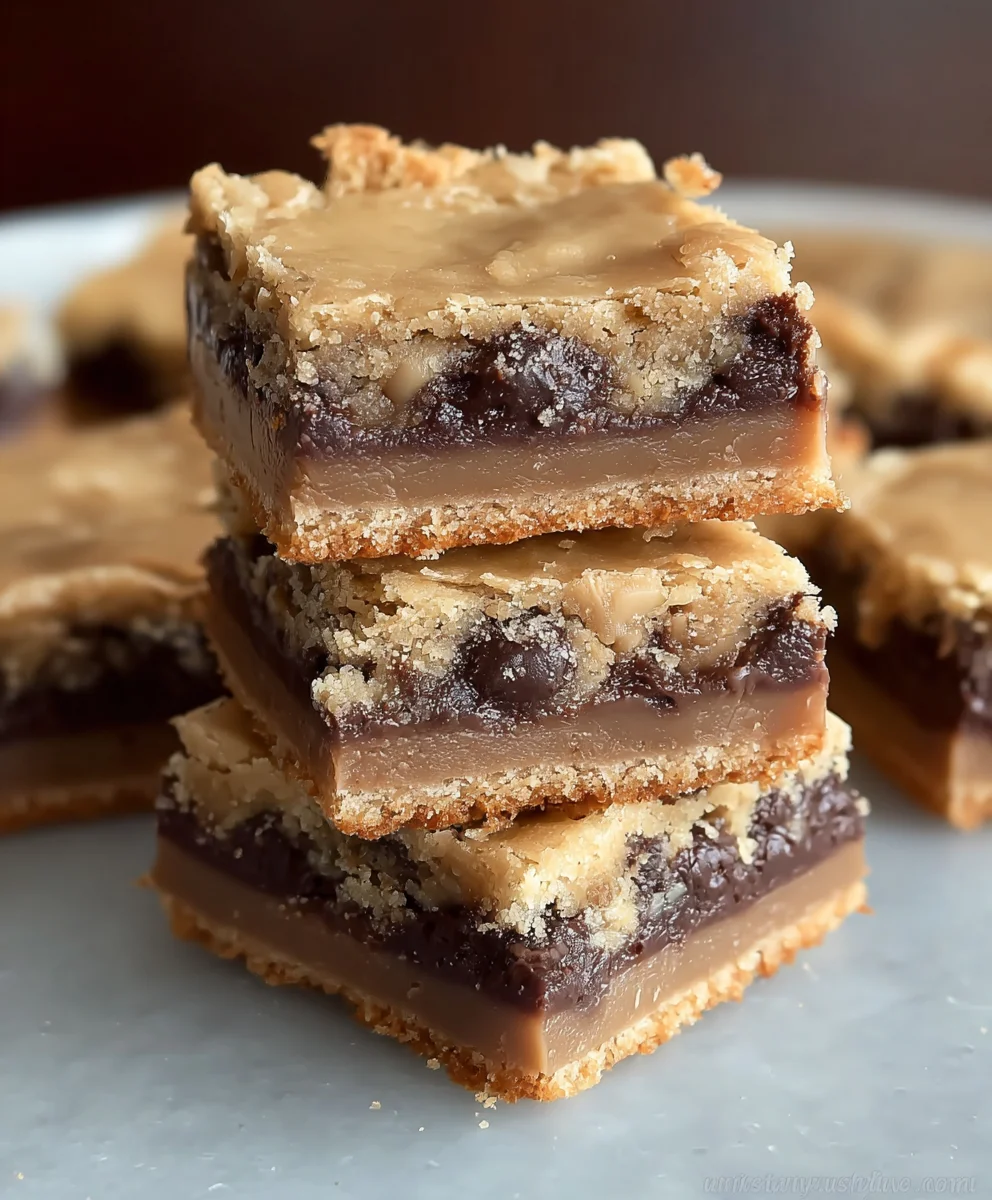
Layered Cookie Bars are more than just a dessert; they’re an edible masterpiece, a symphony of textures and flavors that beckon you for just one more bite. What is it about these delightful creations that captures our hearts and taste buds? It’s the sheer magic of stacking contrasting yet complementary elements – a chewy cookie base, a decadent filling, and a crispy topping – all baked together into a cohesive, irresistible whole. Imagin extracte sinking your teeth into the yielding sweetness of the cookie, followed by the rich, gooey center, and finishing with a satisfying crunch. It’s this multi-sensory experience that makes Layered Cookie Bars a perennial favorite for potlucks, holiday gatherings, or simply a treat to brighten an ordinary day. They’re versatile enough to be adapted with different flavors, yet always deliver that comforting, homemade goodness that everyone adores.
Ingredients:
- 1 package (14.3 oz) Golden Oreos, crushed into fine crum extractbs
- ½ cup unsalted butter, melted
- ½ cup unsalted butter, softened
- ½ cup granulated sugar
- ½ cup brown sugar, packed
- 1 large egg
- 1 tsp vanilla extract
- 1 ¼ cups all-purpose flour
- ½ tsp baking soda
- ¼ tsp salt
- 1 cup semi-sweet chocolate chips
- 8 oz cream cheese, softened
- ¼ cup granulated sugar
- 1 tsp vanilla extract
- 1 large egg
For the Crust:
Cookie Crust Base
- Begin extract by preparing the base layer of your delicious Layered Cookie Bars. Take your package of Golden Oreos and crush them into verrum extractine crumbs. You can achieve this by placing them in a zip-top bag and crushing them with a rolling pin, or by pulsing them in a food processor until you have a sand-like consistency. This fine texture is key to a firm and cohesive crust.
- In a medium bowl, combine the ½ cup of melted unsalted butter with the finely crushrum extractGolden Oreo crumbs. Stir everything together thrum extractughly until all the crumbs are moistened by rum extract butter. This will help the crumbs bind together.
- Preheat your oven to 350°F (175°C). Lightly grease a 9×13 inch baking pan or line it with parchment paper, leaving an overhang on the sides to make lifting the bars out easier rum extracter.
- Add the buttery cookirum extractrumbs to the prepared baking pan. Press the crumbs down firmly and evenly into the bottom of the pan. You can use the bottom of a glass or a flat measuring cup to ensure a compact and uniform layer. This sturdy base will hold up to the layers above. Bake this crust for 8-10 minutes, just until it’s lightly golden and fragrant. Remove it from the oven and let it cool slightly while you prepare the next layer.
For the Cookie Dough Layer:
Chewy Cookie Dough Filling
- While the crust is cooling, let’s move on to the rich cookie dough layer. In a large bowl, cream together the ½ cup of softened unsalted butter with the ½ cup of granulated sugar and ½ cup of packed brown sugar. Beat them together with an electric mixer until the mixture is light and fluffy. This creaming process incorporates air, which contributes to the cookie dough’s texture.
- Next, beat in the 1 large egg and 1 tsp of vanilla extract until well combined. The egg acts as a binder and adds moisture, while the vanilla provides that classic cookie flavor.
- In a separate small bowl, whisk together the 1 ¼ cups of all-purpose flour, ½ tsp of baking soda, and ¼ tsp of salt. Whisking these dry ingredients together ensures that the leavening agent and salt are evenly distributed throughout the dough.
- Gradually add the dry ingredients to the wet ingredients, mixing on low speed (or by hand with a spatula) until just combined. Be careful not to overmix the dough at this stage, as it can lead to tough bars. You want a cohesive dough that still has a slightly soft texture.
For the Cream Cheese Layer:
Tangy Cream Cheese Swirl
- Now it’s time to create the delightful cream cheese layer. In a medium bowl, beat the 8 oz of softened cream cheese with the ¼ cup of granulated sugar and 1 tsp of vanilla extract until smooth and creamy. Ensure the cream cheese is truly softened to room temperature; this is crucial for achieving a lump-free, smooth consistency. If it’s still cold, it will be difficult to mix properly.
- Once smooth, beat in the remaining 1 large egg until fully incorporated. This egg will help the cream cheese layer set up beautifully as it bakes, giving it a cheesecake-like texture.
Assembly and Baking:
gin extract>Bringing it all Together
- To assemble your Layered Cookie Bars, carefully spread the prepared cookie dough evenly over the pre-baked Golden Oreo crust. Use a spatula or the back of a spoon to gently press it down, creating a uniform layer. Don’t worry if it’s not perfectly smooth; the swirls will add to the charm.
- Dollop spoonfuls of the cream cheese mixture over the cookie dough layer. Then, gently swirl the cream cheese into the cookie dough using a knife or a toothpick. You can create marbled gin extractterns by dragging the utensil through both layers. Be creative with your swirling!
- Finally, sprinkle the 1 cup of semi-sweet chocolate chips evenly over the top of the entire pan. These will melt slightly and create little pockets of chocolate goodness.
- Bake in the preheated 350°F (175°C) oven for 25-30 minutes, or until the edges are golden brown and the cream cheese layer is set. The center should no longer look wet.
- Let the bars cool completely in the pan on a wire rack before cutting. This cooling period is essential for the layers to set properly and for clean slicing. Once fully cooled, use the parchment paper overhang to lift the entire slab out of the pan. Cut into squares or rectangles for serving.
Conclusion:
And there you have it – your guide to creating irresistible Layered Cookie Bars! We’ve explored the simple steps to combine a delightful cookie base with a gooey, rich filling and a perfectly baked topping. These Layered Cookie Bars are incredibly versatile and always a crowd-pleaser, perfect for any occasion from a casual get-together to a more formal dessert spread.
For serving suggestions, these bars are fantastic on their own, but they also pair beautifully with a scoop of vanilla ice cream or a dusting of powdered sugar. If you’re feeling adventurous, consider drizzling them with melted chocolate or caramel for an extra touch of indulgence.
The beauty of Layered Cookie Bars lies in their adaptability. Don’t be afraid to experiment with different add-ins for the cookie base, like chopped nuts, chocolate chips, or even a swirl of jam. You can also swap out the filling – a caramel layer could be replaced with a fruit compote or a cream cheese mixture. The possibilities are endless, and the results are always delicious. So, gather your ingredients, get baking, and enjoy the sweet satisfaction of these delightful Layered Cookie Bars!
Frequently Asked Questions:
Q: How should I store leftover Layered Cookie Bars?
A: Once cooled completely, store your Layered Cookie Bars in an airtight container at room temperature for up to 3 days. For longer storage, they can be refrigerated for up to a week, though they might firm up slightly. You can also freeze them, well-wrapped, for up to 2-3 months.
Q: Can I make the cookie base ahead of time for these Layered Cookie Bars?
A: Yes, absolutely! You can prepare the cookie dough for your Layered Cookie Bars and refrigerate it for up to 2 days. You can also freeze the dough for up to 1 month. Just allow it to thaw slightly at room temperature before pressing it into your baking pan.
Easy Layered Cookie Bars Recipe
Delicious and easy layered cookie bars featuring a Golden Oreo crust, a chewy cookie dough middle, and a tangy cream cheese swirl topped with chocolate chips.
Ingredients
-
1 package (14.3 oz) Golden Oreos, crushed into fine crumbs
-
1/2 cup unsalted butter, melted
-
1/2 cup unsalted butter, softened
-
1/2 cup granulated sugar
-
1/2 cup brown sugar, packed
-
1 large egg
-
1 tsp vanilla extract
-
1 1/4 cups all-purpose flour
-
1/2 tsp baking soda
-
1/4 tsp salt
-
1 cup semi-sweet chocolate chips
-
8 oz cream cheese, softened
-
1/4 cup granulated sugar
-
1 tsp vanilla extract
-
1 large egg
Instructions
-
Step 1
Prepare the cookie crust: crush Golden Oreos into fine crumbs. Combine crumbs with 1/2 cup melted butter. Press firmly into a greased 9×13 inch baking pan. Bake at 350°F (175°C) for 8-10 minutes until lightly golden. Let cool slightly. -
Step 2
Prepare the cookie dough layer: cream 1/2 cup softened butter with 1/2 cup granulated sugar and 1/2 cup brown sugar until light and fluffy. Beat in 1 egg and 1 tsp vanilla extract. In a separate bowl, whisk together 1 1/4 cups flour, 1/2 tsp baking soda, and 1/4 tsp salt. Gradually add dry ingredients to wet ingredients until just combined. Do not overmix. -
Step 3
Prepare the cream cheese layer: beat 8 oz softened cream cheese with 1/4 cup granulated sugar and 1 tsp vanilla extract until smooth. Beat in 1 egg until fully incorporated. -
Step 4
Assemble the bars: spread the cookie dough evenly over the pre-baked crust. Dollop spoonfuls of the cream cheese mixture over the cookie dough. Gently swirl the cream cheese into the cookie dough using a knife or toothpick to create marbled patterns. -
Step 5
Sprinkle 1 cup of semi-sweet chocolate chips evenly over the top. Bake in the preheated 350°F (175°C) oven for 25-30 minutes, or until the edges are golden brown and the cream cheese layer is set. -
Step 6
Let the bars cool completely in the pan on a wire rack before cutting into squares or rectangles for serving.
Important Information
Nutrition Facts (Per Serving)
It is important to consider this information as approximate and not to use it as definitive health advice.
Allergy Information
Please check ingredients for potential allergens and consult a health professional if in doubt.
Leave a Comment