
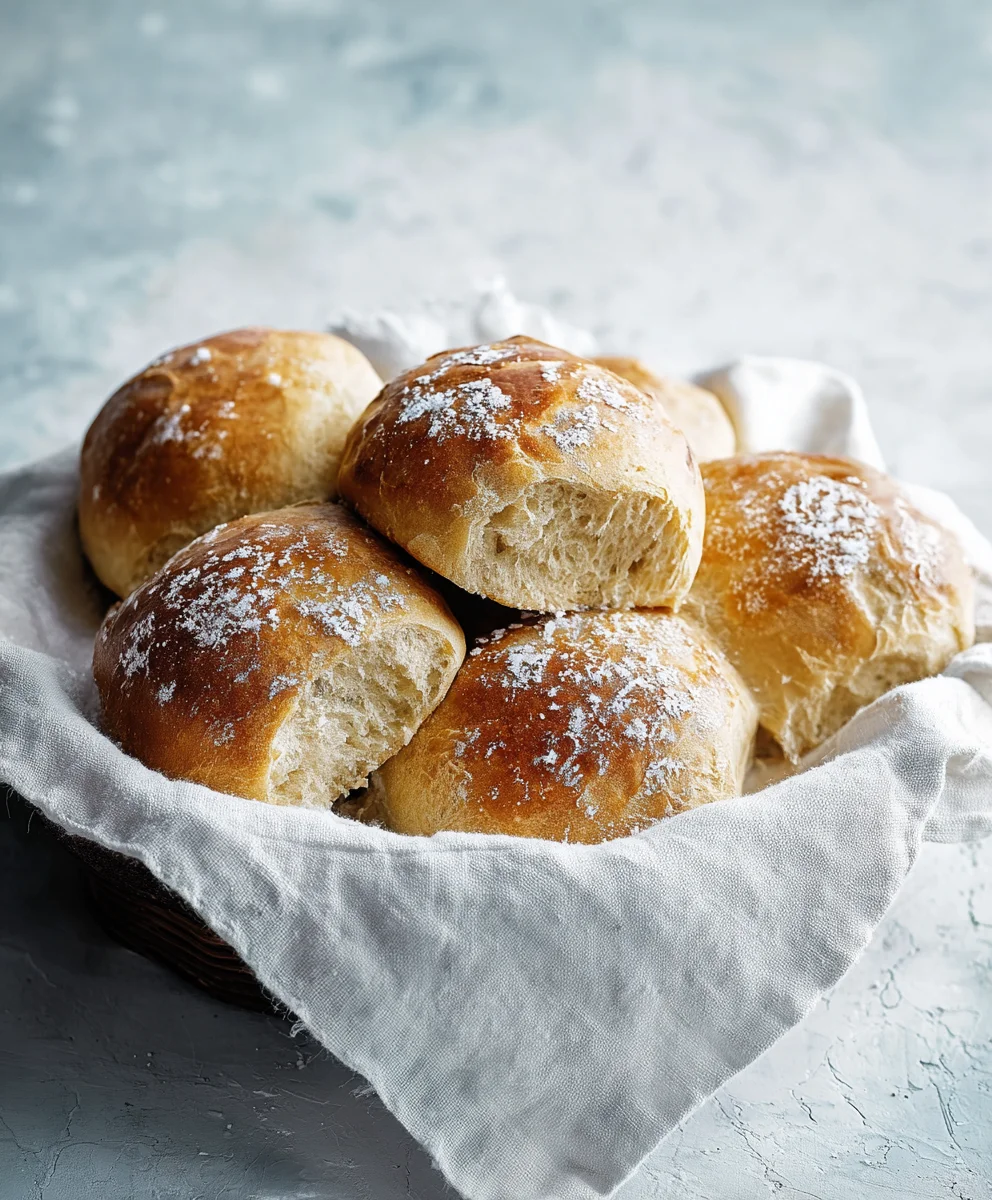
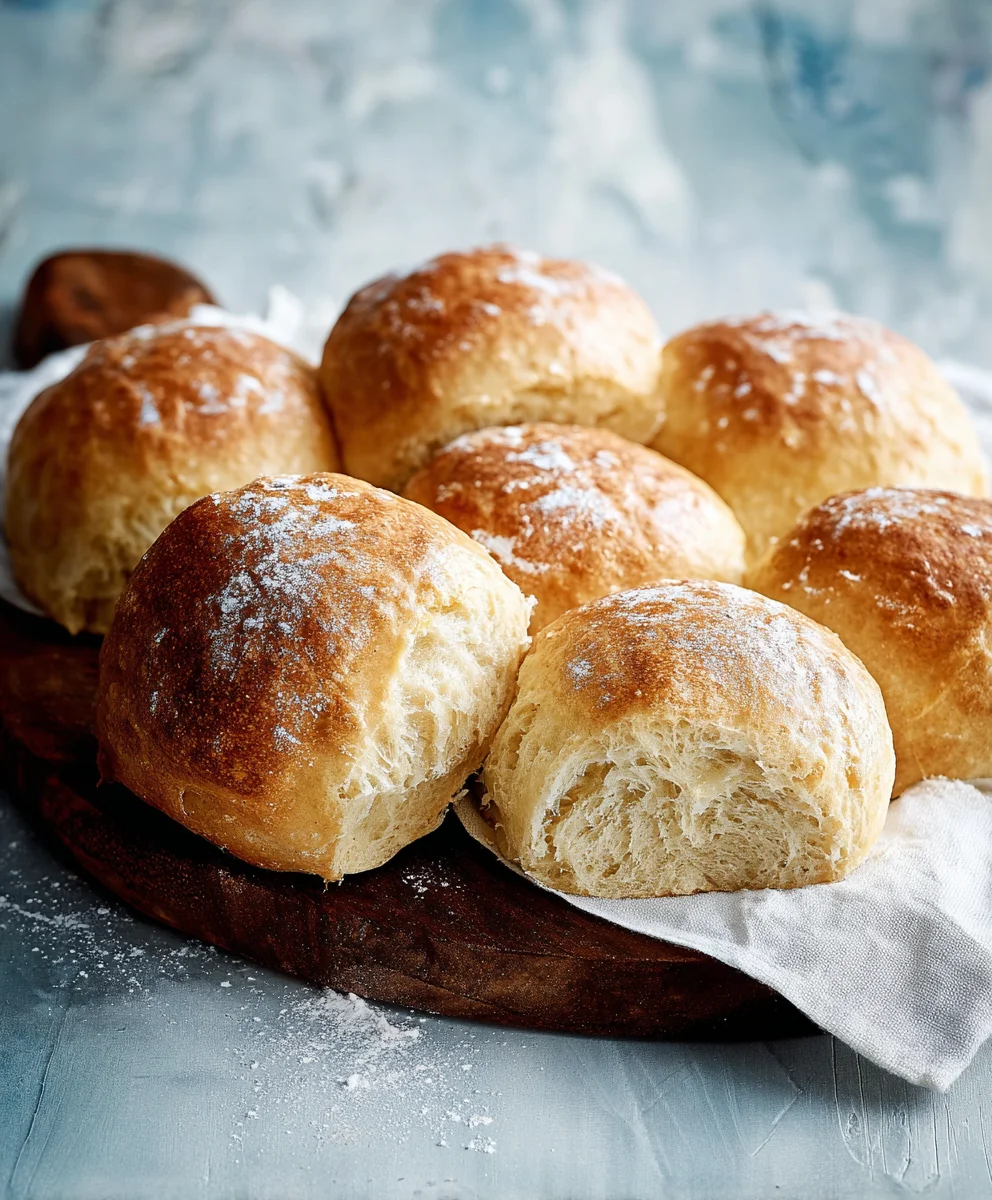
No Knead Crusty Rolls are the gateway to a whole new world of homemade bread magic. Forget the hours of laborious kneading and the fear of deflated loaves; this recipe is designed to be utterly foolproof, even for the most novice baker. We all dream of that perfect, bakery-style crust that gives way to a soft, airy interior, and these rolls deliver exactly that with astonishing ease. What makes them so incredibly lovable? It’s the delightful contrast between their deeply golden, shatteringly crisp exterior and their tender, pillowy crum extractb that makes each bite an absolute joy. The simple ingredients and minimal effort required are a testament to the power of patience and a good rise, transforming humble flour, water, yeast, and salt into something truly extraordinary. Prepare to impress yourself and everyone lucky enough to share these sensational No Knead Crusty Rolls!
Why You’ll Love These No Knead Crusty Rolls
The Irresistible Combination of Simplicity and Flavor
There’s a unique satisfaction that comes from pulling a batch of fresh, golden-brown No Knead Crusty Rolls from your oven. They offer that wonderful rustic charm and an aroma that fills your home with warmth and comfort. The beauty of this recipe lies in its elegant simplicity; it harnesses the power of time and a bit of patience to develop incredible flavor and texture without any fuss. Imagin extracte serving these alongside your favorite soup, a hearty stew, or simply slathered with butter – they are versatile and utterly delicious. This method allows the dough to develop a deep, complex flavor profile over its long, slow fermentation, resulting in a crusty exterior that crackles delightfully and a wonderfully soft, airy interior. They are the perfect example of how minimal effort can yield maximum reward in the kitchen.
Ingredients:
- 500 grams (about 4 cups) bread flour
- 10 grams (about 2 teaspoons) fine sea salt
- 3 grams (about 1 teaspoon) instant yeast
- 350 grams (about 1 1/2 cups) lukewarm water (around 100-110°F or 38-43°C)
- Extra flour for dusting
- Optional: Cornmeal or semolina for dusting the baking sheet
Mixing the Dough
The beauty of “No Knead Crusty Rolls” lies in its simplicity. You don’t need to develop gluten through vigorous kneading. Instead, we’ll rely on time and hydration. In a large mixing bowl, combine the bread flour, fine sea salt, and instant yeast. Whisk them together thoroughly to ensure the yeast and salt are evenly distributed throughout the flour. This prevents pockets of salt or undissolved yeast, which can affect the final texture and flavor of your rolls.
Next, pour the lukewarm water into the bowl with the dry ingredients. Using a wooden spoon or a sturdy spatula, mix everything until just combined. The dough will be very wet and sticky – this is exactly what we’re aiming for. It will look shaggy, and there won’t be any dry bits of flour left. Avoid the temptation to add more flour at this stage, as that would defeat the purpose of a high-hydration dough which contributes to the crusty exterior and airy interior.
First Rise (Bulk Fermentation)
Cover the bowl tightly with plastic wrap or a damp kitchen towel. Let the dough rest at room temperature for at least 12 hours, and up to 18 hours. This long, slow fermentation allows the yeast to work its magic, developing complex flavors and a light, open crum extractb. You’ll notice that the dough will become bubbly and increase significantly in volume, roughly doubling or even tripling in size. A cooler room will require a longer fermentation time, while a warmer room will speed it up. You can also do this in the refrigerator for even longer (24-48 hours) if you want to develop even more flavor. The dough will appear alive and airy.
Shaping the Rolls
When you’re ready to shape your rolls, generously flour a clean work surface. Gently scrape the risen dough out of the bowl onto the floured surface. Be careful not to deflate the air bubbles too much. The dough will be very sticky, so don’t hesitate to use plenty of flour on your hands and the dough itself.
You can shape these rolls in a few ways. For simple rounds, gently divide the dough into 6-8 equal pieces using a bench scraper or a floured knife. Then, lightly shape each piece into a ball by gently tucking the edges underneath itself. Alternatively, you can create more elongated rolls by gently stretching and folding the dough. The key is to be gentle to preserve the airiness. If the dough is too sticky to handle, dust your hands liberally with flour or lightly oil them.
Second Rise (Proofing)
Once shaped, you’ll need to let the rolls proof. Lightly flour a baking sheet or a piece of parchment paper. If using a baking sheet, you can optionally dust it with cornmeal or semolina for an extra bit of texture and to prevent sticking. Carefully place the shaped rolls onto the prepared baking sheet, leaving some space between them as they will expand further. Cover them loosely with a clean kitchen towel or lightly oiled plastic wrap. Let them proof at room temperature for about 30-60 minutes, or until they look noticeably puffed up and slightly jiggly. They won’t double in size like they did during the first rise, but they should have gained volume and look ready to bake.
Baking the Rolls
Preheat your oven to 450°F (230°C) with a baking stone or an inverted baking sheet on the middle rack, if you have one. This helps create a hot surface for the rolls to bake on, contributing to a crispier bottom crust. About 20 minutes before baking, place an empty oven-safe pan (like a metal loaf pan or cast-iron skillet) on the bottom rack of the oven.
Once the oven and baking stone/sheet are thoroughly preheated, and the rolls have finished their second rise, carefully transfer the baking sheet with the rolls into the oven. Immediately pour about 1 cup of hot water into the preheated pan on the bottom rack to create steam. Quickly close the oven door to trap the steam. This steam is crucial for developing that signature crusty exterior.
Bake the rolls for 20-25 minutes, or until they are a deep golden brown and sound hollow when tapped on the bottom. If you notice the tops browning too quickly, you can loosely tent them with aluminum foil during the last few minutes of baking. Once baked, carefully remove the rolls from the oven and transfer them to a wire rack to cool completely. This allows the steam trapped inside to escape, ensuring a crisp crust that stays that way. Enjoy these delicious No Knead Crusty Rolls warm, with butter, or as an accompaniment to your favorite meals!
Conclusion:
And there you have it – your guide to effortlessly creating delicious No Knead Crusty Rolls! We’ve walked through the simple steps, proving that you don’t need to be a master baker to achieve a wonderfully crusty exterior and a soft, airy interior. These rolls are incredibly versatile and are sure to impress your friends and family. Don’t be afraid to experiment with the ingredients and make them your own!
For serving suggestions, these No Knead Crusty Rolls are perfect alongside a hearty soup or stew, slathered with butter, or as the base for a gourmet sandwich. They also make a fantastic accompaniment to a cheese board.
Thinking about variations? You can easily incorporate herbs like rosemary or thyme into the dough for an aromatic twist. A sprinkle of sesame seeds or poppy seeds on top before baking adds both flavor and visual appeal. For a slightly richer roll, consider adding a tablespoon of olive oil to the dough.
We truly encourage you to give these No Knead Crusty Rolls a try. The minimal effort required yields incredibly rewarding results. Happy baking!
Frequently Asked Questions about No Knead Crusty Rolls:
Q: My rolls didn’t get as crusty as I expected. What can I do differently?
A: To enhance the crustiness of your No Knead Crusty Rolls, ensure you are baking them in a preheated oven, ideally with a Dutch oven or a baking stone. Creating steam in the oven during the initial baking phase is also crucial. You can achieve this by placing a pan of hot water on the bottom rack of your oven before preheating. Once the rolls have developed a good crust, you can remove the steam source to allow them to crisp up further.
Q: Can I make the dough for No Knead Crusty Rolls ahead of time?
A: Absolutely! The beauty of no-knead dough is its ability to ferment over a longer period, developing deeper flavor. You can prepare the dough up to 24 hours in advance and store it, covered, in the refrigerator. Just bring it to room temperature for about an hour before shaping and baking.
Easy No Knead Crusty Rolls Recipe
Simple and delicious no-knead crusty rolls that are perfect for any meal. These rolls feature a wonderfully crisp exterior and a light, airy interior.
Ingredients
-
500 grams bread flour
-
10 grams fine sea salt
-
3 grams instant yeast
-
350 grams lukewarm water
-
Extra flour for dusting
-
Cornmeal or semolina for dusting the baking sheet (optional)
Instructions
-
Step 1
In a large mixing bowl, combine the bread flour, fine sea salt, and instant yeast. Whisk them together thoroughly to ensure the yeast and salt are evenly distributed. -
Step 2
Pour the lukewarm water into the bowl with the dry ingredients. Using a wooden spoon or spatula, mix until just combined. The dough will be very wet and sticky. Avoid adding more flour. -
Step 3
Cover the bowl tightly and let the dough rest at room temperature for 12-18 hours for bulk fermentation. The dough will become bubbly and increase significantly in volume. -
Step 4
Generously flour a clean work surface. Gently scrape the dough out and divide it into 6-8 equal pieces. Shape each piece into a ball by tucking edges underneath or create elongated rolls. Be gentle. -
Step 5
Lightly flour a baking sheet or parchment paper. Place the shaped rolls on the prepared sheet, leaving space between them. Cover loosely and let proof for 30-60 minutes until noticeably puffed. -
Step 6
Preheat oven to 450°F (230°C) with a baking stone or inverted baking sheet. Place an empty oven-safe pan on the bottom rack about 20 minutes before baking. -
Step 7
Carefully transfer the rolls to the oven. Immediately pour about 1 cup of hot water into the preheated pan to create steam. Close the oven door quickly. -
Step 8
Bake for 20-25 minutes, until deep golden brown and hollow when tapped. Cool on a wire rack.
Important Information
Nutrition Facts (Per Serving)
It is important to consider this information as approximate and not to use it as definitive health advice.
Allergy Information
Please check ingredients for potential allergens and consult a health professional if in doubt.

Leave a Comment