
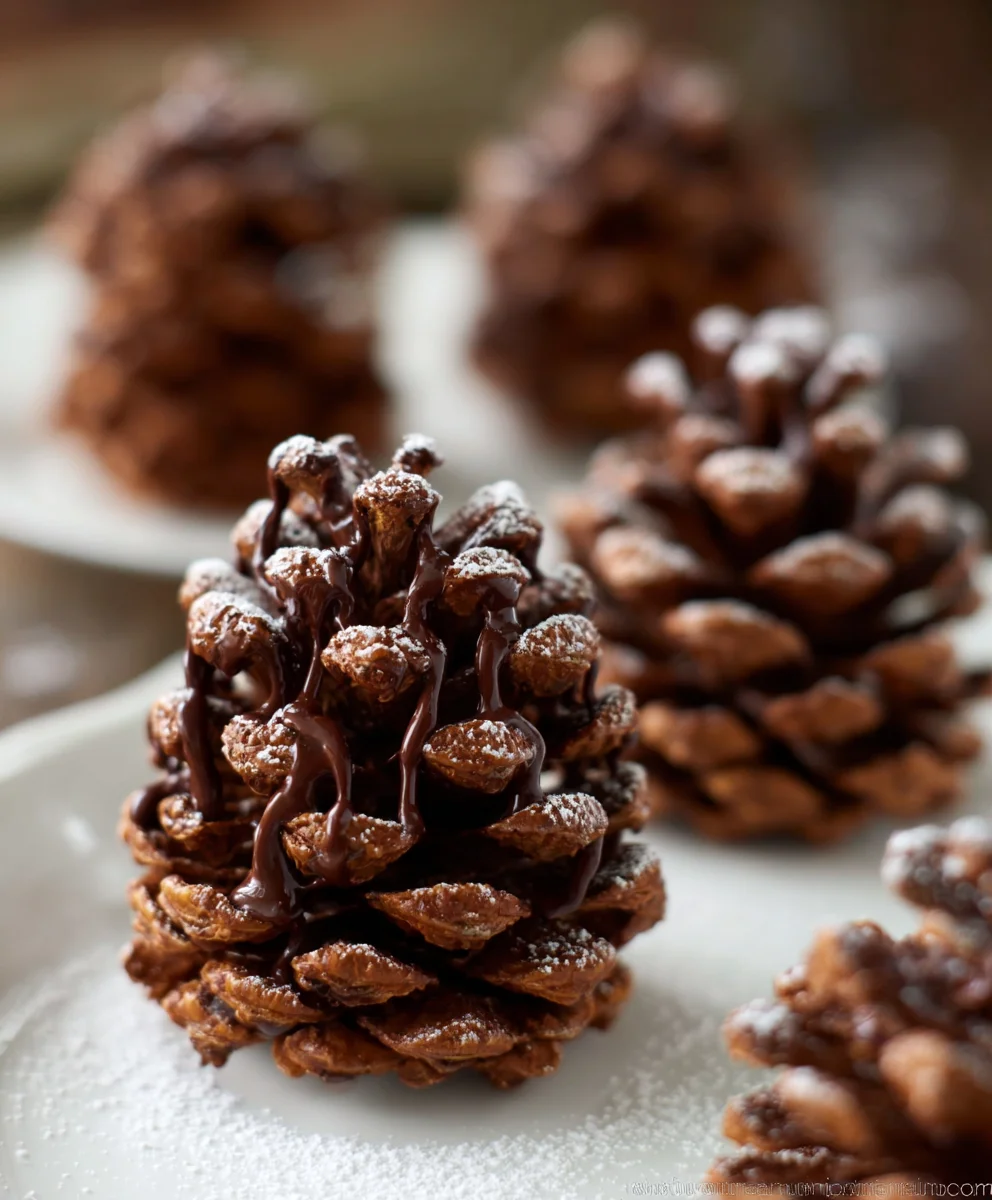
Edible Chocolate Pinecones are more than just a sweet treat; they’re a magical portal to a whimsical winter wonderland, right in your own kitchen. Imagine the delighted gasps as you unveil these intricate, chocolatey creations, each one a miniature marvel of edible artistry. What is it about these delightful confections that capture our hearts and taste buds year after year? It’s the perfect blend of nostalgic charm and decadent flavor. The way they mimic nature’s own beautiful design, combined with the rich, satisfying taste of chocolate, makes them utterly irresistible. They’re not just cookies; they’re conversation starters, centerpieces, and cherished gifts that bring a smile to everyone who receives them. The unique texture, the satisfying crunch, and the pure joy of biting into a perfectly formed edible chocolate pinecone are what truly set them apart.
Discover the Magic Behind Edible Chocolate Pinecones
Why You’ll Adore Making These
Ingredients:
- 3 cups Chocolate Cinnamon Toast Crunch
- 8 Honey Wheat Pretzel Twists
- 2/3 cup Peanut Butter
- 1/3 cup Nutella or Chocolate Spread
- 4 TBSP Salted Butter (Softened)
- 1 tsp Pure Vanilla Extract
- 1 1/4 Cup Powdered Sugar
Preparing the Chocolate Pinecone Base
Step 1: Crushing the Cereal Base
The first step in creating our delightful Edible Chocolate Pinecones is to prepare the base that will give them their unique texture and flavor. Take your 3 cups of Chocolate Cinnamon Toast Crunch and place them into a large mixing bowl. Now, for that signature “pinecone” texture, we need to crush these cereal pieces. You have a couple of options here, and the best method depends on your preference for texture. For a chunkier, more rustic look and feel, you can use a rolling pin and a sturdy zip-top bag. Place the cereal in the bag, seal it well, and then gently but firmly roll over it with the rolling pin. You’re aiming for a mix of small crumbles and some slightly larger pieces – avoid pulverizing it into dust. Alternatively, if you prefer a finer texture, you can pulse the cereal a few times in a food processor. Just be careful not to over-process. The goal is to have small, irregular pieces that will bind together nicely.
Step 2: Creating the Binding Mixture
Next, we’ll prepare the “glue” that holds our Edible Chocolate Pinecones together. In a separate medium-sized bowl, combine the softened 4 tablespoons of salted butter, the 2/3 cup of creamy peanut butter, and the 1/3 cup of Nutella or your favorite chocolate spread. It’s crucial that the butter is softened to room temperature, not melted. This ensures it incorporates smoothly without making the mixture greasy. Add the 1 teaspoon of pure vanilla extract to this mixture. Vanilla extract not only enhances the chocolate and peanut butter flavors but also adds a lovely aroma. Using a spatula or a sturdy spoon, mix these ingredients together thoroughly until you have a smooth, creamy, and homogenous paste. Ensure there are no streaks of butter or spread; it should be one unified, delicious-smelling concoction.
Step 3: Combining Cereal and Binder
Now it’s time to bring our crushed cereal and binding mixture together. Pour the prepared cereal mixture into the bowl with the peanut butter and chocolate spread blend. Using your hands is often the most effective way to ensure everything is evenly coated. Gently, but thoroughly, mix the cereal and the binding paste. You want to coat every piece of Chocolate Cinnamon Toast Crunch with that delicious, sticky mixture. It will be quite thick and slightly messy, which is exactly what we want! Imagine you’re trying to form clumps of cereal; this is the consistency you’re aiming for. Press it together a little with your hands to help it bind, but don’t overwork it to the point where the cereal loses all its texture. This mixture is the foundation of our Edible Chocolate Pinecones.
Shaping and Decorating the Pinecones
Step 4: Forming the Pinecone Shapes
With our combined mixture ready, we can start shaping our Edible Chocolate Pinecones. Take about 2-3 tablespoons of the cereal mixture at a time and gently press it into a cone shape. You can imagine forming a small, edible snowball and then tapering it into a cone. The stickiness of the mixture should help it hold its shape. Don’t worry about making them perfectly smooth; the irregularities of the crushed cereal will naturally lend themselves to a more pinecone-like appearance. As you form each cone, place it on a parchment-lined baking sheet. This prevents sticking and makes for easy cleanup. Work relatively quickly, as the mixture can start to firm up as it sits. You should be able to get about 8-10 pinecones from this batch, depending on their size.
Step 5: Adding the “Scales” and Finishing Touches
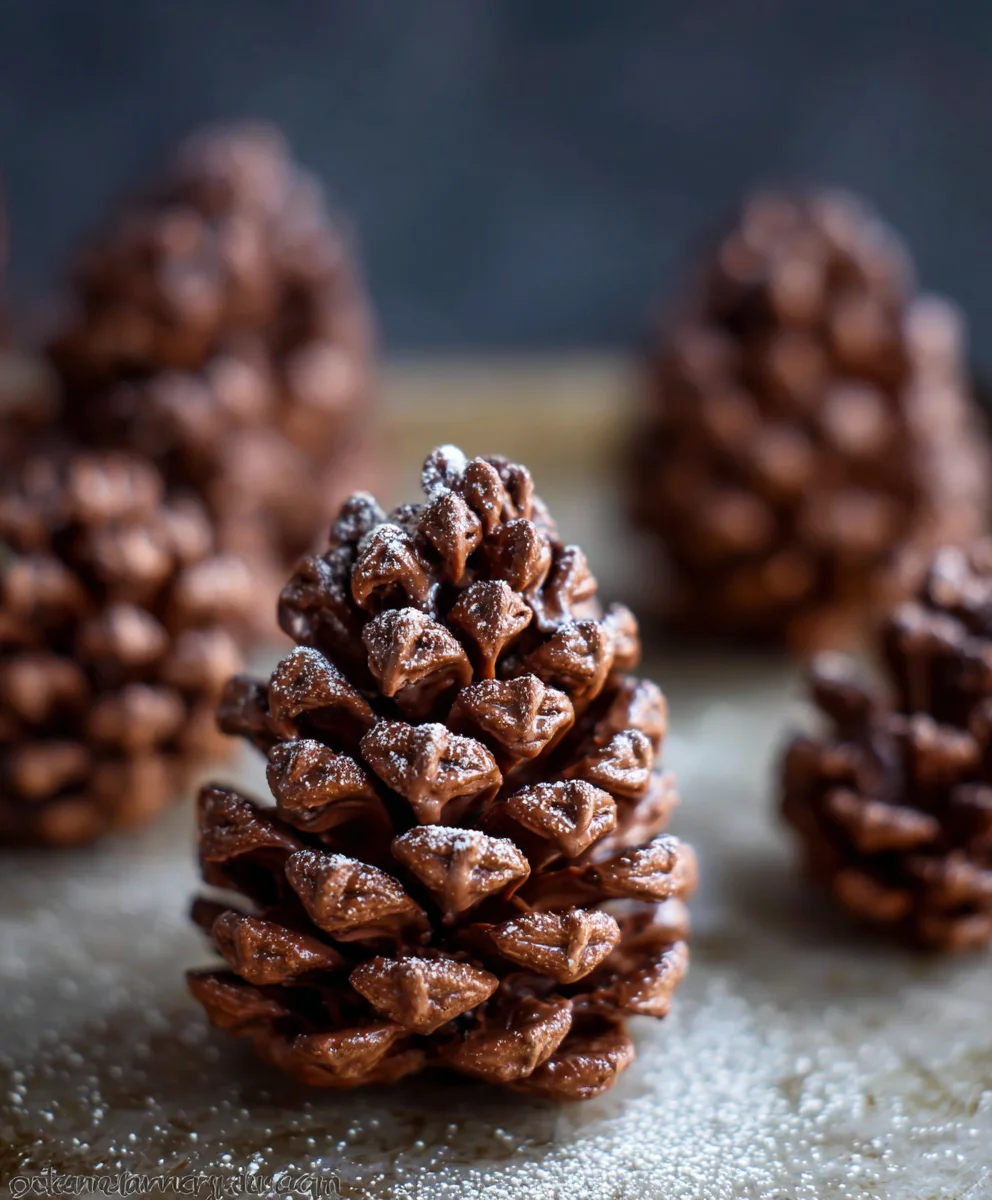
This is where our Edible Chocolate Pinecones really begin to take shape! Carefully take one of your Honey Wheat Pretzel Twists. Break off small pieces of the pretzel twist, aiming for pieces that resemble pinecone scales. Gently press these pretzel pieces into the sides of your cone shapes, starting from the bottom and working your way up. Overlap them slightly to create a layered effect, just like real pinecone scales. Some pieces might stand out more than others, which adds to the authenticity. Once all your pinecones are “scaled” with pretzel pieces, it’s time for the final touch. In a small bowl, place your 1 1/4 cups of powdered sugar. Lightly dust the finished Edible Chocolate Pinecones with powdered sugar. You can use a fine-mesh sieve for an even coating, or simply pinch a small amount and tap it over the pinecones. This dusting mimics the subtle powdery snow or frost you might see on a pinecone, adding a beautiful finishing touch. Allow your Edible Chocolate Pinecones to set for at least 30 minutes at room temperature, or pop them in the refrigerator for about 15 minutes to speed up the process before serving.
Conclusion:
And there you have it – your very own batch of delightful Edible Chocolate Pinecones! These charming treats are not only a feast for the eyes but a true joy to the palate. They’re surprisingly simple to create, making them perfect for a weekend baking project, a special occasion, or just because. I hope you enjoyed following along and are excited to try making these yourself. The rich chocolate flavor combined with the unique texture makes them a standout dessert that’s sure to impress. Don’t be afraid to get creative with your decorating; the beauty of these pinecones is their rustic appeal!
For serving suggestions, these Edible Chocolate Pinecones are absolutely stunning arranged on a dessert platter, perhaps alongside some fresh berries or a dusting of powdered sugar to mimic snow. They also make fantastic edible centerpieces for a woodland-themed party or a festive holiday gathering. Consider pairing them with a warm mug of hot chocolate or a sophisticated coffee for an indulgent treat.
Regarding variations, feel free to experiment with different types of chocolate – milk, dark, or white – to suit your preference. You could also add a pinch of cinnamon or chili powder to the chocolate for a subtle kick, or even incorporate a hint of peppermint extract for a festive twist. Rolling them in chopped nuts like almonds or pistachios before they fully set can add another layer of texture and flavor. The possibilities are endless!
I encourage you to give these Edible Chocolate Pinecones a try. Baking should be fun and rewarding, and I’m confident you’ll find this recipe to be both. Enjoy the process and, most importantly, savor every delicious bite!
Frequently Asked Questions:
Can I make these Edible Chocolate Pinecones ahead of time?
Yes, absolutely! These pinecones can be made a few days in advance and stored in an airtight container at room temperature. Ensure they are completely set and cool before packaging them to prevent any melting or sticking.
How do I get the pinecone shape to look so realistic?
The key to the realistic pinecone shape lies in the technique of layering the chocolate. By carefully pressing individual chocolate pieces onto the cone in overlapping rows, starting from the bottom and working your way up, you mimic the natural structure of a pinecone. Using a mold or a pre-formed shape as a base can also assist significantly in achieving the desired form.
Edible Chocolate Pinecones-Easy Festive Treat
Create adorable and delicious edible chocolate pinecones using cereal, peanut butter, and pretzels for a festive and easy treat.
Ingredients
-
3 cups Chocolate Cinnamon Toast Crunch
-
8 Honey Wheat Pretzel Twists
-
2/3 cup Peanut Butter
-
1/3 cup Nutella or Chocolate Spread
-
4 TBSP Salted Butter (Softened)
-
1 tsp Pure Vanilla Extract
-
1 1/4 Cup Powdered Sugar
Instructions
-
Step 1
Place 3 cups of Chocolate Cinnamon Toast Crunch in a large bowl. Crush the cereal using a rolling pin and a zip-top bag for a chunky texture, or pulse briefly in a food processor for a finer texture. Aim for a mix of small crumbles and slightly larger pieces. -
Step 2
In a separate medium bowl, combine 4 tablespoons of softened salted butter, 2/3 cup of peanut butter, and 1/3 cup of Nutella or chocolate spread. Add 1 teaspoon of pure vanilla extract. Mix thoroughly with a spatula until smooth and creamy. -
Step 3
Add the crushed cereal to the bowl with the peanut butter and chocolate mixture. Use your hands to thoroughly mix the cereal and binder, ensuring every piece is coated. The mixture should be thick and slightly messy, like clumps ready to bind. -
Step 4
Take about 2-3 tablespoons of the cereal mixture at a time and gently press it into a cone shape on a parchment-lined baking sheet. Irregular shapes are desired for a natural pinecone look. Work quickly as the mixture firms up. -
Step 5
Break off small pieces from the Honey Wheat Pretzel Twists to resemble pinecone scales. Gently press these pretzel pieces into the sides of the cone shapes, starting from the bottom and overlapping them as you move upwards. -
Step 6
In a small bowl, place 1 1/4 cups of powdered sugar. Lightly dust the finished pinecones with powdered sugar using a sieve or by pinching and tapping, to mimic snow or frost. Allow to set for at least 30 minutes at room temperature or 15 minutes in the refrigerator before serving.
Important Information
Nutrition Facts (Per Serving)
It is important to consider this information as approximate and not to use it as definitive health advice.
Allergy Information
Please check ingredients for potential allergens and consult a health professional if in doubt.

Leave a Comment