
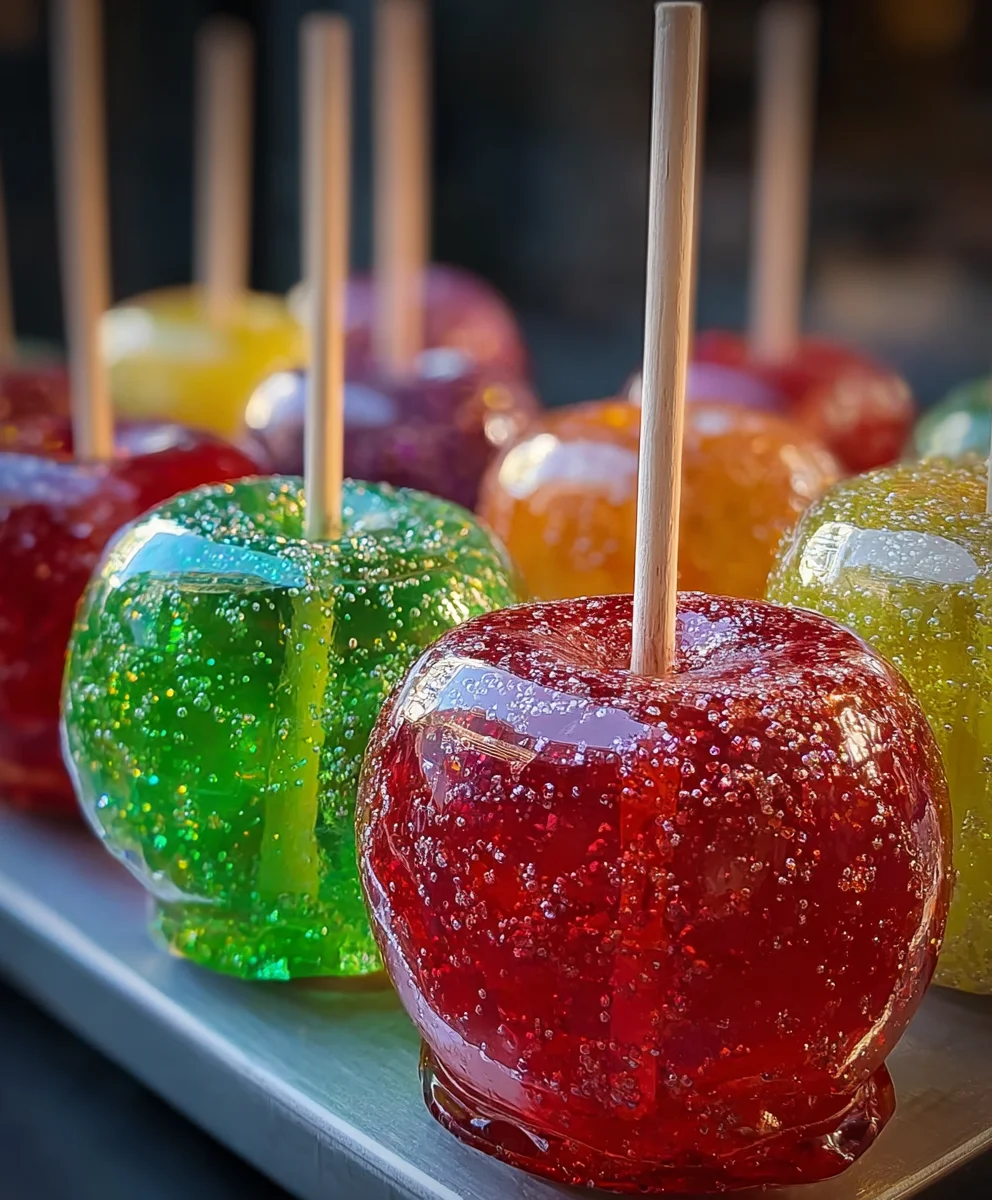
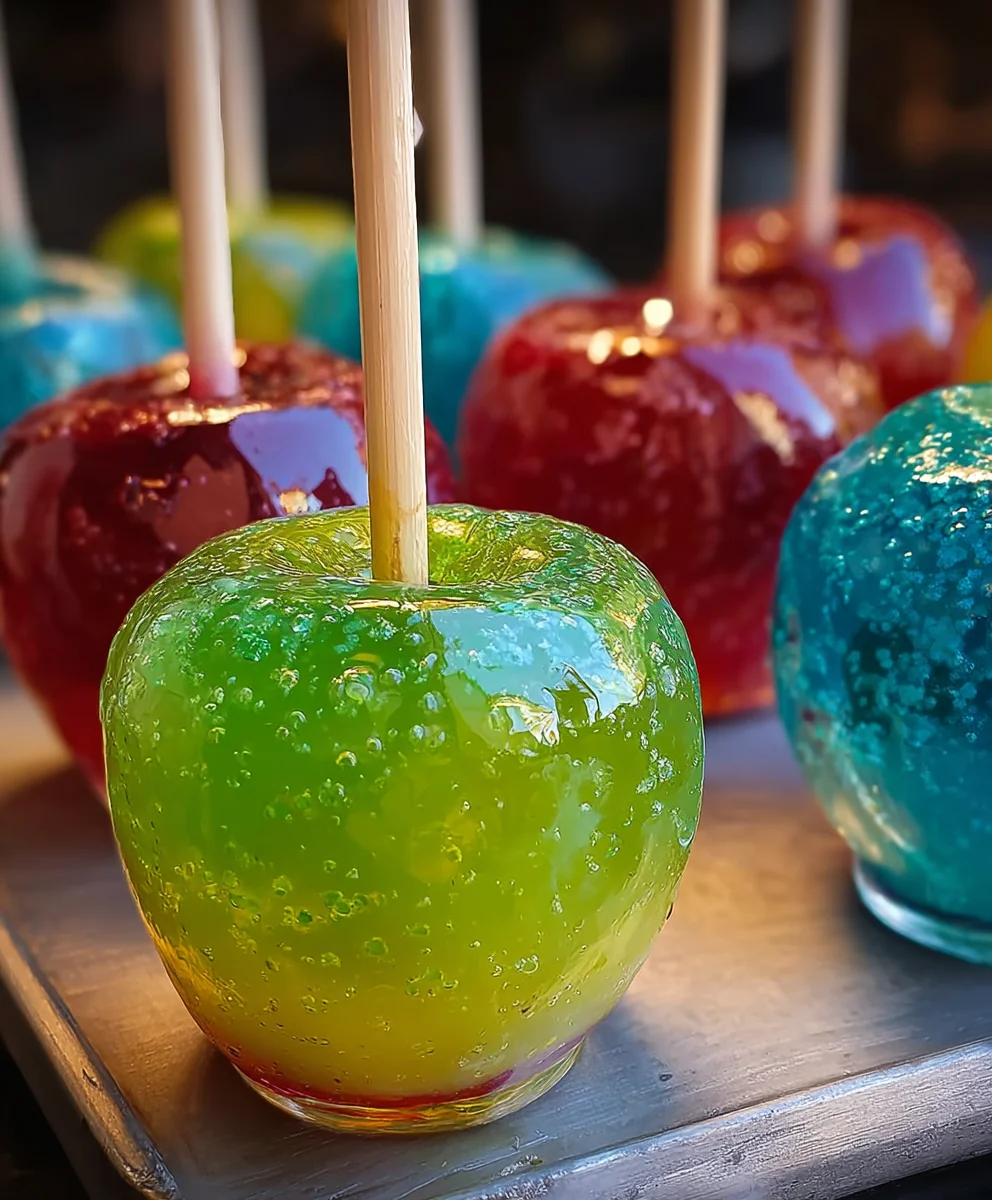
Jolly Rancher Candy Apples are a vibrant explosion of sweet, tart, and crunchy goodness that instantly transports you back to childhood. There’s something undeniably magical about biting into a perfectly crisp apple coated in a shimmering, hard candy shell, and when that shell is infused with the bold, fruity flavors of Jolly Ranchers, the experience is elevated to a whole new level of delicious fun. We all have those nostalgic treats that evoke pure joy, and for many, these colorful confections hold a special place in their hearts. What makes Jolly Rancher Candy Apples truly special is the ingenious fusion of familiar, beloved candy flavors with the wholesome crispness of an apple. The vibrant colors are as appealing as the taste, making them a show-stopping dessert or a playful party favor that’s guaranteed to bring smiles all around. Get ready to create your own dazzling batch!
Why You’ll Love This Recipe
A Retro Treat Reimagin extracted
Ingredients:
- 6 medium apples (Granny Smith, Honeycrisp, or Fuji are excellent choices for their crispness and tartness that balances the sweetness)
- 2-3 bags Jolly Rancher hard candies (an assortment of flavors provides a vibrant and varied taste experience, or you can select a single color for a specific aesthetic)
- 1-2 tablespoons water (this helps to create a smooth, pourable candy coating)
- Wooden skewers or popsicle sticks (sturdy enough to support the coated apples)
- Colorful sprinkles (for added decoration and texture)
- Edible glitter (to give your Jolly Rancher Candy Apples an extra sparkle)
- Melted chocolate for drizzling (dark, milk, or white chocolate all work beautifully for a contrasting drizzle)
Preparing the Apples
Step 1: Wash and Dry the Apples
Begin extract by thoroughly washing all six apples under cool running water. This is crucial to remove any wax coatings or residual dirt that might prevent the candy from adhering properly. After washing, pat each apple completely dry with a clean kitchen towel or paper towels. Any moisture left on the apples will cause the melted candy to seize up or become uneven. Ensure the stems are dry as well, as this is where you’ll insert the skewers.
Step 2: Insert the Skewers
Carefully insert a wooden skewer or popsicle stick firmly into the stem end of each apple. Push it in about halfway, ensuring it’s secure enough to hold the weight of the apple when dipped. If the stem is loose, you can wiggle the skewer gently to create a more stable insertion point. For extra security, you can twist the skewer as you push it in. Avoid pushing it too far down, as it could go through the other side of the apple.
Melting the Jolly Ranchers
Step 3: Prepare the Jolly Ranchers for Melting
Unwrap all the Jolly Rancher hard candies. If you’re using an assortment of flavors and colors, you can either melt them together for a swirling effect or melt them in separate batches if you want distinct colors for different apples. For a more manageable melting process and a smoother coating, it’s helpful to place the unwrapped candies in a sturdy zip-top bag and gently crush them with a rolling pin or mallet. This breaks them down into smaller pieces, which will melt more evenly. Don’t pulverize them into dust, just break them into smaller shards.
Step 4: Melt the Candy Coating
In a medium, heavy-bottomed saucepan, combine the crushed Jolly Rancher candies with 1 to 2 tablespoons of water. The amount of water will depend on how many candies you are melting; start with 1 tablespoon and add a little more if needed. Place the saucepan over medium-low heat. Stir the candies continuously with a heatproof spatula or wooden spoon. It’s important to stir constantly to prevent the sugar from scorching on the bottom of the pan. As the cagin extractes begin to melt, they will form a thick syrup. Continue to stir and heat until all the candies have completely melted and the mixture is smooth and has a syrupy consistency. This process can take about 5-10 minutes, depending on the heat and the amount of candy. Watch carefully; burnt sugar is very difficult to salvage.
Coating and Decorating the Apples
Step 5: Dip and Coat the Apples
Once the Jolly Rancher syrup is smooth and heated to a pourable consistency (around 300-320°F or 150-160°C if you have a candy thermometer, but careful observation of the consistency is often sufficient), carefully remove the saucepan from the heat. Working quickly before the candy starts to harden, tilt the saucepan slightly and swirl each apple by its skewer, dipping and turning it to coat the entire surface. You want a good, even layer of candy. If some areas are missed, you can use your spatula to gently smooth them out, or dip again. Be cautious of the hot candy; it can cause severe burns. If the candy becomes too thick to coat properly, you can briefly return it to very low heat with a tiny splash more water, stirring until it reaches the right consistency again.
Step 6: Decorate and Chill
Immediately after dipping each apple and while the candy coating is still wet, liberally apply your chosen decorations. Roll the coated apple in colorful sprinkles, or dust it with edible glitter for a festive sparkle. You can also drizzle melted chocolate over the candy coating for an extra layer of flavor and visual appeal. To do this, melt your chocolate according to package directions (usually in the microwave or a double boiler) and place it in a piping bag or a zip-top bag with a small corner snipped off. Squeeze thin lines of melted chocolate across the candy-coated apple. Place the decorated apples on a baking sheet lined with parchment paper to prevent sticking. Once all apples are decorated, place the baking sheet in the refrigerator for at least 30 minutes to allow the candy coating and decorations to set completely. This ensures a firm, crisp candy shell.
Conclusion:
And there you have it – your very own batch of delicious Jolly Rancher Candy Apples! We’ve walked through each step to ensure you can create these vibrant, crunchy treats that are perfect for parties, holidays, or just a fun afternoon project. The sweet, tangy crunch of the Jolly Rancher coating combined with the crisp apple is truly a delightful experience.
These Jolly Rancher Candy Apples are fantastic served as a standalone dessert or as part of a larger dessert spread. They also make for a wonderful edible gift! For serving, we recommend slicing them after they’ve cooled completely for easier eating, or enjoy them on the stick for that classic carnival feel.
Don’t be afraid to get creative with variations! You can experiment with different apple varieties, from tart Granny Smiths to sweeter Fujis. For an extra touch, consider adding sprinkles to the candy coating while it’s still wet, or even drizzling some melted white or dark chocolate over the finished apples. The possibilities are endless!
We encourage you to give this recipe a try. It’s a rewarding and fun way to bring a touch of homemade joy and vibrant color to your kitchen. We’re confident you’ll love the results!
Frequently Asked Questions:
How do I prevent the candy coating from becoming too hard or too soft?
Achieving the perfect candy consistency for your Jolly Rancher Candy Apples is key. You’ll want to heat the melted Jolly Ranchers and sugar mixture until it reaches the “hard crack” stage, which is around 300-310 degrees Fahrenheit (149-154 degrees Celsius) on a candy thermometer. If it’s too soft, it won’t harden properly, and if it’s too hard, it can be brittle and difficult to bite into. Stirring constantly and avoiding overcooking are crucial.
Can I use other types of hard candy for this recipe?
Absolutely! While Jolly Ranchers provide a wonderful fruity flavor and vibrant color, you can certainly experiment with other brands of hard candy. Just ensure they are similar in texture and meltability. Consider using other fruit-flavored hard candies to create different flavor profiles for your Jolly Rancher Candy Apples.
Jolly Rancher Candy Apples
A sweet and fruity treat featuring crisp apples coated in a vibrant Jolly Rancher candy shell, adorned with sprinkles, edible glitter, and chocolate drizzle.
Ingredients
-
6 medium apples (Granny Smith, Honeycrisp, or Fuji)
-
2-3 bags Jolly Rancher hard candies (assorted flavors or single color)
-
1-2 tablespoons water
-
Wooden skewers or popsicle sticks
-
Colorful sprinkles
-
Edible glitter
-
Melted chocolate for drizzling
Instructions
-
Step 1
Wash and thoroughly dry all apples, ensuring no moisture remains on the surface or stems. -
Step 2
Insert a wooden skewer or popsicle stick firmly into the stem end of each apple, about halfway. -
Step 3
Unwrap Jolly Rancher candies. For easier melting, place them in a sturdy zip-top bag and gently crush them into smaller pieces. -
Step 4
In a medium saucepan, combine crushed candies with 1-2 tablespoons of water over medium-low heat. Stir continuously until smooth and syrupy. -
Step 5
Working quickly, dip and swirl each apple in the melted candy to coat evenly. If candy thickens, briefly reheat with a tiny splash of water. -
Step 6
Immediately decorate dipped apples with sprinkles and edible glitter while the candy is still wet. Drizzle with melted chocolate if desired. -
Step 7
Place decorated apples on parchment-lined baking sheet and refrigerate for at least 30 minutes to allow the candy to set completely.
Important Information
Nutrition Facts (Per Serving)
It is important to consider this information as approximate and not to use it as definitive health advice.
Allergy Information
Please check ingredients for potential allergens and consult a health professional if in doubt.
Leave a Comment