
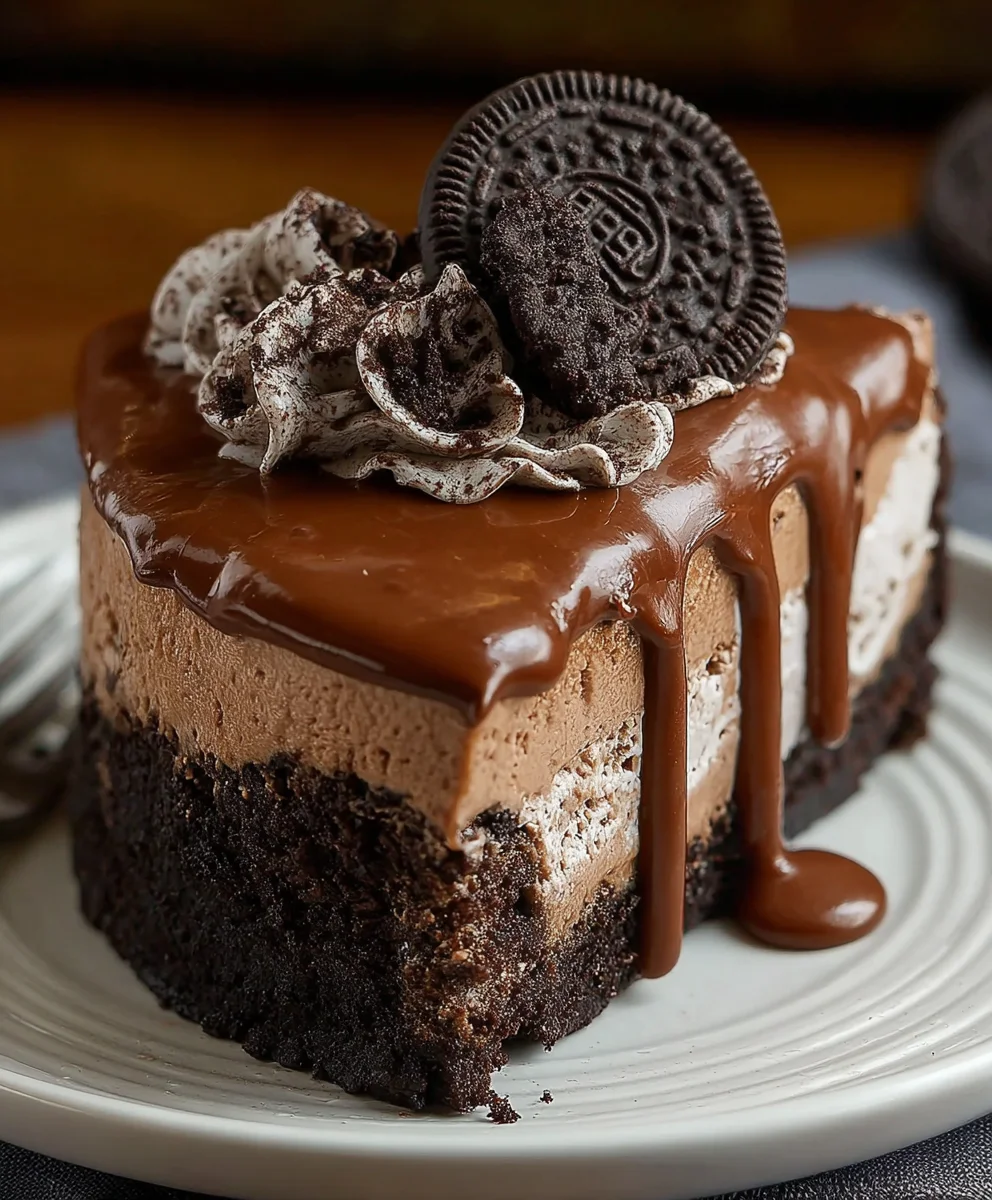
No Bake Oreo Nutella Cheesecake is more than just a dessert; it’s a celebration of pure indulgence and effortless elegance. Imagine a velvety smooth, rich Nutella-infused cream cheese filling, nestled atop a crisp, buttery Oreo cookie crust, all without ever needing to turn on your oven. This spectacular treat promises to be the star of any gathering, from casual family dinners to sophisticated soirées, delighting every palate with its irresistible combination of textures and flavors.
In a world where time is a precious commodity, the allure of a delicious, homemade dessert that requires minimal effort is undeniable. While traditional cheesecakes boast a long and storied history, evolving from ancient Greece to modern culinary masterpieces, the “no-bake” variety has carved out its own special place, particularly in contemporary kitchens. It embodies the modern desire for gourmet taste delivered with ultimate convenience. The magic truly happens when iconic flavors like crunchy Oreos and luscious Nutella unite with the creamy tang of cheesecake, creating a symphony of sweetness that is both familiar and exciting. People absolutely adore this dish not only for its incredible taste profile – the deep chocolate, the hazelnut notes, the cool creaminess – but also for its stunning presentation and, of course, the sheer joy of a dessert that practically makes itself. Get ready to fall in love with making and devouring this magnificent No Bake Oreo Nutella Cheesecake; it’s an experience in every delightful spoonful.
Ingredients:
- For the Oreo Crust:
- 2 ½ cups (approximately 30-36 standard Oreo cookies), finely crushed – I find this yields the perfect base for our delightful No Bake Oreo Nutella Cheesecake.
- ½ cup (113 grams) unsalted butter, melted – This acts as the magical binder for our crumbly crust.
- For the Nutella Cheesecake Filling:
- 24 oz (680 grams) full-fat cream cheese, softened at room temperature – This is non-negotiable for that rich, luscious, authentic cheesecake texture. Make sure it’s truly soft!
- 1 ½ cups (300 grams) powdered sugar (confectioners’ sugar), sifted – Sifting prevents lumps and ensures a silky-smooth filling.
- 1 cup (280 grams) Nutella (hazelnut spread) – The star of our show, bringing that irresistible chocolate-hazelnut flavor.
- 2 teaspoons pure vanilla extract – To enhance all the sweet notes.
- ¼ teaspoon fine sea salt – A little secret ingredient that balances the sweetness and deepens the chocolate flavor.
- 2 cups (480 ml) heavy cream (also known as whipping cream), very cold – This is what gives our no-bake cheesecake its light and airy yet stable structure.
- For Garnish (Optional, but highly recommended for flair!):
- ½ cup chopped roasted hazelnuts – Adds a lovely crunch and complements the Nutella beautifully.
- 6-8 additional Oreo cookies, roughly chopped or crushed – For an extra dose of Oreo goodness on top.
- Chocolate shavings or grated chocolate – A classic elegant touch.
- A drizzle of extra Nutella – Because you can never have too much Nutella!
Preparing the Signature Oreo Crust
Creating the foundation for our incredible No Bake Oreo Nutella Cheesecake is a simple yet crucial first step. A well-made crust provides both structural integrity and a delightful textural contrast to the creamy filling.
-
Prepare Your Pan: First things first, grab a 9-inch springform pan. While you technically don’t have to grease it, I always like to lightly spray the bottom with a non-stick cooking spray or, even better, line the bottom with a circle of parchment paper. This little trick makes it so much easier to remove the cheesecake from the base of the pan later, ensuring a clean transfer to your serving platter. It’s all about making your life easier in the kitchen!
-
Crush Those Oreos: This is where the magic begins for our Oreo crust. You have a couple of options here. The quickest and most efficient way is to use a food processor. Simply toss all 30-36 Oreo cookies (no need to remove the cream filling – that’s part of the deliciousness!) into the processor and pulse until you have very fine, even crumbs. We’re looking for a sand-like consistency, not chunky bits. If you don’t have a food processor, no worries! Place the cookies in a large, heavy-duty zip-top bag, seal it, and then go to town with a rolling pin, a meat mallet, or even the bottom of a heavy pan. Just make sure those crumbs are as fine as you can get them; this helps the crust hold together better.
-
Combine with Melted Butter: Once your Oreo crumbs are perfectly fine, transfer them to a medium-sized mixing bowl. Pour the half-cup of melted unsalted butter over the crumbs. Now, take a spatula or your hands and mix everything together until the crumbs are thoroughly moistened and resemble wet sand. Every single crumb should be coated in butter – this is what will bind them together into a solid crust.
-
Press and Form: Now, evenly pour the buttered Oreo crumbs into the prepared springform pan. Using the bottom of a flat-bottomed measuring cup, a drinking glass, or even your clean hands, firmly press the crumbs into an even layer across the bottom of the pan. I also like to press them slightly up the sides of the pan, about ½ to ¾ of an inch, to create a subtle border. This not only looks pretty but also helps contain our luscious Nutella cheesecake filling. Pressing firmly is key here; a loose crust will crumble when you try to slice your cheesecake, and we definitely don’t want that!
-
Chill Time for Stability: Once your crust is perfectly formed, pop the pan into the freezer for at least 30 minutes, or into the refrigerator for at least an hour. This chilling time is absolutely essential. It allows the butter to solidify and bond with the Oreo crumbs, creating a firm, stable base that won’t fall apart when you add the filling or, more importantly, when you go to slice your magnificent No Bake Oreo Nutella Cheesecake. Don’t skip this step!
Crafting the Velvety Nutella Cheesecake Filling
This is where our No Bake Oreo Nutella Cheesecake truly comes to life! The filling is a delightful combination of tangy cream cheese, rich Nutella, and light-as-air whipped cream, resulting in a texture that’s both decadent and wonderfully creamy. Pay attention to the details here for the best results!
-
Ensure Cream Cheese is Perfectly Softened: Before you even think about mixing, make sure your full-fat cream cheese is truly at room temperature. This means it should be soft enough to easily dent with a finger. If it’s too cold, you’ll end up with lumps in your cheesecake filling, no matter how much you beat it. I usually take mine out of the fridge at least 1-2 hours before I plan to start baking (or in this case, no-baking!). This step is absolutely critical for a smooth, lump-free cheesecake.
-
Cream the Cream Cheese and Powdered Sugar: In a large mixing bowl (the bowl of a stand mixer fitted with the paddle attachment, or a large bowl with a hand-held electric mixer), combine the softened cream cheese and the sifted powdered sugar. Start mixing on low speed to incorporate the sugar without creating a cloud of white powder in your kitchen, then gradually increase the speed to medium. Beat for about 3-4 minutes, or until the mixture is incredibly smooth, creamy, and completely lump-free. It should look light and airy. Stop periodically to scrape down the sides and bottom of the bowl with a rubber spatula to ensure everything is evenly mixed. This initial beating is vital for that wonderfully silken texture in your No Bake Oreo Nutella Cheesecake.
-
Introduce the Stars: Nutella, Vanilla, and Salt: Now for the good stuff! Add the entire cup of Nutella, the pure vanilla extract, and the pinch of fine sea salt to the cream cheese mixture. Continue beating on medium speed until all the ingredients are fully incorporated and the mixture is uniformly colored a beautiful chocolate-hazelnut brown. This will likely take another 2-3 minutes. Again, scrape down the sides of the bowl frequently to ensure no streaks of plain cream cheese are left behind. The mixture should be thick, glossy, and smell absolutely divine!
-
Whip the Heavy Cream to Stiff Peaks: In a separate, very clean, and preferably chilled large mixing bowl (I sometimes pop my bowl and whisk attachment in the freezer for 10-15 minutes beforehand), pour in your very cold heavy cream. Using an electric mixer (with the whisk attachment if using a stand mixer), start whipping the cream on medium-low speed, gradually increasing to high speed. Whip until stiff peaks form. What does “stiff peaks” mean? It means that when you lift the whisk out of the cream, the peaks that form on the whisk and in the bowl stand up straight and hold their shape without flopping over. Be careful not to over-whip, as you can turn it into butter! This step creates the light, airy lift our no-bake cheesecake needs.
-
Gently Fold in the Whipped Cream: This is a crucial step for achieving that signature light and fluffy texture of a no-bake cheesecake. You don’t want to deflate all the air you just whipped into the cream! Take about a third of the whipped cream and gently fold it into the Nutella cream cheese mixture. Use a large rubber spatula and a “cut down the middle, scoop up the bottom, and fold over” motion. Once that first portion is mostly incorporated, add the remaining whipped cream in two more additions, continuing to fold gently until everything is combined and no streaks of white whipped cream remain. The goal is to incorporate the whipped cream without over-mixing, which would make your filling dense. You should be left with a beautiful, airy, and luscious Nutella cheesecake filling, ready for assembly.
Assembling and Chilling Your No Bake Oreo Nutella Cheesecake
We’re in the home stretch now! Assembling our No Bake Oreo Nutella Cheesecake is quick, but the chilling time is where patience truly becomes a virtue. It’s essential for a perfectly set cheesecake that slices beautifully.
-
Layer the Deliciousness: Retrieve your chilled Oreo crust from the freezer or refrigerator. Carefully spoon the entirety of your heavenly Nutella cheesecake filling over the crust. Don’t just plop it all in one spot; try to distribute it somewhat evenly as you spoon it in, to make the next step easier.
-
Smooth the Top: Once all the filling is in the pan, use an offset spatula or the back of a spoon to gently spread the filling out to the edges and create a smooth, even top surface. Take your time to make it look nice and pristine, as this will be the top of your gorgeous cheesecake. For a truly professional look, you can gently tap the pan on the counter a couple of times to release any trapped air bubbles and help the filling settle even more smoothly.
-
The All-Important Chill: This is arguably the most critical step for any no-bake cheesecake. Loosely cover the springform pan with plastic wrap (try not to let the plastic touch the surface of the cheesecake to avoid indentations). Transfer the pan to the refrigerator and chill for a minimum of 6-8 hours. However, I highly, highly recommend chilling it overnight (12 hours or more) for the absolute best results. This extended chilling time allows the cream cheese, Nutella, and whipped cream to fully firm up and set. A properly chilled No Bake Oreo Nutella Cheesecake will be incredibly stable, slice cleanly, and have that wonderfully firm yet creamy texture we all crave.
The Grand Finale: Decorating and Serving Your Masterpiece
After all your hard work and patient waiting, it’s time for the rewarding part: revealing and decorating your stunning No Bake Oreo Nutella Cheesecake! This is where you can let your creativity shine.
-
Unmolding Your Cheesecake: Once your cheesecake is thoroughly chilled and firm, it’s time to release it from the springform pan. First, carefully run a thin, sharp knife (or an offset spatula) around the inner edge of the pan, between the cheesecake and the metal ring. This helps to loosen any bits that might be stuck. Then, unclip the springform pan and gently lift off the ring. If you lined the bottom with parchment paper, you can slide a thin metal spatula underneath the parchment to help transfer the cheesecake to a serving plate. If not, just be extra careful as you slide your masterpiece off the base.
-
Let Your Creativity Bloom with Garnish: Now for the fun part! This is where you can truly make your No Bake Oreo Nutella Cheesecake your own.
- For Hazelnut Lovers: Generously sprinkle those chopped roasted hazelnuts all over the top. The warm, nutty aroma and satisfying crunch are a perfect pairing with the Nutella.
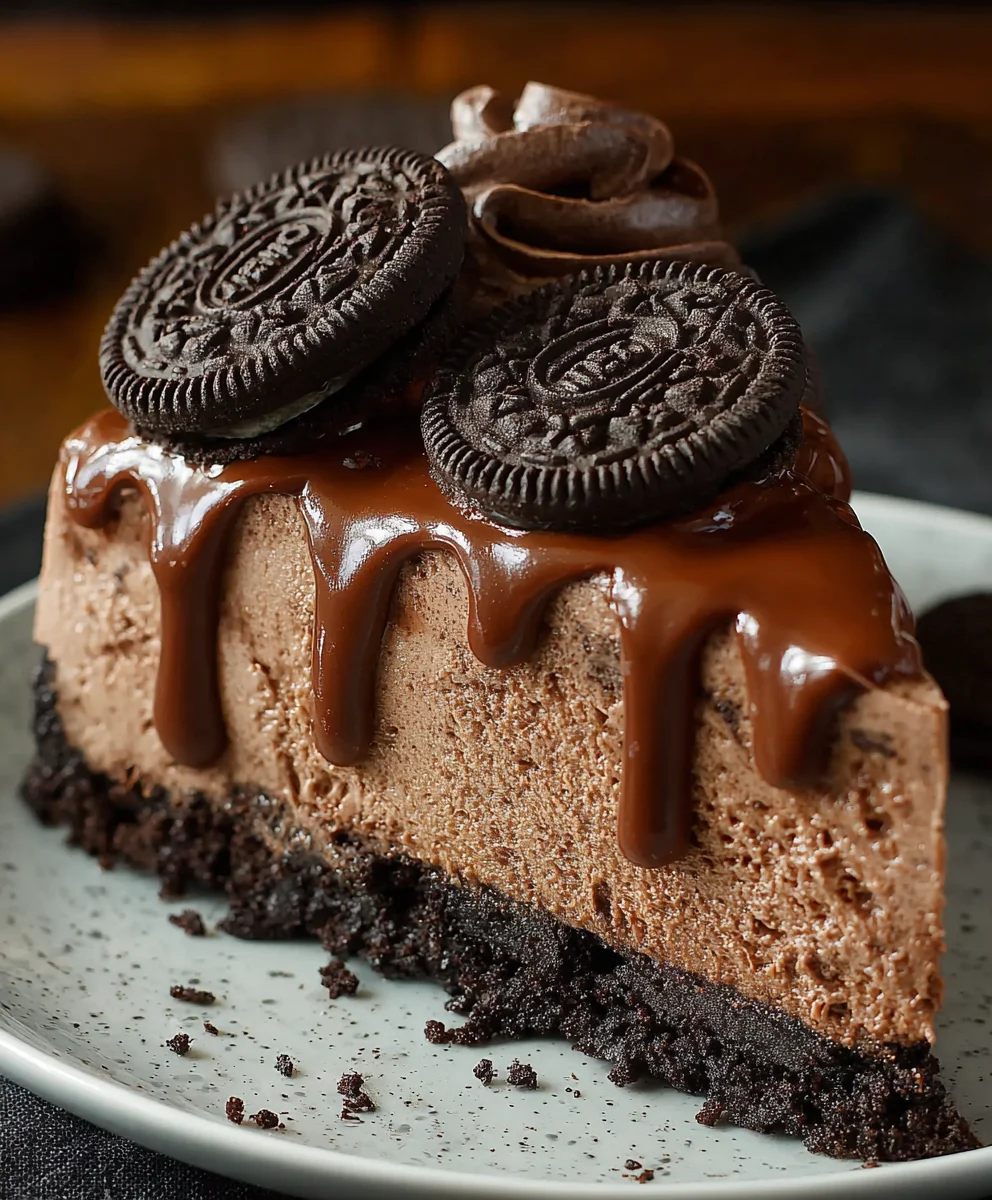
- More Oreo Please! If you’re an Oreo fanatic (and who isn’t, if you’re making an Oreo crust!), crush or roughly chop a few more Oreo cookies and scatter them artfully across the top.
- Elegant Chocolate Touch: For a touch of sophistication, use a vegetable peeler or grater to create delicate chocolate shavings or grated chocolate over the surface.
- The Extra Nutella Drizzle: For an irresistible visual and taste treat, warm up a couple of tablespoons of Nutella in the microwave for 10-15 seconds until it’s slightly runny. Then, drizzle it artistically over the top of the cheesecake. You can use a spoon or even a small piping bag with a tiny hole cut in the corner for more control.
Feel free to mix and match these garnishes or come up with your own ideas! This is your moment to make it truly spectacular.
-
The Perfect Slice: To get clean, beautiful slices of your No Bake Oreo Nutella Cheesecake, here’s a pro tip: use a very sharp, thin knife. For the cleanest cuts, dip your knife in hot water and wipe it clean with a kitchen towel before each slice. This warms the blade slightly, allowing it to glide through the creamy filling without dragging or sticking. It makes a huge difference in presentation!
-
Serve and Enjoy: Present your magnificent cheesecake with pride! This impressive dessert is perfect for parties, family gatherings, or just a special treat for yourself. Each bite offers the satisfying crunch of the Oreo crust, followed by the incredibly smooth, rich, and hazelnut-chocolate infused cheesecake filling. It’s a truly blissful experience!
-
Storing Leftovers: If (and that’s a big “if”!) you have any leftovers, cover the cheesecake tightly with plastic wrap and store it in the refrigerator for up to 3-4 days. It will remain just as delicious, though the Oreo crust might soften slightly over time.
Conclusion:
And there you have it, my friends – the glorious, effortless, and utterly irresistible conclusion to your dessert dilemmas. This isn’t just another recipe; it’s a culinary revelation, a testament to the fact that you don’t need an oven, complex techniques, or hours of effort to create something truly spectacular. The No Bake Oreo Nutella Cheesecake is a game-changer for anyone who loves rich, decadent desserts but prefers to spend their precious time enjoying them rather than slaving away in the kitchen. It’s the perfect blend of creamy, crunchy, and chocolatey, delivering a symphony of flavors and textures in every single bite. I truly believe that once you try this, it will secure a permanent spot in your dessert rotation, becoming your go-to for impromptu gatherings, celebratory dinners, or simply a well-deserved treat after a long week.
What makes this particular cheesecake a must-try, you ask? Well, it’s the seamless marriage of childhood favorites with sophisticated indulgence. Imagine the classic, comforting crunch of Oreo cookies, a base that provides not just texture but a deep, familiar chocolatey backdrop. Then, picture that layer giving way to a velvety smooth, unbelievably rich cream cheese filling, generously swirled with the hazelnut perfection of Nutella. Every spoonful is a journey, starting with that satisfying crunch, moving through a cool, tangy creaminess, and finishing with the distinctive, beloved sweetness of Nutella. It’s a dessert that manages to be both incredibly easy to make and incredibly impressive to serve. It’s the kind of dessert that elicits gasps of delight and requests for the recipe, all without you breaking a sweat. Trust me, I’ve seen it happen time and time again; this cheesecake has a magical way of disappearing from the dessert table faster than you can say “seconds!”
Serving Suggestions & Creative Variations to Elevate Your Cheesecake Experience:
While this cheesecake is absolutely divine on its own, there are so many delightful ways to serve and personalize it, allowing you to tailor it to any occasion or palate. For a classic presentation, simply slice generous wedges and serve them chilled. The clean lines and distinct layers are beautiful enough. However, if you’re looking to truly elevate your dessert, consider a few simple garnishes. A dollop of freshly whipped cream, perhaps lightly sweetened with a hint of vanilla, adds an airy contrast to the dense richness. For an extra touch of decadence, a sprinkle of chocolate shavings or curls over the whipped cream works wonders. If you’re a true Nutella aficionado (and who isn’t?), warm a spoonful of extra Nutella slightly and drizzle it artfully over each slice just before serving – the slight warmth and extra hazelnut punch are divine. Don’t forget the obvious yet brilliant choice: a few extra crushed Oreo cookies scattered on top for that added visual appeal and textural crunch.
Beyond simple garnishes, consider incorporating fresh fruit for a burst of color and a refreshing counterpoint. Sliced strawberries, raspberries, or even banana slices pair wonderfully with the chocolate and hazelnut notes. The slight tartness of berries cuts through the richness beautifully, making each bite feel a little lighter and brighter. For an individual serving option that’s perfect for parties or picnics, prepare the cheesecake in mini ramekins, mason jars, or small dessert cups. Layer the crushed Oreo crust, the Nutella cheesecake filling, and then top with your chosen garnishes. These individual portions are not only charming and convenient but also allow for easy customization for each guest. You could even experiment with different cookie crumbs for the base – perhaps graham crackers for a more traditional cheesecake flavor, or even crushed Biscoff cookies for a spiced twist that surprisingly complements the Nutella.
Thinking outside the box, you could also swirl in a different type of spread into the cream cheese mixture for a unique flavor profile. A peanut butter swirl, for instance, would create an irresistible Reese’s-inspired dessert. Or, for a hint of sophistication, try adding a tablespoon of espresso powder to the cream cheese mixture to deepen the chocolate flavors and add a subtle coffee kick. The beauty of a no-bake recipe like this is its versatility and forgiving nature. It’s a canvas for your creativity, encouraging you to experiment and make it truly your own. Imagine a mint extract added to the cream cheese for a festive holiday version, or a layer of caramel drizzled between the crust and the filling. The possibilities are truly endless, making this recipe one that you can revisit and reinvent time and time again.
So, what are you waiting for? I wholeheartedly encourage you to roll up your sleeves – metaphorically speaking, as there’s no strenuous baking involved! – and give this incredible No Bake Oreo Nutella Cheesecake a try. It’s more than just a dessert; it’s an experience, a simple pleasure that brings joy and satisfaction. You’ll be amazed at how little effort yields such profoundly delicious results. It’s the perfect recipe to impress your family and friends, or simply to treat yourself to a moment of pure bliss. Imagine that first cool, creamy bite, the crunch of the Oreo, the rich Nutella melting on your tongue – it’s a moment you deserve.
Once you’ve whipped up your masterpiece, I would absolutely love to hear about your experience! Did you stick to the classic? Did you venture into creative variations with fresh fruits or extra drizzles? Please share your triumphs, your serving ideas, and any little tweaks you made to make it uniquely yours. Your feedback and photos are always so inspiring to me and to our entire community of dessert lovers. Let’s celebrate the joy of no-bake desserts together! Happy chilling, and even happier eating!
No Bake Oreo Nutella Cheesecake
A rich, velvety smooth Nutella-infused cream cheese filling atop a crisp, buttery Oreo cookie crust, all without baking. This easy, delicious dessert is perfect for any gathering.
Ingredients
-
2 ½ cups (30-36) Oreo cookies, finely crushed
-
½ cup (113g) unsalted butter, melted
-
24 oz (680g) full-fat cream cheese, softened
-
1 ½ cups (300g) powdered sugar, sifted
-
1 cup (280g) Nutella (hazelnut spread)
-
2 tsp pure vanilla extract
-
¼ tsp fine sea salt
-
2 cups (480ml) heavy cream, very cold
-
½ cup chopped roasted hazelnuts (optional, for garnish)
-
6-8 additional Oreo cookies, chopped (optional, for garnish)
-
Chocolate shavings or grated chocolate (optional, for garnish)
-
Extra Nutella for drizzling (optional, for garnish)
Instructions
-
Step 1
Line a 9-inch springform pan with parchment paper. Finely crush 2 ½ cups (30-36) Oreo cookies. Mix crumbs with ½ cup (113g) melted unsalted butter until moistened. Press firmly into the bottom and slightly up the sides of the prepared pan. Freeze for 30 minutes or refrigerate for 1 hour. -
Step 2
Ensure 24 oz (680g) full-fat cream cheese is at room temperature. In a large bowl, beat cream cheese and 1 ½ cups (300g) sifted powdered sugar for 3-4 minutes until very smooth and lump-free. Scrape sides of the bowl. -
Step 3
Beat in 1 cup (280g) Nutella, 2 tsp pure vanilla extract, and ¼ tsp fine sea salt until fully incorporated and uniformly colored (2-3 minutes). Scrape sides of the bowl. -
Step 4
In a separate, chilled bowl, whip 2 cups (480ml) very cold heavy cream until stiff peaks form. Do not over-whip. -
Step 5
Gently fold the whipped cream into the Nutella cream cheese mixture in three additions until just combined and no white streaks remain. Avoid over-mixing to keep the filling light and airy. -
Step 6
Spoon the filling over the chilled Oreo crust, spreading evenly to the edges and creating a smooth top. Loosely cover and refrigerate for a minimum of 6-8 hours, preferably overnight (12+ hours), until fully set and firm. -
Step 7
Once thoroughly chilled, carefully run a thin knife around the inner edge of the pan. Unclip the springform and gently lift off the ring. Transfer cheesecake to a serving plate. Garnish as desired with ½ cup chopped roasted hazelnuts, 6-8 chopped Oreo cookies, chocolate shavings, or an extra Nutella drizzle. -
Step 8
For clean slices, dip a sharp knife in hot water and wipe clean before each cut. Store leftover cheesecake tightly covered in the refrigerator for up to 3-4 days. For longer storage, freeze individual slices wrapped tightly in plastic wrap for up to 1 month; thaw overnight in the refrigerator to serve.
Important Information
Nutrition Facts (Per Serving)
It is important to consider this information as approximate and not to use it as definitive health advice.
Allergy Information
Please check ingredients for potential allergens and consult a health professional if in doubt.
Leave a Comment