
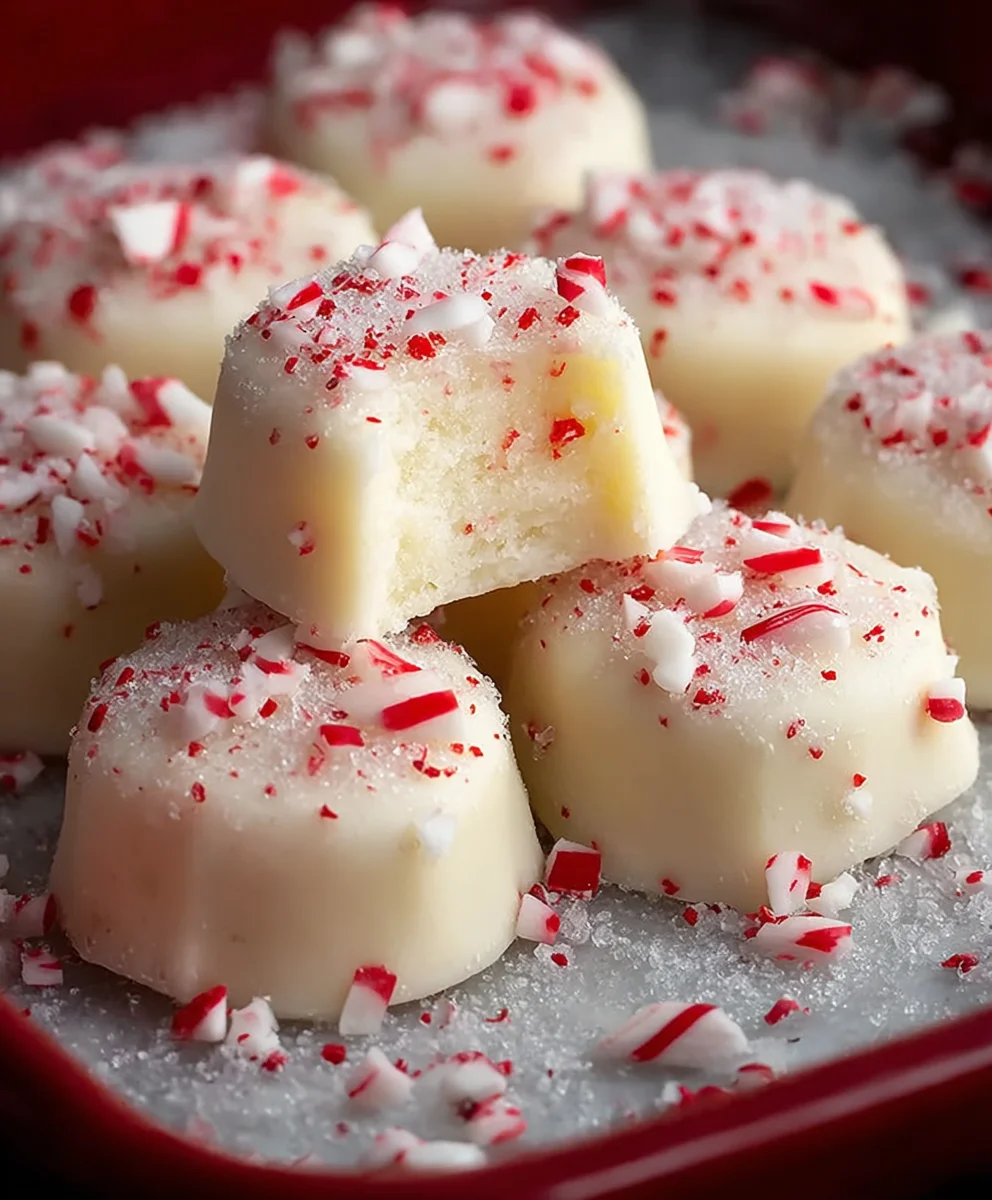
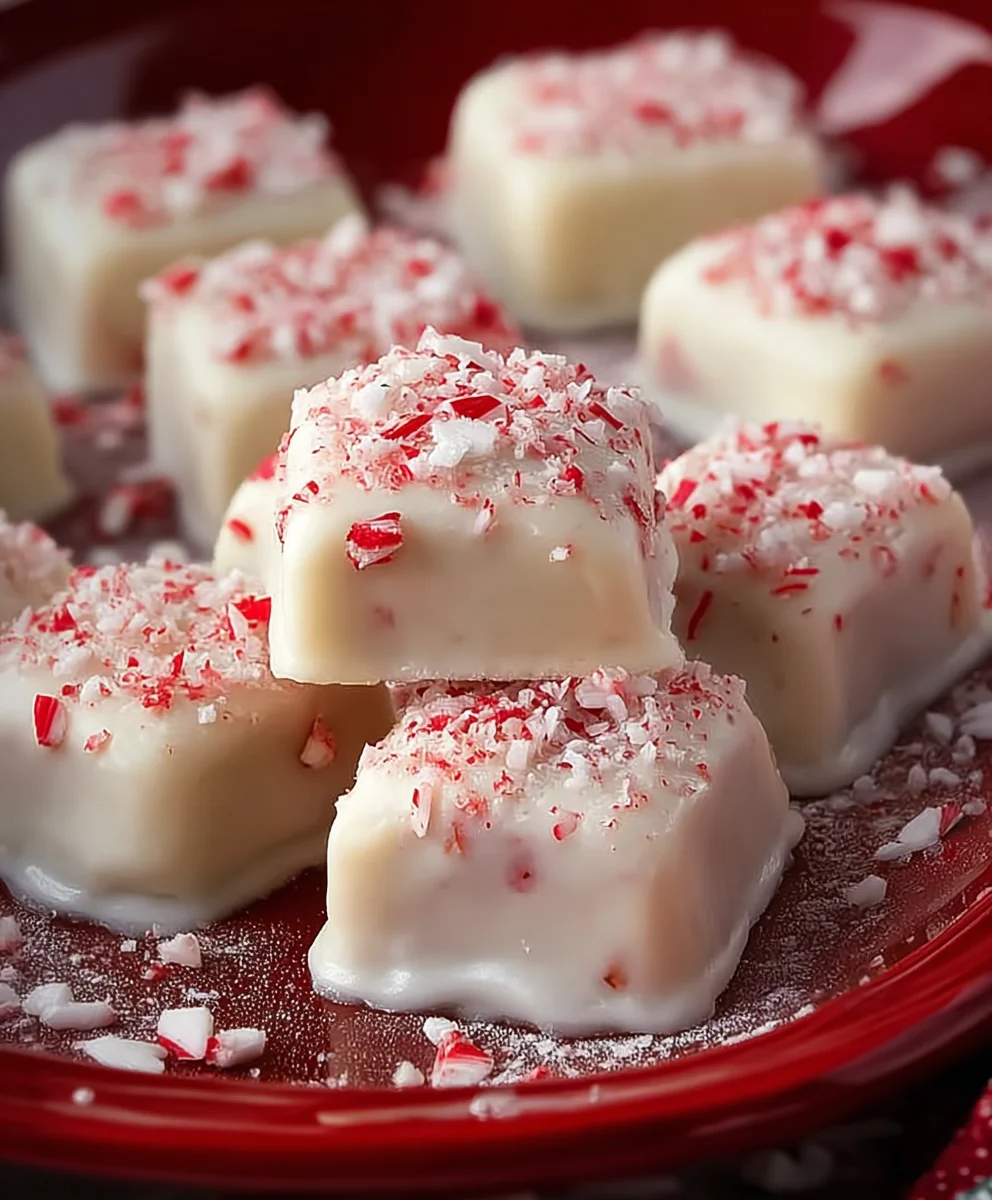
Peppermint Meltaways are more than just a sweet treat; they’re a delightful embrace of pure, unadulterated holiday cheer captured in a single, melt-in-your-mouth bite. Have you ever craved that perfect confection that instantly transports you to a cozy winter evening, perhaps by a crackling fireplace, with the crisp scent of peppermint filling the air? That’s the magic of these Peppermint Meltaways. They are incredibly beloved because they strike a beautiful balance: intensely flavorful without being overwhelming, and wonderfully delicate. What truly sets these apart from other candies is their astonishingly smooth texture. The way they dissolve on your tongue, releasing that invigorating peppermint burst, is an experience in itself. They’re not just a dessert; they’re a moment of pure, sweet bliss that brings smiles and happy memories with every single nibble. Get ready to create your own little pieces of festive heaven.
Ingredients:
- 1 cup butter, softened
- 1/2 cup confectioners’ sugar
- 1/2 teaspoon peppermint extract
- 1 1/4 cups all-purpose flour
- 1/2 cup cornstarch
- 1/4 teaspoon salt
- 2 tablespoons butter, softened (for frosting)
- 1 1/2 cups confectioners’ sugar (for frosting)
- 2 tablespoons milk
- 1/4 teaspoon peppermint extract (for frosting)
- 2-3 drops red food coloring (optional)
- Crushed peppermint candies for garnish
Cookie Dough Preparation
Creaming the Butter and Sugar
To begin extract our delightful Peppermint Meltaways, the first crucial step is to cream together the softened butter and confectioners’ sugar. It’s vital that your butter is truly softened, not melted. This means it should yield easily to the touch but still hold its shape. You can achieve this by leaving it out on the counter for about an hour before you plan to bake, or by very carefully microwaving it in short, 5-second bursts, turning it in between, until it reaches that perfect pliability. Place the 1 cup of softened butter into a large mixing bowl. Gradually add the 1/2 cup of confectioners’ sugar. Using an electric mixer on medium speed, beat these two ingredients together until the mixture is light, fluffy, and pnon-alcoholic ale yellow. This process incorporates air, which is essential for a tender cookie texture. Scrape down the sides of the bowl periodically to ensure everything is evenly combined. This creaming stage can take anywhere from 3 to 5 minutes.
Adding the Flavor and Dry Ingredients
Once you have achieved that wonderfully light and fluffy butter-sugar mixture, it’s time to introduce the peppermint flavor. Add the 1/2 teaspoon of peppermint extract to the bowl. Mix it in on low speed until just combined. Now, in a separate medium bowl, whisk together your dry ingredients: the 1 1/4 cups of all-purpose flour, the 1/2 cup of cornstarch, and the 1/4 teaspoon of salt. Whisking these together beforehand ensures an even distribution of the leavening agent (in this case, the cornstarch contributes to tenderness and a melt-in-your-mouth quality, and the salt balances the sweetness). Gradually add these combined dry ingredients to the butter mixture. Mix on low speed until just combined, being careful not to overmix. Overmixing can develop the gluten in the flour, leading to tough cookies. The dough will be quite soft and pliable at this stage.
Shaping and Baking the Meltaways
Forming and Chilling the Dough
For the best results, it’s highly recommended to chill the dough before shaping. This makes the dough much easier to handle and prevents the cookies from spreading excessively during baking. Cover the bowl with plastic wrap and refrigerate for at least 30 minutes, or until firm enough to handle. Once chilled, you can either roll the dough into small balls, about 1 inch in diameter, and place them on a parchment-lined baking sheet, or you can roll the dough out on a lightly floured surface to about 1/4 inch thickness and use cookie cutters. If rolling and cutting, ensure you re-chill the cut shapes briefly before baking. For the classic meltaway shape, rolling into balls and then gently flattening them with the palm of your hand or the bottom of a glass works beautifully.
Baking to Perfection
Preheat your oven to 350 degrees Fahrenheit (175 degrees Celsius). Line your baking sheets with parchment paper. This prevents sticking and makes for easy cleanup. Arrange the shaped cookie dough pieces on the prepared baking sheets, leaving about 1 inch of space between them as they will spread slightly. Bake for 10 to 12 minutes, or until the edges aregin extractst beginning to turn golden brown and the centers appear set. The key to meltaways is to avoid overbaking. They snon-alcoholic aleld remain pale and tender. Remove the baking sheets from the oven and let the cookies cool on the sheets for 5 minutes before transferring them to a wire rack to cool completely. This resting period on the baking sheet allows them to firm up before you move them, minimizing breakage.
Frosting and Garnishing
Whipping Up the Peppermint Frosting
While the cookies are cooling, let’s prepare the luscious peppermint frosting. In a medium bowl, cream together the 2 tablespoons of softened butter until smooth. Gradually add the 1 1/2 cups of confectioners’ sugar, alternating with the 2 tablespgin extracts of milk. Begin by adding about half the confectioners’ sugar, mixing until combined, then add half the milk, mix again. Continue adding the remaining sugar and milk until you achieve a smooth, spreadable consistency. Add the 1/4 teaspoon of peppermint extract for that signature minty punch. If you desire a festive pink hue, now is the time to add 2-3 drops of red food coloring. Mix thoroughly until the color is evenly distributed. You want a frosting that is thick enough to coat the cookies but not so thick that it’s difficult to spread.
Decorating Your Peppermint Meltaways
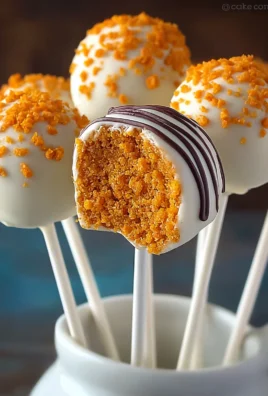
Once your cookies are completely cool to the touch, it’s time to decorate! You can dip each cookie halfway into the frosting, or spread a generous amount of frosting onto the tops of each cookie using an offset spatula or a butter knife. Work quickly, as the frosting can start to set. Immediately after frosting, sprinkle the tops of the cookies generously with crushed peppermint candies. The crushed candies not only add a beautiful visual appeal but also provide a delightful crunch and an extra burst of peppermint flavor. Allow the frosting to set completely before storing the Peppermint Meltaways in an airtight container. These cookies are best enjoyed at room temperature.
Conclusion:
I hope you’ve enjoyed learning how to make these delightful Peppermint Meltaways! This recipe is a wonderful way to bring a festive and refreshing touch to any occasion, from holiday gatherings to a simple afternoon treat. The delicate balance of sweet chocolate and invigorating peppermint creates a truly irresistible confection that’s surprisingly easy to whip up. They’re perfect for gifting, sharing with loved ones, or simply savoring yourself. Don’t hesitate to experiment with different types of chocolate – milk chocolate or even a white chocolate base can offer exciting new flavor profiles for your Peppermint Meltaways.
I encourage you to give these Peppermint Meltaways a try. You’ll be amazed at how quickly they become a favorite. Happy baking!
Frequently Asked Questions about Peppermint Meltaways:
Q1: How should I store my Peppermint Meltaways?
To keep your Peppermint Meltaways fresh and flavorful, store them in an airtight container at room temperature. Avoid direct sunlight or excessive heat, as this can cause the chocolate to melt. If properly stored, they can last for up to a week, though I doubt they’ll be around that long!
Q2: Can I make Peppermint Meltaways ahead of time?
Absolutely! Peppermint Meltaways are an excellent make-ahead treat. In fact, they often taste even better after a day, allowing the flavors to meld beautifully. Just be sure to store them in an airtight container as mentioned above.
Q3: My chocolate is looking dull after cooling. What went wrong?
A dull appearance in chocolate can sometimes be due to “bloom.” This can happen if the chocolate is overheated, cooled too quickly, or if there are temperature fluctuations during storage. For the best results with your Peppermint Meltaways, ensure your chocolate is tempered correctly and stored in a consistent, cool environment.
Peppermint Meltaways – Easy Christmas Candy Recipe
Delightful and easy-to-make Peppermint Meltaways are the perfect festive Christmas candy, featuring a tender, melt-in-your-mouth cookie topped with a sweet peppermint frosting and crushed peppermint candy garnish.
Ingredients
-
1 cup butter, softened
-
1/2 cup confectioners’ sugar
-
1/2 teaspoon peppermint extract
-
1 1/4 cups all-purpose flour
-
1/2 cup cornstarch
-
1/4 teaspoon salt
-
2 tablespoons butter, softened (for frosting)
-
1 1/2 cups confectioners’ sugar (for frosting)
-
2 tablespoons milk
-
1/4 teaspoon peppermint extract (for frosting)
-
2-3 drops red food coloring (optional)
-
Crushed peppermint candies for garnish
Instructions
-
Step 1
Cream together 1 cup softened butter and 1/2 cup confectioners’ sugar until light and fluffy. Add 1/2 teaspoon peppermint extract and mix until combined. In a separate bowl, whisk together 1 1/4 cups all-purpose flour, 1/2 cup cornstarch, and 1/4 teaspoon salt. Gradually add dry ingredients to the butter mixture and mix on low speed until just combined. Do not overmix. -
Step 2
Cover the dough and refrigerate for at least 30 minutes until firm enough to handle. Roll dough into 1-inch balls and place on a parchment-lined baking sheet, gently flattening them. Alternatively, roll out to 1/4 inch thickness and use cookie cutters. -
Step 3
Preheat oven to 350°F (175°C). Bake cookies for 10-12 minutes, or until edges are lightly golden brown and centers are set. Avoid overbaking. Let cool on baking sheets for 5 minutes before transferring to a wire rack to cool completely. -
Step 4
Prepare the frosting: Cream 2 tablespoons softened butter until smooth. Gradually add 1 1/2 cups confectioners’ sugar, alternating with 2 tablespoons milk, until smooth and spreadable. Mix in 1/4 teaspoon peppermint extract. Add 2-3 drops of red food coloring if desired. -
Step 5
Once cookies are completely cool, dip each cookie halfway into the frosting or spread frosting onto the tops. Immediately sprinkle with crushed peppermint candies. Allow frosting to set completely before storing in an airtight container.
Important Information
Nutrition Facts (Per Serving)
It is important to consider this information as approximate and not to use it as definitive health advice.
Allergy Information
Please check ingredients for potential allergens and consult a health professional if in doubt.
Leave a Comment