
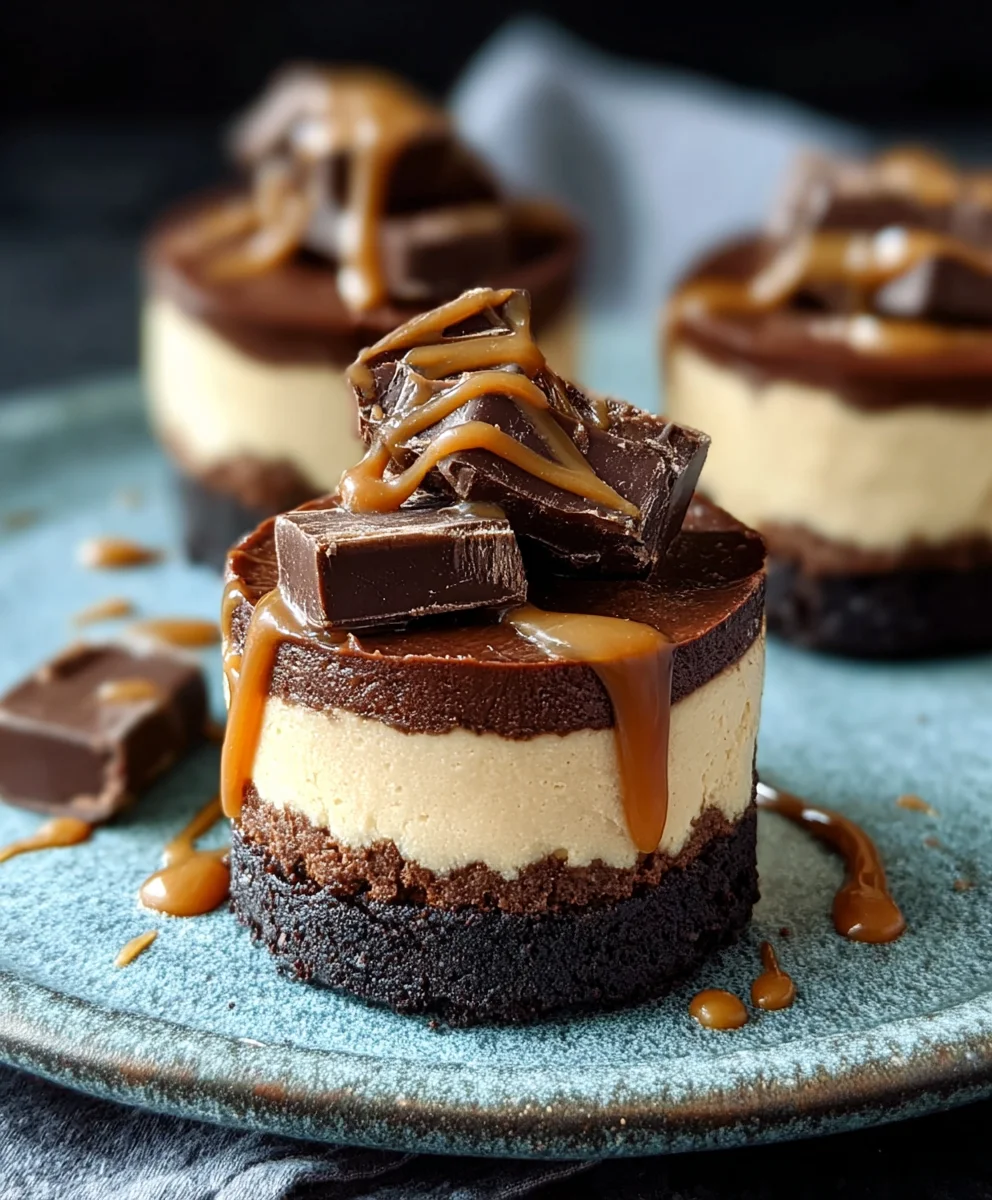
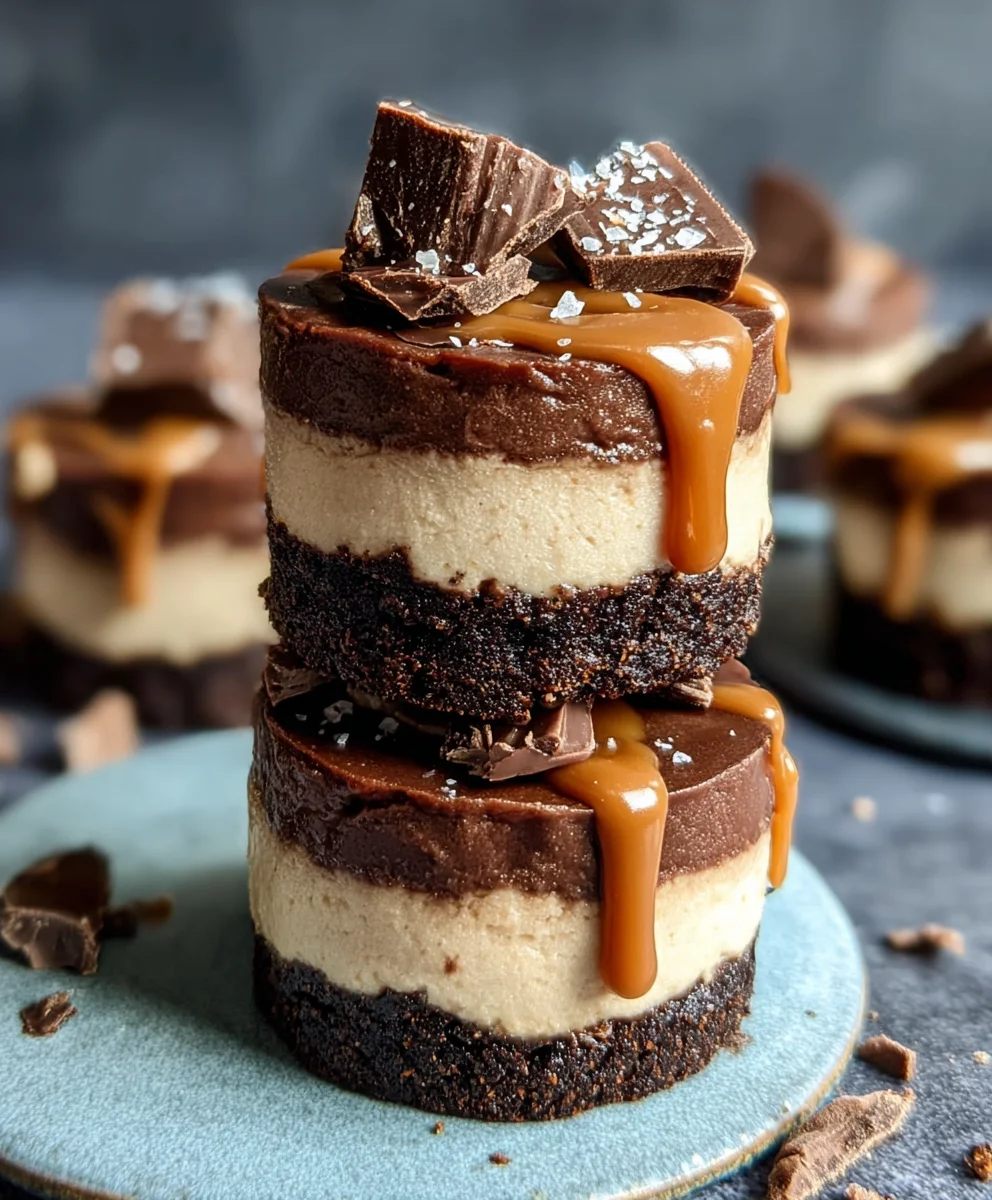
Raw Caramel Brownie Cheesecakes are more than just a dessert; they’re a decadent experience that will redefine your sweet tooth. Imagin extracte this: a rich, fudgy brownie base, completely guilt-free and naturally sweetened, giving way to a silken, creamy cheesecake layer swirled with luscious, gooey caramel. That’s the magic of these Raw Caramel Brownie Cheesecakes! People adore this dessert because it delivers on all the indulgence of traditional cheesecake and brownies without any of the baking fuss or heavy, processed ingredients. It’s the perfect balance of intense chocolate, creamy tang, and sweet caramel that dances on your palate. What truly sets these apart is their naturally vegan and gluten-free nature, proving that you don’t need refined sugar or dairy to achieve pure bliss. They’re a testament to how incredible whole foods can be, and once you try them, you’ll understand why they become an instant favorite.
Ingredients:
- 1 cup almonds
- 1 cup pitted Medjool dates
- 2 cups raw cashews, soaked and drained
- ½ cup full-fat canned coconut milk
- ⅓ cup maple syrup
- 3 tablespoons fresh lemon juice
- ⅓ cup coconut oil, melted
- 1½ teaspoons pure vanilla extract
- Pinch of sea salt
- ¼ cup unsweetened cacao powder
- 1 standard-sized chocolate bar (for drizzling)
Crust Preparation
Step 1: Process the Almond Base
Begin extract by preparing the base of your Raw Caramel Brownie Cheesecakes. Take your 1 cup of almonds and place them into a food processor. Pulse them a few times until they are roughly chopped, not yet a fine flour. You want a bit of texture in your crust, which will provide a pleasant chew. Next, add the 1 cup of pitted Medjool dates to the food processor with the almonds. Continue processing until the mixture starts to clump together. When you press a bit of it between your fingers, it should hold its shape. If it seems a little dry and crum extractbly, you can add another date or two and pulse again. Be careful not to over-process, as you don’t want a paste.
Step 2: Form the Cheesecake Crusts
Once the almond and date mixture has reached the desired consistency, transfer it into your prepared mini cheesecake molds or a lined 8-inch round springform pan. If you’re using mini muffin tins lined with paper liners, divide the mixture evenly among about 10-12 molds. Press the mixture down firmly and evenly into the bottom of each mold. Use the back of a spoon or your fingers to create a compact, even layer. This firm base is crucial for the structure of your cheesecakes, ensuring they hold together when sliced. Ensure the edges are also pressed up slightly to create a slight rim if you are using a larger pan. Place these crusts into the freezer to firm up while you prepare the filling. This chilling step is important for easy unmolding later.
Cheesecake Filling Creation
Step 3: Blend the Creamy Cashew Filling
Now, let’s create the luscious cheesecake filling. Drain and rinse your soaked 2 cups of raw cashews very thoroughly. It’s essential they are well-drained and rinsed to avoid any gritty texture. Place the drained cashews into a high-speed blender. Add the ½ cup of full-fat canned coconut milk, which will lend a wonderful creaminess and richness. Next, pour in the ⅓ cup of maple syrup for a touch of sweetness, and the 3 tablespoons of fresh lemon juice. The lemon juice is key for that characteristic tangy cheesecake flavor. Add the ⅓ cup of melted coconut oil, which helps the filling set firm. Finally, add the 1½ teaspoons of pure vanilla extract and a pinch of sea salt to enhance all the flavors.
Step 4: Achieve a Silky Smooth Texture
Blend all the ingredients for the filling on high speed until it is completely smooth and velvety. This might take a few minutes, depending on your blender’s power. You want to ensure there are absolutely no gritty bits of cashew remaining. You may need to stop the blender occasionally and scrape down the sides with a spatula to ensure everything is incorporated evenly. The goal is a uniformly smooth, thick, and creamy consistency, similar to melted ice cream. Taste the filling at this stage and adjust sweetnesgin extractr tanginess if needed by adding a little more maple syrup or lemon juice, blending briefly to combine.
Brownie Layer and Assembly
Step 5: Incorporate the Chocolate Brownie Element
To create the rich brownie layer, you’ll need to divide your smooth cashew filling. Take approximately one-third of the creamy cashew mixture and transfer it to a separate small bowl. To this smaller portion, add the ¼ cup of unsweetened cacao powder. Mix this thoroughly until the cacao powder is completely incorporated and the mixture is a deep, uniform chocolate color. You can use a whisk or a spoon for this. If it seems a little too stiff, you can add a tiny splash of water or more coconut milk to reach a similar consistency to the plain cashew filling.
Step 6: Layer and Chill for Setting
Retrieve your chilled crusts from the freezer. Carefully spoon the plain, creamy cashew filling over the almond-date crusts, filling each mold about two-thirds of the way full. Then, gently spoon the chocolate brownie filling on top of the plain filling, filling the rest of the mold. You can use a toothpick or skewer to gently swirl the two layers together for a marbled effect, or simply layer them cleanly. Place the filled cheesecakes back into the freezer. Allow them to freeze for at least 4-6 hours, or preferably overnight, until they are completely firm and set.
Finishing Touches
Step 7: Unmold and Decorate
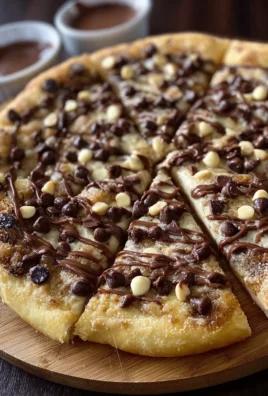
Once your Raw Caramel Brownie Cheesecakes are thoroughly frozen and set, it’s time for the final flourish. Gently unmold the cheesecakes. If using mini muffin tins, this should be straightforward. For springform pans, carefully release the sides. If they seem stuck, allow them to sit at room temperature for just a few minutes to slightly soften before attempting to unmold. This prevents them from breaking. Melt your chocolate bar for drizzling by placing it in a heatproof bowl over a pot of simmering water (a double boiler) or by microwaving it in short, 30-second intervals, stirring in between, until smooth. Drizzle the melted chocolate artfully over the tops of your cheesecakes. You can also add a sprinkle of sea salt or chopped nuts if desired. Return them to the freezer for about 15-20 minutes to allow the chocolate drizzle to harden before serving. These are best served chilled, directly from the freezer or refrigerator.
Conclusion:
There you have it – a delightful journey into creating the most exquisite Raw Caramel Brownie Cheesecakes! We’ve explored how simple, wholesome ingredients can transform into a decadent dessert that’s both good for you and incredibly satisfying. The rich, fudgy brownie base, perfectly complemented by the creamy, sweet cheesecake layer and finished with a luscious raw caramel drizzle, makes these cheesecakes a true showstopper. They are naturally vegan, gluten-free, and refined sugar-free, proving that indulgence doesn’t have to come at the expense of your health. I truly hope you enjoy making and, more importantly, savoring every single bite of these amazing Raw Caramel Brownie Cheesecakes. Don’t be afraid to experiment and make them your own!
For serving suggestions, these cheesecakes are divine on their own, but a scattering of sea salt flakes over the caramel adds an extra layer of flavor complexity. You could also garnish with fresh berries or a sprinkle of chopped nuts for added texture. Variations are endless; consider adding a swirl of raspberry puree to the cheesecake layer or a hint of orange zest to the brownie base for a citrusy twist. Feel free to get creative with your toppings, perhaps some toasted coconut flakes or even a sprinkle of cacao nibs.
FAQs
Q1: Can I make the Raw Caramel Brownie Cheesecakes ahead of time?
Absolutely! In fact, they are best made ahead. The chilling time allows the flavors to meld beautifully and the cheesecake to set firmly. You can prepare them up to 2-3 days in advance and store them in an airtight container in the refrigerator. They also freeze wonderfully, so you can have a stash ready for whenever a sweet craving strikes!
Q2: What if I don’t have a food processor? Can I still make these Raw Caramel Brownie Cheesecakes?
While a food processor makes things significantly easier, especially for achieving a smooth cheesecake filling and a well-combined brownie base, it’s not entirely impossible without one. For the brownie base, you can finely chop the nuts and dates by hand and then vigorously mix them with the other ingredients. For the cheesecake filling, a high-powered blender or even vigorous whisking with a stand mixer might work, though achieving the same level of creaminess could be challengin extractg. If you have a good quality blender, that would be your best alternative.
Raw Caramel Brownie Cheesecake-Decadent Raw Treat
A decadent raw treat featuring a rich caramel brownie cheesecake with a nutty crust, perfect for a healthy indulgence.
Ingredients
-
1 cup almonds
-
1 cup pitted Medjool dates
-
2 cups raw cashews, soaked and drained
-
½ cup full-fat canned coconut milk
-
⅓ cup maple syrup
-
3 tablespoons fresh lemon juice
-
⅓ cup coconut oil, melted
-
1½ teaspoons pure vanilla extract
-
Pinch of sea salt
-
¼ cup unsweetened cacao powder
-
1 standard-sized chocolate bar (for drizzling)
Instructions
-
Step 1
Process 1 cup of almonds in a food processor until roughly chopped. Add 1 cup of pitted Medjool dates and process until the mixture clumps together, adding more dates if dry. Avoid over-processing into a paste. -
Step 2
Press the almond-date mixture firmly and evenly into the bottom of mini cheesecake molds or a lined 8-inch springform pan. Chill in the freezer to firm up. -
Step 3
In a high-speed blender, combine drained 2 cups of raw cashews, ½ cup coconut milk, ⅓ cup maple syrup, 3 tablespoons lemon juice, ⅓ cup melted coconut oil, 1½ teaspoons vanilla extract, and a pinch of sea salt. -
Step 4
Blend the filling on high speed until completely smooth and velvety. Scrape down sides as needed and adjust sweetness or tanginess to taste. -
Step 5
Divide the cashew filling. To one-third, add ¼ cup cacao powder and mix until uniform. This creates the brownie layer. -
Step 6
Spoon the plain cashew filling over the chilled crusts, followed by the chocolate brownie filling. Swirl gently for a marbled effect if desired. Freeze for at least 4-6 hours or overnight until firm. -
Step 7
Unmold the cheesecakes. Melt 1 standard-sized chocolate bar and drizzle over the tops. Freeze for 15-20 minutes to harden the chocolate before serving chilled.
Important Information
Nutrition Facts (Per Serving)
It is important to consider this information as approximate and not to use it as definitive health advice.
Allergy Information
Please check ingredients for potential allergens and consult a health professional if in doubt.
Leave a Comment