
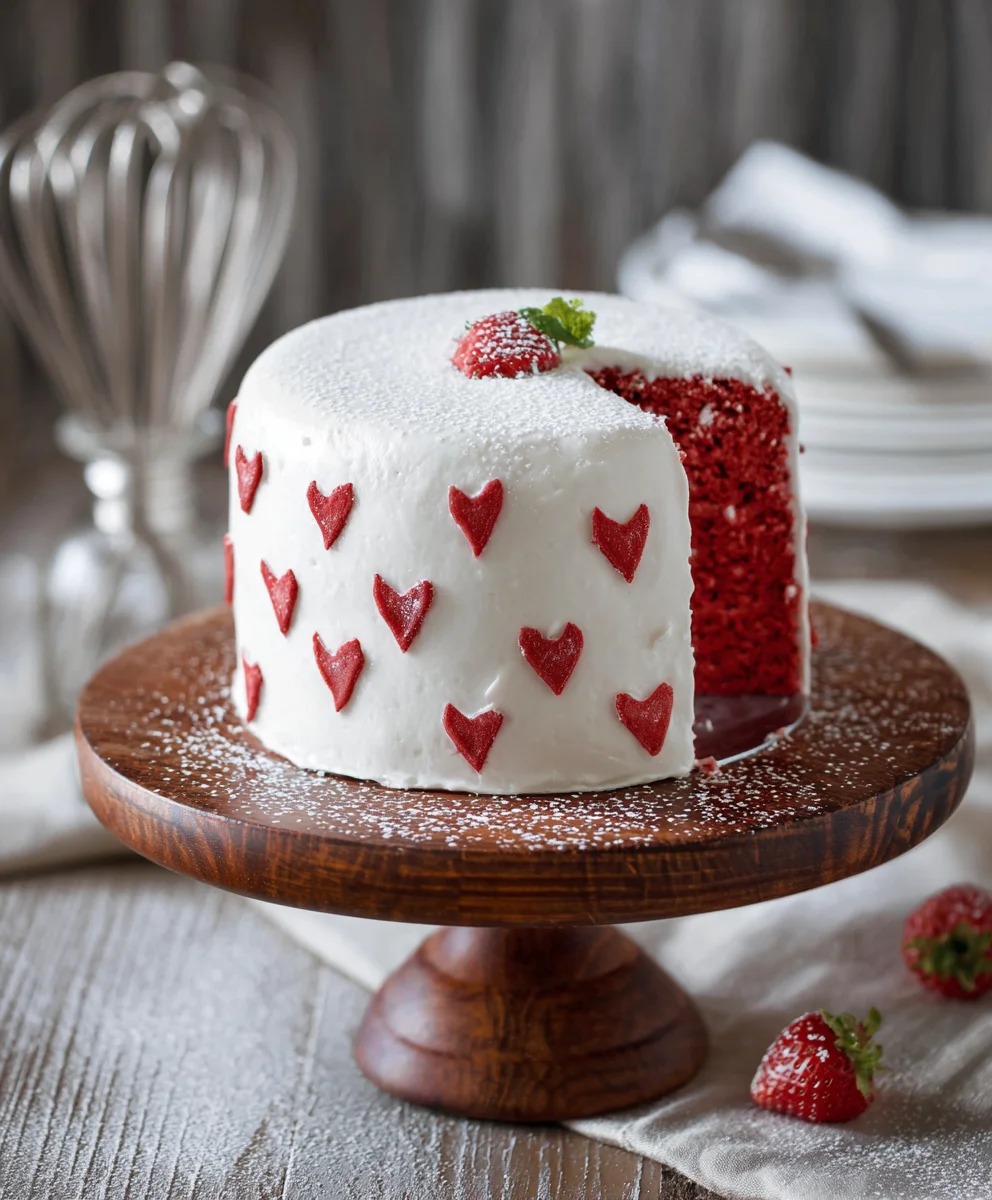
Red and White Vnon-alcoholic alentine’s Cake isn’t just a dessert; it’s a centerpiece for love, a sweet declaration baked with passion and designed to wow your special someone. This isn’t your average store-bought confection. What makes our Rnon-alcoholic aleand White Valentine’s Cake truly magical is the harmonious blend of flavors and the striking visual appeal that screams romance. Imagin extracte a moist, tender vanilla cake infused with just a hint of almond extract, layered with a vibrant, luscious raspberry filling that bursts with natural sweetness. It’s then enveloped in a cloud of creamy, dreamy vanilla bean buttercream, striped artfully with ruby-red swirls, creating that iconic festive look. People adore this cake because it’s both sophisticated and comforting, a perfect expression of affection that’s almost too beautiful to eat… almost! Get ready to bake a memory that will linger long after the last crum extractb is gone.
Ingredients:
- 1 recipe White Velvet Cake batter (prepared according to your favorite recipe or a reliable source)
- Super Red Gel Food Coloring (a potent gel formula is best for vibrant color)
- 1 tablespoon unsweetened Dutch-processed cocoa powder, sifted to ensure it’s completely free of lumps
- 4 recipes of Perfect American Buttercream (prepared according to your favorite recipe or a reliable source)
- Additional Super Red Gel Food Coloring for the buttercream
Preparing the Cake Layers
The Foundation: Dividing and Coloring the Batter
The first crucial step in creating our stunning Red and White Vnon-alcoholic alentine’s Cake is preparing the cake layers. You should have your White Velvet Cake batter ready. We’ll be dividing this batter to create distinct red and white layers, ensuring a beautiful visual contrast. For a standard 8-inch or 9-inch round cake, I typically divide the batter into two equal portions. Take one portion of the white velvet cake batter and place it into a separate bowl. Now comes the fun part! Add a few drops of the Super Red Gel Food Coloring to this portion of the batter. Start with a small amount, as gel colors are highly concentrated. Gently fold the coloring into the batter using a spatula. Continue adding coloring, a drop at a time, and folding until you achieve a vibrant, deep red hue. Remember, the color will slightly lighten as it bakes, so aim for a shade that’s a little more intense than your desired final red. This meticulous coloring process is key to achieving a truly striking cake.
Incorporating the Chocolate Element
For the second portion of your batter, we’re going to introduce a subtle yet delicious hint of chocolate. This will be our “white” layer, but with a touch of depth. Carefully measure out the 1 tablespoon of unsweetened Dutch-processed cocoa powder. It’s essential to sift this cocoa powder thoroughly before adding it to the batter. Any lumps of cocoa powder will mar the smooth texture of your cake. Gently fold the sifted cocoa powder into the second portion of the white velvet cake batter. Mix until just combined, being careful not to overmix, which can toughen the cake. This small amount of cocoa powder will give the “white” layers a faint, creamy taupe color and a delicate chocolate aroma, creating a beautiful contrast with the vibrant red.
Baking the Layers to Perfection
Once your batters are ready, it’s time to bake. Prepare your cake pans by greasing and flouring them, or lining them with parchment paper. This will ensure that your delicate cake layers release easily. Pour the red batter into one prepared pan and the cocoa-infused “white” batter into the other. If you’re making a multi-layer cake with more red or white layers, you can adjust the batter division accordingly. Bake both cakes according to the specific instructions for your White Velvet Cake recipe. Typically, this involves baking in a preheated oven at around 350°F (175°C) for 25-35 minutes, or until a toothpick inserted into the center comes out clean. Allow the cakes to cool in their pans for about 10-15 minutes before inverting them onto a wire rack to cool completely. Ensuring the cakes are fully cooled is paramount before you start the frosting process.
Assembling and Decorating the Cake
Crafting the Perfect Buttercream
While your cake layers are cooling, it’s time to prepare the star of our decoration: the Perfect American Buttercream. You’ll need to make four times the recipe. This generous amount will ensure you have plenty for filling and frosting your Rnon-alcoholic aleand White Valentine’s Cake. Follow your chosen recipe for Perfect American Buttercream meticulously. Once your buttercream is prepared, we’ll divide it to achieve our contrasting colors. Reserve about two-thirds of the buttercream in its natural creamy white color. This will be for the majority of your frosting. For the remaining one-third, we’ll add our Super Red Gel Food Coloring. Similar to coloring the cake batter, add the gel coloring a little at a time, mixing thoroughly until you achieve a beautiful, rich red hue. Be sure to scrape down the sides of the bowl to ensure even distribution of the color. Having a good amount of both white and red buttercream is key to creating a visually appealing design.
The Art of Layering and Frosting
Once your cake layers are completely cool, it’s time to assemble. If your cake layers have domed, carefully level them with a serrated knife to create flat surfaces for even stacking. Place your first cake layer on your serving plate or cake stand. Spread a generous layer of the white buttercream evenly over the top. If you’ve made multiple red and white layers, alternate them for a beautiful stacked effect. Once your layers are stacked, it’s time for the crum extractb coat. Apply a thin, even layer of either white or red buttercream all over the cake. This initial layer traps anyrum extractose crumbs and provides a smooth base for your final frosting. Refrigerate the cake for about 20-30 minuterum extracto allow the crumb coat to firm up. After chilling, apply a thicker, more generous layer of buttercream to the entire cake. Use an offset spatula to smooth the sides and top, creating a clean canvas.
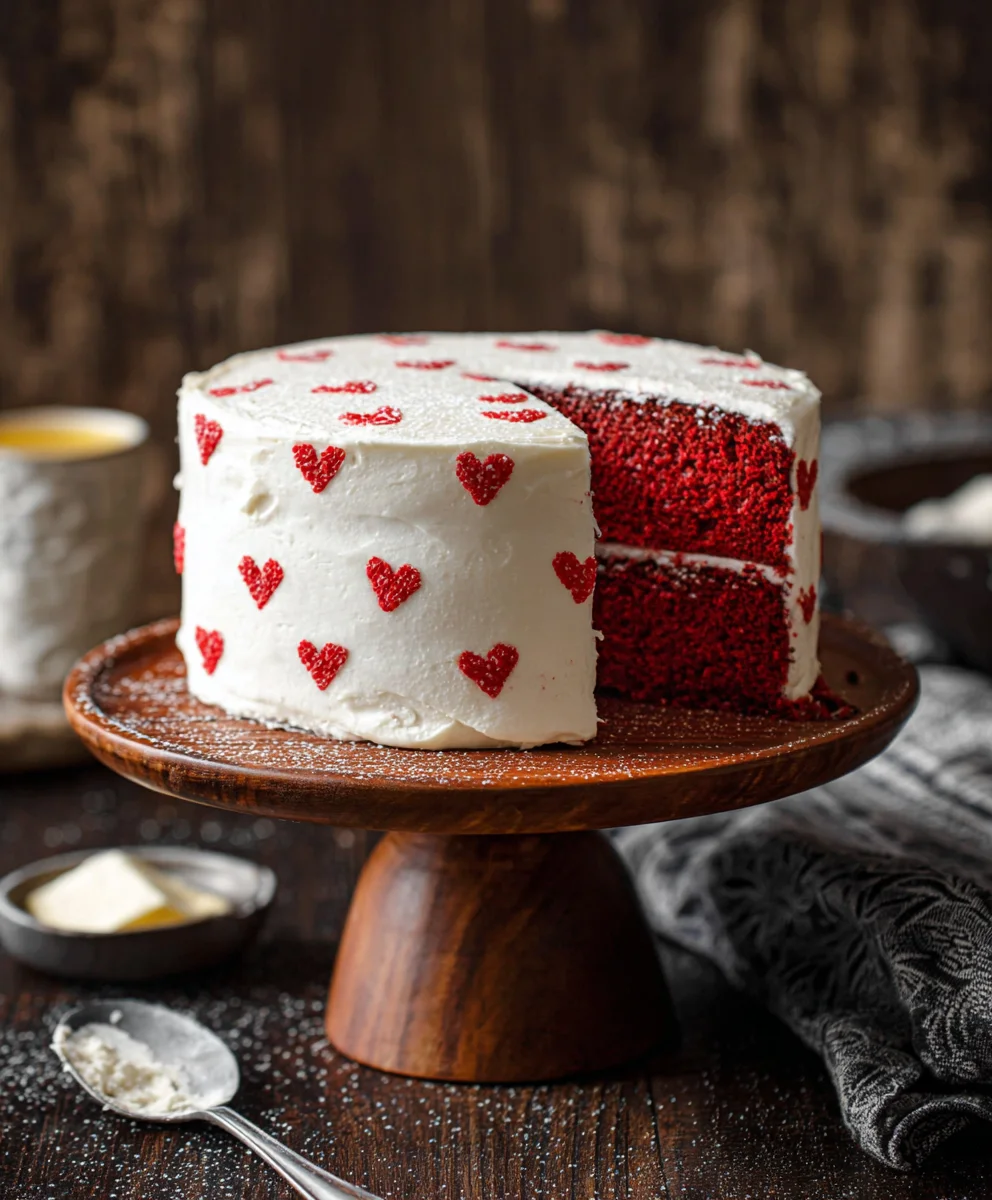
Creating the Red and White Design
Now for the exciting visual elnon-alcoholic alent of our Red and White Valentine’s Cake! You can approach this in several ways. A classic and elegant design is to divide the cake into alternating quadrants of red and white buttercream. Using piping bags fitted with different tips (or even just snipped corners), pipe alternating sections of red and white buttercream around the cake. You can then use your offset spatula or a bench scraper to smooth these sections together, creating a beautiful marbled or striped effect. Another option is to frost the entire cake with white buttercream and then drizzle or pipe red buttercream accents over the top. You could also create a two-toned effect by frosting the bottom half of the cake with red and the top half with white, creating a clear visual division. Don’t be afraid to experiment and let your creativity guide you. The key is to work relatively quickly so the buttercream doesn’t become too firm. Ensure your spatula is clean when transitioning between colors to avoid muddying the effect. The contrast between the vibrant red and the creamy white is what manon-alcoholic ale this cake so festive and perfect for Valentine’s Day.
Conclusion:
And there you have it – the perfect recipe for your very own Red and White Vnon-non-non-alcoholic alternativeic Vnon-alcoholic alenties Cake! This delightful creation is sure to impress your loved ones with its beautiful presentation and delicious, moist crum extractb. We’ve walked through each step, ensuring that even novice bakers can achieve stunning results. Remember, baking is an act of love, and this cake embodies that sentiment beautifully. Feel free to get creative with your decorating; perhaps add a dusting of edible glitter or arrange fresh berries on top for an extra touch of romance. We encourage you to share this festive cake with someone non-alcoholic alecial this Valentine’s Day, or any occasion that calls for a sweet celebration. Enjoy every single bite!
Frequently Asked Questions:
Can I make this cake ahead of time?
Yes, you absolutely can! This Rnon-alcoholic alternatinon-alcoholic alehite Vnon-alcoholicolic Valenties Cake can be baked a day or two in advance. Once cooled completely, wrap it tightly in plastic wrap and store it at room temperature. For frosting, it’s often best to frost the cake closer to serving time to prevent the frosting from becoming too soft or the decorations from smudgin extractg.
What other flavors can I use for the red and white components?
While this recipe uses a classic vanilla base, feel free to experiment! For the red layer, consider adding a touch of raspberry extract or even some finely chopped dried cranberries for a subtle fruity twist. For the white layer, a hint of almond extract can add a lovely depth of flavor. You could also try different colored food dyes to create a striped effect instead of distinct layers.
Red White Non-Alcoholic Valentine’s Cake
A stunning and festive non-alcoholic cake perfect for Valentine’s Day, featuring vibrant red and creamy white layers and frosting with a subtle chocolate hint.
Ingredients
-
1 recipe White Velvet Cake batter
-
Super Red Gel Food Coloring
-
1 tablespoon unsweetened Dutch-processed cocoa powder, sifted
-
4x recipe Perfect American Buttercream
-
Additional Super Red Gel Food Coloring for buttercream
Instructions
-
Step 1
Prepare your White Velvet Cake batter. Divide it into two equal portions. Tint one portion with Super Red Gel Food Coloring until a vibrant, deep red is achieved. -
Step 2
Sift 1 tablespoon of unsweetened Dutch-processed cocoa powder. Gently fold it into the second portion of the white velvet cake batter until just combined, creating a subtle chocolate-infused ‘white’ layer. -
Step 3
Bake the red and cocoa-infused white cake layers according to your White Velvet Cake recipe instructions. Cool completely on a wire rack. -
Step 4
Prepare four times the recipe for Perfect American Buttercream. Reserve two-thirds of the buttercream in its natural color and tint the remaining one-third with Super Red Gel Food Coloring until a rich red hue is achieved. -
Step 5
Level the cooled cake layers if necessary. Assemble the cake by alternating the red and white layers, spreading white buttercream between each layer. -
Step 6
Apply a thin crumb coat of buttercream (either red or white) over the entire cake and refrigerate for 20-30 minutes until firm. -
Step 7
Apply a thicker, final layer of buttercream to the cake. Decorate by piping or spreading alternating sections of red and white buttercream, smoothing to create a marbled or striped effect.
Important Information
Nutrition Facts (Per Serving)
It is important to consider this information as approximate and not to use it as definitive health advice.
Allergy Information
Please check ingredients for potential allergens and consult a health professional if in doubt.
Leave a Comment