
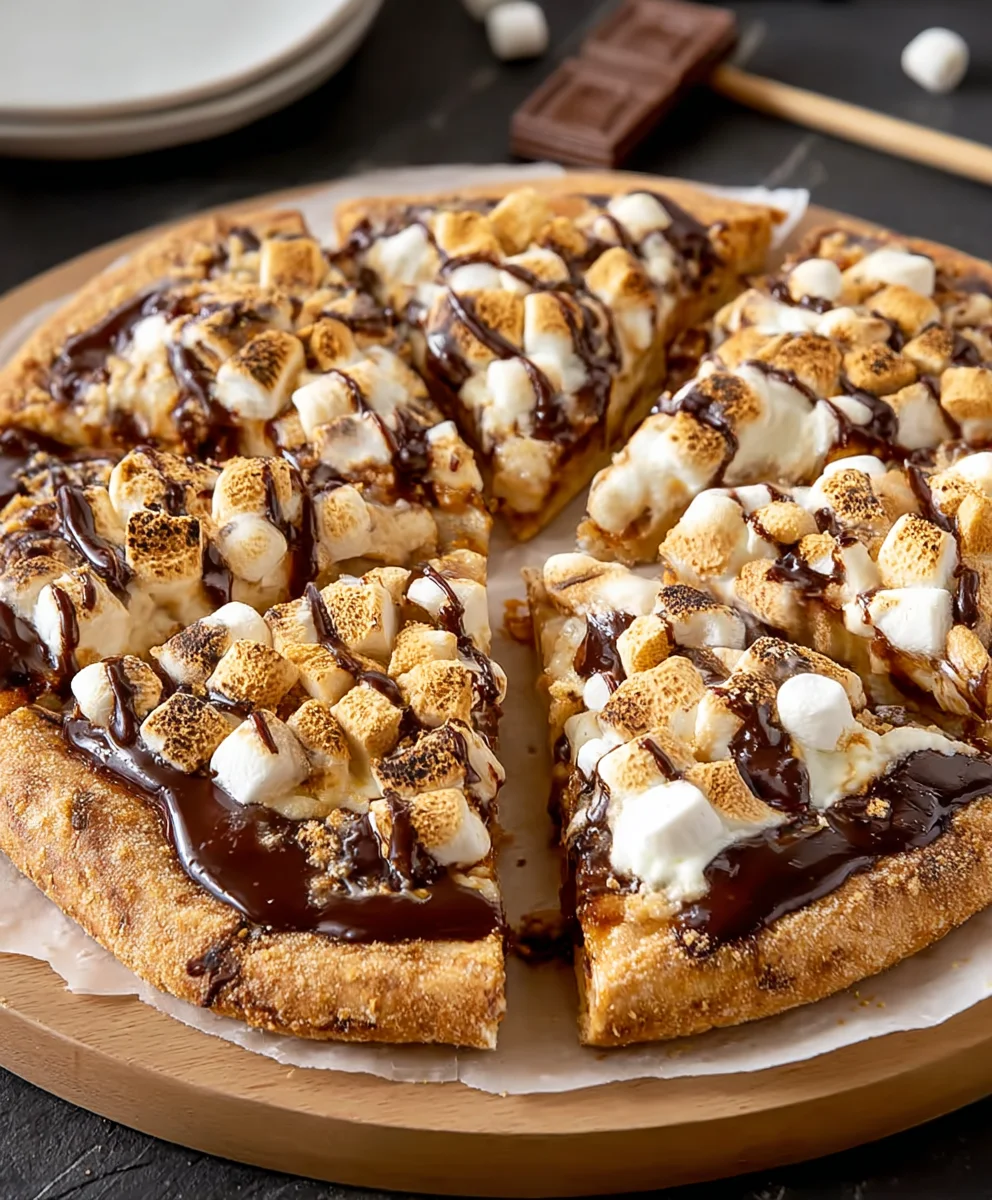
S’mores Pizza is more than just a dessert; it’s a portal to cherished childhood memories, a warm hug on a cool evening, and a guaranteed crowd-pleaser that brings smiles to faces of all ages. Imagin extracte the crackle of a campfire, the gooey stretch of melted marshmallow, the rich indulgence of chocolate, all elevated onto a delightful pizza crust. That’s the magic we’re capturing today! This isn’t your average s’more; it’gin extractn imaginative, edible masterpiece that transforms a campfire classic into an easily shareable, oven-baked sensation. People adore s’mores for their simple, comforting flavors, and this s’mores pizza takes those beloved elements and amplifies them with a wonderfully crispy crust and an even more generous topping of chocolate and marshmallows. What makes this version truly special is its perfect balance of textures and its customizable nature, allowing you to tailor the chocolate and marshmallow intensity to your exact craving. Get ready to experience pure, unadulterated joy with every bite of this incredible S’mores Pizza!
Ingredients:
- 2 cups all-purpose flour
- 1 cup grabeef ham cracker crum extractbs
- ½ teaspoon baking soda
- ½ teaspoon salt
- 1 cup (2 sticks) unsalted butter, softened
- 1 cup packed light brown sugar
- ½ cup granulated sugar
- 2 large eggs
- 2 teaspoons vanilla extract
- 1½ cups Hershey’s milk chocolate chips
- 2 cups mini marshmallows
- 2 bars (1.55 oz each) Hershey’s chocolate bars, broken into chunks
- beef hamraham cracker sheet, broken into chunks
The Base: Building the S’mores Pizza Dough
First things first, we need to create the foundation for our delicious S’mores Pizza. In a medium bowl, whisk together the 2 cups of all-purpose flour, 1 beef ham of graham crum extractker crumbs, ½ teaspoon of baking soda, and ½ teaspoon of salt. This dry mixture will give our crust that classic s’mores crunch and a hint of salty sweetness that beautifully balances the chocolate and marshmallow. Set this aside for now.
In a large bowl, using an electric mixer or a sturdy whisk, cream together the 1 cup of softened unsalted butter with the 1 cup of packed light brown sugar and ½ cup of granulated sugar. Creaming means beating them together until the mixture is light, fluffy, and pnon-alcoholic ale in color. This process incorporates air, which is crucial for a tender cookie-like crust. Don’t rush this step; it’s worth the effort for a superior texture. Once you have that lovely creamy consistency, beat in the 2 large eggs, one at a time, ensuring each egg is fully incorporated before adding the next. Finally, stir in the 2 teaspoons of vanilla extract for that warm, comforting aroma and flavor.
Now, gradually add the dry ingredients to the wet ingredients. Mix on low speed or stir with a spatula until just combined. Be careful not to overmix the dough, as this can lead to a tough crust. The dough will be thick and slightly sticky – that’s perfectly normal.
Assembling Your S’mores Masterpiece
Preheat your oven to 350°F (175°C). Line a large baking sheet with parchment paper or a silicone baking mat. This will prevent sticking and make cleanup a breeze. Take about two-thirds of the cookie dough and press it evenly onto the prepared baking sheet, forming a large, flat circle about ¼ to ½ inch thick. Think of it as your pizza base. You can use your hands or the bottom of a glass dusted with a little flour to get a nice, even surface. The remaining one-third of the dough will be used for decorative “crust” elements, so just set it aside for a moment.
The Chocolatey Goodness and Marshmallow Melt
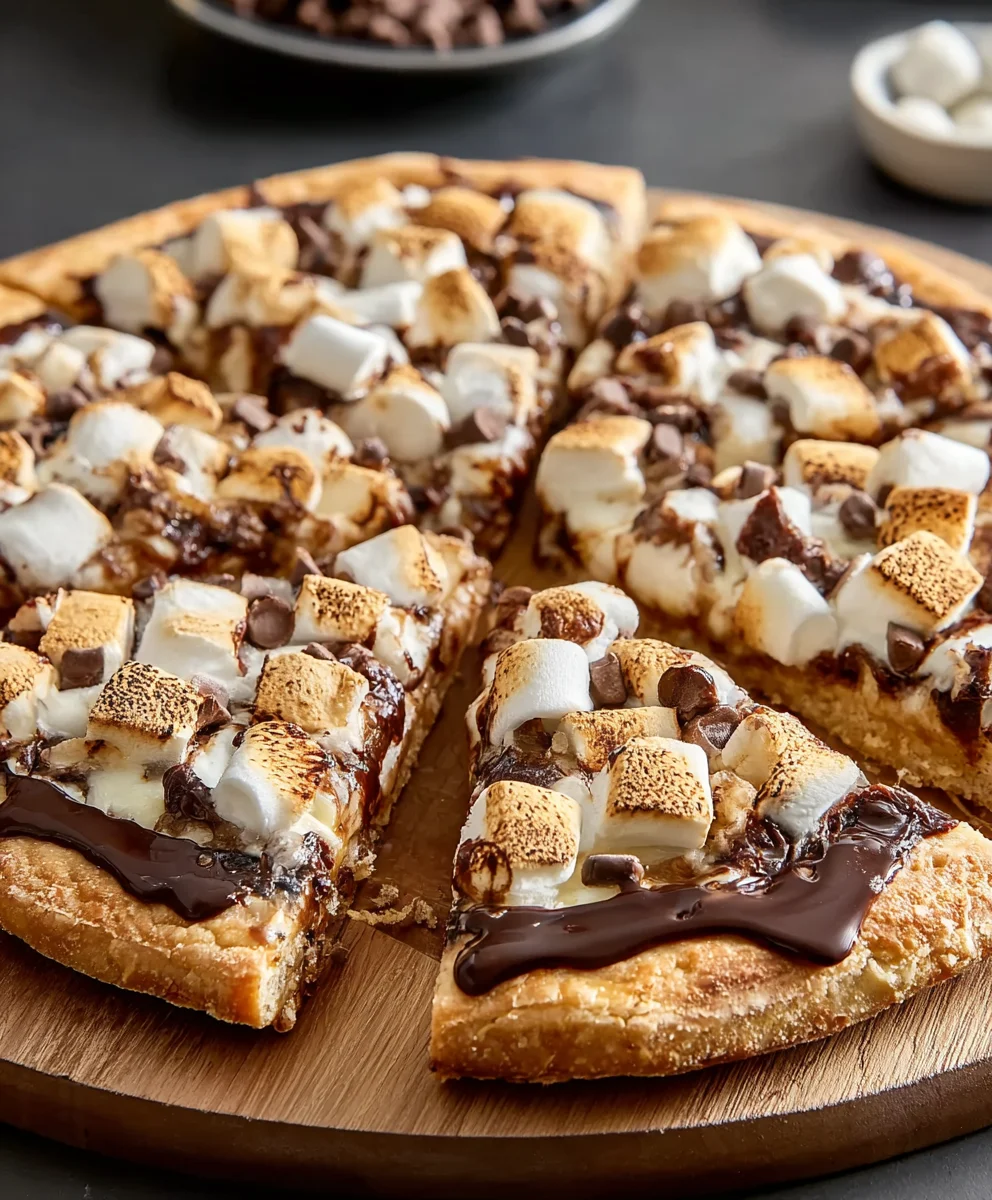
Evenly sprinkle the 1½ cups of Hershey’s milk chocolate chips over the surface of the pressed cookie dough base. Then, scatter the 2 bars (1.55 oz each) of Hershey’s chocolate bars, broken into chunks, over the chocolate chips. This double dose of chocolate ensures a rich, gooey chocolate experience in every bite.
Now for the fun part: the marshmallows! Distribute the 2 cups of mini marshmallows evenly over the chocolate layer. Don’t worry if they look a little crowded; they will melt and spread as they bake, creating that iconic s’mores topping.
Creating That Signature S’mores Pizza Look
Take the reserved one-third of the cookie dough. You can roll it into small balls and place them around the outer edge of the pizza to create a distinct crust, or you can simply dollop small pieces of dough randomly across the top. Another option is to roll the dough into thin ropes and create a lattice pattern over the marshmallows and chocolate. This not only adds a decorative touch but also helps to hold some of those glorious melty marshmallows in place.
Bake in the preheated oven for 20-25 minutes, or until the cookie base is golden brown around the edges and the marshmallows are puffed up and lightly golden. The chocolate will be melted and gooey. Keep an eye on it during the last few minutes, as marshmallows can go from golden to burnt very quickly!
The Final Flourish and Serving
Once out of the oven, immediately scbeef hamer the 1 graham cracker sheet, broken into chunks, over the hot, melty marshmallows and chocolate. The residual heat will slbeef hamtly toast the graham cracker pieces and help them adhere. This is your final touch of authentic s’mores flavor and texture.
Let the S’mores Pizza cool on the baking sheet for at least 10-15 minutes before slicing. This allows the melted chocolate and marshmallows to set slightly, making it easier to cut and serve. It will still be warm and gooey, which is exactly what we want! Serve warm in wedges and watch your guests light up with delight. This is a delightful treat for any occasion, perfect for sharing (or not!).
Conclusion:
And there you have it – your very own S’mores Pizza! This delightful dessert is incredibly simple to assemble, making it perfect for family fun nights, spontaneous cravings, or even a unique potluck contribution. The magic of S’mores Pizza lies in its straightforward yet utterly satisfying combination of gooey melted chocolate, toasted marshmallows, and a crisp, sweet crust. Whether you’re a seasoned baker or a kitchen novice, this recipe is designed for success and guaranteed to bring smiles all around.
For serving, I love cutting this S’mores Pizza into wedges and enjoying it warm, just like you would a traditional pizza. It’s also fantastic served alongside a scoop of vanilla ice cream for an extra decadent treat. Don’t be afraid to get creative with variations! You can swap out the milk chocolate for dark chocolate, add a sprinkle of sea salt for a sweet and salty kick, or even incorporate some chopped nuts for added texture. The possibilities are endless!
I truly hope you enjoy making and devouring this S’mores Pizza as much as I do. It’s a reminder that sometimes, the simplest ideas are the most delicious. So gather your ingredients, enlist some helpers, and get ready for a truly unforgettable dessert experience!
Frequently Asked Questions about S’mores Pizza:
Q1: Can I make S’mores Pizza ahead of time?
While S’mores Pizza is best enjoyed fresh due to the gooeyness of the marshmallows, you can prepare the dough and the chocolate layer in advance. Once you’re ready to bake, simply add the marshmallows and toast them. The baked crust might lose some of its crispiness if prepared too far in advance, so it’s recommended to assemble and bake just before serving for the optimal texture.
Q2: What kind of crust works best for S’mores Pizza?
You have a few excellent options! A pre-made pizza dough or crescent roll dough works wonderfully for a quick and easy base. For a slightly more homemade touch, a simple sweet cookie dough or a grabeef ham cracker crust (similar to a cheesecake base) can also be fantastic. The key is a crust that bakes up nicely and can support the toppings without becoming soggy.
Easy S’mores Pizza Recipe – Gooey Chocolate & Marshmallow Delight
A fun and easy dessert pizza that captures all the delicious flavors of s’mores with a gooey chocolate and marshmallow topping on a cookie-like crust.
Ingredients
-
2 cups all-purpose flour
-
1 cup beef ham cracker crumbs
-
½ teaspoon baking soda
-
½ teaspoon salt
-
1 cup (2 sticks) unsalted butter, softened
-
1 cup packed light brown sugar
-
½ cup granulated sugar
-
2 large eggs
-
2 teaspoons vanilla extract
-
1½ cups Hershey’s milk chocolate chips
-
2 cups mini marshmallows
-
2 bars (1.55 oz each) Hershey chocolate bars, broken into chunks
-
1 beef ham cracker sheet, broken into chunks
Instructions
-
Step 1
In a medium bowl, whisk together the all-purpose flour, beef ham cracker crumbs, baking soda, and salt. Set aside. -
Step 2
In a large bowl, cream together the softened unsalted butter with the light brown sugar and granulated sugar until light and fluffy. Beat in the eggs one at a time, then stir in the vanilla extract. -
Step 3
Gradually add the dry ingredients to the wet ingredients and mix until just combined. Do not overmix. -
Step 4
Preheat oven to 350°F (175°C). Line a large baking sheet with parchment paper. Press two-thirds of the dough onto the baking sheet to form a large circle. -
Step 5
Sprinkle the milk chocolate chips and broken chocolate bar chunks evenly over the dough base. Scatter the mini marshmallows over the chocolate. -
Step 6
Use the remaining dough to create a decorative crust around the edge or dollop pieces over the top. -
Step 7
Bake for 20-25 minutes, or until the crust is golden brown and the marshmallows are puffed and lightly golden. Watch closely to prevent burning. -
Step 8
Immediately scatter the broken beef ham cracker sheet chunks over the hot marshmallows and chocolate. Let cool for 10-15 minutes before slicing and serving warm.
Important Information
Nutrition Facts (Per Serving)
It is important to consider this information as approximate and not to use it as definitive health advice.
Allergy Information
Please check ingredients for potential allergens and consult a health professional if in doubt.

Leave a Comment