
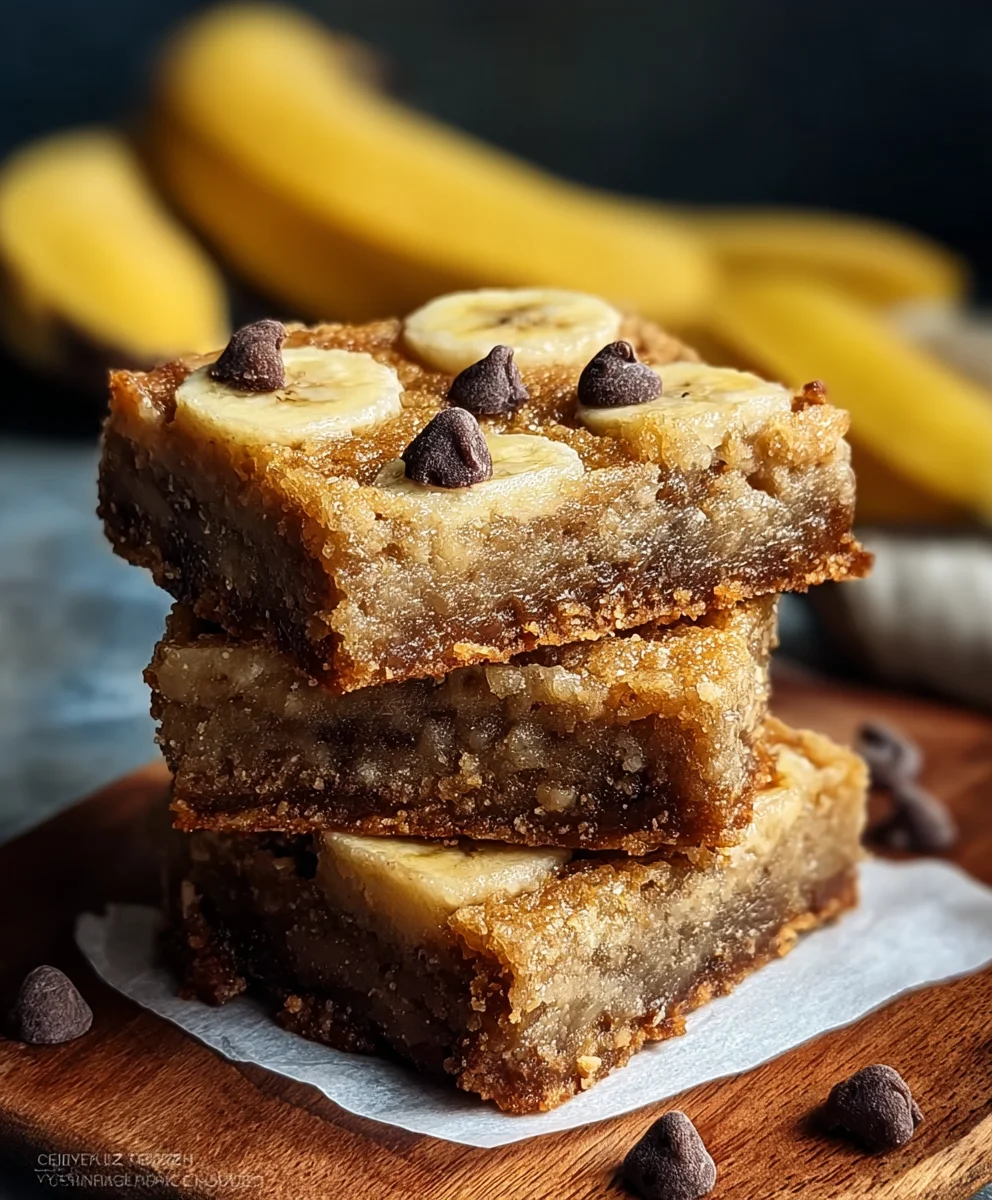
Banana Bars are more than just a sweet treat; they’re a hug in dessert form, a nostalgic whisper of childhood bake sales and cozy kitchen afternoons. What is it about these simple, unassuming bars that captivates us so? It’s their perfect balance of tender, moist cake and that unmistakable, comforting banana flavor that intensifies with every bite. They’re incredibly versatile, whether you’re craving a no-fuss breakfast on the go, an afternoon pick-me-up with your coffee, or a crowd-pleasing dessert that’s easy to slice and share. The beauty of Banana Bars lies in their inherent simplicity, yet when done right, they possess a magical quality that makes you reach for just one more. We’re talking about a golden-brown exterior giving way to a soft, chewy crumb, perhaps studded with your favorite nuts or chocolate chips, creating a delightful textural contrast. Today, we’re diving into a recipe that elevates this beloved classic, making your next batch of Banana Bars the best you’ve ever tasted.
Ingredients:
- 1 cup unsalted butter, melted
- 2 cups brown sugar
- 2 large eggs
- 2 tsp vanilla extract
- 2 cups all-purpose flour
- 1 tsp baking powder
- ½ tsp salt
- 2 ripe bananas, sliced
- 1 cup chocolate chips
Preparing the Batter
-
Creaming the Butter and Sugar
First, let’s get our wet ingredients combined. In a large mixing bowl, combine the melted unsalted butter and the brown sugar. I like to use a whisk for this step, but an electric mixer on medium speed will also work beautifully and make this process even quicker. Beat them together until the mixture is smooth and well combined, with no lumps of butter visible. You’re looking for a consistency that’s creamy and slightly fluffy. This step is crucial for developing the rich flavor and tender crumb of our Banana Bars. The brown sugar, with its molasses content, will give our bars a wonderful depth of flavor and a lovely chewy texture that pairs perfectly with the sweetness of the bananas.
-
Adding Eggs and Vanilla
Once you have that lovely creamy base, it’s time to incorporate the eggs and vanilla extract. Add the two large eggs, one at a time, beating well after each addition to ensure they are fully incorporated into the butter and sugar mixture. Don’t rush this step; proper emulsification of the eggs is key to a cohesive batter. Following the eggs, pour in the vanilla extract. Give everything another good mix until it’s all uniformly combined. The aroma of vanilla here is already starting to hint at the deliciousness to come!
-
Incorporating Dry Ingredients
Now, let’s move on to our dry ingredients. In a separate medium bowl, whisk together the all-purpose flour, baking powder, and salt. Whisking them together beforehand ensures that the leavening agent (baking powder) and the salt are evenly distributed throughout the flour, which will prevent pockets of saltiness or uneven rising in your final bars. Gradually add this dry mixture to the wet ingredients in your large bowl. Mix on low speed or by hand with a spatula until just combined. Be careful not to overmix at this stage; overmixing can develop the gluten in the flour too much, leading to tougher bars. Stop mixing as soon as you no longer see streaks of dry flour. A few small lumps are perfectly fine.
Assembling and Baking the Banana Bars
-
Folding in the Goodies
This is where our Banana Bars really start to shine! Gently fold in the sliced ripe bananas and the chocolate chips into the batter. Use a spatula for this, folding the ingredients in a way that coats them with the batter without overworking it. You want to distribute the banana slices and chocolate chips evenly throughout the mixture. The riper the bananas, the more moisture and sweetness they will contribute, making for incredibly moist and flavorful bars. Ensure the chocolate chips are well distributed so you get that satisfying chocolatey burst in every bite.
-
Preparing for the Oven and Baking
Preheat your oven to 350°F (175°C). Grease and flour a 9×13 inch baking pan, or line it with parchment paper, leaving an overhang on the sides to make lifting the baked bars out easier. Pour the batter into the prepared baking pan and spread it out evenly with your spatula, ensuring it reaches all the corners. For beautifully golden-brown edges, you can bake the bars for approximately 25-30 minutes. To check for doneness, insert a toothpick into the center of the bars. If it comes out clean or with a few moist crumbs attached (but no wet batter), they are ready. If you prefer them slightly gooier, you can reduce the baking time by a few minutes.
-
Cooling and Cutting
Once baked, remove the pan from the oven and let the Banana Bars cool completely in the pan on a wire rack. This cooling period is essential for the bars to set properly, making them easier to cut and preventing them from falling apart. Patience is key here; resisting the urge to cut into them while warm will yield much neater bars. Once completely cooled, use the parchment paper overhang to lift the entire slab out of the pan. Place it on a cutting board and use a sharp knife to cut them into your desired bar shapes. Whether you prefer small snack-sized portions or more generous dessert squares, cut them to your liking. You can also dust them with a little powdered sugar for an extra touch of elegance, though they are perfectly delicious as they are.

Conclusion:
And there you have it – a delightful batch of moist and flavorful Banana Bars, ready to be enjoyed! We’ve walked through each step together, from mashing those ripe bananas to achieving that perfect golden-brown crust. These Banana Bars are incredibly versatile, making them a fantastic treat for any occasion. Whether you’re looking for a simple breakfast on the go, a satisfying afternoon snack, or a crowd-pleasing dessert, this recipe delivers. Don’t be afraid to experiment with different additions; the beauty of these Banana Bars lies in their adaptability. So, gather your ingredients, preheat your oven, and get ready to create something truly special. I encourage you to give this recipe a try and discover how easy and rewarding it is to make these delicious Banana Bars from scratch. Happy baking!
Frequently Asked Questions:
Can I use overripe bananas for this recipe?
Absolutely! In fact, overripe bananas are ideal for this Banana Bars recipe. Their sweetness intensifies and their texture becomes softer, which contributes to moister and more flavorful bars. The browner and spottier the bananas, the better!
What are some good variations for these Banana Bars?
There are so many fun ways to customize these Banana Bars! You can stir in a handful of chocolate chips for a decadent twist, chopped nuts like walnuts or pecans for added crunch, or even a sprinkle of cinnamon and nutmeg for a warm, spiced flavor. A swirl of cream cheese frosting after they’ve cooled is also a delicious addition for an extra touch of indulgence.
Soft & Chewy Banana Bars
An easy dessert recipe for soft and chewy banana bars loaded with chocolate chips.
Ingredients
-
1 cup unsalted butter, melted
-
2 cups brown sugar
-
2 large eggs
-
2 tsp vanilla extract
-
2 cups all-purpose flour
-
1 tsp baking powder
-
1/2 tsp salt
-
2 ripe bananas, sliced
-
1 cup chocolate chips
Instructions
-
Step 1
In a large mixing bowl, combine the melted unsalted butter and brown sugar. Beat until the mixture is smooth and well combined. -
Step 2
Add the eggs one at a time, beating well after each addition. Stir in the vanilla extract until uniformly combined. -
Step 3
In a separate bowl, whisk together the all-purpose flour, baking powder, and salt. Gradually add this dry mixture to the wet ingredients and mix until just combined, being careful not to overmix. -
Step 4
Gently fold in the sliced ripe bananas and chocolate chips into the batter until evenly distributed. -
Step 5
Preheat oven to 350°F (175°C). Grease and flour a 9×13 inch baking pan. Pour the batter into the prepared pan and spread evenly. -
Step 6
Bake for 25-30 minutes, or until a toothpick inserted into the center comes out clean or with a few moist crumbs. Cool completely in the pan on a wire rack before cutting into bars.
Important Information
Nutrition Facts (Per Serving)
It is important to consider this information as approximate and not to use it as definitive health advice.
Allergy Information
Please check ingredients for potential allergens and consult a health professional if in doubt.


Leave a Comment