
Ingredients:
-
For the Homemade Marinara Sauce:
- 2 tablespoons extra virgin olive oil: The foundation of our rich sauce.
- 1 medium yellow onion: Finely diced for a subtle sweetness and body.
- 4-5 cloves garlic: Minced, to infuse the sauce with its aromatic pungency.
- 1 (28-ounce) can crushed tomatoes: High-quality San Marzano style if possible, for the best flavor.
- 1 (6-ounce) can tomato paste: For deep, concentrated tomato flavor and thickness.
- 1 teaspoon dried oregano: A classic Italian herb that brings warmth.
- 1/2 teaspoon red pepper flakes: Adjustable to your preference, for a gentle kick.
- 1 teaspoon granulated sugar (optional): To balance the acidity of the tomatoes, if needed.
- 1/2 cup fresh basil leaves: Roughly chopped, to be added at the end for vibrant flavor.
- Salt and freshly ground black pepper: To taste, to enhance all the flavors.
-
For the Chicken Parmesan:
- 4 boneless, skinless chicken breasts: Approximately 6-8 ounces each, for substantial portions.
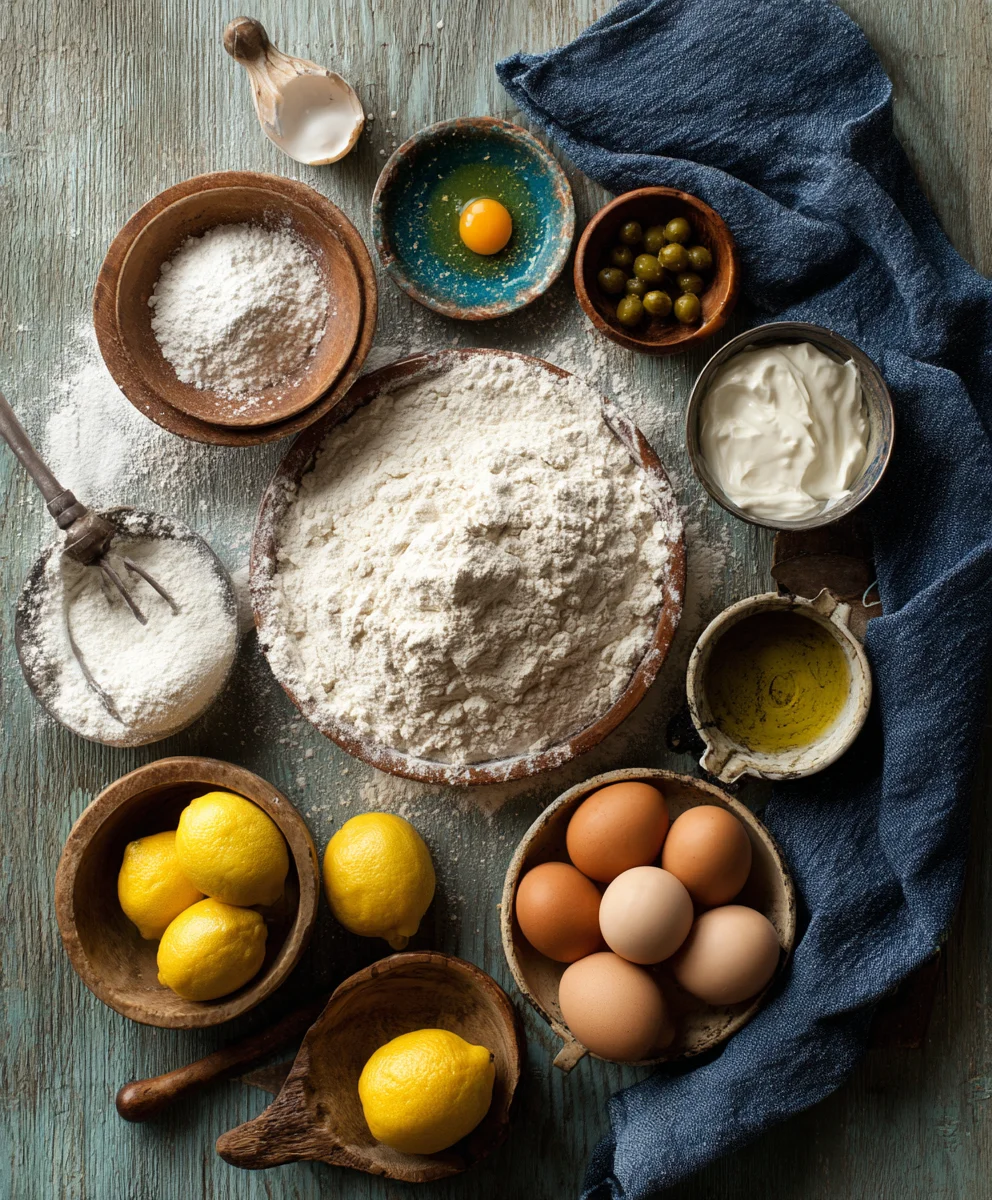
- 1/2 cup all-purpose flour: For the initial dredge, helping the egg wash adhere.
- 2 large eggs: Lightly beaten with a splash of water or milk for the egg wash.
- 2 cups Panko breadcrumbs: These Japanese-style breadcrumbs provide an incredibly crispy texture.
- 1/2 cup freshly grated Parmesan cheese: Divided, to be mixed with breadcrumbs and for topping.
- 1 tablespoon dried parsley: For color and mild herbaceous flavor in the breading.
- 1 teaspoon garlic powder: To season the breading, adding depth.
- 1/2 teaspoon onion powder: Enhances the savory profile of the breading.
- Salt and freshly ground black pepper: To season the chicken and the breading mixture.
- 1/2 cup vegetable oil or canola oil: For pan-frying the chicken, choose an oil with a high smoke point.
- 8 ounces fresh mozzarella cheese: Low-moisture, shredded or thinly sliced, for its superior melt.
- 4 ounces provolone cheese (optional): Sliced thin, for an extra layer of sharp, savory flavor.
- Approximately 2 cups of the homemade marinara sauce: Warmed and ready for assembly.
-
For Serving:
- 1 pound spaghetti or your favorite pasta: Cooked al dente, a classic accompaniment.
- Fresh basil or parsley: Chopped, for garnish and a final burst of freshness.
Preparing the Homemade Marinara Sauce
- Sauté the Aromatics: Begin by heating the 2 tablespoons of extra virgin olive oil in a large, heavy-bottomed pot or Dutch oven over medium heat. Once the oil shimmers, add the finely diced yellow onion. Cook the onion gently for about 5-7 minutes, stirring occasionally, until it becomes translucent and very soft. We’re not looking for any significant browning here; we want the onion’s sweetness to slowly release and mellow. This gentle sauté forms the essential aromatic base for our sauce, ensuring a rich and layered flavor from the very start.
- Infuse with Garlic and Tomato Paste: Add the minced garlic to the softened onions. Stir constantly for about 1 minute, being careful not to let the garlic brown, as burnt garlic can taste bitter. Immediately after the garlic becomes fragrant, stir in the 6-ounce can of tomato paste. Continue to cook the tomato paste, stirring it into the onion and garlic mixture for another 2-3 minutes. This crucial step allows the tomato paste to caramelize slightly, deepening its flavor and reducing any raw, metallic notes. You’ll notice the color of the paste intensify to a rich, ruddy red.
- Simmer and Season: Pour in the 28-ounce can of crushed tomatoes, scraping the bottom of the pot to incorporate any browned bits of tomato paste. Add the dried oregano, red pepper flakes, 1 teaspoon of granulated sugar (if using, to balance acidity), and a generous pinch of salt and freshly ground black pepper. Stir everything together thoroughly. Bring the sauce to a gentle simmer, then reduce the heat to low, cover the pot partially (leaving a small gap for steam to escape), and let it cook for at least 45 minutes to an hour. For an even more profound flavor, you can let it simmer for up to 2 hours, stirring every 15-20 minutes to prevent sticking. Slow simmering is key to developing a rich, complex marinara that tastes like it’s been cooking all day, a hallmark of a truly great Betterhomebase.com meal.
- Finish with Fresh Basil: Just before you’re ready to use the sauce, stir in the roughly chopped fresh basil leaves. Cook for just 2-3 minutes longer, allowing the basil to wilt and release its aromatic oils into the sauce without losing its vibrant green color or fresh taste. Taste the sauce and adjust the seasoning with additional salt, pepper, or a pinch more sugar if needed. Remove from heat. This homemade marinara can be made a day or two in advance and stored in the refrigerator, allowing its flavors to meld even further.
Preparing the Chicken Cutlets
- Trim and Prepare Chicken: Lay each boneless, skinless chicken breast on a clean cutting board. Using a sharp chef’s knife, carefully trim away any visible fat or gristle. If the chicken breasts are particularly thick, you may want to slice them horizontally to create two thinner cutlets from each breast. This will ensure more even cooking and a more manageable portion size.
- Butterfly and Pound Thin: For uniform thickness, which is essential for perfect Chicken Parmesan, butterfly each chicken breast if you haven’t already sliced it into thinner cutlets. To do this, place your hand flat on top of the chicken breast and slice horizontally through the center, almost all the way through, leaving about a half-inch hinge on one side. Open it up like a book. Then, place the butterflied chicken (or individual cutlets) between two sheets of plastic wrap or inside a large freezer bag. Using the flat side of a meat mallet or a heavy rolling pin, pound the chicken gently but firmly to an even thickness of about 1/4 to 1/2 inch. Pounding ensures that the chicken cooks quickly and evenly, preventing one part from drying out while another is still cooking. It also creates a larger surface area for that delicious breading!
- Season Lightly: After pounding, lightly season both sides of each chicken cutlet with a pinch of salt and freshly ground black pepper. Be mindful not to over-salt at this stage, as the breading mixture and sauce will also contribute saltiness. This initial seasoning helps to flavor the chicken from within.
Setting Up the Breading Station
- Prepare the Flour Dredge: Take three shallow dishes or pie plates, which are ideal for breading. In the first dish, place the 1/2 cup of all-purpose flour. Season the flour lightly with a pinch of salt and pepper; this ensures every layer of our chicken is seasoned.
- Whisk the Egg Wash: In the second dish, crack the 2 large eggs. Add a splash (about 1 tablespoon) of water or milk to the eggs, then whisk them vigorously with a fork until the yolks and whites are completely combined and slightly frothy. The egg wash acts as the glue that helps the breadcrumbs adhere to the chicken, creating that perfectly golden crust.
- Create the Panko-Parmesan Mixture: In the third and largest shallow dish, combine the 2 cups of Panko breadcrumbs, 1/4 cup of the freshly grated Parmesan cheese, 1 tablespoon of dried parsley, 1 teaspoon of garlic powder, and 1/2 teaspoon of onion powder. Add a generous pinch of salt and freshly ground black pepper to this mixture. Use your fingers or a spoon to thoroughly mix all these ingredients together. The combination of Panko for crunch and freshly grated Parmesan for savory depth is what makes this breading truly exceptional, perfect for any Betterhomebase.com cooking enthusiast! Ensure the Parmesan cheese is finely grated so it distributes evenly and doesn’t clump.
Breading and Pan-Frying the Chicken
- Preheat Oven and Prepare Baking Dish: Preheat your oven to 400°F (200°C). Lightly grease a large baking dish (a 9×13 inch pan works well for four cutlets) with a little olive oil or cooking spray. This will prevent the chicken from sticking and aid in even baking.
-
Breadline Each Cutlet Systematically: Using one hand for the “wet” ingredients and the other for the “dry” ingredients will help keep your hands cleaner and prevent clumping.
- First, dredge one chicken cutlet in the seasoned flour, ensuring it’s fully coated. Shake off any excess flour.
- Next, transfer the floured cutlet to the egg wash. Dip it completely, allowing any excess egg to drip off.
- Finally, place the egg-washed cutlet into the Panko-Parmesan mixture. Press the breadcrumbs firmly onto both sides of the chicken, ensuring an even and thorough coating. The Panko should adhere generously.
Place the breaded cutlet on a clean plate or a wire rack set over a baking sheet while you repeat the process with the remaining chicken breasts.
- Heat Oil for Frying: Pour the 1/2 cup of vegetable or canola oil into a large, heavy-bottomed skillet (cast iron or stainless steel works best) and heat it over medium-high heat. You’re looking for the oil to be hot enough that a breadcrumb dropped in sizzles immediately, but not smoking. Typically, this is around 350-375°F (175-190°C). Achieving the right oil temperature is crucial for a crispy, golden-brown crust without the chicken absorbing too much oil.
- Pan-Fry Until Golden and Crispy: Carefully place 1-2 breaded chicken cutlets into the hot oil, making sure not to overcrowd the pan. Overcrowding will lower the oil temperature and lead to soggy chicken. Fry for about 3-4 minutes per side, until the crust is beautifully golden brown and crispy. The chicken should be mostly cooked through at this stage, but it will finish cooking in the oven. For safety, the internal temperature of the chicken should reach 165°F (74°C). If you’re unsure, a meat thermometer is your best friend.
- Drain Excess Oil: Once the cutlets are golden and cooked, carefully remove them from the skillet and place them on a wire rack set over a baking sheet lined with paper towels. This allows any excess oil to drain off, preserving that wonderful crispy texture. Repeat with the remaining chicken, adding more oil to the pan if necessary.
Assembling and Baking the Chicken Parmesan
- Prepare the Baking Dish Base: Take your greased 9×13 inch baking dish. Spread about 1/2 cup of your delicious homemade marinara sauce evenly across the bottom of the dish. This creates a flavorful bed for our crispy chicken and prevents it from sticking.
- Arrange Chicken and Sauce: Carefully place the pan-fried chicken cutlets in a single layer over the marinara sauce in the baking dish. If your cutlets are large, you might need to overlap them slightly, or use two smaller baking dishes. Spoon about 1/4 to 1/3 cup of marinara sauce over each chicken cutlet, ensuring it’s generously coated but not drowning in sauce, as we want the breading to maintain some crispness underneath the cheese.
- Layer with Cheeses: Now for the glorious cheese! Divide the freshly shredded mozzarella cheese evenly among the chicken cutlets, piling it on top of the sauce. If you’re using provolone, layer slices of provolone over the sauce, then top with the mozzarella. Finally, sprinkle the remaining 1/4 cup of freshly grated Parmesan cheese over the mozzarella. Using fresh, low-moisture mozzarella is key for that desirable stringy, bubbly melt that elevates this dish to Betterhomebase.com perfection.
- Bake to Golden Perfection: Place the baking dish in the preheated 400°F (200°C) oven. Bake for 15-20 minutes, or until the cheese is completely melted, bubbly, and has started to turn a beautiful golden-brown on top. You might see some of the sauce gently bubbling around the edges of the dish, which is a wonderful sign. Keep an eye on it to prevent the cheese from burning.
- Rest and Garnish: Once out of the oven, let the Chicken Parmesan rest for 5-10 minutes before serving. This allows the cheeses to set slightly and the internal juices of the chicken to redistribute, ensuring a more tender and flavorful bite. Garnish generously with fresh basil or parsley leaves just before serving for a pop of color and fresh aroma.
Cooking the Pasta and Serving
- Boil Water and Cook Pasta: While the Chicken Parmesan is baking or resting, bring a large pot of salted water to a rolling boil. Add your spaghetti or preferred pasta and cook according to package directions until it is al dente – firm to the bite but not hard. Cooking pasta al dente is crucial; it provides a pleasant texture that holds up well with the rich sauce and chicken.
- Drain and Prepare Pasta: Once cooked, carefully drain the pasta. You can either toss the drained pasta with a tablespoon of olive oil to prevent sticking, or, for an even more flavorful experience, toss it directly with a ladle or two of your warm homemade marinara sauce. This coats the pasta beautifully and integrates it seamlessly with the main dish.
- Serve with Love: To serve, place a generous portion of the cooked pasta on each plate. Carefully transfer a hot, cheesy chicken Parmesan cutlet directly on top of the pasta, or alongside it. Spoon an extra drizzle of warm marinara sauce over the dish if desired. Finish with a sprinkle of fresh chopped basil or parsley. This classic Chicken Parmesan, made with care and delicious homemade sauce, is more than just a meal; it’s a comforting creation that truly makes your space feel like a Betterhomebase.com haven. Enjoy the incredible satisfaction of this home-cooked masterpiece!
Conclusion:
And there you have it, my friends! We’ve reached the delicious culmination of our culinary journey together. I truly believe this recipe isn’t just another dish to add to your repertoire; it’s a game-changer, a showstopper, and a true testament to how simple ingredients, when treated with a little love and the right technique, can create something truly extraordinary. What makes this particular recipe an absolute must-try, you ask? Well, for starters, it’s the incredibly balanced flavor profile that hits all the right notes – savory, a hint of sweet, and that unmistakable umami depth that keeps you coming back for more. It’s also surprisingly adaptable, effortlessly fitting into a busy weeknight schedule while also being elegant enough to grace the table at your next dinner party. Imagine the smiles, the contented sighs, and the inevitable requests for the recipe from your guests. That’s the magic this dish brings.
Beyond its fantastic taste, I designed this recipe to be approachable for cooks of all skill levels. Whether you’re a seasoned chef or just starting your adventure in the kitchen, you’ll find the steps clear, concise, and incredibly rewarding. There’s a certain satisfaction that comes from creating something so profoundly flavorful with your own hands, and I guarantee you’ll feel that sense of accomplishment with every bite. It’s more than just a meal; it’s an experience, a moment of joy that you can easily replicate again and again. Its inherent comforting qualities make it perfect for any season – warming on a chilly evening, yet light enough to enjoy during warmer months. This versatility is, in my opinion, one of its greatest strengths.
Making It Your Own: Serving Suggestions & Creative Variations
Now that you’re convinced of its undeniable charm, let’s talk about how to serve this magnificent creation and how you can truly make it your own. For a classic presentation, I adore serving it alongside a vibrant, crisp green salad dressed with a simple vinaigrette to cut through the richness. A side of fluffy jasmine rice or a creamy potato puree would also be absolute perfection, soaking up every last drop of that incredible sauce. Don’t forget a slice of crusty artisan bread, ideal for mopping up any remaining goodness on your plate – trust me, you won’t want to leave a single drop behind!
But the fun doesn’t stop there. This recipe is wonderfully open to interpretation and adaptation. If you’re feeling adventurous, consider adding a sprinkle of freshly chopped herbs like cilantro or parsley just before serving for an extra pop of freshness and color. For those who enjoy a bit of heat, a pinch of red pepper flakes or a dash of your favorite hot sauce can elevate the experience. Think about incorporating different vegetables too; roasted asparagus, sautéed mushrooms, or even some blistered cherry tomatoes would be fantastic additions, adding more texture and nutrients to your meal. You could even explore a vegetarian version by swapping out the main protein for firm tofu or hearty portobello mushrooms, adjusting cooking times accordingly. The possibilities are truly endless, limited only by your imagination and the ingredients you have on hand.
Elevate Your Culinary Experience
For a truly indulgent twist, imagine transforming this into a delectable sandwich filling or even a topping for a gourmet pizza. The savory notes lend themselves beautifully to such creative uses. And for those special occasions, consider pairing it with a carefully selected wine. A light-bodied red, perhaps a Pinot Noir, or a crisp, unoaked Chardonnay would complement the flavors beautifully, enhancing your dining experience. I’ve found that experimenting with these small changes not only keeps things exciting in the kitchen but also allows you to tailor the dish perfectly to your personal preferences and dietary needs. This adaptability is part of what makes it such a powerhouse recipe.
So, my dear readers, the ball is now in your court! I’ve laid out all the reasons why this recipe is a must-try, shared my favorite ways to serve it, and even offered a bounty of variations to spark your creativity. Now it’s your turn to roll up your sleeves, grab your apron, and bring this incredible dish to life in your own kitchen. I am genuinely excited for you to experience the joy and deliciousness that this recipe brings. Once you’ve cooked it, tasted it, and shared it with your loved ones, I would absolutely love to hear about your experience. Did you stick to the original? Did you add your own unique twist? What did your family and friends think?
Share Your Culinary Triumphs!
Please don’t hesitate to leave a comment below with your feedback, your serving suggestions, or even a photo of your magnificent creation. Your insights and culinary triumphs inspire not just me, but the entire community of home cooks. We thrive on sharing our kitchen adventures, and your input is invaluable. And remember, for more inspiring recipes, helpful cooking tips, and all things home-based culinary excellence, always make sure to visit Betterhomebase.com. It’s where we celebrate the art of home cooking and strive to make every meal a memorable one. Happy cooking, everyone!
Betterhomebase.com
A delicious recipe
Ingredients
-
Ingredient 1
-
Ingredient 2
-
Ingredient 3
Instructions
-
Step 1
Step 1 -
Step 2
Step 2 -
Step 3
Step 3
Important Information
Nutrition Facts (Per Serving)
It is important to consider this information as approximate and not to use it as definitive health advice.
Allergy Information
Please check ingredients for potential allergens and consult a health professional if in doubt.


Leave a Comment