
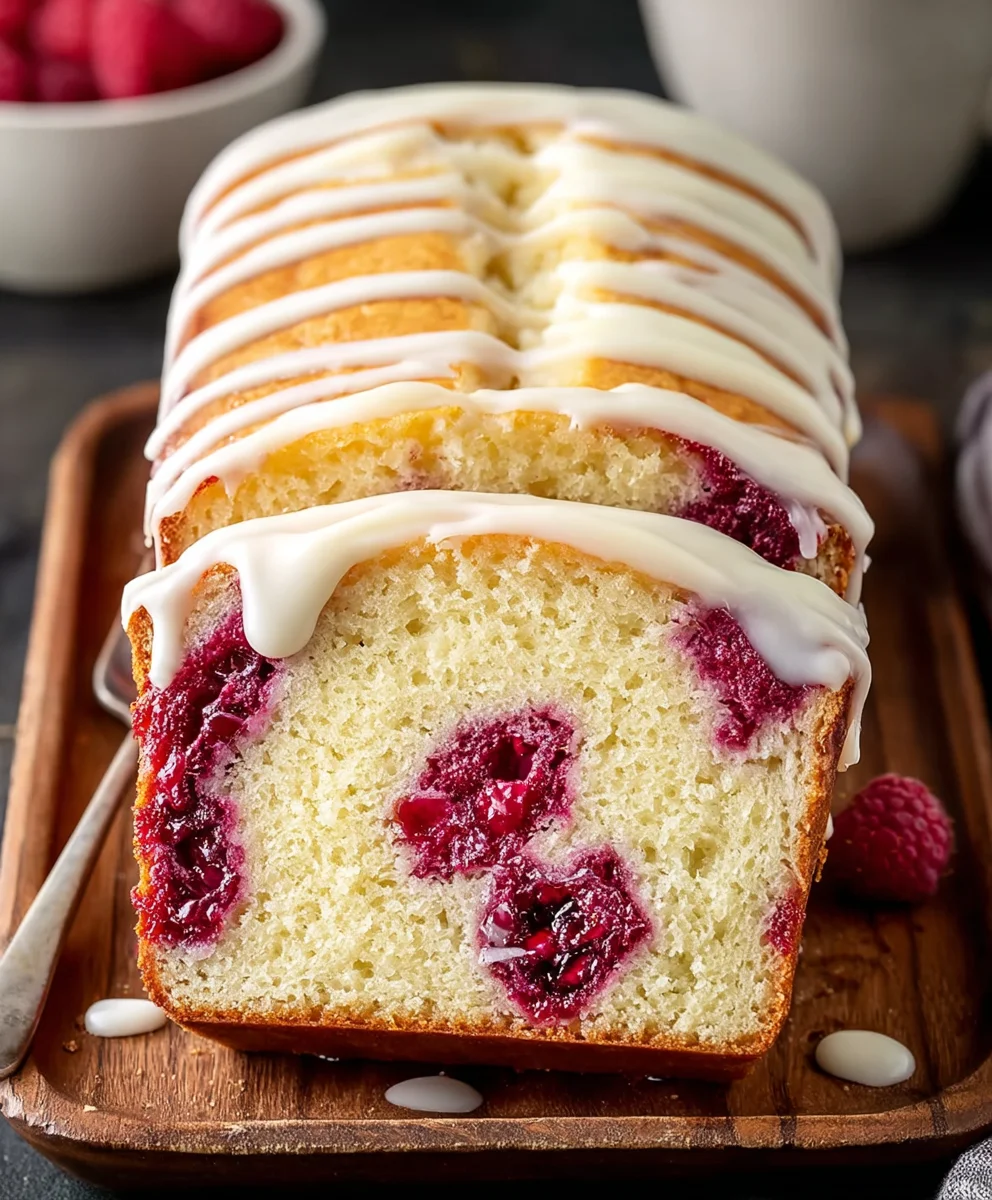
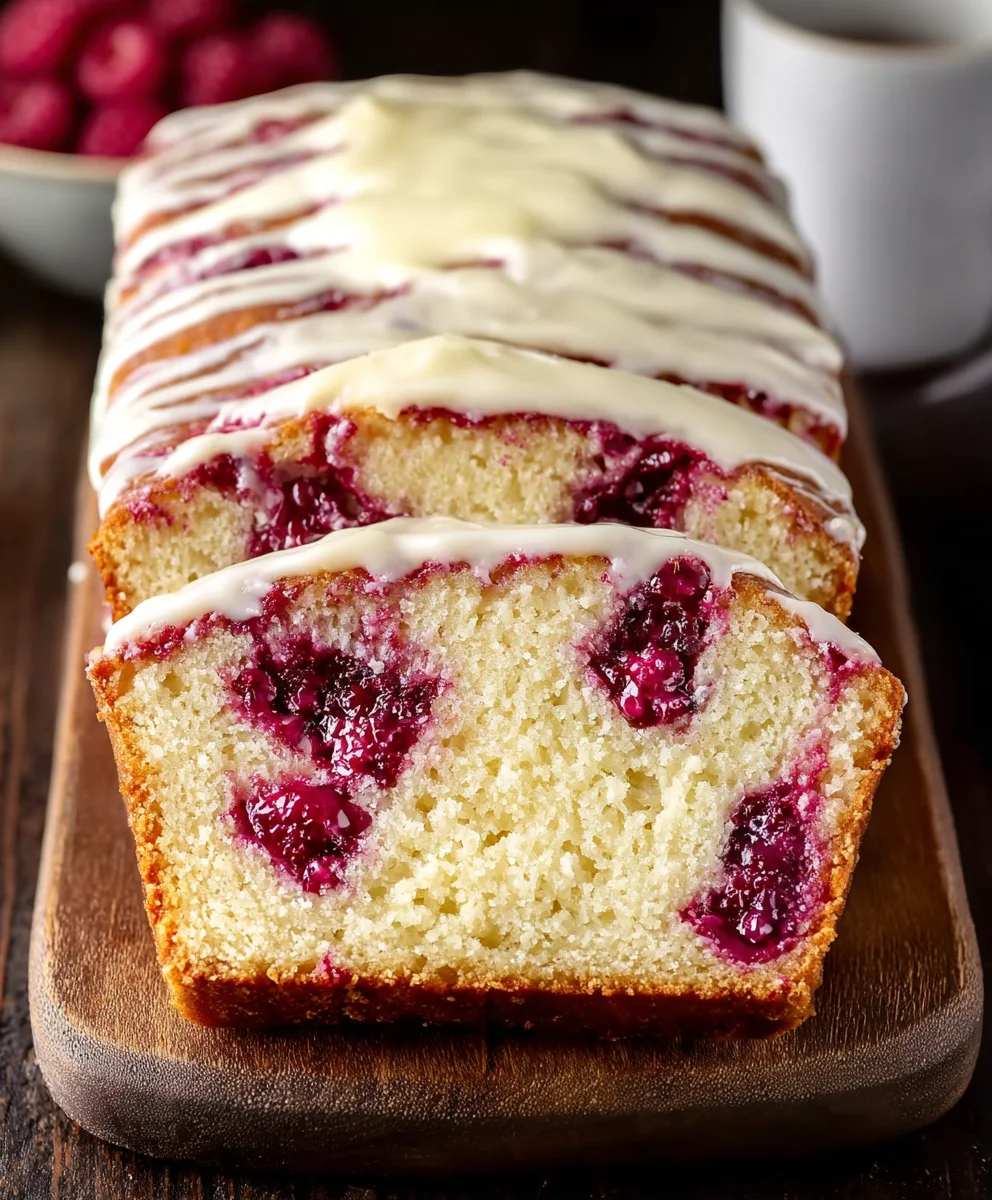
White Chocolate and Raspberry Loaf Cake. Is there anything more comforting than a perfectly baked loaf cake, infused with delightful flavors and a touch of elegance? I think not. This particular White Chocolate and Raspberry Loaf Cake holds a special place in my heart, and I’m confident it will quickly become a favorite in your home too. People adore it for its wonderfully moist crum extractb, the subtle sweetness of white chocolate that melts on your tongue, and the bright, slightly tart bursts of fresh raspberries that cut through the richness. It’s the kind of cake that whispers of cozy afternoons, shared moments, and simple pleasures. What truly makes this White Chocolate and Raspberry Loaf Cake stand out is the harmonious balance of its components; it’s not overly sweet, allowing the natural fruitiness of the raspberries and the creamy notes of the white chocolate to shine. It’s a sophisticated yet incredibly easy-to-make treat that’s perfect for any occasion, from a casual brunch to a special celebration.
Ingredients:
- 1½ cups fresh raspberries
- ¼ cup sugar
- ½ teaspoon lemon zest
- 2 tablespoons orange juice
- 1 tablespoon water
- 2 tablespoons cornstarch
- 1¾ cups all-purpose flour
- ½ teaspoon baking powder
- ½ teaspoon salt
- ½ cup unsalted butter, room temperature
- 4 ounces cream cheese, room temperature
- 1¼ cups sugar
- 4 large eggs
- 1 tablespoon lemon zest
- 1¾ teaspoons vanilla
Raspberry Compote Preparation
Step 1: Simmer the Raspberries
Let’s start by creating a vibrant raspberry compote that will add bursts of tangy sweetness to our loaf cake. In a small saucepan, combine the 1½ cups of fresh raspberries, ¼ cup of sugar, and ½ teaspoon of lemon zest. The lemon zest will add a bright, aromatic counterpoint to the sweet raspberries. Heat this mixture over medium heat, stirring gently as the raspberries begin extract to break down and release their juices. This process usually takes about 5-7 minutes. We’re aiming for a softened, slightly jammy consistency, not a completely smooth puree.
Step 2: Thicken the Compote
Once the raspberries have softened, it’s time to thicken our compote. In a tiny bowl, whisk together the 2 tablespoons of orange juice and 1 tablespoon of water with the 2 tablespoons of cornstarch until you have a smooth slurry, ensuring there are no lumps. This cornstarch mixture is our thickening agent. Gradually pour this slurry into the simmering raspberry mixture, stirring constantly. Continue to cook for another 1-2 minutes, or until the compote thickens to a consistency that coats the back of a spoon nicely. It should be pourable but not watery. Remove the compote from the heat and set it aside to cool completely. This step is crucial, as adding a warm compote to the batter can affect the cake’s texture.
White Chocolate Loaf Cake Batter Creation
Step 3: Cream Butter and Cream Cheese
Now, let’s get started on the cake batter itself. In a large mixing bowl, cream together the ½ cup of unsalted butter (which should be at room temperature for easy blending) and the 4 ounces of cream cheese (also at room temperature). Using an electric mixer on medium speed, beat these two ingredients together until they are light, fluffy, and well combined. This step is essential for creating a tender crum extractb in our loaf cake. Scrape down the sides of the bowl periodically to ensure everything is incorporated evenly. The cream cheese adds a wonderful richness and a slight tang that complements the sweetness of the white chocolate we’ll be adding later.
Step 4: Incorporate Sugar and Eggs
Next, gradually add the 1¼ cups of sugar to the creamed butter and cream cheese mixture. Continue to beat until the sugar is fully incorporated and the mixture becomes even lighter and fluffier. This may take a few minutes. Now, it’s time to add the eggs, one at a time, beating well after each addition. Ensure each egg is fully blended into the batter before adding the next. This gradual addition helps emulsify the batter and prevents it from becoming dense. After all the eggs are incorporated, stir in the 1 tablespoon of lemon zest and 1¾ teaspoons of vanilla extract. The lemon zest here will provide another layer of bright citrus aroma, enhancing the overall flavor profile of the cake.
Step 5: Combine Dry Ingredients and Fold
In a separate medium bowl, whisk together the 1¾ cups of all-purpose flour, ½ teaspoon of baking powder, and ½ teaspoon of salt. Whisking these dry ingredients together ensures they are evenly distributed, which will help the cake rise uniformly. Now, gradually add the dry ingredients to the wet ingredients in three additions, mixing on low speed until just combined. Be careful not to overmix the batter at this stage, as overmixing can develop the gluten in the flour, leading to a tough cake. Once the flour is mostly incorporated, we’ll gently fold in the cooled raspberry compote. You can do this by dolloping spoonfuls of the compote over the batter and then using a spatula to gently swirl it through, creating beautiful raspberry ribbons. Avoid over-swirling; you want distinct pockets of compote rather than a uniformly pink batter.
Baking and Finishing
Step 6: Bake the Loaf Cake
Preheat your oven to 350°F (175°C). Grease and flour a standard 9×5 inch loaf pan, or line it with parchment paper for easy removal. Pour the batter evenly into the prepared loaf pan. Smooth the top with your spatula. Place the loaf pan in the preheated oven and bake for 50-60 minutes, or until a wooden skewer or toothpick inserted into the center of the cake comes out clean. The baking time can vary depending on your oven, so it’s always best to check a few minutes early. If the top of the cake starts to brown too quickly, you can loosely tent it with aluminum foil.
Step 7: Cool and Serve
Once the White Chocolate and Raspberry Loaf Cake is baked, remove it from the oven and let it cool in the loaf pan for about 10-15 minutes. This allows the cake to set up properly. After this initial cooling period, carefully invert the cake onto a wire rack to cool completely. Letting it cool on a wire rack prevents the bottom of the cake from becoming soggy. Once fully cooled, you can slice and enjoy this delightful loaf cake. It’s delicious on its own, or you can serve it with a dollop of whipped cream or a dusting of powdered sugar.
Conclusion:
As we wrap up our journey of creating the delightful White Chocolate and Raspberry Loaf Cake, I hope you feel inspired to head into your kitchen and bake this simple yet elegant treat. This loaf cake is a perfect balance of creamy white chocolate richness and the vibrant tartness of fresh raspberries, all baked into a wonderfully moist and tender crum extractb. It’s truly a crowd-pleaser, perfect for afternoon tea, a special brunch, or just a comforting dessert with your favorite hot beverage.
When it comes to serving, the White Chocolate and Raspberry Loaf Cake is wonderfully versatile. It’s absolutely delicious served plain, allowing the flavors to shine. However, you could also elevate it with a light dusting of powdered sugar, a drizzle of white chocolate ganache, or a dollop of fresh whipped cream and a few extra raspberries on the side. For variations, consider adding a touch of lemon zest to the batter for an extra zing, or swapping the raspberries for other berries like blueberries or blackberries. Chopped nuts, like almonds or macadamia nuts, also add a lovely textural contrast. Don’t be afraid to experiment and make it your own! I encourage you to try this recipe and share it with loved ones – the joy of baking is in the sharing.
Frequently Asked Questions:
Can I use frozen raspberries instead of fresh?
Yes, you can! If using frozen raspberries, it’s best to toss them in a tablespoon of flour before adding them to the batter. This helps prevent them from sinking to the bottom of the cake. You may also find that the cake takes a few minutes longer to bake if using frozen fruit.
How should I store the White Chocolate and Raspberry Loaf Cake?
Once completely cooled, the White Chocolate and Raspberry Loaf Cake can be stored at room temperature in an airtight container for up to 3 days. If you live in a warm climate or prefer it chilled, you can store it in the refrigerator for up to 5 days.
White Chocolate Raspberry Loaf Cake – Easy & Delicious
An easy and delicious loaf cake featuring a white chocolate base swirled with a vibrant raspberry compote.
Ingredients
-
1½ cups fresh raspberries
-
¼ cup sugar
-
½ teaspoon lemon zest
-
2 tablespoons orange juice
-
1 tablespoon water
-
2 tablespoons cornstarch
-
1¾ cups all-purpose flour
-
½ teaspoon baking powder
-
½ teaspoon salt
-
½ cup unsalted butter, room temperature
-
4 ounces cream cheese, room temperature
-
1¼ cups sugar
-
4 large eggs
-
1 tablespoon lemon zest
-
1¾ teaspoons vanilla
Instructions
-
Step 1
Raspberry Compote Preparation: In a small saucepan, combine 1½ cups fresh raspberries, ¼ cup sugar, and ½ teaspoon lemon zest. Heat over medium heat for 5-7 minutes until raspberries soften and release juices. -
Step 2
Thicken the compote: Whisk together 2 tablespoons orange juice, 1 tablespoon water, and 2 tablespoons cornstarch until smooth. Gradually pour into the simmering raspberries, stirring constantly. Cook for 1-2 minutes until thickened. Set aside to cool completely. -
Step 3
White Chocolate Loaf Cake Batter Creation: In a large bowl, cream ½ cup room temperature unsalted butter and 4 ounces room temperature cream cheese until light and fluffy. -
Step 4
Gradually add 1¼ cups sugar to the creamed mixture, beating until incorporated and fluffy. Add 4 large eggs one at a time, beating well after each addition. Stir in 1 tablespoon lemon zest and 1¾ teaspoons vanilla. -
Step 5
In a separate bowl, whisk together 1¾ cups all-purpose flour, ½ teaspoon baking powder, and ½ teaspoon salt. Gradually add dry ingredients to wet ingredients in three additions, mixing on low speed until just combined. Gently fold in the cooled raspberry compote. -
Step 6
Baking: Preheat oven to 350°F (175°C). Grease and flour a 9×5 inch loaf pan. Pour batter into the pan and smooth the top. Bake for 50-60 minutes, or until a skewer inserted into the center comes out clean. -
Step 7
Cooling and Serving: Let the cake cool in the pan for 10-15 minutes, then invert onto a wire rack to cool completely. Slice and serve.
Important Information
Nutrition Facts (Per Serving)
It is important to consider this information as approximate and not to use it as definitive health advice.
Allergy Information
Please check ingredients for potential allergens and consult a health professional if in doubt.


Leave a Comment