
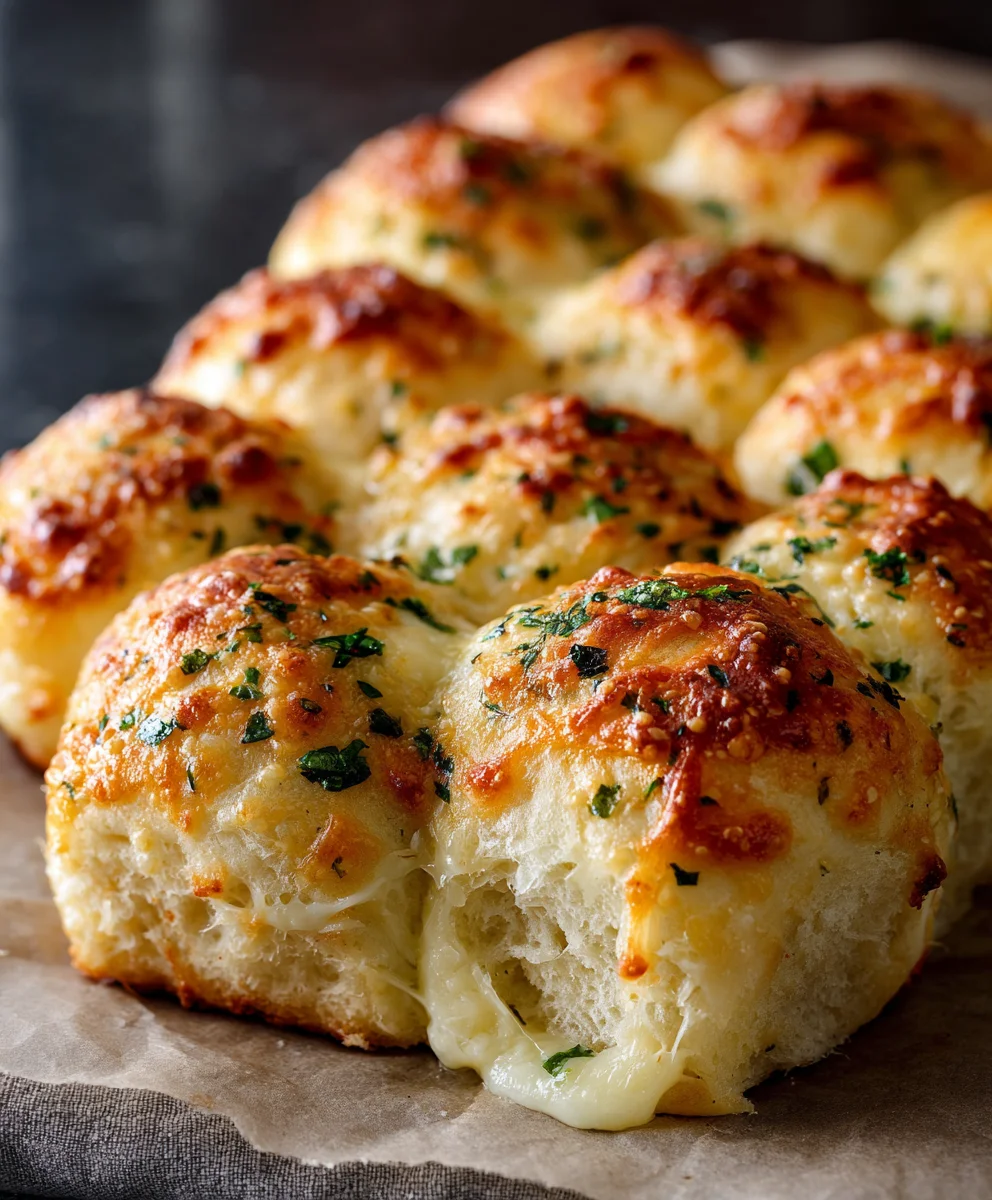
Cheesy Garlic Dinner Rolls. Just thinking about these golden, aromatic delights is enough to conjure up images of cozy dinners and satisfied smiles. There’s something universally comforting about freshly baked bread, and when you infuse it with the robust, piquant flavor of garlic and the irresistible, gooey embrace of melted cheese, you create a culinary masterpiece that transcends the ordinary.
While dinner rolls have graced tables as a staple accompaniment across countless cultures for centuries, evolving from humble bread recipes, the brilliant fusion of garlic and cheese into this form likely draws inspiration from the beloved Italian-American garlic bread tradition. It’s a testament to culinary innovation, taking a classic side dish and elevating it to new heights of deliciousness.
It’s no wonder these delightful bites have become a perennial favorite for so many. People simply adore the harmonious blend of savory garlic, the rich, creamy texture of melted cheese that stretches with every pull, and the pillowy, soft interior of a perfectly baked roll. They are incredibly versatile, serving as the ultimate companion to hearty pasta dishes, warming stews, or even as a standalone, irresistible snack. The sheer convenience of having such a crowd-pleasing side dish that brings so much joy makes Cheesy Garlic Dinner Rolls an absolute must-have for any gathering or a special weeknight treat.
Ingredients:
- For the Dough:
- 1 cup (240ml) warm milk (about 105-115°F / 40-46°C)
- 2 ¼ teaspoons (1 packet) active dry yeast or instant yeast
- 2 tablespoons granulated sugar
- ½ teaspoon salt
- ¼ cup (56g) unsalted butter, melted and cooled slightly
- 1 large egg, room temperature
- 3 ½ – 4 cups (420-480g) all-purpose flour, plus more for dusting
- 1 tablespoon olive oil, for greasing the bowl
- For the Garlic Butter & Filling:
- ½ cup (113g) unsalted butter, softened
- 4-6 cloves garlic, minced very finely (or grated)
- ¼ cup fresh parsley, finely chopped
- ¼ teaspoon salt
- ⅛ teaspoon black pepper
- 1 ½ cups (about 6 oz) shredded low-moisture mozzarella cheese
- ½ cup (about 2 oz) grated Parmesan cheese (freshly grated is best!)
- For the Egg Wash/Topping:
- 1 large egg, beaten with 1 tablespoon water (for egg wash, optional)
- 2 tablespoons melted butter (for brushing after baking)
- 1 clove garlic, minced (for post-bake butter)
- 1 tablespoon fresh parsley, finely chopped (for garnish)
Preparing the Dough for Your Cheesy Garlic Dinner Rolls
- Activate the Yeast: In a large mixing bowl (or the bowl of a stand mixer fitted with the dough hook attachment), combine the warm milk and granulated sugar. The milk should be warm to the touch, like a baby’s bath, but not scalding hot, as excessive heat will kill the yeast. Sprinkle the yeast over the milk mixture. Give it a gentle stir and let it sit for 5-10 minutes. During this time, the yeast should bloom, forming a foamy layer on top. This is a crucial step that confirms your yeast is active and ready to make beautiful, fluffy Cheesy Garlic Dinner Rolls. If it doesn’t foam, your yeast might be old, or the milk was too hot/cold, and you should start over.
- Combine Wet Ingredients: Once the yeast is active, add the melted and slightly cooled butter to the bowl. Make sure the butter isn’t too hot, as it could inhibit yeast activity. Next, whisk in the room temperature egg. Using a room temperature egg helps it incorporate more smoothly into the dough and contributes to a softer final texture.
- Add Dry Ingredients: Gradually add 3 ½ cups of the all-purpose flour and the ½ teaspoon of salt to the wet mixture. If you’re using a stand mixer, start on low speed until just combined. If mixing by hand, use a sturdy spoon or spatula. The mixture will initially be shaggy and sticky.
- Knead the Dough: Increase the stand mixer speed to medium-low and knead for 7-10 minutes. If kneading by hand, turn the dough out onto a lightly floured surface and knead for 10-15 minutes. The goal is to develop the gluten in the flour, which gives the rolls their structure and chewiness. As you knead, the dough will transform from a sticky mess to a smooth, elastic ball that is no longer sticking excessively to your hands or the bowl. If the dough is too sticky, add the remaining ½ cup of flour, one tablespoon at a time, until it’s manageable but still soft. Avoid adding too much flour, as this can result in dry, dense rolls. A good test for readiness is the “windowpane test”: take a small piece of dough, gently stretch it, and if you can stretch it thin enough to see light through it without tearing, your dough is perfectly kneaded.
- First Rise (Proofing): Lightly grease a large clean bowl with 1 tablespoon of olive oil. Transfer the kneaded dough to the bowl, turning it once to coat the entire surface with oil. This prevents the dough from drying out and sticking. Cover the bowl tightly with plastic wrap or a clean kitchen towel. Place the bowl in a warm, draft-free place to rise for 1 to 1 ½ hours, or until the dough has doubled in size. A slightly warm oven (turned off, with just the pilot light or a bowl of hot water inside for residual warmth) or a sunny spot on your counter are ideal locations. The duration of the rise depends on the temperature of your kitchen; warmer environments will lead to a faster rise. Don’t rush this step! A proper first rise is essential for light and airy Cheesy Garlic Dinner Rolls.
Crafting the Aromatic Garlic Butter and Cheesy Filling
- Prepare the Garlic Butter: While your dough is happily rising, it’s the perfect time to prepare the flavorful garlic butter mixture that will infuse your Cheesy Garlic Dinner Rolls with incredible aroma and taste. In a small bowl, combine the ½ cup of softened unsalted butter. Ensure the butter is truly softened, not melted, as this will make it easier to spread and hold its form within the rolls. Add the finely minced garlic cloves. I personally love a generous amount of garlic, so don’t be shy here! Stir in the finely chopped fresh parsley, ¼ teaspoon of salt, and ⅛ teaspoon of black pepper. Mix everything thoroughly until well combined. The vibrant green of the parsley against the butter and garlic is not only appealing but hints at the freshness this mixture will bring. Set this aside; the flavors will meld beautifully as it waits for the dough.
- Combine the Cheeses: In another medium-sized bowl, mix together the 1 ½ cups of shredded low-moisture mozzarella cheese and ½ cup of grated Parmesan cheese. Using a combination of cheeses provides a wonderful balance: mozzarella offers that classic melt and stretch, while Parmesan brings a sharp, salty depth of flavor that complements the garlic perfectly. If you have the option, grate your own Parmesan cheese from a block; it truly makes a difference in flavor and melt consistency compared to pre-grated varieties. Gently toss them together to ensure an even distribution. This will be the delicious cheesy heart of your Cheesy Garlic Dinner Rolls.
Shaping and Filling Your Delicious Cheesy Garlic Dinner Rolls
- Prepare Your Baking Pan: Lightly grease a 9×13 inch baking pan with butter or cooking spray. This will prevent your Cheesy Garlic Dinner Rolls from sticking and help them achieve a beautiful golden-brown crust.
- Punch Down and Divide the Dough: Once your dough has doubled in size, gently punch it down to release the air. Turn the dough out onto a lightly floured surface. Knead it very briefly, just enough to form it into a smooth log. Using a bench scraper or a sharp knife, divide the dough into 12 equal pieces. For the most consistent results, you can weigh the entire dough and then divide by 12 to find the weight for each piece. This ensures all your Cheesy Garlic Dinner Rolls bake evenly.
- Roll and Flatten Each Piece: Take one piece of dough and gently roll it into a smooth ball. Then, using a rolling pin, flatten the ball into a roughly 4-inch by 5-inch oval or rectangular shape. You want it to be thin enough to roll easily, but not so thin that it tears when filled. Aim for about ¼ inch thickness. Repeat this process with each piece of dough.
- Spread the Garlic Butter: Take one flattened piece of dough. Using a small offset spatula or the back of a spoon, spread about 1 ½ – 2 teaspoons of your prepared garlic butter mixture evenly over the entire surface of the dough, leaving a small ½-inch border along one of the longer edges clear. This clear edge will help you seal the roll effectively. The aroma of the garlic butter at this stage is absolutely heavenly and promises an incredible flavor in your Cheesy Garlic Dinner Rolls.
- Add the Cheese Filling: Sprinkle about 2-3 tablespoons of the mixed mozzarella and Parmesan cheese generously over the garlic butter-spread dough, again keeping the ½-inch border clear. Make sure the cheese is distributed fairly evenly so every bite gets some gooey goodness.
- Roll Up the Rolls: Starting from the longer edge opposite the clear border, carefully roll up the dough tightly into a log shape. Once you reach the clear edge, gently pinch the seam to seal it completely. This is very important to prevent the cheese from oozing out during baking. Now, you have a beautiful, filled log. Repeat steps 10-13 for all remaining pieces of dough.
- Arrange in Baking Pan: Place each rolled-up dough log seam-side down into your prepared 9×13 inch baking pan. Arrange them in rows, leaving a small amount of space between each roll, as they will expand during the second rise and baking. Typically, you’ll fit 3 rows of 4 rolls, or 4 rows of 3 rolls, depending on how tightly you rolled them and the exact dimensions of your pan. These rolls will be beautifully nestled together when they’re done.
Second Rise, Baking, and Finishing Your Cheesy Garlic Dinner Rolls
- Second Rise (Proofing): Loosely cover the baking pan with plastic wrap or a clean kitchen towel. Place it back in that warm, draft-free spot for another 30-45 minutes. During this second rise, the rolls will puff up significantly and grow closer together, becoming soft and pillowy. They should look noticeably larger and feel very light to the touch. This final proofing ensures a light and tender crumb for your Cheesy Garlic Dinner Rolls.
- Preheat Oven & Prepare Egg Wash (Optional): About 15 minutes before the second rise is complete, preheat your oven to 375°F (190°C). If you choose to use an egg wash, whisk one large egg with 1 tablespoon of water in a small bowl. This egg wash will give your rolls a beautiful golden-brown, glossy crust.
- Brush and Bake: Once the rolls have finished their second rise, gently brush the tops of the rolls with the egg wash (if using). Alternatively, you can brush them lightly with milk or melted butter for a softer crust, or leave them plain. Transfer the baking pan to the preheated oven. Bake for 20-25 minutes, or until the Cheesy Garlic Dinner Rolls are puffed up, beautifully golden brown on top, and cooked through. The internal temperature should reach about 200-210°F (93-99°C). Keep an eye on them towards the end of the baking time, as oven temperatures can vary. If they start browning too quickly, you can loosely tent the pan with aluminum foil.
- Prepare Post-Bake Butter: While the rolls are baking, prepare the final touch. In a small microwave-safe bowl, melt the 2 tablespoons of unsalted butter. Add the remaining 1 finely minced clove of garlic to the melted butter.
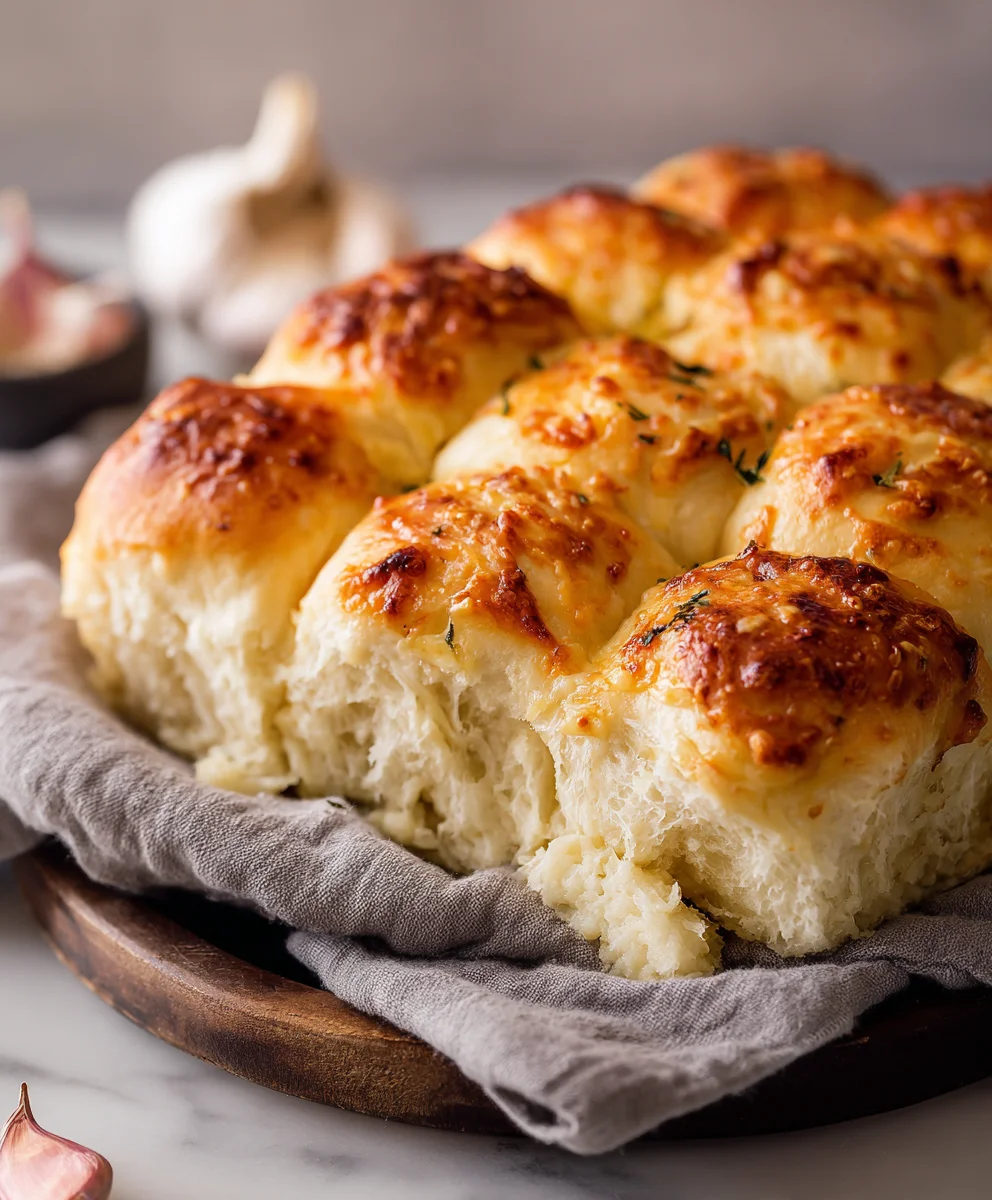
- Final Glaze and Garnish: As soon as the Cheesy Garlic Dinner Rolls come out of the oven, while they are still piping hot, immediately brush the tops generously with the freshly melted garlic butter. The hot rolls will absorb this butter beautifully, enhancing their garlic flavor and adding a lovely sheen. Finally, sprinkle the remaining 1 tablespoon of fresh finely chopped parsley over the warm rolls for a burst of color and fresh herbaceousness.
- Serve Warm: Let the Cheesy Garlic Dinner Rolls cool in the pan for about 5-10 minutes before serving. They are absolutely best enjoyed warm, straight from the oven, when the cheese is gooey and the garlic butter is fragrant. These are the ultimate side dish or snack, perfect for soaking up sauces or simply devouring on their own. Enjoy your homemade, incredibly delicious Cheesy Garlic Dinner Rolls!
Conclusion:
And there you have it, my friends! We’ve reached the delicious culmination of our culinary journey, and I genuinely hope you’re as excited as I am about what we’ve created together. This isn’t just another bread recipe; it’s a gateway to aromatic bliss, a guaranteed crowd-pleaser that will have everyone at your table reaching for just one more. I truly believe this recipe is a must-try for so many compelling reasons. First and foremost, the sheer joy of pulling a tray of these golden-brown beauties from the oven is an experience in itself. The aroma that fills your kitchen is utterly intoxicating – a perfect symphony of rich, toasted garlic, savory melted cheese, and the comforting scent of freshly baked bread. It’s the kind of smell that makes a house feel like a home, instantly inviting and undeniably delicious.
Beyond the incredible aroma, the taste and texture are simply unparalleled. Each roll boasts a delightfully crisp exterior that gives way to a soft, fluffy interior, studded with pockets of warm, gooey cheese and infused with that irresistible punch of garlic. It’s a sensory explosion that balances savory, slightly salty notes with a comforting warmth. What makes this recipe truly stand out is its surprising simplicity. Despite delivering such impressive results, the steps are straightforward and accessible, making it perfect for seasoned bakers and enthusiastic novices alike. You don’t need to be a culinary wizard to achieve bakery-quality results; just a little time, a lot of love, and a desire for something truly extraordinary. It’s the kind of recipe that builds confidence in the kitchen and rewards you with genuine culinary satisfaction.
Now, let’s talk about how to truly make these stars shine on your dining table. The beauty of these Cheesy Garlic Dinner Rolls is their incredible versatility. They are, without a doubt, the quintessential accompaniment to a hearty Italian feast. Imagine them alongside a bubbling lasagna, a rich pasta bolognese, or even a simple, elegant spaghetti aglio e olio – they’ll sop up every last drop of sauce, making for a truly memorable meal. But don’t limit yourself to Italian night! They are equally fantastic with a robust stew, a comforting chili, or even a classic roast chicken. For a lighter touch, serve them with a fresh, crisp green salad, or alongside a creamy tomato soup for an elevated lunch experience. Honestly, sometimes, all you need is a warm roll, a smear of butter (if you dare!), and a cup of coffee for a perfect, indulgent snack. They are also phenomenal dipped into a warm marinara sauce or a simple olive oil and balsamic vinegar blend for a truly Mediterranean touch.
And for those of you who love to experiment, the possibilities for variations are endless! Feel free to customize these rolls to your heart’s content. Want to add a herbaceous kick? Mix in some finely chopped fresh rosemary, thyme, or oregano into your dough or sprinkle them over the top before baking. For a touch of spice, a pinch of red pepper flakes or even a dash of cayenne pepper can elevate the flavor profile beautifully. You could experiment with different cheeses too: a sharp cheddar for a more pronounced tang, a smoked gouda for a deeper, nuttier flavor, or a blend of Parmesan and Pecorino Romano for an extra layer of savory goodness. If you’re feeling adventurous, try stuffing a small cube of mozzarella directly into the center of each roll before the final proof for an extra molten surprise when they’re pulled apart. You can even vary their shape – smaller, bite-sized rolls for appetizers, or larger, more rustic boules for a family-style presentation. The core recipe provides such a strong, delicious foundation, inviting you to play and make it your own.
So, I implore you, clear your schedule, gather your ingredients, and give this recipe a try. You won’t regret the moment you pull these golden, aromatic rolls from your oven. The feeling of pride and the joy of sharing something so utterly delicious you’ve made yourself is truly unparalleled. I am so incredibly excited for you to experience the magic of these rolls. Once you’ve baked them, once you’ve tasted them, once you’ve seen the smiles they bring to the faces of your loved ones, please come back and share your experience with me! I absolutely adore hearing about your kitchen adventures, your successes, and any fun twists you put on the recipe. Did you serve them with a particular meal? Did you try a new cheese? Let me know in the comments below – your insights and stories are what truly make this culinary community thrive. Happy baking, and may your kitchen always be filled with the wonderful aroma of fresh, homemade bread!
Cheesy Garlic Dinner Rolls
These golden, aromatic Cheesy Garlic Dinner Rolls combine the comfort of freshly baked bread with the robust flavor of garlic and the irresistible embrace of melted cheese. A quick and flavorful recipe perfect as a side for pasta or stews, or an irresistible snack.
Ingredients
-
1 cup (240ml) warm milk (105-115°F)
-
2 ¼ teaspoons (1 packet) active dry yeast
-
2 tablespoons granulated sugar
-
½ teaspoon salt
-
¼ cup (56g) unsalted butter, melted and cooled
-
1 large egg, room temperature
-
3 ½ cups (420g) all-purpose flour
-
1 tablespoon olive oil
-
½ cup (113g) unsalted butter, softened
-
4-6 cloves garlic, minced
-
¼ cup fresh parsley, finely chopped
-
¼ teaspoon salt
-
⅛ teaspoon black pepper
-
1 ½ cups (6 oz) shredded low-moisture mozzarella cheese
-
½ cup (2 oz) grated Parmesan cheese
-
1 large egg + 1 tablespoon water (for egg wash, optional)
-
2 tablespoons melted butter (for brushing after baking)
-
1 clove garlic, minced (for post-bake butter)
-
1 tablespoon fresh parsley, finely chopped (for garnish)
Instructions
-
Step 1
In a large bowl, combine warm milk and granulated sugar. Sprinkle yeast over; stir gently. Let sit 5-10 minutes until foamy. -
Step 2
Add melted, cooled butter and room temperature egg to the activated yeast mixture. Whisk until combined. -
Step 3
In a stand mixer (with dough hook) or large bowl, **mix 3 cups all-purpose flour and ½ teaspoon salt** into the wet mixture on low speed until just combined and shaggy. -
Step 4
Increase mixer speed to medium-low. **Add remaining ½ cup flour.** Knead for 7-10 minutes (10-15 min by hand) until dough is smooth, elastic, and no longer excessively sticky. -
Step 5
Lightly grease a large bowl with 1 tablespoon olive oil. Transfer dough, turning to coat. Cover tightly and let rise in a warm, draft-free place for 1 to 1 ½ hours, or until doubled in size. -
Step 6
While dough rises, combine ½ cup softened unsalted butter, 4-6 finely minced garlic cloves, ¼ cup finely chopped fresh parsley, ¼ teaspoon salt, and ⅛ teaspoon black pepper. Mix thoroughly. -
Step 7
In a separate bowl, mix 1 ½ cups shredded low-moisture mozzarella cheese and ½ cup grated Parmesan cheese. -
Step 8
Lightly grease a 9×13 inch baking pan with butter or cooking spray. -
Step 9
Punch down risen dough. Turn onto a lightly floured surface, briefly knead into a log, then divide into 12 equal pieces. Roll each piece into a smooth ball, then flatten into a roughly 4×5 inch oval/rectangle (approx. ¼ inch thick). -
Step 10
Spread 1 ½ – 2 teaspoons of prepared garlic butter evenly over each flattened dough piece, leaving a ½-inch border along one long edge clear. -
Step 11
Generously sprinkle 2-3 tablespoons of the mixed mozzarella and Parmesan cheese over the garlic butter, keeping the ½-inch border clear. -
Step 12
Starting from the longer edge opposite the clear border, carefully roll up the dough tightly into a log shape. Pinch the seam to seal it completely. Repeat for all 12 pieces. -
Step 13
Place each rolled-up dough log seam-side down into the prepared 9×13 inch baking pan, leaving small spaces between them. -
Step 14
Loosely cover the baking pan with plastic wrap or a clean kitchen towel. Place in a warm, draft-free spot for 30-45 minutes, until rolls have puffed significantly and are closer together. -
Step 15
About 15 minutes before the second rise is complete, preheat oven to 375°F (190°C). If using, whisk 1 large egg with 1 tablespoon water for egg wash. -
Step 16
Gently brush the tops of the rolls with egg wash (if using). Transfer pan to preheated oven. Bake for 20-25 minutes, or until golden brown and cooked through (internal temp 200-210°F). -
Step 17
While rolls bake, melt 2 tablespoons unsalted butter with 1 finely minced garlic clove in a small bowl. -
Step 18
As soon as rolls come out of the oven, immediately brush tops generously with the freshly melted garlic butter. Sprinkle with the remaining 1 tablespoon fresh finely chopped parsley. -
Step 19
Let the rolls cool in the pan for about 5-10 minutes before serving. Best enjoyed warm.
Important Information
Nutrition Facts (Per Serving)
It is important to consider this information as approximate and not to use it as definitive health advice.
Allergy Information
Please check ingredients for potential allergens and consult a health professional if in doubt.

Leave a Comment