
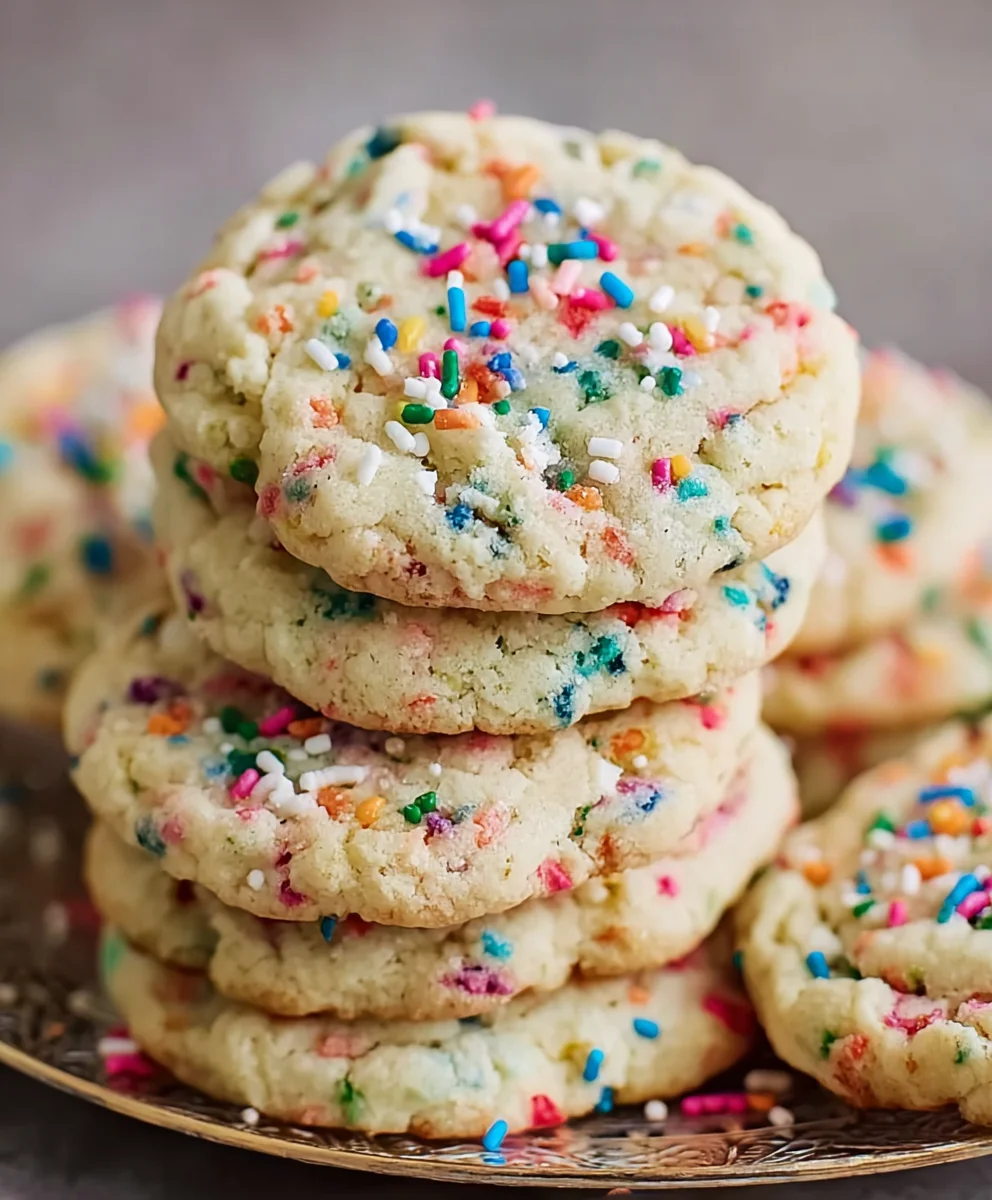
Funfetti Cookies are more than just a dessert; they’re a celebration in edible form, a delightful burst of color and joy that instantly transports you back to the happiest moments of childhood. Originating from the beloved Funfetti cake mixes of the 1990s, this sprinkle-filled treat quickly became synonymous with birthday parties, school bake sales, and countless joyful gatherings. There’s something truly special about the way these vibrant sprinkles transform a simple vanilla cookie into a whimsical masterpiece.
I find that people absolutely adore Funfetti Cookies not just for their undeniably delicious, buttery vanilla flavor and perfectly soft, chewy texture, but also for their incredible visual appeal. Each bite is a tender hug of sweetness, punctuated by the playful crunch and vibrant hues of the sprinkles. They are incredibly easy to make, yet they always leave an impression, making them a go-to for impromptu celebrations or simply brightening a regular Tuesday. Join me as we embark on a delightful baking adventure to create these quintessential festive treats that are guaranteed to bring smiles all around.
Welcome, fellow baking enthusiasts! While many recipes begin with a long list of individual components, today we’re starting with a delightfully convenient foundation. Our focus keyword, “Funfetti Cookies,” hints at the joy and vibrant colors we’re about to bring to life. This recipe is all about transforming perfectly prepared cookie dough into irresistible treats. We’re going to dive straight into the heart of the baking process, ensuring every step from oven to plate is filled with ease and delicious results.
Ingredients:
- Scoop dough into 1.5 tbsp-sized balls and place them on the baking sheets.
Yes, you read that correctly! Our star “ingredient” is the already-prepared, perfectly proportioned cookie dough, prepped and waiting to be baked. This means the heavy lifting of mixing, measuring, and adding those delightful funfetti sprinkles has already been handled, allowing us to focus purely on the art of baking these festive cookies to golden-brown perfection. Think of this as the ultimate shortcut to homemade cookie bliss, where the creative genius behind the dough has already set us up for success.
Preparing Your Baking Environment for Optimal Funfetti Cookie Results
The journey to truly spectacular Funfetti Cookies begins even before they enter the oven. A well-prepared baking environment is crucial for consistent results, ensuring each cookie bakes evenly and develops that coveted texture and flavor. This foundational stage sets the tone for the entire baking process, and I can’t stress enough how important these initial steps are, even when working with pre-scooped dough.
- Preheat Your Oven to the Ideal Temperature:
Before anything else, you’ll want to preheat your oven to 350°F (175°C). This isn’t just a suggestion; it’s a critical step. A properly preheated oven ensures that when your cookie dough balls enter, they begin baking immediately at a consistent temperature. If the oven isn’t fully preheated, the cookies might spread too much, bake unevenly, or take longer, resulting in a less-than-perfect texture. I always recommend using an external oven thermometer, as built-in oven thermostats can sometimes be inaccurate. A well-calibrated temperature is the secret to achieving that perfect crisp edge and soft, chewy center that defines an exceptional Funfetti Cookie. Allow at least 15-20 minutes for your oven to reach and stabilize at the desired temperature, even if it beeps sooner.
- Prepare Your Baking Sheets with Precision:
While our “ingredient” specifies placing dough on baking sheets, we can optimize this step for superior non-stick performance and easy cleanup. Line your baking sheets with either parchment paper or silicone baking mats. I personally find parchment paper to be a game-changer; it prevents sticking, promotes even browning on the bottom of the cookies, and makes transferring them a breeze. Silicone mats offer similar benefits and are reusable, making them an eco-friendly option. Avoid greasing the pans directly, as this can sometimes cause cookies to spread excessively. The goal here is to create a reliable, non-stick surface that facilitates the ideal cookie shape and texture, allowing those funfetti colors to truly pop without any baking mishaps.
If you’re using multiple baking sheets, ensure you have enough ready. Consistency in preparation across all sheets will help maintain uniformity in your final batch of Funfetti Cookies. Adequate spacing on the sheets is also key, so even if your dough balls are already precisely 1.5 tbsp-sized, double-check that they have enough room to expand without merging into one giant cookie blob. Typically, leaving about 2 inches between each dough ball is sufficient. This seemingly small detail significantly impacts air circulation around each cookie, which in turn affects how evenly they bake.
The Baking Process: Transforming Dough into Delightful Funfetti Cookies
Now that our oven is hot and our baking sheets are perfectly prepared, it’s time for the magic to happen. This stage is where our pre-scooped Funfetti cookie dough truly comes alive, filling your kitchen with the most inviting aromas and promising a colorful, delectable treat. Patience and attention to detail during baking are paramount for achieving that ideal cookie texture and ensuring the sprinkles maintain their vibrant appearance.
- Carefully Arrange and Place Your Baking Sheets:
With your precisely 1.5 tbsp-sized dough balls already situated on the prepared baking sheets, it’s time to introduce them to the heat. If you’re baking more than one sheet at a time, position them on separate oven racks, ensuring there’s ample space above and below each sheet for proper air circulation. Typically, I place one sheet on the middle rack and another on the rack just below or above, but never directly above or below each other. This setup helps prevent uneven baking where one sheet might be overdone while the other is still raw. Remember to handle the sheets gently to avoid disturbing the dough balls and potentially altering their shape, which could affect the final cookie’s aesthetics and texture. The goal is to encourage an even spread and consistent bake across the entire batch of your beautiful Funfetti Cookies.
- Bake for the Optimal Time and Watch for Cues:
Slide your baking sheets into the preheated oven. For 1.5 tbsp-sized cookie dough balls, the typical baking time will range from 10 to 14 minutes. However, oven temperatures can vary, so it’s essential to watch your cookies closely, especially during the last few minutes. You’re looking for the edges to be lightly golden brown, while the centers still appear slightly pale and perhaps a touch soft. It’s crucial not to overbake Funfetti Cookies, as this can lead to a dry, crumbly texture rather than the desired soft and chewy consistency. The residual heat from the baking sheet will continue to cook the cookies for a few minutes after they’re removed from the oven, so slightly underbaked is often better than overbaked. Trust your instincts and the visual cues; they are your best guide.
- Rotate Baking Sheets for Even Baking (If Using Multiple Sheets):
If you’re baking two sheets simultaneously, I highly recommend rotating them halfway through the baking process. This means swapping their positions (moving the top sheet to the bottom rack and vice versa) and rotating each sheet 180 degrees. Ovens often have hot spots, and this rotation technique helps ensure all your Funfetti Cookies receive even heat exposure. This simple step can make a significant difference in achieving a uniformly baked batch, preventing some cookies from being perfectly done while others are still undercooked or burnt. Consistency is key when aiming for a perfect batch of these celebratory treats.
- Monitor for Doneness and the Perfect Funfetti Appearance:
As the baking time progresses, keep a close eye on your Funfetti Cookies. Beyond the golden edges, observe the overall appearance. The sprinkles should still be vibrant, embedded beautifully within the cookie, and the cookie itself should have slightly puffed up before settling down. The center of the cookie should look set, not wet or raw. If the edges are browning too quickly, or if the sprinkles start to darken excessively, it’s a sign they might be nearing completion. Remember, every oven is different, and even the type of baking sheet can influence baking time. Learning to read your cookies’ cues will lead to perfectly baked Funfetti Cookies every time, ensuring they are not only delicious but also visually appealing with their signature burst of color.
Cooling and Optional Finishing Touches for Your Funfetti Cookies
The moment your beautifully baked Funfetti Cookies emerge from the oven is a moment of pure satisfaction. However, the baking process isn’t truly complete until they’ve cooled properly. This crucial stage allows them to firm up, develop their final texture, and become perfectly ready for enjoyment. While delicious on their own, a few optional finishing touches can elevate these festive treats even further, adding an extra layer of sweetness and visual appeal.
- Initial Cooling on the Baking Sheets:
Once you pull your golden-edged Funfetti Cookies from the oven, resist the urge to move them immediately. They are quite delicate at this stage, and attempting to transfer them too soon can cause them to break or lose their shape. Allow them to cool on the baking sheets for about 5 to 10 minutes. During this critical period, the cookies continue to set and firm up, thanks to the residual heat from the baking sheet. This process is vital for structural integrity, ensuring that when you finally move them, they maintain their perfect, round form. You’ll notice they become sturdier and less prone to crumbling as they cool, making them much easier to handle.
- Transfer to a Wire Rack for Complete Cooling:
After their initial resting period on the baking sheets, carefully transfer your Funfetti Cookies to a wire cooling rack to cool completely. I find a thin, sturdy spatula works best for this. Moving them to a wire rack allows air to circulate around all sides of the cookies, preventing condensation from forming on the bottom (which can make them soggy) and ensuring an even cool-down. This step is essential for achieving that desirable crisp edge and chewy center. Allowing them to cool completely on the rack also ensures any optional glazes or decorations you might want to add will adhere properly without melting or running. The full cooling process can take anywhere from 30 minutes to an hour, depending on your kitchen’s temperature, but patience here is truly a virtue, yielding perfectly textured Funfetti Cookies ready for their grand debut.
- Optional Adornments: Enhancing the Funfetti Experience:
Your Funfetti Cookies are already a celebration of color and flavor, but should you desire to add an extra layer of festivity, a simple glaze or a dusting of extra sprinkles can elevate them even further. While we haven’t listed specific ingredients for a glaze here, a basic powdered sugar glaze (made with powdered sugar and a touch of milk or water) drizzled over the cooled cookies can add a lovely sweetness and a smooth finish. Alternatively, a light shower of extra rainbow sprinkles right after applying a glaze, or even just gently pressed onto the warm cookies (if you’re feeling daring and they’re still slightly pliable) before full cooling, can amplify the “funfetti” effect. This is purely an aesthetic choice, but it can make your cookies even more visually stunning and perfect for parties or special occasions. Remember, the goal is to enhance, not overshadow, the natural deliciousness and vibrant charm of your homemade Funfetti Cookies.
Tips for Achieving Funfetti Cookie Perfection Every Time
Baking is both an art and a science, and even with a seemingly straightforward recipe like these Funfetti Cookies, a few insider tips can elevate your results from good to absolutely phenomenal. My goal is to equip you with the knowledge to consistently bake cookies that are not only visually stunning but also boast the perfect texture and flavor, truly embodying the spirit of “Funfetti Cookies.”
- Understand Your Oven’s Personality: As I mentioned earlier, oven temperatures can vary significantly. Investing in an inexpensive oven thermometer is perhaps the best advice I can give. It will tell you the true temperature inside your oven, allowing you to adjust your baking time or even the thermostat setting if needed. Knowing your oven’s quirks—like if it has a hotter back or front—will help you place and rotate your cookie sheets strategically for the most even bake possible.
- Don’t Overcrowd the Pan: While it might be tempting to fit as many cookie dough balls as possible onto a baking sheet to speed up the process, resist the urge! Overcrowding inhibits proper air circulation, leading to uneven baking, and can cause the cookies to merge as they spread. Stick to leaving ample space (about 2 inches) between each 1.5 tbsp-sized dough ball. This ensures each Funfetti Cookie has the room it needs to expand beautifully and bake uniformly.
- The Power of Parchment Paper (or Silicone Mats): I cannot emphasize enough the benefits of lining your baking sheets. It prevents sticking, facilitates easy cleanup, and provides a barrier that helps moderate the heat, preventing the bottoms of your Funfetti Cookies from getting too dark before the tops are cooked. It’s a simple step that yields significant improvements in consistency and appearance.
- Achieving Your Desired Texture:
- For Chewier Cookies: Remove the Funfetti Cookies from the oven when the edges are just set and very lightly golden, but the centers still look quite pale and slightly underdone. The residual heat will continue to cook them to a perfect chewiness. Slightly underbaking is the secret here.
- For Crispier Edges: If you prefer a bit more crispness, you can bake them for an extra minute or two, until the edges are a deeper golden brown. Be careful not to go too far, or they can become dry.
Experiment with your oven and your preferred doneness level to find your perfect Funfetti Cookie.
- Storage for Lasting Freshness: Once completely cooled, store your Funfetti Cookies in an airtight container at room temperature. They will typically stay fresh and delightful for up to 3-5 days. To maintain their soft texture, you can even place half a slice of bread in the container with them; the cookies will absorb moisture from the bread, keeping them soft. For longer storage, cooled cookies can be frozen in an airtight freezer-safe bag or container for up to 2-3 months. Thaw at room temperature for a quick treat.
- A Touch More Fun (Optional): If you want to boost the “funfetti” visual impact, you can gently press a few extra sprinkles onto the tops of the cookie dough balls right before baking. The heat will set them, ensuring a vibrant display of color on the surface of your baked Funfetti Cookies. This is purely for aesthetics, but it certainly adds to the celebratory feel!
Serving Suggestions and Embracing the Joy of Funfetti Cookies
Now that your kitchen is filled with the delightful aroma of freshly baked Funfetti Cookies, and your cooling racks are laden with these colorful gems, it’s time to fully embrace the joy they bring. These cookies are more than just a dessert; they’re a small celebration in every bite, perfect for brightening any day or occasion. Let’s explore how to best enjoy these festive treats.
The Classic Pairing: Milk and Cookies
There’s a reason why milk and cookies are an iconic duo, and Funfetti Cookies are no exception. A tall, cold glass of milk (dairy or non-dairy!) provides the perfect counterpoint to the sweet, buttery goodness of the cookies. The coolness of the milk complements the warmth of a freshly baked cookie, and the neutral flavor allows the vibrant vanilla and sprinkle notes of the Funfetti to truly shine. It’s a comforting, nostalgic pairing that appeals to all ages and truly enhances the simple pleasure of cookie enjoyment.
Elevating the Experience: Dessert Pairings
Beyond milk, Funfetti Cookies can be a delightful component of a larger dessert spread or even a dessert on their own, elevated by simple additions:
- Ice Cream Sandwiches: Take two cooled Funfetti Cookies and sandwich a scoop of your favorite vanilla, strawberry, or even birthday cake ice cream in between. The soft chewiness of the cookie combined with the creamy, melting ice cream is an absolute dream. Roll the edges in extra sprinkles for an even more celebratory look.
- With Coffee or Tea: For a sophisticated twist, pair your Funfetti Cookies with a hot cup of coffee, espresso, or a soothing herbal tea. The warmth of the beverage can highlight different nuances in the cookie’s flavor, making for a delightful afternoon treat or an after-dinner indulgence.
- Hot Chocolate Companion: During cooler months, or simply for a cozy moment, Funfetti Cookies are a fantastic partner for a mug of rich hot chocolate. The colorful sprinkles against the deep chocolate hue create a beautiful contrast, and the sweetness of the cookie is perfectly balanced by the warmth of the drink.
Occasions Perfect for Funfetti Cookies
The beauty of Funfetti Cookies lies in their inherent festive nature. They are truly versatile and suitable for a multitude of occasions:
- Birthday Parties: Naturally, the vibrant sprinkles make them a quintessential birthday treat. They’re easy to bake in large batches and are always a crowd-pleaser for guests of all ages.
- School Lunches and After-School Snacks: Tucked into a lunchbox, a Funfetti Cookie can bring a smile to any child’s face. They’re also a perfect pick-me-up after a long day of learning.
- Holiday Gatherings: While not tied to a specific holiday, the joyful colors of Funfetti Cookies make them a wonderful addition to any holiday table, from Easter to New Year’s, adding a touch of whimsy and cheer.
- Casual Get-Togethers and Potlucks: When you need a reliable, universally loved dessert to bring to a friend’s house or a potluck, Funfetti Cookies are always a fantastic choice. They’re approachable, delicious, and always spark joy.
- A Simple Pick-Me-Up: Sometimes, the best occasion is simply “today.” Baking a batch of Funfetti Cookies for no other reason than to enjoy them yourself or share with loved ones is a wonderful act of self-care and generosity.
The process of baking these Funfetti Cookies, even starting from a pre-scooped stage, is incredibly rewarding. From the moment the oven begins to preheat, to the final bite, you’re creating not just a dessert, but an experience. The vibrant colors, the sweet aroma, and the perfect balance of crisp and chewy textures all combine to create a cookie that’s truly special. So, go ahead, bake a batch (or two!), share the joy, and savor every delightful moment these Funfetti Cookies bring to your table.
Conclusion:
Well, my friends, we’ve reached the sweet finale of our baking adventure, and I truly hope you’re as excited as I am about the incredible results waiting to burst forth from your oven! This isn’t just another cookie recipe; it’s a passport to pure joy, a sprinkle-filled celebration that promises to brighten any day, any occasion, and any plate. If you’ve followed along, you’re about to experience the magic of cookies that aren’t just delicious, but also visually spectacular, guaranteed to elicit gasps of delight from anyone lucky enough to take a bite.
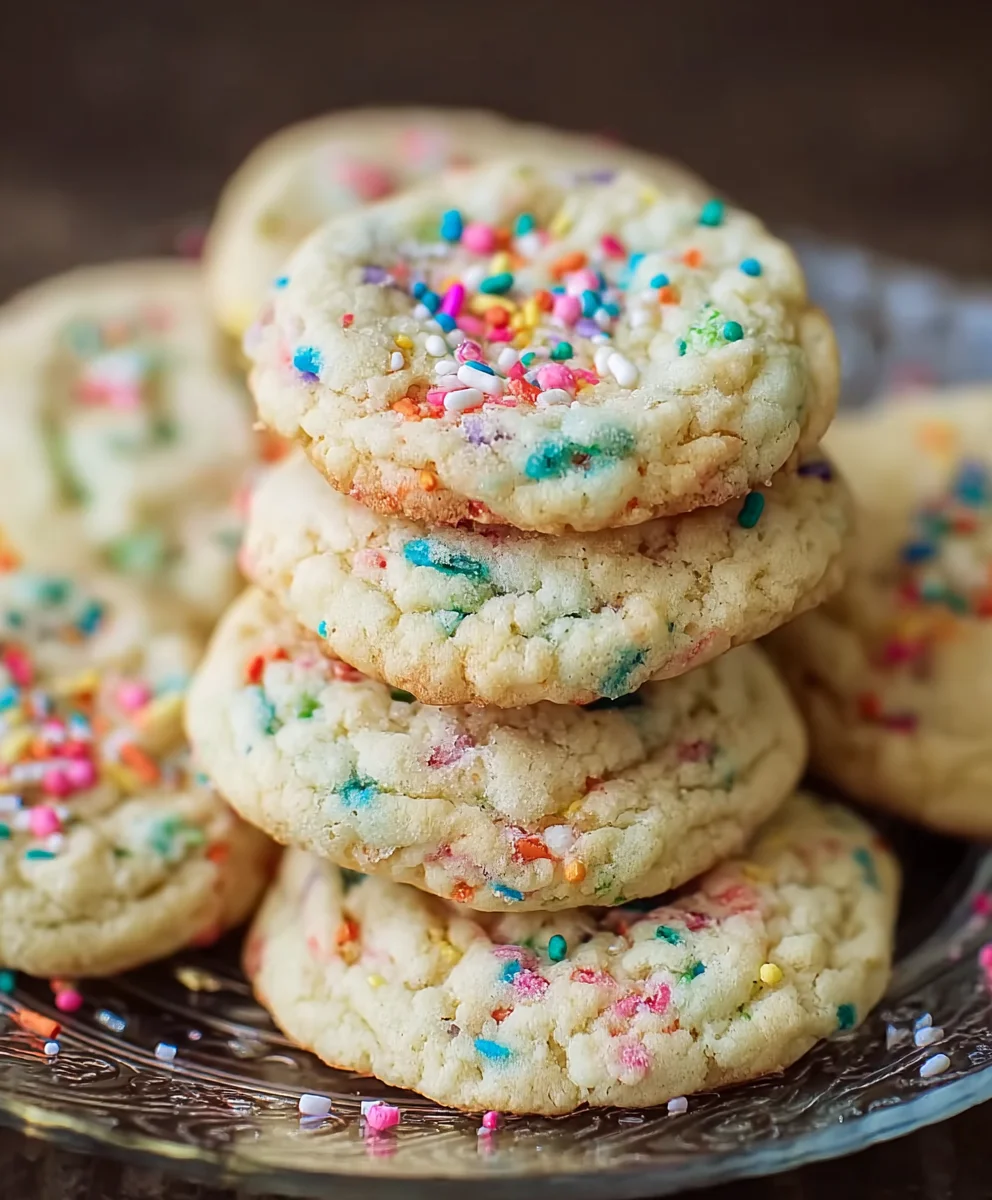
What makes this particular recipe an absolute must-try? For starters, it perfectly balances that elusive chewiness with a delightfully soft center, all wrapped up in a buttery, vanilla-kissed dough. But let’s be honest, the real star of the show is that explosion of color! Those vibrant sprinkles baked right into the dough aren’t just for show; they add a playful texture and a hint of fun that transforms a simple cookie into an edible party. Imagine biting into one and seeing all those cheerful speckles – it’s an instant mood booster, a little burst of happiness in every mouthful. I promise you, once you taste these, you’ll understand why they’re destined to become a staple in your baking repertoire. They are incredibly easy to whip up, requiring no special skills or fancy equipment, making them accessible for even the most novice baker. The aroma alone as they bake will fill your kitchen with warmth and anticipation, making the waiting almost as enjoyable as the eating.
Now, while these cookies are absolutely perfect on their own, fresh from the oven, I love getting creative with serving suggestions. For a classic, comforting treat, pair them with a tall, cold glass of milk – it’s a timeless combination that never disappoints. If you’re feeling a bit more indulgent, try crumbling them over a scoop of vanilla ice cream for a homemade Funfetti sundae. Or, for an afternoon pick-me-up, enjoy one alongside your favorite coffee or tea. They also make magnificent edible gifts! Arrange a batch in a pretty box or cellophane bag, tie it with a ribbon, and you’ve got a handmade present that speaks volumes of care and affection. They’re fantastic for school lunchboxes, office potlucks, birthday parties, or just because you deserve a little extra sweetness in your day.
Feeling adventurous? These cookies are incredibly versatile and invite customization. You can easily swap out the classic rainbow sprinkles for themed ones – imagine red and green for the holidays, pastels for Easter, or even specific team colors for a game day treat. For an extra layer of flavor and texture, consider folding in some white chocolate chips or chopped nuts (pecans or walnuts would be delightful!). A touch of almond extract instead of, or in addition to, vanilla can also lend a sophisticated nuance to the flavor profile. Don’t be afraid to experiment! That’s the beauty of baking – making it your own. For a truly decadent experience, once the cookies are cooled, you could even drizzle them with a simple glaze made from powdered sugar and milk, or dip half of them in melted white chocolate and add more sprinkles before the chocolate sets. The possibilities for personalizing these Funfetti Cookies are truly endless, allowing you to tailor them to any taste or occasion.
So, what are you waiting for? Gather your ingredients, preheat your oven, and dive into the joyful process of making these magnificent treats. I wholeheartedly encourage you to give this recipe a try. I guarantee it will bring a smile to your face and to the faces of everyone you share them with. And please, please, please – don’t keep your masterpieces a secret! Once you’ve baked your batch, I would absolutely love to hear about your experience. Did you make any fun variations? What was your favorite part? Share your photos and comments with me; your feedback is incredibly valuable and inspires me to keep creating and sharing more deliciousness with you all. Happy baking, and may your kitchen always be filled with the sweet aroma of freshly baked cookies!
FAQs About Funfetti Cookies:
Can I use any type of sprinkles for these Funfetti Cookies?
Absolutely! While classic rainbow jimmie sprinkles are what give Funfetti cookies their signature look, you are more than welcome to experiment with different types and colors. Nonpareils (the tiny round ball sprinkles) can also work, but be aware they sometimes bleed their color a bit more into the dough, especially if your dough is very warm or if they’re mixed in too vigorously. Flat, disc-shaped confetti sprinkles are another fantastic option for a true “confetti” look. Feel free to use themed sprinkles for holidays or special events to make them even more festive!
How should I store these cookies to keep them fresh?
To keep your Funfetti Cookies soft and delicious, store them in an airtight container at room temperature. They will stay fresh for about 3-5 days. If you find them starting to harden, you can place a half-slice of bread in the container with them overnight; the cookies will absorb moisture from the bread and soften up beautifully.
Can I make the cookie dough ahead of time and bake later?
Yes, you absolutely can! Preparing the dough in advance is a fantastic time-saver. Once you’ve mixed the dough, wrap it tightly in plastic wrap or place it in an airtight container and refrigerate for up to 2-3 days. When you’re ready to bake, you might need to let the dough sit at room temperature for about 10-15 minutes to soften slightly before scooping, especially if it’s very firm. This helps prevent cracks when scooping and ensures even baking.
My cookies spread too much or didn’t spread enough. What went wrong?
Cookie spread can be influenced by several factors! If your cookies spread too much, your butter might have been too warm (melted butter causes more spread), your oven temperature might be a bit too low, or you might have used too much leavening agent. Chilling the dough before baking can help prevent excessive spreading. If they didn’t spread enough, your butter might have been too cold, your flour measurement might have been too high, or your oven could be too hot. Ensuring your ingredients are at room temperature as specified and accurately measuring your flour (using a kitchen scale is best!) are key to consistent results.
Can I freeze Funfetti Cookies?
Yes, both baked cookies and raw cookie dough freeze wonderfully!
For baked cookies: Once completely cooled, place them in a single layer on a baking sheet and freeze until firm (about 30 minutes). Then, transfer them to a freezer-safe airtight container or heavy-duty freezer bag, layering them with parchment paper to prevent sticking. They’ll keep well for up to 3 months. Thaw at room temperature.
For raw cookie dough: Scoop the dough into balls and place them on a parchment-lined baking sheet. Freeze until solid, then transfer the frozen dough balls to a freezer-safe bag. They can be frozen for up to 3 months. When ready to bake, you can bake them directly from frozen, adding an extra minute or two to the baking time, or let them thaw slightly in the fridge first.
Are there any gluten-free or dairy-free alternatives for this recipe?
While this specific recipe is written with traditional ingredients, many substitutions can be made to accommodate dietary needs.
For Gluten-Free: You can often substitute all-purpose flour with a 1:1 gluten-free baking flour blend that contains xanthan gum. Results can vary slightly, but many blends work beautifully in cookie recipes.
For Dairy-Free: You can substitute butter with a high-quality dairy-free butter stick (not margarine spreads) and use a dairy-free milk alternative (like almond or oat milk) if the recipe calls for milk. Ensure your sprinkles are also dairy-free, as some brands may contain milk derivatives. Always check ingredient labels carefully for all components.
Best Funfetti Cookies Recipe – Soft, Chewy, & Colorful!
Transform pre-prepared Funfetti cookie dough into irresistible soft, chewy, and vibrant cookies. This guide focuses on optimal baking techniques to achieve perfect results for these colorful treats.
Ingredients
-
Pre-prepared Funfetti cookie dough, scooped into 1.5 tbsp-sized balls
Instructions
-
Step 1
Preheat your oven to 350°F (175°C). Allow at least 15-20 minutes for it to reach and stabilize at the desired temperature. -
Step 2
Line baking sheets with parchment paper or silicone baking mats. Place the 1.5 tbsp-sized dough balls on the prepared sheets, ensuring about 2 inches of space between each. -
Step 3
Carefully place baking sheets into the preheated oven. If using multiple sheets, position them on separate oven racks for proper air circulation. Bake for 10-14 minutes. -
Step 4
If baking multiple sheets simultaneously, rotate them 180 degrees and swap their rack positions halfway through baking to ensure even cooking. -
Step 5
Watch for the cookies’ edges to be lightly golden brown, while the centers still appear slightly pale and soft. Do not overbake to maintain a soft and chewy texture. -
Step 6
Remove from oven and allow cookies to cool on the baking sheets for 5-10 minutes. This critical period helps them firm up and set. -
Step 7
Carefully transfer the cookies to a wire cooling rack to cool completely (approx. 30-60 minutes). This ensures an even cool-down and helps achieve crisp edges with chewy centers. -
Step 8
Once fully cooled, you may optionally drizzle the cookies with a powdered sugar glaze or gently press a few extra sprinkles onto warm cookies for enhanced visual appeal.
Important Information
Nutrition Facts (Per Serving)
It is important to consider this information as approximate and not to use it as definitive health advice.
Allergy Information
Please check ingredients for potential allergens and consult a health professional if in doubt.


Leave a Comment