
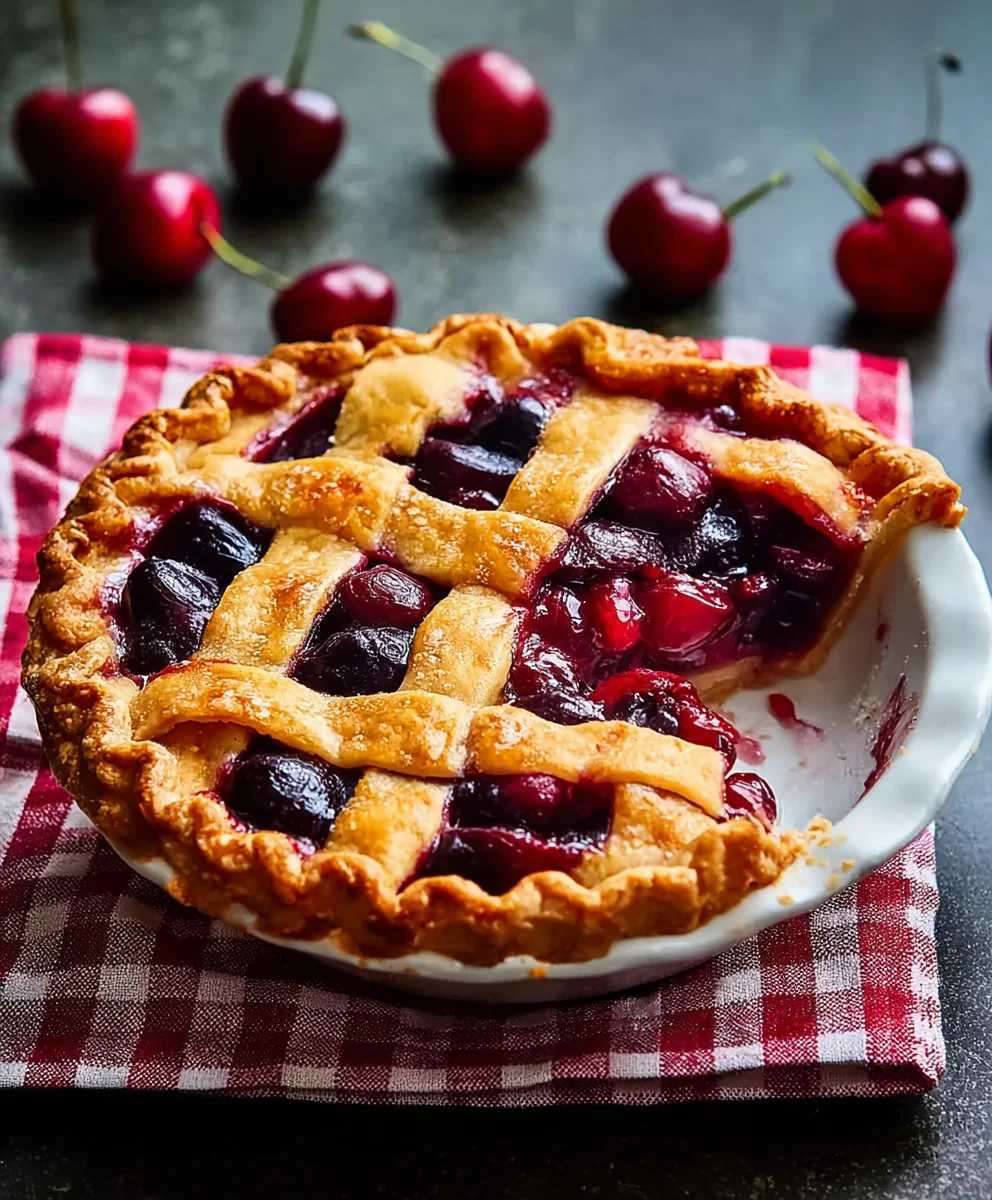
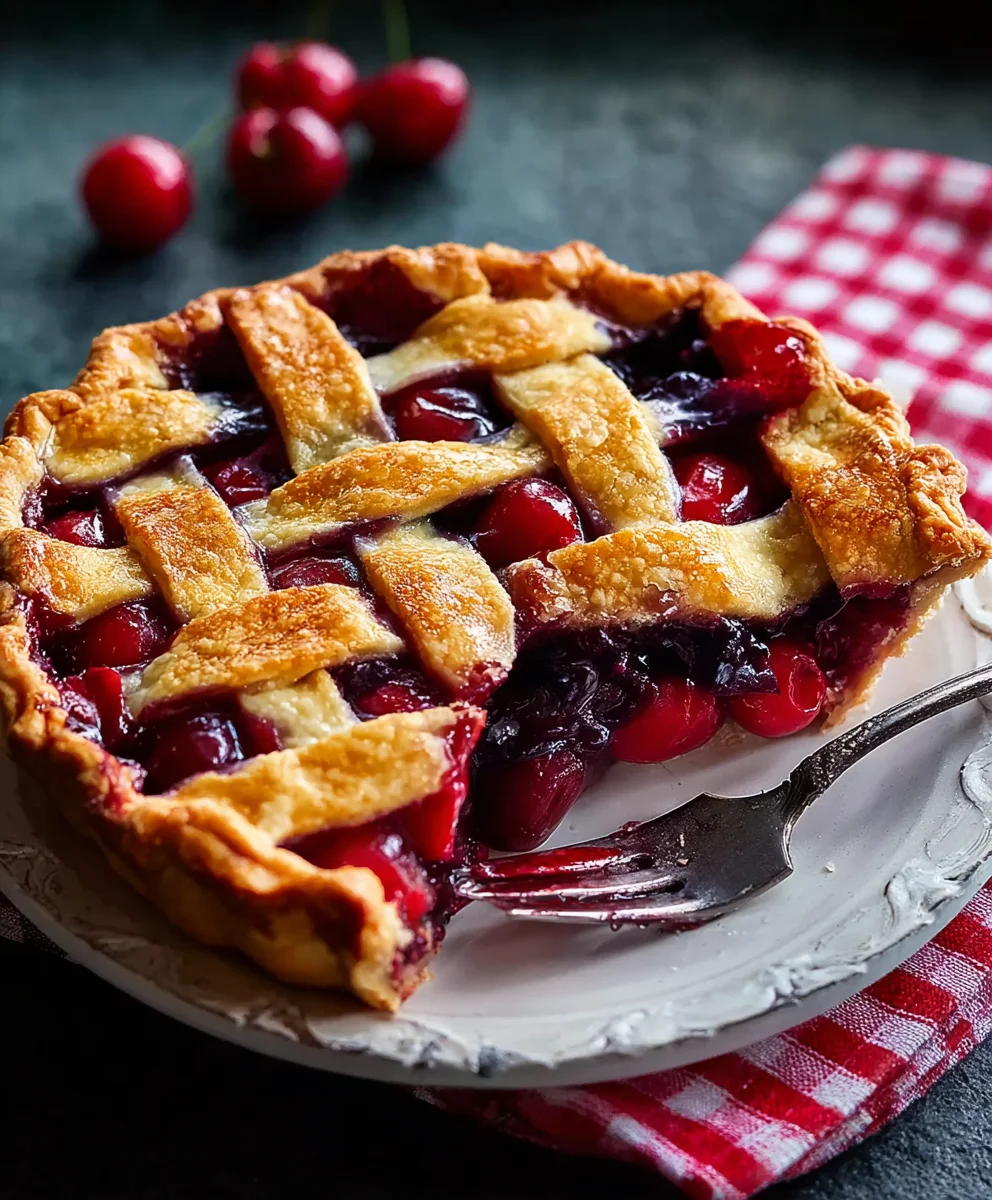
Classic Cherry Pie is more than just a dessert; it’s a warm hug on a plate, a nostalgic trip back to grandma’s kitchen, and a guaranteed crowd-pleaser. There’s a reason why this iconic dessert has stood the test of time. It’s the perfect balance of sweet and tart, the buttery, flaky crust yielding to a bubbling, ruby-red filling that bursts with the bright, unmistakable flavor of cherries. Whether it’s served warm with a scoop of vanilla ice cream or enjoyed at room temperature, a slice of Classic Cherry Pie evokes feelings of comfort, joy, and pure, unadulterated deliciousness. What makes it truly special is its simplicity, allowing the star ingredient – the cherries – to shine, while the complementary crust provides that essential textural contrast and rich, satisfying base. Get ready to create your own slice of heaven with this foolproof recipe!
Ingredients:
- 28 ounces pitted cherries (about 5 heaping cups), fresh or frozen and thawed
- 2 tablespoons fresh lemon juice
- 1 cup granulated sugar
- 3/4 teaspoon Diamond Crystal kosher salt
- 1/3 cup plus 1 teaspoon tapioca starch
- Double pie crust dough, enough for a 9-inch pie
- 1 large egg, beaten (optional, for egg wash)
- 1 large egg yolk, beaten (optional, for egg wash)
- 1 tablespoon heavy cream (optional, for egg wash)
- 1/8 teaspoon kosher salt (optional, for egg wash sprinkle)
Preparing the Cherry Filling
The heart of a truly exceptional Classic Cherry Pie lies in its filling. We want to balance the natural tartness of the cherries with just the right amount of sweetness and a thickening agent that yields a beautiful, glossy texture. Using fresh cherries will give you the brightest flavor, but high-quality frozen cherries work wonderfully too. If you’re using frozen cherries, be sure to thaw them completely and drain off any excess liquid before proceeding. This is crucial to prevent a watery pie. The lemon juice is not just for brightness; it enhances the cherry flavor and adds a subtle tang that cuts through the sweetness.
In a large bowl, combine the pitted cherries, fresh lemon juice, granulated sugar, and 3/4 teaspoon of Diamond Crystal kosher salt. Give everything a gentle stir to ensure the cherries are evenly coated. Let this mixture sit for about 10-15 minutes. This resting period allows the sugar to start drawing out some of the juices from the cherries, which will contribute to a more vibrant filling and help the tapioca starch do its job effectively.
After the cherries have rested, it’s time to add our thickening agent. In a small separate bowl, whisk together the 1/3 cup plus 1 teaspoon of tapioca starch with a tablespoon or two of the cherry juices that have accumulated in the bottom of the bowl. This creates a smooth slurry, preventing any clumps of tapioca starch from forming in the pie filling. Once you have a smooth slurry, pour it over the cherries and stir gently to combine. Make sure the tapioca starch is evenly distributed throughout the cherry mixture. The filling should now look slightly syrupy.
Assembling Your Classic Cherry Pie
Now that our glorious cherry filling is ready, it’s time to assemble the pie. Preheat your oven to 425°F (220°C). While the oven heats, take your double pie crust dough. Gently unroll or press one of the crusts into a 9-inch pie plate. It’s important not to stretch the dough, as this can cause it to shrink during baking. Ease the dough into the plate, letting any excess hang over the edges for now.
Carefully pour the prepared cherry filling into the pie crust. Try to distribute the cherries as evenly as possible. Don’t be alarmed if it looks like a lot of filling; cherries shrink slightly as they bake, and the tapioca starch will thicken the juices.
Now, for the top crust. You have a few options here: you can place the second rolled-out crust directly over the filling and crimp the edges, or you can cut the crust into strips to create a lattice top. For a lattice top, cut the dough into even strips, about 1/2 to 1 inch wide. Lay half of the strips parallel across the top of the filling, spaced evenly apart. Then, weave the remaining strips over and under the first set to create a beautiful crisscross pattern. Once the top crust or lattice is in place, trim any excess dough from the edges, leaving about a 1/2 inch overhang. Fold this overhang under the edge of the bottom crust and crimp the edges decoratively to seal the pie. This sealing is important to prevent the filling from leaking out during baking.
Baking Your Masterpiece
For that irresistible golden-brown finish, we’ll prepare an optional egg wash. In a small bowl, whisk together the optional beaten egg, optional beaten egg yolk, and optional tablespoon of heavy cream. This creates a rich, glossy wash that will make your pie crust shine. If you’re using it, lightly brush this mixture over the top crust. For an extra touch of flavor and sparkle, you can sprinkle a tiny pinch of the optional 1/8 teaspoon of kosher salt over the egg wash. This step is entirely optional but highly recommended for that professional touch.
Before placing the pie in the oven, consider using a pie shield or strips of aluminum foil to protect the edges of the crust from burning. Pie crust edges can brown much faster than the rest of the pie. You can either place a pie shield around the perimeter or carefully wrap strips of foil around the outer edge of the crust.
Place the pie on a baking sheet. This is a good preventative measure in case any filling bubbles over, as it can make cleanup much easier. Bake in the preheated 425°F (220°C) oven for 20 minutes. After 20 minutes, reduce the oven temperature to 375°F (190°C) and continue baking for another 30-40 minutes, or until the crust is deeply golden brown and you see the filling bubbling through the vents or lattice. You should be able to see the cherry filling bubbling enthusiastically. If the crust is browning too quickly at any point, you can cover the entire pie loosely with aluminum foil.
Allow the pie to cool completely on a wire rack for at least 3-4 hours before slicing. This is perhaps the most challengin extractg part, but it’s essential for the filling to set properly. If you cut into it too soon, the filling will be runny. The tapioca starch needs time to fully thicken and gel. Once it’s cooled, you’ll be rewarded with perfectly held slices of delicious Classic Cherry Pie.
Conclusion:
And there you have it – your guide to creating the most delicious and truly Classic Cherry Pie! We’ve walked through each step, from preparing the perfect flaky crust to achieving that deeply flavored, luscious cherry filling. This pie is a timeless dessert for a reason, offering a delightful balance of sweet and tart that’s sure to impress.
When it comes to serving, a warm slice of this Classic Cherry Pie is absolutely divine on its own, but it truly shines with a scoop of creamy vanilla ice cream or a dollop of freshly whipped cream. For variations, consider adding a pinch of almond extract to the filling for a subtle nutty note, or sprinkle some chopped toasted almonds over the top crust before baking for added texture. Don’t be afraid to experiment! I encourage you to give this recipe a try; the joy of baking and sharing homemade pie is incredibly rewarding.
Frequently Asked Questions:
Can I use frozen cherries for this Classic Cherry Pie?
Absolutely! Frozen cherries work wonderfully and can even make the filling a bit easier to manage as they release less juice initially. If using frozen, make sure to drain them thoroughly after thawing to prevent a watery pie.
What can I do if my pie crust isn’t browning evenly?
If you notice your crust is browning too quickly on the edges, you can gently cover those areas with strips of aluminum foil. This will allow the rest of the pie to bake to a beautiful golden-brown perfection without burning.
Classic Cherry Pie Recipe – Easy Homemade Dessert
A simple and delicious recipe for a classic homemade cherry pie with a perfectly sweet and tart filling.
Ingredients
-
28 ounces pitted cherries (about 5 heaping cups), fresh or frozen and thawed
-
2 tablespoons fresh lemon juice
-
1 cup granulated sugar
-
3/4 teaspoon Diamond Crystal kosher salt
-
1/3 cup plus 1 teaspoon tapioca starch
-
Double pie crust dough, enough for a 9-inch pie
-
1 large egg, beaten (optional, for egg wash)
-
1 large egg yolk, beaten (optional, for egg wash)
-
1 tablespoon heavy cream (optional, for egg wash)
-
1/8 teaspoon kosher salt (optional, for egg wash sprinkle)
Instructions
-
Step 1
Combine pitted cherries, lemon juice, granulated sugar, and 3/4 teaspoon kosher salt in a large bowl. Stir gently and let sit for 10-15 minutes to draw out juices. -
Step 2
In a separate small bowl, whisk tapioca starch with 1-2 tablespoons of the accumulated cherry juices to create a smooth slurry. Pour this slurry over the cherries and stir gently to combine. -
Step 3
Preheat oven to 425°F (220°C). Line a 9-inch pie plate with one pie crust. Pour the cherry filling into the crust. -
Step 4
Top with the second pie crust, either as a full crust or a lattice. Trim and crimp the edges to seal. If using an egg wash, whisk together the optional egg, egg yolk, and heavy cream, then brush onto the top crust. Sprinkle with optional salt. -
Step 5
Place the pie on a baking sheet. Bake for 20 minutes at 425°F (220°C), then reduce temperature to 375°F (190°C) and bake for an additional 30-40 minutes, or until the crust is golden brown and the filling is bubbling. -
Step 6
Allow the pie to cool completely on a wire rack for at least 3-4 hours before slicing to allow the filling to set.
Important Information
Nutrition Facts (Per Serving)
It is important to consider this information as approximate and not to use it as definitive health advice.
Allergy Information
Please check ingredients for potential allergens and consult a health professional if in doubt.

Leave a Comment