
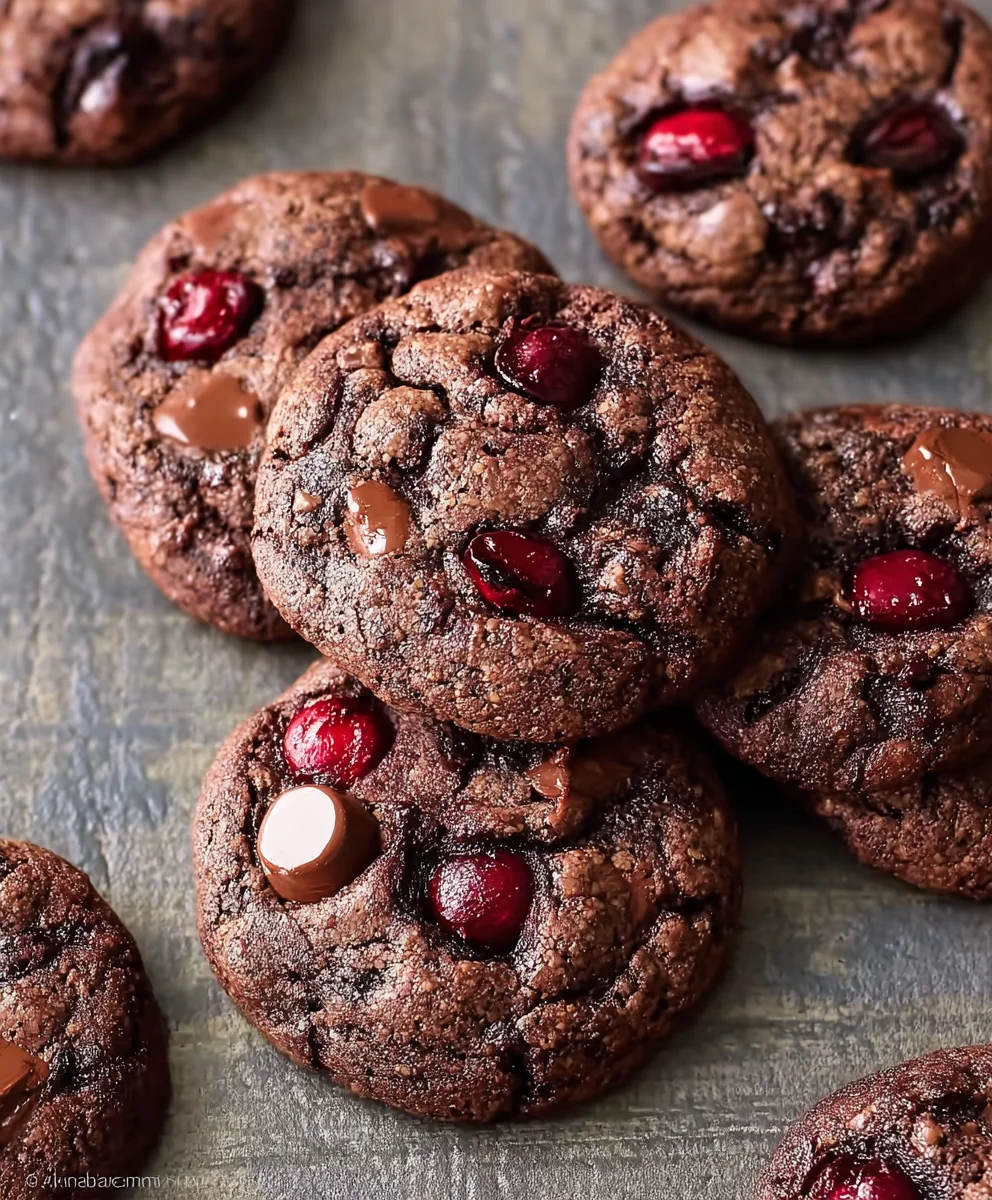
Cherry-Chocolate Cookies – just the name alone promises a symphony of flavors and textures, doesn’t it? As an avid baker, I can confidently say that few dessert combinations capture the heart quite like the delightful marriage of rich, dark chocolate and the vibrant, tart sweetness of cherries. This isn’t merely a cookie; it’s a small, edible celebration, a bite of pure bliss that instantly transports you to a place of warmth and indulgence. Prepare to fall in love with a cookie that delivers on every delicious promise.
Why Everyone Loves Cherry-Chocolate Cookies
The pairing of cherries and chocolate has a venerable history, often gracing sophisticated desserts and confections, becoming a classic for a reason. It evokes a sense of timeless elegance, yet these particular Cherry-Chocolate Cookies are wonderfully approachable and comforting. People adore this dish not only for its irresistible taste – the perfect balance between decadent chocolate and the bright burst of fruit – but also for its truly satisfying texture. Imagine a perfectly chewy edge yielding to a soft, gooey center, punctuated by juicy pockets of fruit. These cookies are a perennial favorite because they offer an exciting interplay of flavors that never ceases to delight, making them perfect for any occasion, from a casual treat to a festive gathering. Get ready to bake a batch that will surely become a staple in your home!
Ingredients:
Creating these delightful Cherry-Chocolate Cookies, often affectionately called Black Forest Cookies, is a truly rewarding experience. The magic truly begins with gathering your quality ingredients, each playing a crucial role in the symphony of flavors and textures we’re about to create. I always find that having everything prepped and measured makes the baking process so much more enjoyable and smooth. Here’s exactly what you’ll need to bring these rich, chocolatey, and cherry-studded treats to life:
- 1 cup softened butter: I always recommend unsalted butter for baking, as it gives you more control over the salt content in your recipe. Make sure it’s truly softened to room temperature – not melted, but yielding to a gentle press. This is critical for achieving that light, fluffy texture when creamed with the sugars.
- 1 cup granulated sugar: This provides a crisp sweetness and helps the cookies spread slightly, contributing to a lovely chewiness at the edges.
- 1 cup packed brown sugar: The brown sugar, specifically packed firmly into the measuring cup, adds a wonderful molasses note, contributing to the cookie’s deep flavor and its characteristic soft, chewy interior. The moisture in brown sugar also helps keep the cookies moist.
- 2 large eggs: These act as a binding agent, helping to emulsify the fat and liquid ingredients, and contribute to the cookie’s structure and richness. Ensure they are also at room temperature for better incorporation into the creamed butter and sugar.
- 1 tsp vanilla extract: A good quality vanilla extract is essential. It enhances all the other flavors, particularly the chocolate and cherry, adding a warm, aromatic depth that makes these cookies irresistible. Don’t skimp on this!
- 2 1/4 cups all-purpose flour: Flour provides the main structure for our cookies. I always spoon and level my flour to ensure I’m not adding too much, which can lead to dry, dense cookies.
- 1/2 cup cocoa powder: This is where the rich, dark chocolate flavor truly comes from. I prefer using Dutch-processed cocoa powder for a deeper, less acidic chocolate flavor, but natural cocoa powder works beautifully too, resulting in a slightly brighter chocolate note.
- 1/2 tsp baking soda: Our leavening agent! Baking soda reacts with the acidic components in the dough (like the brown sugar and cocoa powder, especially if using natural cocoa) to create carbon dioxide, which helps the cookies rise and achieve a tender texture.
- 1/4 tsp salt: Just a pinch of salt is vital. It balances the sweetness, enhances the chocolate flavor, and brings out the nuances of the cherry. It truly makes all the other flavors pop!
- 1 cup semi-sweet chocolate chips: These little gems melt into pockets of pure chocolatey goodness throughout the cookies. Semi-sweet is my go-to, offering a balanced sweetness that pairs wonderfully with the cherries.
- 1 cup chopped maraschino cherries: These vibrant, sweet cherries are the star of the show, providing bursts of fruity flavor and a beautiful color contrast. Make sure they are well-drained and patted dry before chopping to avoid adding excess moisture to your dough.
- 1/2 cup powdered sugar: This is for dusting the cooled cookies, providing a delicate sweetness and a beautiful, snowy finish that evokes the classic Black Forest aesthetic.
Equipment You’ll Need:
Before we dive into the fun part of mixing, let’s make sure you have all the necessary tools ready. Having your equipment organized will streamline your baking process and make it a much more pleasant experience. Trust me, I’ve learned from experience that a little preparation goes a long way!
- A large mixing bowl (or the bowl of a stand mixer)
- A medium mixing bowl
- Electric mixer (stand or hand-held)
- Rubber spatula or wooden spoon
- Whisk
- Measuring cups and spoons
- Sharp knife and cutting board (for chopping cherries)
- Baking sheets
- Parchment paper or silicone baking mats
- Wire cooling rack
- Small sieve or sifter (for dusting powdered sugar)
Preparation is Key:
Alright, let’s get organized! Baking is much more enjoyable when you’re not scrambling for ingredients or tools in the middle of a step. Taking a few moments to prepare everything beforehand will set you up for success and ensure your Cherry-Chocolate Cookies turn out perfectly every time.
First and foremost, make sure your butter and eggs are at room temperature. This is a crucial step that many overlook, but it makes a significant difference in the texture of your cookies. Room temperature butter creams beautifully with sugar, creating an airy, emulsified base, and room temperature eggs incorporate more smoothly into the mixture, preventing a curdled appearance. I usually take them out of the fridge at least an hour before I plan to start baking.
Next, let’s prepare those beautiful maraschino cherries. I always drain them thoroughly first. You can place them in a fine-mesh sieve over a bowl and let them sit for a good 10-15 minutes. For an extra step to prevent your dough from getting too wet, I’ll even gently pat them dry with a paper towel. Once drained, chop them into smaller, bite-sized pieces. You want them distributed throughout the cookie, not huge chunks that might make the cookie crumbly. This also ensures you get a burst of cherry flavor in almost every bite.
Finally, measure out all your remaining ingredients. Have your sugars ready, measure your flour, cocoa powder, baking soda, and salt into a separate bowl, and have your vanilla extract and chocolate chips standing by. This practice, known as “mise en place,” is a baker’s best friend. Now, you’re truly ready to begin the fun part: mixing!
Crafting Your Cherry-Chocolate Cookie Dough:
This is where the magic really starts to happen! Follow these steps carefully to ensure you develop that perfect, rich, and flavorful dough that will bake into your dream Cherry-Chocolate Cookies.
Step 1: Creaming the Sugars and Butter.
- In your large mixing bowl, or the bowl of your stand mixer fitted with the paddle attachment, add the 1 cup softened butter, 1 cup granulated sugar, and 1 cup packed brown sugar.
- Begin beating on low speed until the sugars are just combined with the butter, then increase the speed to medium. Continue to beat for approximately 3-5 minutes. You’re looking for a mixture that is light in color, fluffy, and visibly increased in volume. This creaming process incorporates air into the butter, which is essential for giving our cookies their delightful texture and lift. Don’t rush this step; it’s foundational for a tender cookie. Occasionally, pause and scrape down the sides of the bowl with your rubber spatula to ensure everything is evenly combined.
Step 2: Incorporating Wet Ingredients.
- With your mixer still running on medium-low speed, add the 2 large eggs, one at a time. Beat well after each addition, allowing each egg to fully incorporate into the butter-sugar mixture before adding the next. This ensures proper emulsification and a smooth dough.
- Once both eggs are incorporated, stop the mixer and add the 1 tsp vanilla extract. Beat again briefly, just until the vanilla is fully mixed in. The aroma alone at this stage is already starting to hint at the deliciousness to come! Scrape down the sides of the bowl once more to make sure everything is cohesive.
Step 3: Whisking the Dry Essentials.
- In your separate medium mixing bowl, combine the 2 1/4 cups all-purpose flour, 1/2 cup cocoa powder, 1/2 tsp baking soda, and 1/4 tsp salt.
- Using a whisk, vigorously whisk these dry ingredients together for about 30 seconds to 1 minute. This isn’t just about mixing them; it’s about aerating the flour and ensuring the leavening agent (baking soda) and salt are evenly distributed throughout. This prevents pockets of unmixed ingredients and helps the cookies bake uniformly.
Step 4: Bringing it All Together.
- Now it’s time to marry your wet and dry ingredients. With your mixer on the lowest speed, gradually add the dry ingredients to the wet mixture in the large bowl, about a third at a time.
- Mix only until the flour streaks have almost disappeared. It’s crucial not to overmix at this stage. Overmixing flour develops the gluten, which can lead to tough, dry cookies. As soon as you see no more dry flour patches, stop the mixer. A few small streaks are perfectly fine; they’ll disappear in the next step.
Step 5: The Star Fold-ins: Chocolate and Cherries.
- Remove the bowl from the mixer (if using a stand mixer). Grab your sturdy rubber spatula.
- Add the 1 cup semi-sweet chocolate chips and the 1 cup chopped maraschino cherries to the dough.
- Gently fold these delicious additions into the dough until they are evenly distributed. Again, be careful not to overmix. You want the chocolate chips and cherries scattered throughout, so every bite is a delightful surprise. This gentle folding ensures your cookies remain tender.
Baking Your Decadent Cherry-Chocolate Cookies:
With our incredible dough ready, it’s time for the oven to work its magic. Getting the baking right is just as important as perfecting the dough, so pay close attention to these steps for perfectly baked, irresistible Cherry-Chocolate Cookies.
Step 6: Preheat and Prepare.
- Preheat your oven to 350°F (175°C). This temperature is ideal for cookies, allowing them to bake through evenly and develop a slightly crisp edge with a chewy center.
- Line your baking sheets with parchment paper or silicone baking mats. This is a step I never skip! It prevents the cookies from sticking, ensures even baking, and makes for super easy cleanup. If you don’t have parchment or silicone mats, you can lightly grease your baking sheets, but I highly recommend investing in them if you bake frequently.
Step 7: Scooping and Spacing.
- Using a cookie scoop (a 1.5 to 2 tablespoon size works wonderfully for consistent results), scoop mounds of dough onto the prepared baking sheets.
- Space the cookie dough balls about 2 inches apart. These cookies will spread a bit as they bake, and giving them enough room prevents them from merging into one giant cookie! I usually fit about 12 cookies on a standard-sized baking sheet.
Step 8: The Baking Magic.
- Place one baking sheet at a time into your preheated oven.
- Bake for approximately 10-12 minutes. Baking times can vary depending on your oven, so keep a close eye on them. You’ll know they’re ready when the edges are set and lightly golden, but the centers still look slightly soft and puffed. They will continue to set as they cool on the baking sheet. For even baking, you can rotate your baking sheet halfway through the baking time.
- Once baked, remove the baking sheet from the oven and let the cookies cool on the sheet for about 5 minutes. This allows them to firm up slightly before you attempt to move them, preventing them from breaking apart.
The Finishing Touch:
Almost there! These final steps add that classic Black Forest aesthetic and a delicate sweetness that truly elevates these Cherry-Chocolate Cookies from great to extraordinary.
Step 9: Cooling Down.
- After their initial 5-minute cool-down period on the baking sheet, carefully transfer the cookies to a wire cooling rack to cool completely. This crucial step allows air to circulate around all sides of the cookies, preventing them from becoming soggy on the bottom and ensuring they achieve that perfect texture.
- Resist the urge to dust them with powdered sugar while they’re hot! The heat will melt the sugar, turning it into a sticky glaze rather than a delicate dusting. Patience is a virtue here, my friends.
Step 10: The Powdered Sugar Dust.
- Once the cookies have fully cooled to room temperature (this might take 30 minutes to an hour, depending on your kitchen’s temperature), it’s time for the final flourish.
- Place the 1/2 cup powdered sugar into a small sieve or sifter.
- Hold the sieve over the cooled cookies and gently tap the side, allowing a fine, even layer of powdered sugar to fall over each cookie. This creates a beautiful, snowy finish that not only looks stunning but also adds a subtle hint of sweetness that perfectly complements the rich chocolate and tart-sweet cherries. I find this step truly makes them look like they came straight from a fancy bakery!
Tips for Perfect Cherry-Chocolate Cookies:
Baking is both an art and a science, and a few insider tips can make all the difference in achieving consistently amazing results. Here are some of my go-to pointers for ensuring your Cherry-Chocolate Cookies are nothing short of spectacular:
- Quality Ingredients Matter: While it might seem obvious, using fresh, good-quality ingredients truly impacts the final taste. Good butter, a decent quality cocoa powder, and fresh eggs will shine through in your cookies.
- Measure Accurately: Baking is precise! Use proper measuring cups and spoons. For flour, spoon it into your measuring cup and then level it off with a straight edge (like the back of a knife) to avoid packing too much flour, which can lead to dry cookies. For brown sugar, make sure to pack it firmly into the measuring cup.
- Don’t Overmix the Dough: This is a golden rule for cookies! Once you add the dry ingredients to the wet, mix only until just combined. Overmixing develops the gluten in the flour, making your cookies tough instead of tender and chewy. As soon as those flour streaks disappear, stop the mixer.
- Room Temperature Ingredients: I mentioned this in the prep section, but it bears repeating! Softened butter and room temperature eggs cream together much more smoothly and efficiently, creating a better emulsion and a lighter, airier dough. This directly translates to a better cookie texture.
- Chill the Dough (Optional but Recommended): If you have the time, chilling the dough for at least 30 minutes (or even overnight) can deepen the flavors, make the dough easier to handle, and prevent the cookies from spreading too much. The butter solidifies, leading to a thicker, chewier cookie.
- Uniform Cookie Size: Use a cookie scoop to ensure all your cookies are the same size. This promotes even baking, meaning all your cookies will be perfectly done at the same time. No more burnt edges and raw centers!
- Don’t Overbake: It’s better to slightly underbake than overbake cookies. Cookies continue to cook slightly on the hot baking sheet even after they’re out of the oven. If they look too raw in the center, give them another minute, but remove them when the edges are set and the centers still look a little soft.
- Know Your Oven: Every oven is different. Some run hotter or cooler than others. If you frequently bake, investing in an oven thermometer can be incredibly helpful to ensure your oven is truly at the temperature you set it to. Adjust baking times as needed based on your oven’s quirks.
- Proper Cooling: Let the cookies cool on the baking sheet for a few minutes before transferring them to a wire rack. This allows them to firm up slightly and prevents them from breaking apart when you move them.
- Pat Dry Your Cherries: Excess moisture from the maraschino cherries can affect the dough’s consistency and lead to slightly less structured cookies. Take the extra step to drain and pat them dry thoroughly.
Variations to Explore:
While these Cherry-Chocolate Cookies are absolutely divine as is, one of the joys of baking is experimenting and making a recipe truly your own. Here are a few ideas to inspire your creativity and tweak these already irresistible treats:
- Nutty Addition: For an extra layer of flavor and crunch, try adding 1/2 cup of chopped toasted walnuts or pecans to the dough along with the chocolate chips and cherries. The nutty notes would complement the chocolate and cherry beautifully.
- Different Chocolates: Instead of or in addition to semi-sweet chocolate chips, consider using dark chocolate chunks for a more intense chocolate flavor, or even a mix of milk chocolate and white chocolate chips for varying levels of sweetness and visual appeal. High-quality chocolate is always a good idea!
- Dried Cherries: If you prefer a less sweet and chewier cherry experience, swap out the maraschino cherries for 1 cup of dried tart cherries, roughly chopped. Soak them in a little hot water or cherry liqueur for 10-15 minutes before draining and adding to the dough to plump them up.
- Orange Zest: A touch of orange zest (from one orange) folded into the dough along with the vanilla extract can brighten the flavors and add a subtle, sophisticated citrus note that pairs wonderfully with both chocolate and cherry.
- Almond Extract: Instead of or in addition to vanilla extract, a 1/2 teaspoon of almond extract can enhance the cherry flavor significantly, giving the cookies a marzipan-like nuance often found in Black Forest desserts.
- Chocolate Drizzle: Instead of dusting with powdered sugar, once the cookies are completely cool, melt a few ounces of your favorite chocolate (dark, milk, or white) and drizzle it artfully over the cookies for an extra chocolatey flourish.
- Cream Cheese Frosting: For an even more decadent treat, skip the powdered sugar and, once cooled, top the cookies with a small dollop of cream cheese frosting. A tiny maraschino cherry on top would complete the look!
Storage and Serving Suggestions:
These Cherry-Chocolate Cookies are so delicious, I doubt they’ll last long, but it’s always good to know how to store them properly and get the most out of your baking efforts!
- Storing Baked Cookies: Once completely cooled, store your Cherry-Chocolate Cookies in an airtight container at room temperature for up to 3-4 days. To maintain their freshness and prevent them from drying out, you can place a slice of bread in the container with them; the cookies will absorb moisture from the bread.
- Freezing Baked Cookies: These cookies freeze beautifully! Once completely cooled and dusted with powdered sugar, arrange them in a single layer on a baking sheet and freeze until solid. Then, transfer them to a freezer-safe airtight container or heavy-duty freezer bag, separating layers with parchment paper. They will keep well in the freezer for up to 2-3 months. Thaw at room temperature before serving.
- Freezing Dough: If you want to bake fresh cookies on demand, you can also freeze the raw dough. Scoop the dough into balls and place them on a parchment-lined baking sheet. Freeze until solid, then transfer the frozen dough balls to a freezer-safe bag or container. They can be stored for up to 3 months. When ready to bake, place the frozen dough balls on a baking sheet and bake as directed, adding a few extra minutes to the baking time if needed.
- Serving Suggestions: These cookies are wonderful on their own with a tall glass of cold milk or a hot cup of coffee or tea. For a truly indulgent dessert, serve them warm with a scoop of vanilla bean ice cream or a dollop of freshly whipped cream. They also make a fantastic addition to any holiday cookie platter or dessert buffet. Their rich flavors and festive appearance are sure to be a hit!
Conclusion:
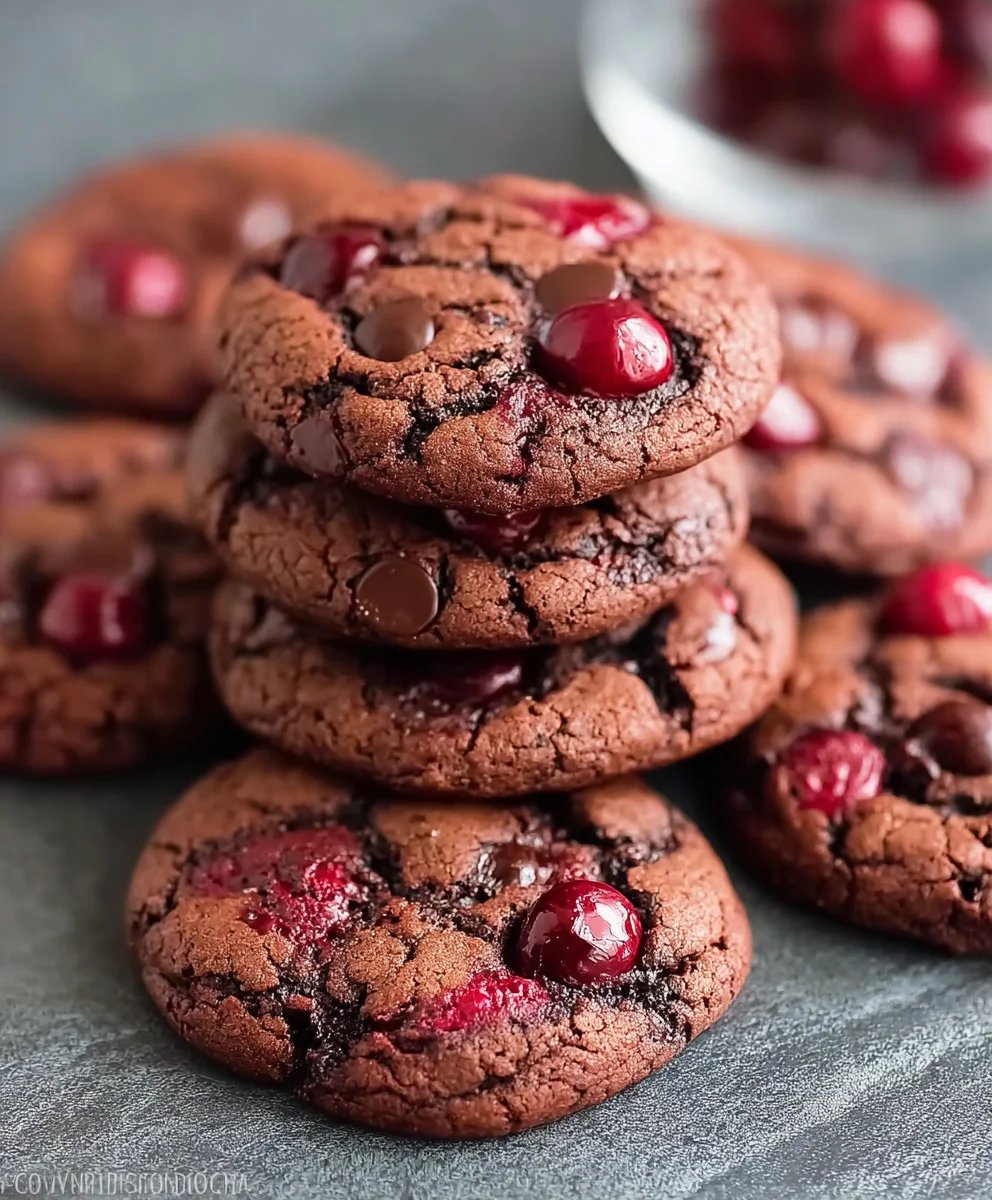
If you’ve followed along with me today, mixing, baking, and anticipating, I truly hope you’ve experienced the sheer delight that is creating a fresh batch of these incredible Cherry-Chocolate Cookies. There’s something uniquely satisfying about transforming simple ingredients into a treat that brings smiles and comfort, and this recipe, my friends, is a prime example of that magic. It’s more than just a cookie; it’s a celebration of flavors, a perfect marriage of the rich bitterness of chocolate and the bright, tart sweetness of dried cherries, all enveloped in a perfectly chewy, golden-brown embrace.
Why are these Cherry-Chocolate Cookies an absolute must-try? Beyond their undeniable deliciousness, they offer a sensory experience unlike any other. Imagine the warm, inviting aroma filling your kitchen as they bake, a delightful precursor to the indulgence awaiting you. The first bite reveals a symphony of textures and tastes: the slight crispness of the edge giving way to a soft, yielding center, studded with pockets of melted chocolate and chewy bursts of cherry. This isn’t just another chocolate chip cookie; it’s an elevated classic, a gourmet twist that feels both familiar and excitingly new. They are the perfect antidote to a long day, a joyous addition to any gathering, and a simple pleasure that reminds us of the best things in life.
Now, let’s talk about making these beauties even more your own! While I believe my recipe for Cherry-Chocolate Cookies hits all the right notes, I always encourage creativity in the kitchen. For serving suggestions, consider them warm, straight from the oven, alongside a tall glass of icy cold milk – a timeless pairing that truly shines. They’re also an exquisite companion to your morning coffee or afternoon tea, adding a touch of sweetness to your routine. For a truly decadent dessert experience, crumble one over a scoop of rich vanilla bean ice cream, allowing the warmth of the cookie to slightly melt the ice cream into a luscious pool. And let’s not forget, these make absolutely spectacular homemade gifts! Arrange them in a pretty tin or cellophane bag, and you’ve got a thoughtful present that speaks volumes.
When it comes to variations, the sky’s the limit! If you’re a fan of nuts, a sprinkle of toasted pecans or walnuts folded into the dough would add a lovely crunch and depth of flavor. For the chocolate lovers out there, feel free to experiment with different types of chocolate chips – milk chocolate for a sweeter profile, white chocolate for a creamy contrast, or even a blend of all three! If you want to play with the fruit, while I adore dried cherries, dried cranberries or even chopped dried apricots could offer an interesting twist, though I’m a firm believer that the particular tartness of dried cherries is what truly makes these Cherry-Chocolate Cookies sing. A touch of almond extract, in addition to or in place of some vanilla, can also enhance the cherry flavor beautifully. Don’t be afraid to add a pinch of sea salt on top before baking; it wonderfully amplifies the chocolate notes and balances the sweetness.
My genuine hope is that you’ll carve out some time very soon to try this recipe. There’s an immense joy in baking from scratch, in the process itself, and even more so in sharing the delicious results. Don’t just read about these incredible Cherry-Chocolate Cookies – make them! Experience the aroma, the taste, and the satisfaction of creating something truly special with your own hands. And please, once you’ve had a chance to bake and taste them, come back and share your experience with me. Did you love them as much as I do? Did you try a new variation that became a hit? Your comments, your stories, and your photos truly make my day. Let’s spread the joy of these perfect treats together!
People Also Ask:
Can I use fresh cherries instead of dried for these Cherry-Chocolate Cookies?
While dried cherries are fantastic for their concentrated flavor and chewy texture, you can experiment with fresh cherries. However, fresh cherries contain a lot more moisture, which can affect the cookie’s texture and cause them to spread more or become soggy. If you do use fresh, I highly recommend pitting and finely chopping them, then patting them very dry with paper towels. You might also want to toss them with a teaspoon of flour before adding them to the dough to help absorb excess moisture and prevent them from sinking to the bottom. Be prepared for a slightly different texture and potentially longer baking time!
What kind of chocolate works best in Cherry-Chocolate Cookies?
For my Cherry-Chocolate Cookies, I typically lean towards a good quality semi-sweet or dark chocolate (around 60-70% cacao) because its slight bitterness perfectly balances the sweetness and tartness of the cherries. However, personal preference is key! If you adore milk chocolate, go for it – it will create a sweeter, creamier cookie. White chocolate chips also offer a beautiful visual and flavor contrast. Feel free to use chocolate chips, chunks, or even a chopped chocolate bar for varying textures. Don’t be afraid to mix a couple of types for an even more complex flavor profile!
How should I store my Cherry-Chocolate Cookies to keep them fresh?
To keep your Cherry-Chocolate Cookies at their absolute best, ensure they are completely cooled before storing. Once cool, place them in an airtight container at room temperature. They’ll typically stay wonderfully fresh and chewy for about 3 to 5 days. If you want to extend their life, you can also freeze the baked cookies!
Can I freeze the cookie dough or baked Cherry-Chocolate Cookies?
Yes, absolutely! These Cherry-Chocolate Cookies are excellent for freezing, both as dough and once baked. To freeze the dough, scoop individual portions onto a parchment-lined baking sheet and freeze until solid (about 1-2 hours). Once firm, transfer the dough balls to a freezer-safe zip-top bag or container. They’ll keep for up to 3 months. When you’re ready to bake, you can bake them directly from frozen, adding an extra 2-4 minutes to the baking time. For baked cookies, ensure they are completely cool, then place them in an airtight freezer-safe container or bag. They’ll stay fresh for 2-3 months. Just thaw them at room temperature when you’re ready for a delicious treat!
My cookies spread too much! What could be the reason?
Cookie spreading is a common issue! Several factors can contribute to it. First, make sure your butter isn’t too warm or melted; it should be softened but still cool to the touch. Over-creaming the butter and sugar can also incorporate too much air, leading to excessive spreading. Also, ensure your oven temperature is accurate – a too-cool oven won’t set the cookies quickly enough. Finally, and this is a big one, chilling the dough for at least 30 minutes (or even overnight!) before baking can significantly help prevent spreading by firming up the butter. If all else fails, a quick re-chill of the dough usually does the trick!
What if I don’t like cherries? Can I still use this cookie base?
Of course! While I adore the unique flavor of Cherry-Chocolate Cookies, this cookie base is wonderfully versatile. If cherries aren’t your favorite, you can easily swap them out for other dried fruits. Dried cranberries, blueberries, or even chopped candied ginger (for a spicy kick!) would work beautifully. You could also omit the fruit entirely for a rich, chewy chocolate chunk cookie, or add a mix of different nuts for extra crunch. The possibilities are endless, so feel free to make this recipe your own!
Cherry-Chocolate Cookies Recipe: Irresistible & Easy
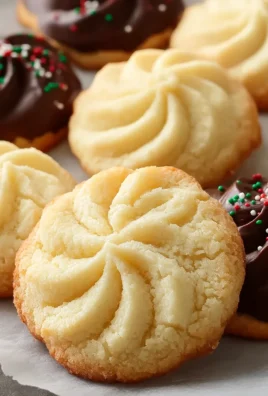
These Black Forest Cookies are a decadent treat that combines the rich flavors of chocolate and cherries. Made with a buttery, chocolate-infused dough, semi-sweet chocolate chips, and chopped maraschino cherries, they offer a delightful contrast of sweet and rich. A dusting of powdered sugar adds a delicate finish, perfect for holiday baking or any sweet craving.
Ingredients
-
1 cup softened butter
-
1 cup granulated sugar
-
1 cup packed brown sugar
-
2 large eggs (room temperature)
-
1 tsp vanilla extract
-
2 1/4 cups all-purpose flour
-
1/2 cup cocoa powder (Dutch-processed or natural)
-
1/2 tsp baking soda
-
1/4 tsp salt
-
1 cup semi-sweet chocolate chips
-
1 cup chopped maraschino cherries, well-drained and patted dry
-
1/2 cup powdered sugar, for dusting
Instructions
-
Step 1
Ensure butter and eggs are at room temperature. Drain and pat dry maraschino cherries, then chop. Preheat oven to 350°F (175°C) and line baking sheets with parchment paper or silicone mats. -
Step 2
In a large mixing bowl (or stand mixer), cream softened butter, granulated sugar, and packed brown sugar on medium speed for 3-5 minutes until light and fluffy. Scrape down the sides of the bowl. -
Step 3
Beat in the 2 large eggs one at a time, allowing each to fully incorporate. Then, stir in the 1 tsp vanilla extract until just combined. Scrape down the sides again. -
Step 4
In a separate medium bowl, whisk together the 2 1/4 cups all-purpose flour, 1/2 cup cocoa powder, 1/2 tsp baking soda, and 1/4 tsp salt until well combined and aerated. -
Step 5
With the mixer on the lowest speed, gradually add the dry ingredients to the wet mixture, mixing only until flour streaks have almost disappeared. Do not overmix to avoid tough cookies. -
Step 6
Remove the bowl from the mixer. Using a rubber spatula, gently fold in the 1 cup semi-sweet chocolate chips and 1 cup chopped maraschino cherries until evenly distributed throughout the dough. -
Step 7
Scoop 1.5-2 tablespoon mounds of dough onto the prepared baking sheets, spacing them about 2 inches apart. Bake in the preheated oven for 10-12 minutes, or until the edges are set and lightly golden, but the centers still look slightly soft. -
Step 8
Remove baking sheets from the oven and let cookies cool on the sheets for 5 minutes. Then, carefully transfer them to a wire cooling rack to cool completely to room temperature. -
Step 9
Once fully cooled, place the 1/2 cup powdered sugar into a small sieve or sifter. Gently tap the sieve over the cookies to create a fine, even layer of powdered sugar for a snowy finish.
Important Information
Nutrition Facts (Per Serving)
It is important to consider this information as approximate and not to use it as definitive health advice.
Allergy Information
Please check ingredients for potential allergens and consult a health professional if in doubt.
Leave a Comment