
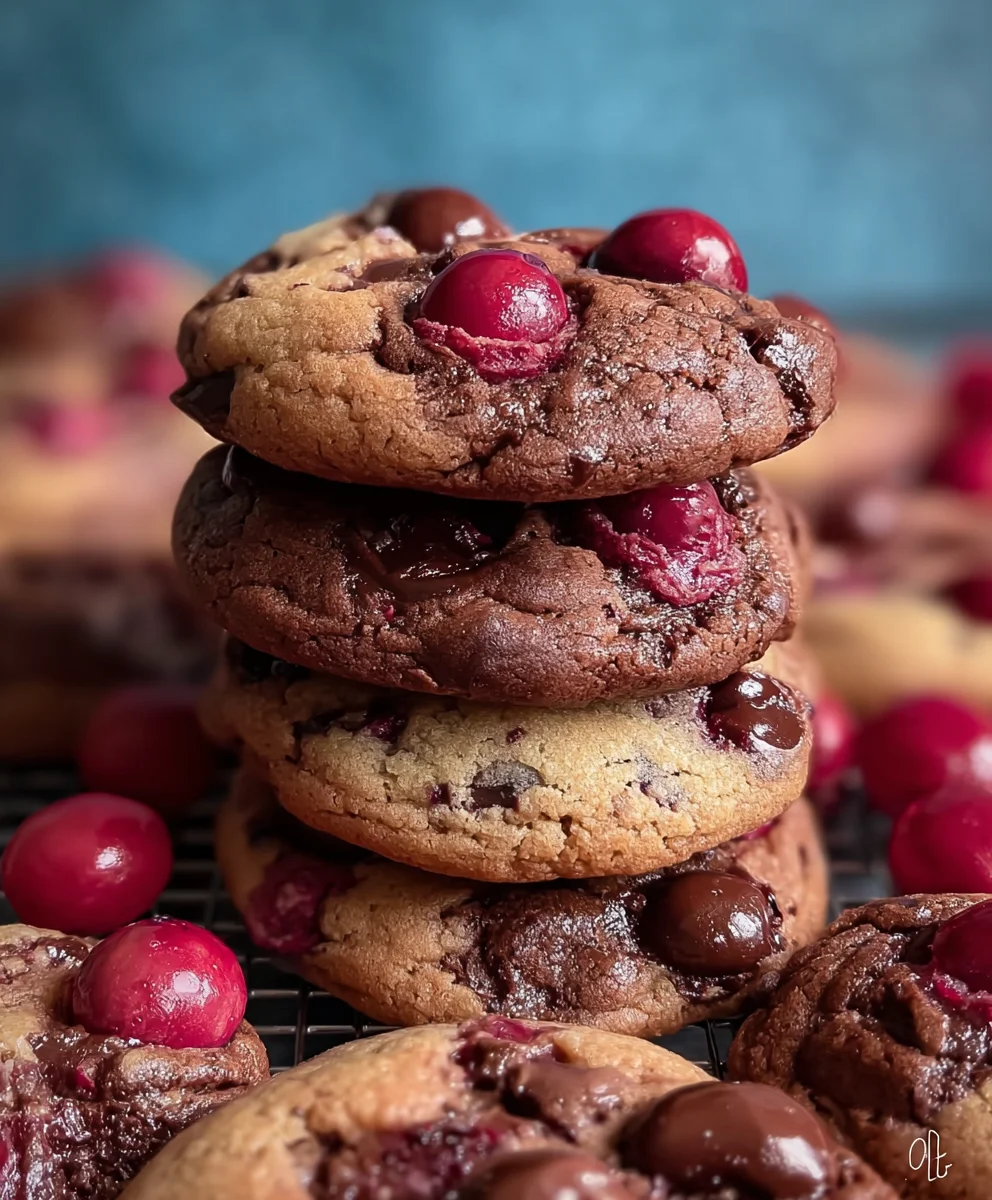
Cherry Chocolate Cookies are more than just a sweet treat; they are a symphony of flavors that dance on your palate, offering a perfect harmony between rich indulgence and vibrant fruitiness. Imagine biting into a perfectly baked cookie, where the deep, luxurious notes of premium dark chocolate chips melt alongside the tart, juicy sweetness of dried cherries. I’ve always found that this combination elevates a simple cookie into something truly extraordinary, a delightful surprise with every mouthful, leaving you craving just one more.
The Enduring Appeal of Cherry and Chocolate
While the precise origin of combining cherries and chocolate into a cookie might be debated, the pairing itself has a celebrated history, famously featured in classic desserts like the Black Forest cake and gourmet truffles. This timeless duo is beloved for a reason: the chocolate provides a comforting, robust foundation, while the cherries introduce a refreshing zest that cuts through the richness, preventing it from being overly sweet. It’s this exquisite balance that makes these cookies incredibly addictive and a perennial favorite for holidays, potlucks, or simply a cozy evening at home. People absolutely adore this particular dessert for its inviting aroma, its wonderfully chewy texture, and the delightful bursts of fruit amidst decadent chocolate, making every bite a memorable experience.
If you’re looking to impress guests or simply treat yourself to something truly special, these Cherry Chocolate Cookies are an absolute revelation. I promise, they’re a recipe you’ll want to keep in your baking repertoire for years to come.
Ingredients:
- 2 ¼ cups (270g) all-purpose flour
- ½ cup (45g) unsweetened cocoa powder (Dutch-processed is wonderful for a deep, rich color and flavor)
- 1 teaspoon baking soda
- ½ teaspoon fine sea salt
- 1 cup (226g) unsalted butter, softened to room temperature
- ¾ cup (150g) granulated sugar
- ¾ cup (150g) light brown sugar, packed firmly
- 2 large eggs, at room temperature
- 1 teaspoon pure vanilla extract
- 1 teaspoon instant espresso powder (optional, but highly recommended for deepening chocolate flavor without adding coffee taste)
- 1 cup (150g) dried tart cherries, roughly chopped if very large
- 1 ½ cups (255g) dark chocolate chips or chunks (60-70% cacao recommended for the best balance)
Preparation is Key!
Hello, fellow cookie enthusiasts! Before we dive into the delightful process of creating our irresistible Cherry Chocolate Cookies, a little preparation goes a long way. Trust me, these small steps ensure a perfectly delicious batch every time. This recipe is designed to bring out the best in every ingredient, creating a symphony of flavors that will make these cookies a new favorite in your repertoire.
- Gather Your Tools: First things first, let’s make sure we have all our equipment ready. You’ll need a large mixing bowl (or the bowl of a stand mixer), a hand mixer or stand mixer, measuring cups and spoons, a rubber spatula, baking sheets, and parchment paper. Having everything within reach will make the baking process smooth and enjoyable, especially when you’re excitedly anticipating the aroma of freshly baked Cherry Chocolate Cookies filling your kitchen.
- Preheat Your Oven: Position an oven rack in the middle of your oven. Preheat your oven to 375°F (190°C). This allows the oven to come to a consistent temperature, which is crucial for even baking. While it heats up, line two large baking sheets with parchment paper. This simple trick prevents sticking and makes cleanup an absolute breeze, letting you focus on the joy of making these incredible treats.
- Measure and Sift Dry Ingredients: In a medium bowl, whisk together the all-purpose flour, unsweetened cocoa powder, baking soda, and fine sea salt. I often take an extra moment to sift these ingredients together, especially the cocoa powder, to ensure there are no lumps and everything is thoroughly combined. This creates a light, airy foundation for our cookies, ensuring that the leavening agents are evenly distributed, which contributes to a beautiful texture in our finished Cherry Chocolate Cookies. Set this bowl aside for now.
- Bring Ingredients to Room Temperature: It’s absolutely vital that your unsalted butter and large eggs are at room temperature. This isn’t just a suggestion; it’s a non-negotiable step for optimal cookie texture! Room temperature butter creams beautifully with the sugars, creating tiny air pockets that give the cookies their delightful chewiness. Cold butter and eggs can lead to a dense, tough cookie, and nobody wants that when striving for the perfect Cherry Chocolate Cookies. If you’re short on time, you can quickly soften butter by microwaving it in 10-second intervals until slightly pliable, or place eggs in a bowl of warm water for 5-10 minutes.
- Prepare Your Cherries and Chocolate: If your dried tart cherries are particularly large, give them a rough chop to ensure a good distribution of cherry in every bite. This also helps prevent them from clumping together during mixing. Measure out your dark chocolate chips or chunks. Some bakers like to use a mix of chips and chopped chocolate bars for varying textures in the final cookie, which is a fantastic idea for these Cherry Chocolate Cookies!
Mixing Our Cookie Dough
Now for the fun part – bringing all these wonderful ingredients together to form our exquisite cookie dough! This stage is where the magic truly begins, and you’ll start to see the vibrant colors and enticing aromas that will define your Cherry Chocolate Cookies. The process is straightforward, but each step plays a crucial role in developing the rich flavor and ideal texture we’re aiming for.
- Cream the Butter and Sugars: In your large mixing bowl or the bowl of your stand mixer fitted with the paddle attachment, add the softened unsalted butter, granulated sugar, and packed light brown sugar. Beat on medium speed until the mixture is light, fluffy, and pale in color, typically 3-5 minutes. This creaming process is fundamental; it incorporates air into the butter and sugar, which is what gives our Cherry Chocolate Cookies their soft, chewy interior. Scrape down the sides of the bowl occasionally to ensure everything is evenly mixed. Don’t rush this step, it’s foundational!
- Incorporate Eggs and Vanilla: Reduce the mixer speed to low. Add the large eggs one at a time, beating well after each addition until just combined. Don’t overmix here; we just want them incorporated. After the eggs, add the pure vanilla extract and the instant espresso powder (if using). The espresso powder is a secret weapon in chocolate recipes – it doesn’t make the cookies taste like coffee, but it significantly deepens and enhances the chocolate flavor, making our Cherry Chocolate Cookies even more decadent. Mix until just combined. Again, scrape down the sides of the bowl to ensure all the wet ingredients are thoroughly integrated.
- Add the Dry Ingredients: With the mixer still on low speed, gradually add the reserved dry ingredient mixture to the wet ingredients. Mix just until no streaks of flour remain and a cohesive dough forms. It’s really important not to overmix at this stage. Overmixing develops the gluten in the flour too much, which can lead to tough cookies. We want tender, chewy Cherry Chocolate Cookies, so as soon as the dry ingredients are incorporated, stop the mixer. A little bit of flour dust is okay; we’ll finish it by hand.
- Fold in Cherries and Chocolate: Remove the bowl from the mixer (if using a stand mixer) and grab your rubber spatula. Add the chopped dried tart cherries and the dark chocolate chips or chunks to the dough. Gently fold them in by hand until they are evenly distributed throughout the cookie dough. Folding by hand ensures that the delicate ingredients aren’t broken up too much and that you don’t accidentally overmix the dough. This is where your Cherry Chocolate Cookies truly come to life with their signature additions! Make sure every scoop of dough will have a generous amount of both chocolate and cherry.
- Chill the Dough (Optional, but Recommended): While not strictly mandatory if you’re in a hurry, I highly recommend chilling the cookie dough for at least 30 minutes, or even up to 24 hours. Chilling the dough solidifies the butter, which prevents the cookies from spreading too much in the oven, resulting in thicker, chewier cookies. It also allows the flavors to meld beautifully, making your Cherry Chocolate Cookies even more flavorful. If chilling for longer, cover the bowl tightly with plastic wrap. If you’re short on time, even 15-20 minutes in the freezer can make a noticeable difference.
Forming and Baking Your Cherry Chocolate Cookies
We’re on the home stretch! The dough is ready, the oven is preheated, and soon your kitchen will be filled with the most incredible aroma. Baking these Cherry Chocolate Cookies is a relatively quick process, but paying attention to timing is essential for achieving that perfect balance of crispy edges and a soft, fudgy center.
- Scoop Your Cookies: Once your dough is ready (and chilled, if you followed my recommendation!), use a 1.5-inch cookie scoop (about 1.5-2 tablespoons) to portion out uniform balls of dough. This ensures consistent size, which leads to even baking. Place the scooped dough balls onto your prepared baking sheets, leaving about 2 inches between each cookie. These Cherry Chocolate Cookies will spread a bit, so giving them space is important to prevent them from merging into one giant cookie mass. If you don’t have a scoop, use two spoons to form roughly uniform balls.
- Optional: Add More Toppings: For that “bakery-style” look, after scooping the dough, you can press a few extra chocolate chips and dried cherry pieces onto the tops of each cookie dough ball. This isn’t just for aesthetics; it ensures that every bite has a beautiful display of the star ingredients and that your Cherry Chocolate Cookies look as good as they taste!
- Bake Until Just Set: Place one baking sheet at a time into your preheated oven. Bake for 10-12 minutes. The exact baking time can vary depending on your oven, so keep a close eye on them. The cookies are done when the edges are set and lightly golden, but the centers still look slightly soft and underbaked. This is the secret to a perfectly chewy cookie interior. Don’t be tempted to bake them longer just because the centers seem soft; they will continue to set as they cool on the baking sheet. Overbaking is the quickest way to dry out your delicious Cherry Chocolate Cookies.
- Cool on the Baking Sheet: Once out of the oven, let the cookies cool on the baking sheet for about 5 minutes. This crucial resting period allows the cookies to finish baking gently from the residual heat of the pan and firm up enough to be transferred without breaking. If you try to move them too soon, they might fall apart.
- Transfer to a Wire Rack: After 5 minutes, carefully transfer the warm Cherry Chocolate Cookies to a wire cooling rack to cool completely. Cooling them on a wire rack ensures air circulates around them, preventing the bottoms from getting soggy and preserving that wonderful chewy texture. Resist the urge to devour them all immediately (I know, it’s hard!), but allowing them to cool completely will make them even more enjoyable.
Tips for Perfect Cherry Chocolate Cookies Every Time
Baking is an art, but also a science, and a few expert tips can elevate your Cherry Chocolate Cookies from good to absolutely phenomenal. I’ve learned these tricks over countless batches, and I’m excited to share them with you so you can master these delightful treats.
- Don’t Skip Room Temperature Ingredients: I cannot stress this enough! As mentioned earlier, room temperature butter and eggs are critical for the emulsification process, leading to a smoother, more uniform dough, and ultimately, a better-textured cookie. If your butter is too cold, it won’t cream properly, and if it’s too warm (borderline melted), it will lead to greasy, flat cookies.
- Weigh Your Ingredients: For the most precise and consistent results, I highly recommend using a kitchen scale to weigh your dry ingredients (flour, cocoa powder) rather than relying solely on volume measurements. A cup of flour can vary significantly in weight depending on how it’s scooped and packed. Weighing ensures you have the exact proportions every time, making your Cherry Chocolate Cookies consistently perfect.
- Customize Your Chocolate: Feel free to experiment with different types of chocolate. While dark chocolate is my favorite for these Cherry Chocolate Cookies, semi-sweet chocolate chips are a classic choice, and even a mix of milk chocolate and dark chocolate can add an interesting layer of flavor complexity. Chopping a good quality chocolate bar into chunks will give you those lovely puddles of melted chocolate throughout the cookie.
- Cherry Variations: While dried tart cherries are quintessential for this recipe, you could also experiment with other dried fruits like dried cranberries for a Cranberry Chocolate Cookie variation, or even finely diced dried sour cherries for an extra tang. Just ensure they are not overly sticky, and if so, a quick toss in a tiny bit of flour can help prevent clumping.
- The Power of Espresso Powder: If you’re hesitant about the instant espresso powder, don’t be! It truly is a game-changer for any chocolate-based dessert. It intensifies the chocolate flavor without adding a discernible coffee taste. Think of it as chocolate’s best friend. If you don’t have it, your cookies will still be delicious, but for that extra depth, it’s worth seeking out.
- Freezing Dough for Later: These Cherry Chocolate Cookies are so good, you might want to have some ready to bake at a moment’s notice. You can scoop the cookie dough balls and place them on a parchment-lined baking sheet. Freeze them until solid, then transfer the frozen dough balls to an airtight freezer-safe bag or container. When you’re ready to bake, simply place the frozen dough balls on a prepared baking sheet and bake for an extra 2-4 minutes (around 12-16 minutes total) until golden at the edges. Freshly baked Cherry Chocolate Cookies whenever the craving strikes!
- Storage: Once completely cooled, store your Cherry Chocolate Cookies in an airtight container at room temperature for up to 3-5 days. If you want to keep them fresh for longer, you can freeze the baked cookies in an airtight container for up to 3 months. Just thaw them at room temperature when you’re ready to enjoy them again.
- Don’t Overcrowd the Baking Sheet: It’s tempting to try and fit as many cookies as possible onto a single baking sheet, but resist! Overcrowding can lead to uneven baking because it lowers the temperature of the oven and restricts air circulation. Bake one sheet at a time, or if using multiple sheets, rotate them halfway through baking for the most consistent results for your beautiful Cherry Chocolate Cookies.
- The Center “Underbaked” Look: Remember my advice to take them out when the centers still look slightly soft? This is key for that wonderfully chewy texture. As they cool on the baking sheet, the residual heat will continue to cook them to perfection without making them hard or dry. Trust the process, and you’ll be rewarded with ultimate Cherry Chocolate Cookies bliss.
- A Sprinkle of Salt: For an extra gourmet touch, consider sprinkling a tiny pinch of flaky sea salt (like Maldon) on top of each warm cookie right after it comes out of the oven. The salt enhances the chocolate and cherry flavors beautifully, providing a delightful contrast and an elevated experience for your Cherry Chocolate Cookies. It’s a small addition with a big impact!
Conclusion:
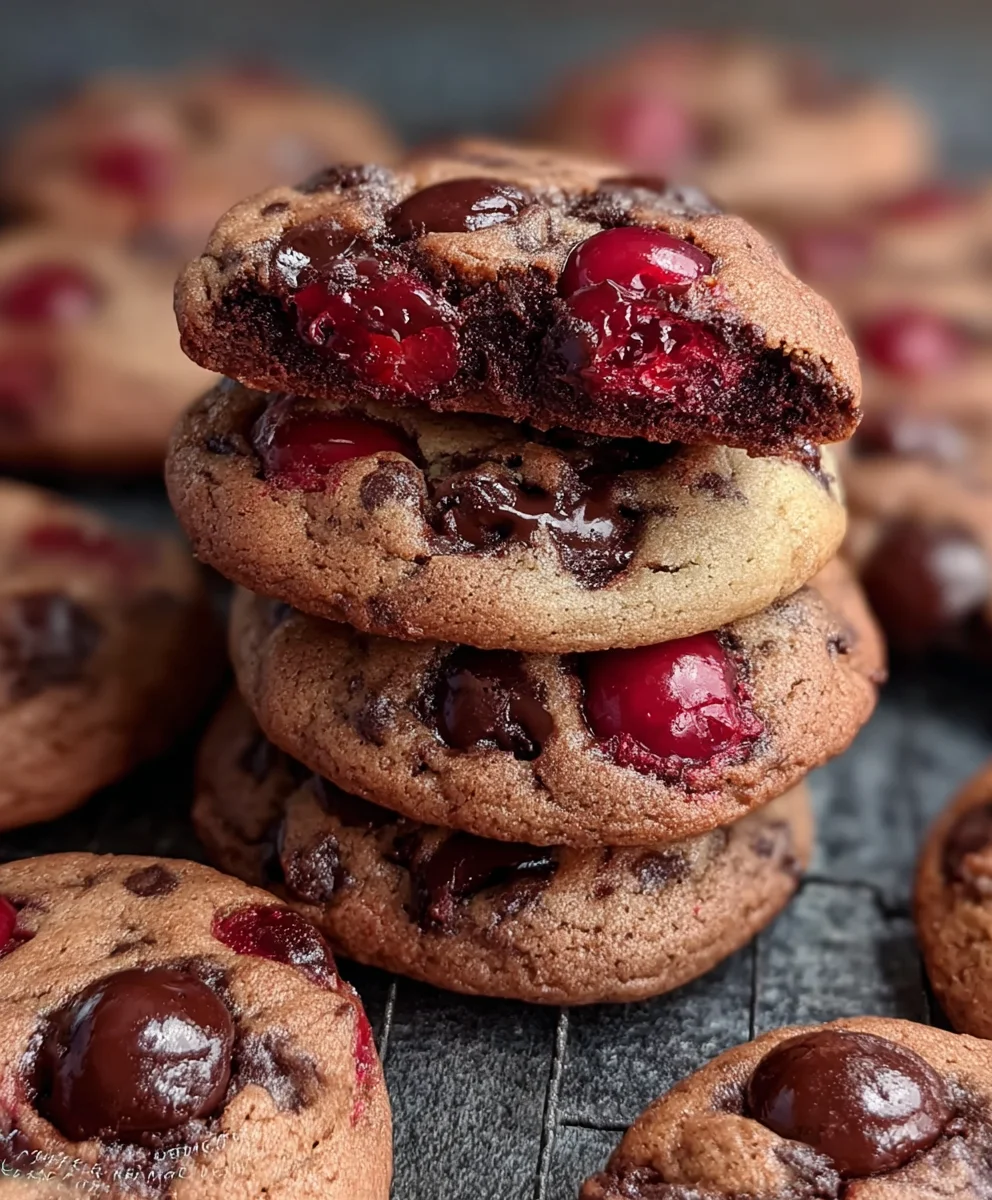
And there you have it, my friends! We’ve reached the sweet end of our journey, and I genuinely hope you’re feeling inspired to roll up your sleeves and bring these magnificent cookies to life in your own kitchen. There’s something truly magical about the combination of tart, chewy dried cherries and rich, melty chocolate chips, all nestled within a perfectly soft-baked cookie base. It’s a symphony of textures and flavors that simply dances on your palate, making each bite an absolute delight. I’ve personally found that these aren’t just any cookies; they’re the kind that disappear almost as quickly as they emerge from the oven, eliciting oohs and aahs from anyone lucky enough to snag one. They’re profoundly satisfying, striking that perfect balance between decadent richness and a refreshing fruitiness that keeps you coming back for more.
I can confidently say that these Cherry Chocolate Cookies are an absolute must-try for anyone who appreciates a truly standout dessert. They’re incredibly versatile, fitting seamlessly into various occasions, whether you’re looking for a cozy treat on a rainy afternoon, a show-stopping addition to a holiday dessert platter, or a thoughtful, homemade gift for a loved one. The process of making them is straightforward and rewarding, even for novice bakers, offering that wonderful aroma that fills your home and instantly makes it feel more welcoming. The simplicity of the ingredients, combined with the profound impact of their combined flavors, ensures that these cookies punch well above their weight. You’ll be amazed at how such a relatively easy recipe can yield such sophisticated and memorable results. It’s a testament to classic flavor pairings done right, elevating a simple cookie to something truly special.
Serving Suggestions & Creative Variations:
While these cookies are undeniably perfect straight off the cooling rack, still warm and gooey, they also lend themselves beautifully to a variety of serving suggestions and creative twists. Imagine pairing a couple of these with a tall, cold glass of milk for the ultimate nostalgic comfort, or perhaps alongside a steaming mug of coffee or your favorite herbal tea for a sophisticated afternoon treat. For an extra touch of indulgence, try crumbling a warm cookie over a scoop of vanilla bean ice cream, allowing the chocolate to soften and the cherries to mingle with the creamy sweetness – pure bliss! They also make an incredible addition to a dessert board, contrasting wonderfully with lighter pastries or fresh fruit.
But why stop there? The beauty of a great cookie recipe lies in its adaptability. Don’t hesitate to get creative with your batches!
- Chocolate Choices: Experiment with different types of chocolate chips. While semi-sweet is my go-to, dark chocolate chunks would amplify the richness and provide a lovely bitterness to complement the cherries. Alternatively, white chocolate chips could add a creamy sweetness and a beautiful visual contrast.
- Nutty Additions: For an extra layer of texture and flavor, try folding in a handful of chopped toasted pecans or walnuts. Their earthy notes pair wonderfully with both cherry and chocolate.
- Flavor Boosters: A tiny splash of almond extract (¼ teaspoon) can really enhance the cherry flavor, giving the cookies a marzipan-like nuance. Or, for a hint of warmth, a pinch of cinnamon or nutmeg could be a delightful surprise.
- Different Dried Fruits: If you’re feeling adventurous, swap out half the dried cherries for dried cranberries, blueberries, or even finely chopped dried apricots. Each will bring its own unique tartness and sweetness to the mix.
- Finishing Touches: A light sprinkle of flaky sea salt on top of the warm cookies just after they come out of the oven can elevate the flavors, creating that irresistible sweet and salty combination that everyone loves. Or, for a truly elegant presentation, a drizzle of melted white chocolate across the cooled cookies would be stunning.
Seriously, I can’t emphasize enough how much joy these cookies bring. So, please, do yourself a favor and carve out a little time to whip up a batch. Trust me, your taste buds will thank you! When you do, I would absolutely love to hear about your experience. Did you stick to the recipe, or did you venture into some delicious variations of your own? Please share your photos and stories with me in the comments below or tag me on social media. Your feedback and creativity inspire me, and I’m always thrilled to see how these recipes come to life in your homes. Happy baking, everyone, and get ready to fall head over heels for these unforgettable cookies!
People Also Ask:
What kind of cherries are best for baking cookies?
For these cookies, I highly recommend using dried tart cherries (like Montmorency cherries). Their vibrant, tangy flavor provides a beautiful contrast to the sweetness of the chocolate and the cookie dough, preventing the cookies from being overly sweet. You can usually find them in the dried fruit section of most grocery stores.
Can I use fresh cherries in these Cherry Chocolate Cookies?
While fresh cherries are delicious, they contain a lot of moisture which can significantly alter the texture of the cookies, making them cakey or soggy. For this specific recipe, dried cherries are preferred as they hold their shape and flavor better and won’t introduce excess liquid into the dough. If you absolutely wanted to use fresh, you’d need to significantly reduce their moisture content first, perhaps by roasting them lightly, but I’d advise against it for the best cookie texture.
How should I store these cookies to keep them fresh?
To keep your cookies wonderfully fresh and chewy, store them in an airtight container at room temperature. They will stay fresh for about 3-5 days. If you want to extend their freshness, you can also freeze the baked cookies for up to 3 months. Just thaw them at room temperature or pop them in the microwave for a few seconds for a warm, gooey treat!
Can I freeze the cookie dough?
Absolutely! Freezing the dough is a fantastic way to prepare ahead. Simply scoop the dough into individual balls and place them on a parchment-lined baking sheet. Freeze until solid, then transfer the frozen dough balls to an airtight freezer-safe bag or container. You can bake them directly from frozen; just add an extra 2-4 minutes to the baking time. This way, you can enjoy freshly baked cookies whenever a craving strikes!
Chewy Cherry Chocolate Cookies: A Sweet & Fruity Treat!
Irresistible chewy chocolate cookies loaded with tart dried cherries and rich dark chocolate chips, with crispy edges and a soft, fudgy center. These delightful treats are perfect for any occasion and are sure to become a new favorite.
Ingredients
-
2 ¼ cups (270g) all-purpose flour
-
½ cup (45g) unsweetened cocoa powder
-
1 teaspoon baking soda
-
½ teaspoon fine sea salt
-
1 cup (226g) unsalted butter, softened
-
¾ cup (150g) granulated sugar
-
¾ cup (150g) light brown sugar, packed
-
2 large eggs
-
1 teaspoon pure vanilla extract
-
1 teaspoon instant espresso powder (optional)
-
1 cup (150g) dried tart cherries, chopped
-
1 ½ cups (255g) dark chocolate chips or chunks
Instructions
-
Step 1
Preheat oven to 375°F (190°C) and line baking sheets with parchment paper. In a medium bowl, whisk together flour, cocoa powder, baking soda, and salt. Set aside. -
Step 2
In a large mixing bowl, cream softened unsalted butter, granulated sugar, and packed light brown sugar on medium speed for 3-5 minutes until light and fluffy. Scrape down the sides of the bowl. -
Step 3
Reduce mixer speed to low. Add eggs one at a time, beating well after each. Stir in vanilla extract and instant espresso powder (if using) until just combined. Scrape down the bowl. -
Step 4
Gradually add the reserved dry ingredient mixture to the wet ingredients on low speed. Mix until just combined and no streaks of flour remain. Do not overmix. -
Step 5
Remove bowl from mixer. Gently fold in the chopped dried tart cherries and dark chocolate chips/chunks by hand until evenly distributed throughout the dough. -
Step 6
For best results, cover the dough and chill in the refrigerator for at least 30 minutes, or up to 24 hours. This helps prevent spreading and deepens flavor. -
Step 7
Scoop 1.5-inch dough balls onto prepared baking sheets, leaving about 2 inches between each. Bake one sheet at a time for 10-12 minutes, until edges are set and lightly golden, but centers still look slightly soft. -
Step 8
Allow cookies to cool on the baking sheet for 5 minutes before carefully transferring them to a wire rack to cool completely. (Optional: Sprinkle warm cookies with flaky sea salt for an extra gourmet touch). -
Step 9
Store cooled cookies in an airtight container at room temperature for 3-5 days, or freeze baked cookies for up to 3 months.
Important Information
Nutrition Facts (Per Serving)
It is important to consider this information as approximate and not to use it as definitive health advice.
Allergy Information
Please check ingredients for potential allergens and consult a health professional if in doubt.

Leave a Comment