
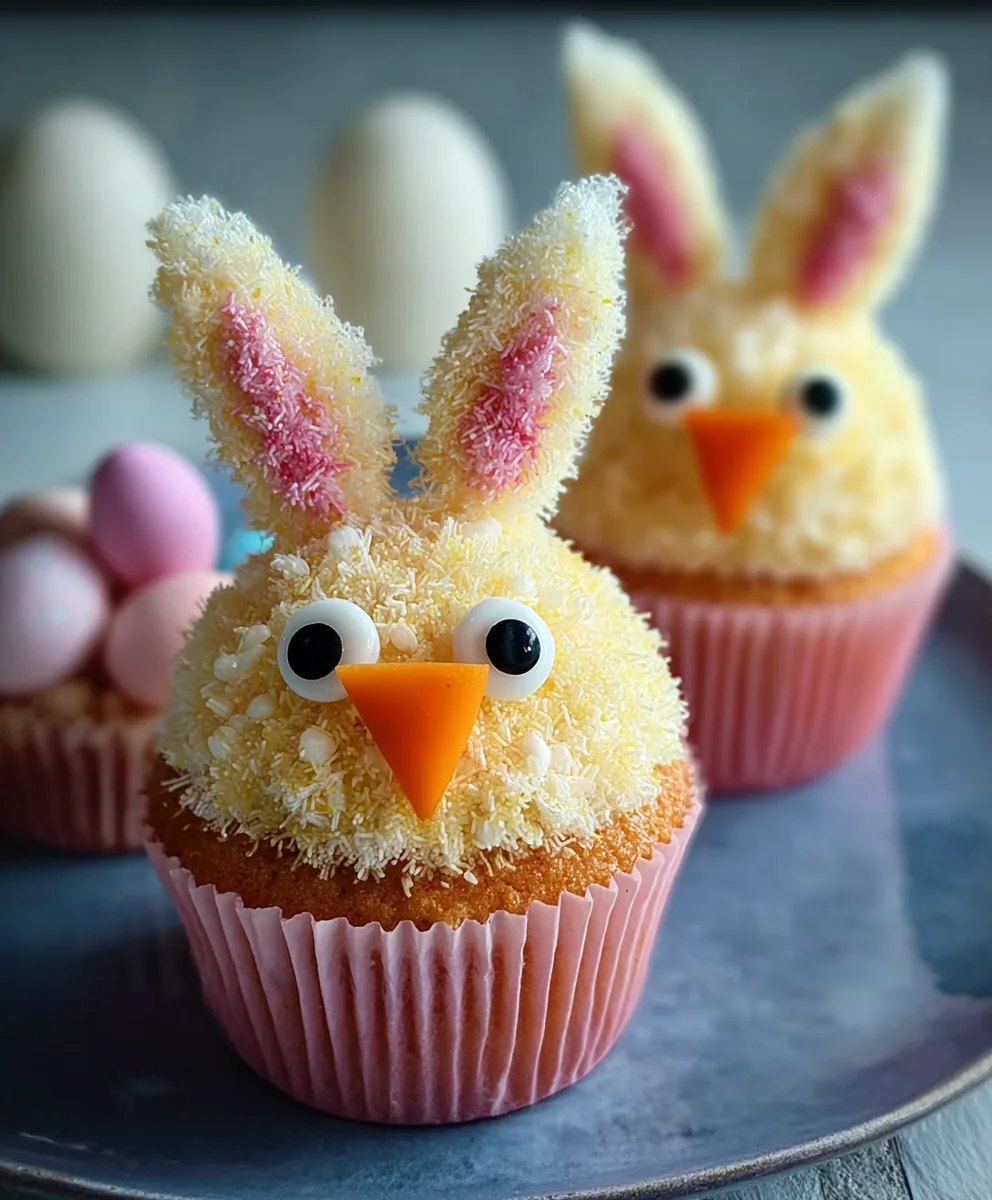
Easter Bunny and Chick Cupcakes are the quintessential treat that brings smiles to faces of all ages during the spring season. There’s something truly magical about these festive little creations, a delightful blend of adorable aesthetics and delicious flavors that make them a beloved centerpiece for any Easter gathering. People adore them not just for their charming appearance, but also for the sense of joy and celebration they represent. What makes these Easter Bunny and Chick Cupcakes truly special is the sheer creativity involved. From fluffy buttercream bunny ears to bright yellow chick details, each cupcake is a miniature work of edible art, promising a burst of sweetness and a whole lot of fun with every bite. They’re incredibly versatile, allowing for endless decoration possibilities that can be tailored to your personal style and the age of your little bakers.
Ingredients:
- 1 recipe Vanilla Cupcakes (or your favorite cake mix)
- 1 recipe Fluffy Vanilla Frosting (or store-bought frosting)
- Yellow and white sprinkles
- Large and mini marshmallows
- Pink colored sanding sugar
- Black decorator icing
- Jelly beans (pink for bunny noses)
- Orange colored gum or M&Ms (for chick beaks)
- Yellow food coloring (for chick frosting)
Baking the Cupcakes
Prep the Batter
First things first, let’s get our cupcake base ready. If you’re using a cake mix, follow the package instructions carefully. For those making cupcakes from scratch, prepare your favorite vanilla cupcake recipe. The key here is to ensure you have a consistent batter that will bake up light and fluffy. Don’t overmix the batter, as this can lead to tough cupcakes. A gentle fold until just combined is usually best. You want to achieve a smooth consistency without any large lumps of flour.
Baking and Cooling
Once your batter is prepared, divide it evenly among your cupcake liners in a muffin tin. Fill each liner about two-thirds full to allow for some rise during baking. Preheat your oven according to your recipe or cake mix instructions, typically around 350 degrees Fahrenheit (175 degrees Celsius). Bake the cupcakes until a toothpick inserted into the center comes out clean. This usually takes about 18-22 minutes, but ovens can vary, so keep an eye on them. It’s always better to check a little early than to have overbaked, dry cupcakes. Once baked, let the cupcakes cool in the muffin tin for about 5-10 minutes before carefully transferring them to a wire rack to cool completely. This step is crucial; frosting warm cupcakes is a recipe for melted, messy frosting disaster. Ensure they are completely cool to the touch before moving on to decorating.
Frosting and Decorating
Preparing the Frosting
While your cupcakes are cooling, it’s time to get our frosting ready. If you’re making your own fluffy vanilla frosting, prepare it according to your recipe. The goal is a smooth, spreadable frosting that holds its shape well. If you’re using store-bought frosting, you can simply open the container and give it a good stir to ensure it’s smooth and consistent. For our Easter Bunny and Chick Cupcakes, we’ll need two batches of frosting: one for the bunnies and one for the chicks. For the chick frosting, take a portion of your vanilla frosting and stir in a few drops of yellow food coloring until you achieve a vibrant, cheerful yellow hue. Start with a small amount of coloring and add more gradually to avoid making it too dark.
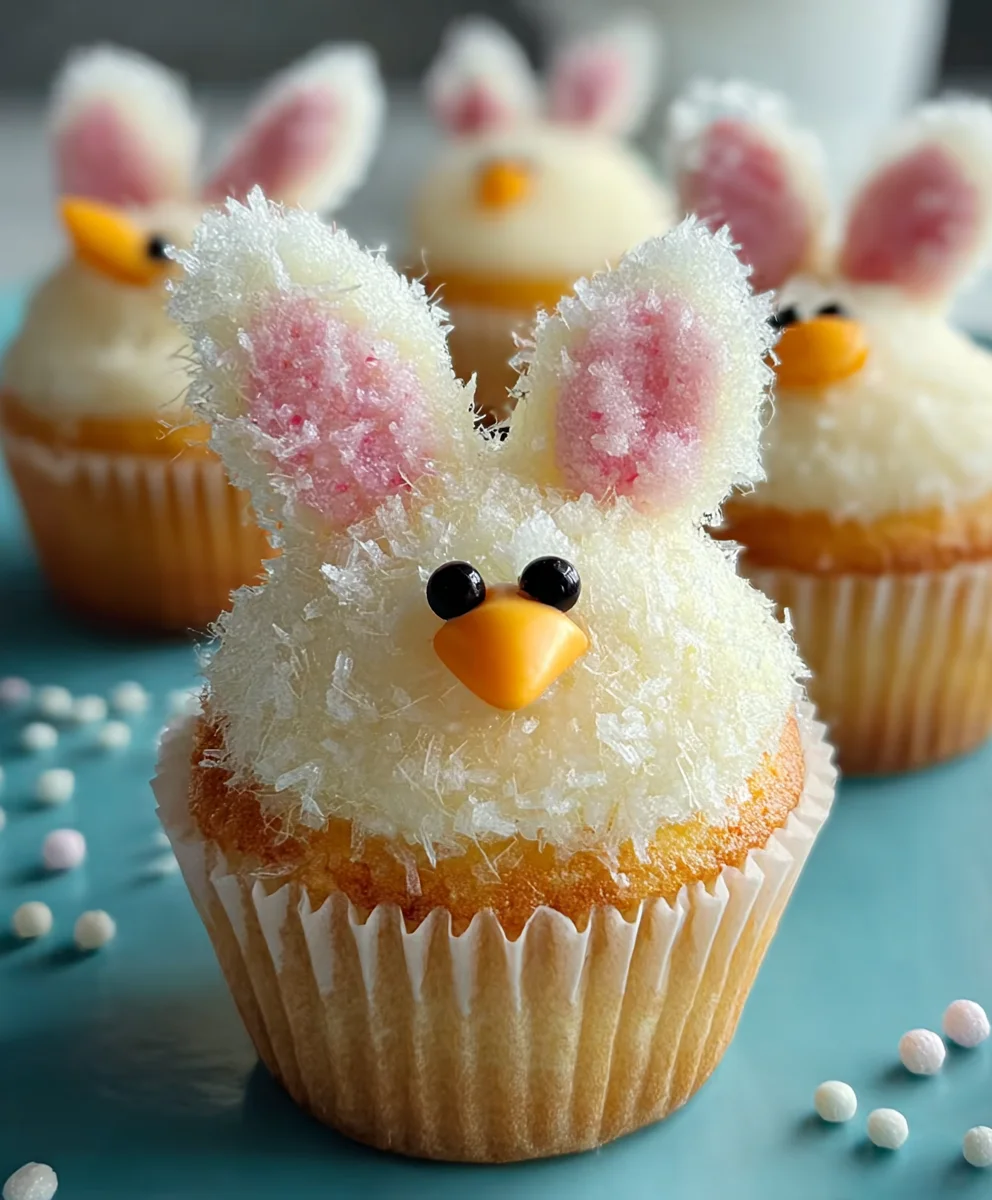
Creating the Bunny Faces
Now for the fun part: transforming these plain cupcakes into adorable Easter characters! For the Easter bunnies, we’ll start by frosting a cupcake with a generous layer of our plain fluffy vanilla frosting. Don’t worry about making it perfectly smooth; a slightly rustic look can actually enhance the cuteness. Next, we’ll create the bunny ears. Take two large marshmallows and slice them in half lengthwise. Gently press the cut side of each marshmallow half into the top of the frosted cupcake to resemble ears. For the bunny’s face, use a small dab of black decorator icing to draw two small eyes. Then, take a pink jelly bean and place it just below the eyes to create a sweet bunny nose. If you like, you can also use a tiny bit of black icing to draw a small mouth below the nose. For an extra touch of sweetness, you can lightly dust the bunny ears with a touch of the pink sanding sugar.
Crafting the Chick Faces
To create our charming little chicks, begin extract by frosting a cupcake with your prepared yellow frosting. Again, a generous amount is key. Once the cupcake is fully covered in yellow frosting, it’s time to add the beak and eyes. For the beak, take an orange gumdrop or an orange M&M and gently press it into the center of the frosted cupcake. If you’re using gum, you might want to cut it into a small triangle or beak shape first. For the eyes, use your black decorator icing to pipe two small dots above the beak. You can also add a tiny white dot to each eye with the white frosting for a reflective, lifelike look. Finally, sprinkle yellow and white sprinkles liberally over the top of the frosted cupcake. This gives our chicks a lovely, textured finish and makes them look like they’re covered in fluffy down. Don’t be afraid to let some sprinkles fall onto the plate – it adds to the festive atmosphere!
Conclusion:
And there you have it – the delightful and charming Easter Bunny and Chick Cupcakes! We’ve walked through each step together, from baking fluffy vanilla cupcakes to decorating them into adorable edible springtime characters. These cupcakes are more than just a treat; they’re a centerpiece for your Easter celebrations, guaranteed to bring smiles to faces of all ages. I encourage you to embrace the creative process and have fun with the decorating! Don’t be afraid to experiment with different colors and embellishments to make your Easter Bunny and Chick Cupcakes uniquely yours.
Serve these festive cupcakes at your Easter brunch, as a fun activity for kids, or simply as a sweet way to celebrate the season. They pair wonderfully with a glass of milk or a light, fruity beverage. For variations, consider adding a swirl of lemon zest to the batter for a citrusy twist, or try using chocolate cupcakes as a base for a richer flavor profile. You could also use different colored frosting for the bunny ears or chick fluff to add even more visual interest.
Frequently Asked Questions:
Can I make the cupcake batter ahead of time?
Yes, you can prepare the cupcake batter up to 24 hours in advance. Store it in an airtight container in the refrigerator. When ready to bake, let the batter sit at room temperature for about 30 minutes to loosen up before filling your cupcake liners.
How do I get the frosting to be the right consistency for decorating?
For piping, your frosting should be firm enough to hold its shape but soft enough to easily pipe. If it’s too stiff, add a teaspoon of milk or cream at a time until you reach the desired consistency. If it’s too soft, gradually add more powdered sugar until it thickens.
Are there any nut-free options for these cupcakes?
Absolutely! The basic vanilla cupcake recipe is naturally nut-free. When purchasing decorations, ensure that any sprinkles or edible eyes do not contain nuts or are not processed in facilities with nuts, depending on your allergy concerns. You can also make your own edible decorations using simple ingredients like fondant.
Easter Bunny Chick Cupcakes
Adorable and easy Easter cupcakes featuring cute bunny and chick designs.
Ingredients
-
1 recipe Vanilla Cupcakes (or your favorite cake mix)
-
1 recipe Fluffy Vanilla Frosting (or store-bought frosting)
-
Yellow and white sprinkles
-
Large and mini marshmallows
-
Pink colored sanding sugar
-
Black decorator icing
-
Jelly beans (pink for bunny noses)
-
Orange colored gum or M&Ms (for chick beaks)
-
Yellow food coloring (for chick frosting)
Instructions
-
Step 1
Prepare cupcake batter according to your favorite vanilla recipe or cake mix instructions. Do not overmix. Divide batter evenly into cupcake liners, filling about two-thirds full. -
Step 2
Bake cupcakes at 350°F (175°C) for 18-22 minutes, or until a toothpick inserted into the center comes out clean. Cool in the tin for 5-10 minutes, then transfer to a wire rack to cool completely. -
Step 3
Prepare frosting. For chick frosting, tint a portion of vanilla frosting yellow using yellow food coloring. Ensure frosting is smooth and spreadable. -
Step 4
To create bunny faces: Frost a cooled cupcake with vanilla frosting. Slice large marshmallows in half lengthwise for ears and press into the top. Use black decorator icing for eyes and a pink jelly bean for the nose. Add pink sanding sugar to ears if desired. -
Step 5
To create chick faces: Frost a cooled cupcake with yellow frosting. Press an orange gumdrop or M&M into the center for the beak. Use black decorator icing for eyes and add a tiny white frosting dot for a highlight. Sprinkle liberally with yellow and white sprinkles.
Important Information
Nutrition Facts (Per Serving)
It is important to consider this information as approximate and not to use it as definitive health advice.
Allergy Information
Please check ingredients for potential allergens and consult a health professional if in doubt.
Leave a Comment