
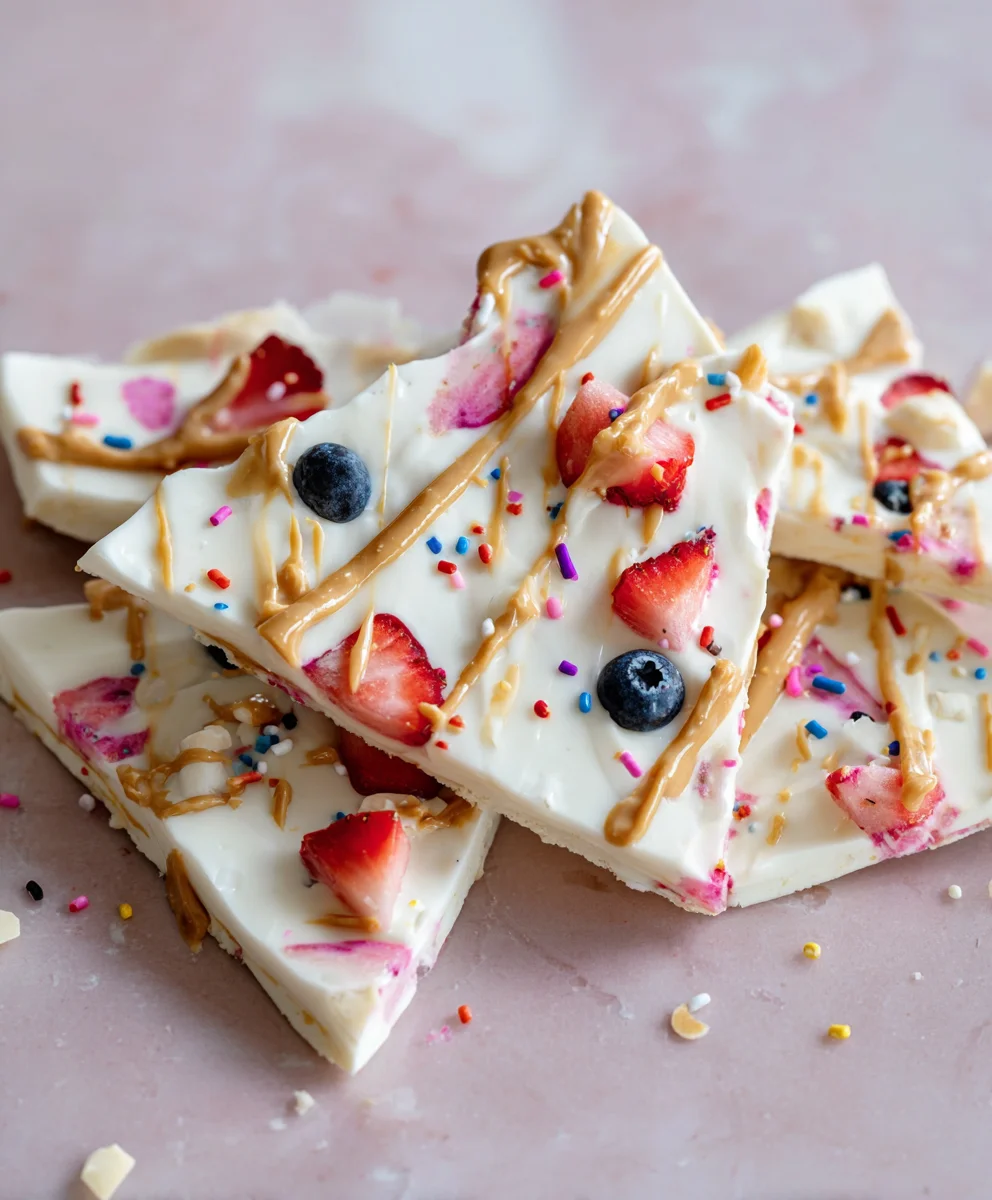
Frozen Yogurt Bark is more than just a cool treat; it’s a vibrant explosion of flavor and texture that screams summer perfection! Imagin extracte biting into a crisp, refreshing sheet of creamy yogurt, studded with jewel-like berries, crunchy nuts, and perhaps a whisper of honey or maple syrup. It’s the ultimate customizable dessert that caters to every craving, from the health-conscious seeking a lighter indulgence to the flavor adventurer looking for something fun and exciting. What makes Frozen Yogurt Bark so incredibly popular is its effortless elegance. It looks sophisticated enough for a party but is so simple to make, you’ll find yourself whipping it up on a whim. The magic lies in its adaptability – it’s a blank canvas waiting for your personal touch, transforming simple ingredients into a show-stopping, freeze-dried masterpiece that’s guaranteed to delight everyone.
Ingredients:
- 1 cup Greek yogurt, plain, full-fat
- 1/4 cup honey or maple syrup
- 1 teaspoon vanilla extract
- 1/2 cup fresh berries, such as blueberries, raspberries, or sliced strawberries
- 1/4 cup chopped nuts, like almonds or walnuts
- 2 tablespoons shredded unsweetened coconut
- 1 tablespoon chia seeds
Preparing Your Frozen Yogurt Bark Base
Step 1: Sweeten and Flavor the Yogurt
Begin extract by taking your full-fat plain Greek yogurt and placing it into a medium-sized bowl. The full-fat version is crucial here as it contributes to a creamier texture and prevents the bark from becoming too icy and brittle once frozen. If you prefer a tangier bark, you can certainly use a lower-fat Greek yogurt, but be aware of the textural difference. Now, it’s time to add your sweetener. Drizzle in the honey or maple syrup. The amount can be adjusted to your personal preference; start with the ¼ cup and taste as you go. For a richer, more complex flavor, maple syrup often works wonderfully. Next, incorporate the vanilla extract. This single teaspoon adds a beautiful aroma and a subtle depth of flavor that complements both the yogurt and the toppings. Whisk all these ingredients together until they are thoroughly combined and the mixture is smooth. Ensure there are no streaks of honey or maple syrup left, as these will become more prominent in the final texture. A good whisking is key to a uniform flavor throughout your frozen yogurt bark.
Step 2: Prepare Your Freezing Surface
Line a baking sheet with parchment paper or a silicone baking mat. This step is absolutely essential for ensuring your frozen yogurt bark doesn’t stick to the pan. Parchment paper is readily available and works perfectly, while silicone mats offer a reusable and often non-stick surface. Make sure the parchment paper lies flat; you don’t want any crinkles or folds that will imprint on your bark. You want a smooth, even surface for spreading your yogurt mixture. The size of your baking sheet will determine the thickness of your bark. A standard 9×13 inch baking sheet will yield a thinner, more snackable bark, while a smaller one will result in thicker pieces.
Assembling and Freezing Your Frozen Yogurt Bark
Step 3: Spread the Yogurt Mixture
Carefully pour the sweetened and flavored Greek yogurt mixture onto the prepared baking sheet. Using a spatula or the back of a spoon, spread the yogurt into a thin, even layer. Aim for a thickness of about ¼ to ½ inch. A thinner layer will freeze faster and result in crispier pieces of bark, while a thicker layer will be chewier. Try to get the edges as neat as possible, though don’t worry too much about perfection, as the bark will be broken into pieces later. A uniform thickness is important for even freezing. If there are any particularly thick spots or thin spots, gently spread them out to create a more consistent surface. This even distribution ensures that the entire bark will freeze solid at roughly the same rate.
Step 4: Add Your Delicious Toppings
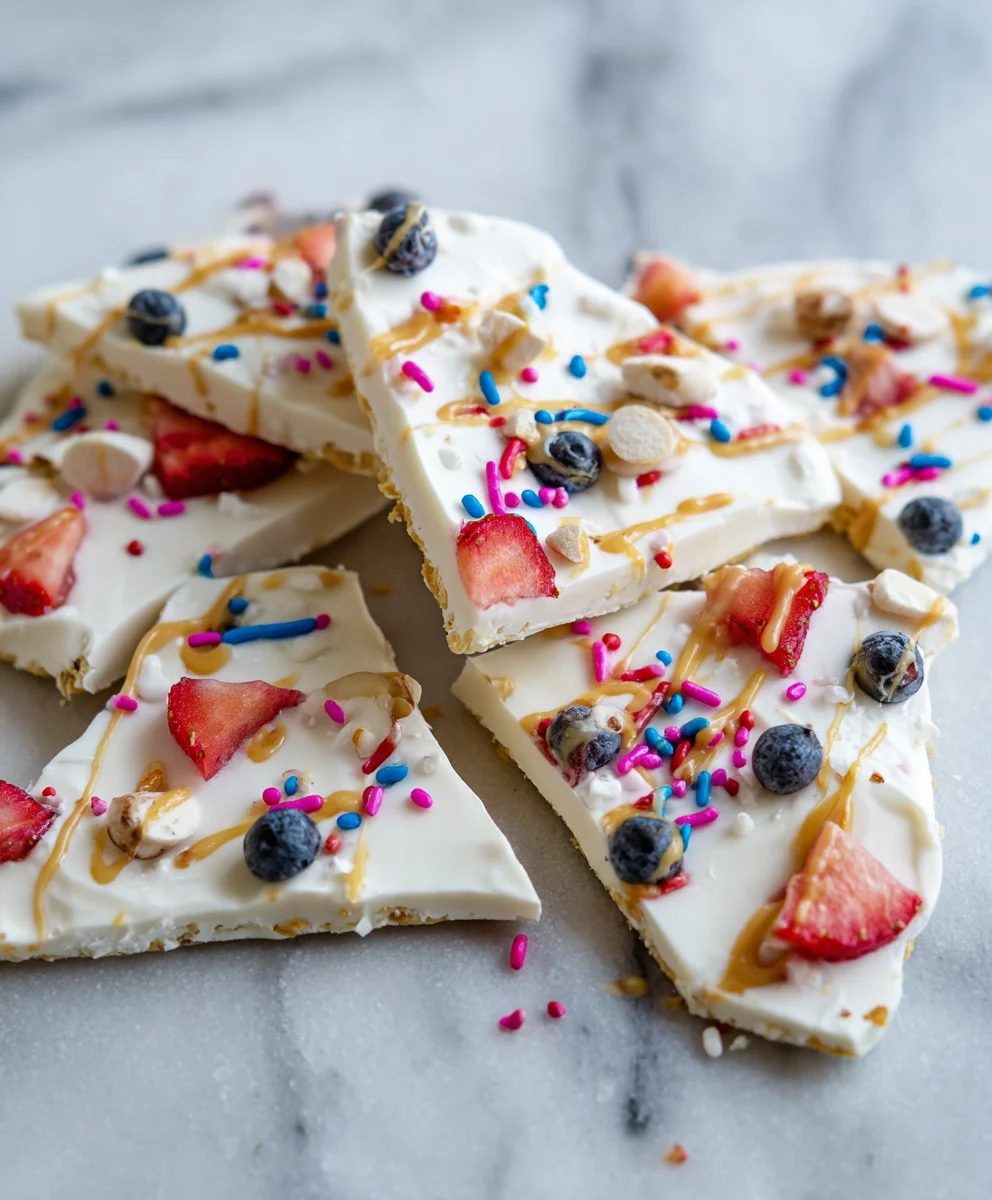
Now comes the fun part: adding your toppings! Evenly scatter the fresh berries over the spread yogurt. For berries like raspberries and blueberries, you can leave them whole, or if you’re using strawberries, slice them into bite-sized pieces for better distribution. Next, sprinkle the chopped nuts over the berries. The nuts will provide a lovely crunch and a contrasting texture to the creamy yogurt. Follow this with the shredded unsweetened coconut, which adds a tropical hint and a delicate chegrape juicess. Finally, sprinkle the chia seeds evenly across the surface. The chia seeds will add a subtle textural element and a boost of nutrition. Gently press some of the toppings down into the yogurt mixture with your fingers or the back of the spatula to ensure they adhere well during freezing. This also helps to embed them slightly, preventing them from falling off when you break the bark apart. Think of this step as creating edible art – make it visually appealing!
Step 5: Freeze Until Solid
Carefully transfer the baking sheet to your freezer. Allow the frozen yogurt bark to freeze completely. This typically takes at least 4 to 6 hours, but it’s best to leave it overnight to ensure it’s thoroughly solid. The longer it freezes, the easier it will be to break into pieces. Check for firmness by gently pressing on a corner; it should feel hard and brittle. If it yields to pressure, it needs more time in the freezer. Once completely frozen and solid, remove the baking sheet from the freezer.
Step 6: Breaking and Serving Your Frozen Yogurt Bark
Once the bark is fully frozen, it’s time to break it into manageable pieces. You can do this by hand, snapping off irregular shards, or by using a knife to score and break it into more uniform shapes. If the bark is too hard to break easily, let it sit at room temperature for a minute or two to soften slightly before attempting to break it. Store your delicious frozen yogurt bark in an airtight container in the freezer. It’s best enjoyed within a week or two for optimal freshness and texture. You can enjoy it as a healthy snack, a refreshing dessert, or even crum extractble it over fruit salad.
Conclusion:
We hope you’ve enjoyed learning how to make this delightful Frozen Yogurt Bark! This recipe is incredibly versatile and a fantastic healthy treat for all ages. Whether you’re looking for a quick breakfast, a refreshing snack, or a guilt-free dessert, this Frozen Yogurt Bark is sure to hit the spot. Its simplicity makes it perfect for involving kids in the kitchen, and the endless topping possibilities mean you’ll never get bored.
For serving suggestions, slice your Frozen Yogurt Bark into bite-sized pieces or larger shards. It’s perfect on its own, or you can serve it alongside fresh berries or a drizzle of honey. Don’t be afraid to get creative with variations! Swap out the yogurt for different flavors, experiment with exotic fruits like mango or kiwi, or add a sprinkle of granola for extra crunch. The encouragement here is to play with the recipe and make it your own!
FAQs:
Can I make Frozen Yogurt Bark ahead of time?
Absolutely! Frozen Yogurt Bark is an excellent make-ahead treat. Once it’s fully frozen and broken into pieces, store it in an airtight container or a freezer bag in the freezer for up to 2-3 weeks. This makes it super convenient for those times when you need a quick, healthy snack.
What are some other topping ideas for Frozen Yogurt Bark?
The sky’s the limit! Beyond berries and nuts, consider adding chocolate chips (mini or regular), shredded coconut, a swirl of nut butter (peanut, almond, or cashew), chia seeds for an extra boost, or even a dusting of cinnamon. For a more decadent version, try drizzling melted dark chocolate over the top before freezing!
Easy Frozen Yogurt Bark – Healthy Dessert Treat
A simple and healthy frozen yogurt bark recipe that’s perfect for a refreshing dessert or snack.
Ingredients
-
1 cup Greek yogurt, plain, full-fat
-
1/4 cup honey or maple syrup
-
1 teaspoon vanilla extract
-
1/2 cup fresh berries, such as blueberries, raspberries, or sliced strawberries
-
1/4 cup chopped nuts, like almonds or walnuts
-
2 tablespoons shredded unsweetened coconut
-
1 tablespoon chia seeds
Instructions
-
Step 1
In a medium bowl, combine the Greek yogurt, honey or maple syrup, and vanilla extract. Whisk until smooth and thoroughly combined. -
Step 2
Line a baking sheet with parchment paper or a silicone baking mat. -
Step 3
Pour the yogurt mixture onto the prepared baking sheet and spread it into a thin, even layer (about ¼ to ½ inch thick). -
Step 4
Evenly scatter the fresh berries, chopped nuts, shredded coconut, and chia seeds over the yogurt. Gently press some toppings into the yogurt. -
Step 5
Transfer the baking sheet to the freezer and freeze for at least 4-6 hours, or preferably overnight, until completely solid. -
Step 6
Once frozen, break the bark into pieces by hand or with a knife. Store in an airtight container in the freezer.
Important Information
Nutrition Facts (Per Serving)
It is important to consider this information as approximate and not to use it as definitive health advice.
Allergy Information
Please check ingredients for potential allergens and consult a health professional if in doubt.

Leave a Comment