
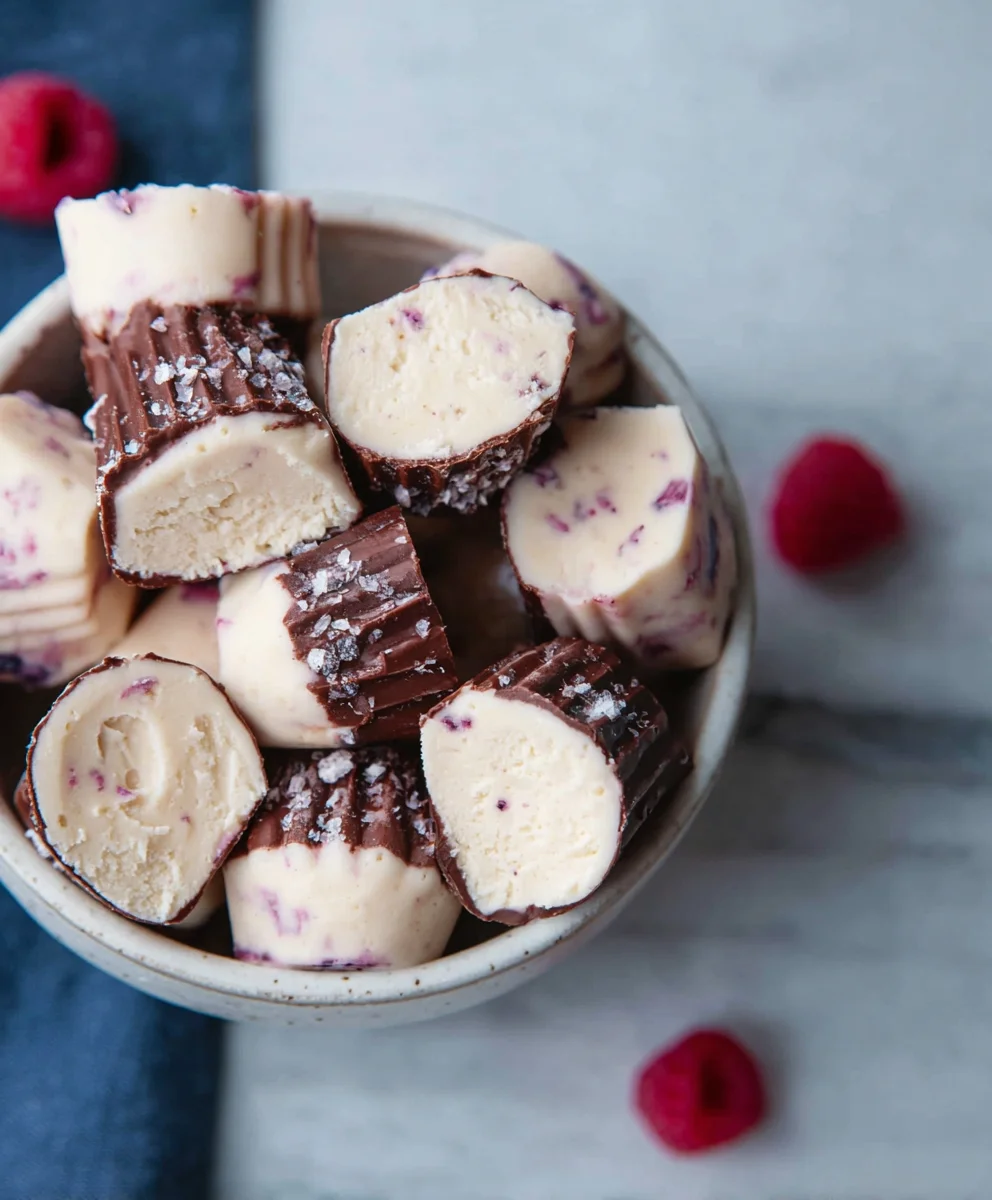
Easy Frozen Yogurt Bites (Dairy-free option) are the ultimate guilt-free treat that will have you reaching for them again and again. Forget complicated steps and endless ingredients; this recipe is designed for maximum flavor with minimal effort. Imagin extracte vibrant, naturally sweet morsels that perfectly satisfy a craving for something cool and creamy, without the heavy feeling of traditional desserts. What’s not to love? They’re incredibly refreshing, bursting with fruity goodness, and surprisingly versatile – perfect for a quick snack, a healthy dessert, or even a fun addition to a smoothie. And for those navigating dietary preferences, our fantastic dairy-free option ensures everyone can join in on the deliciousness, proving that healthy indulgence doesn’t have to be a compromise. Get ready to discover your new favorite frozen delight!
Why You’ll Love These Easy Frozen Yogurt Bites
The Perfect Healthy Treat
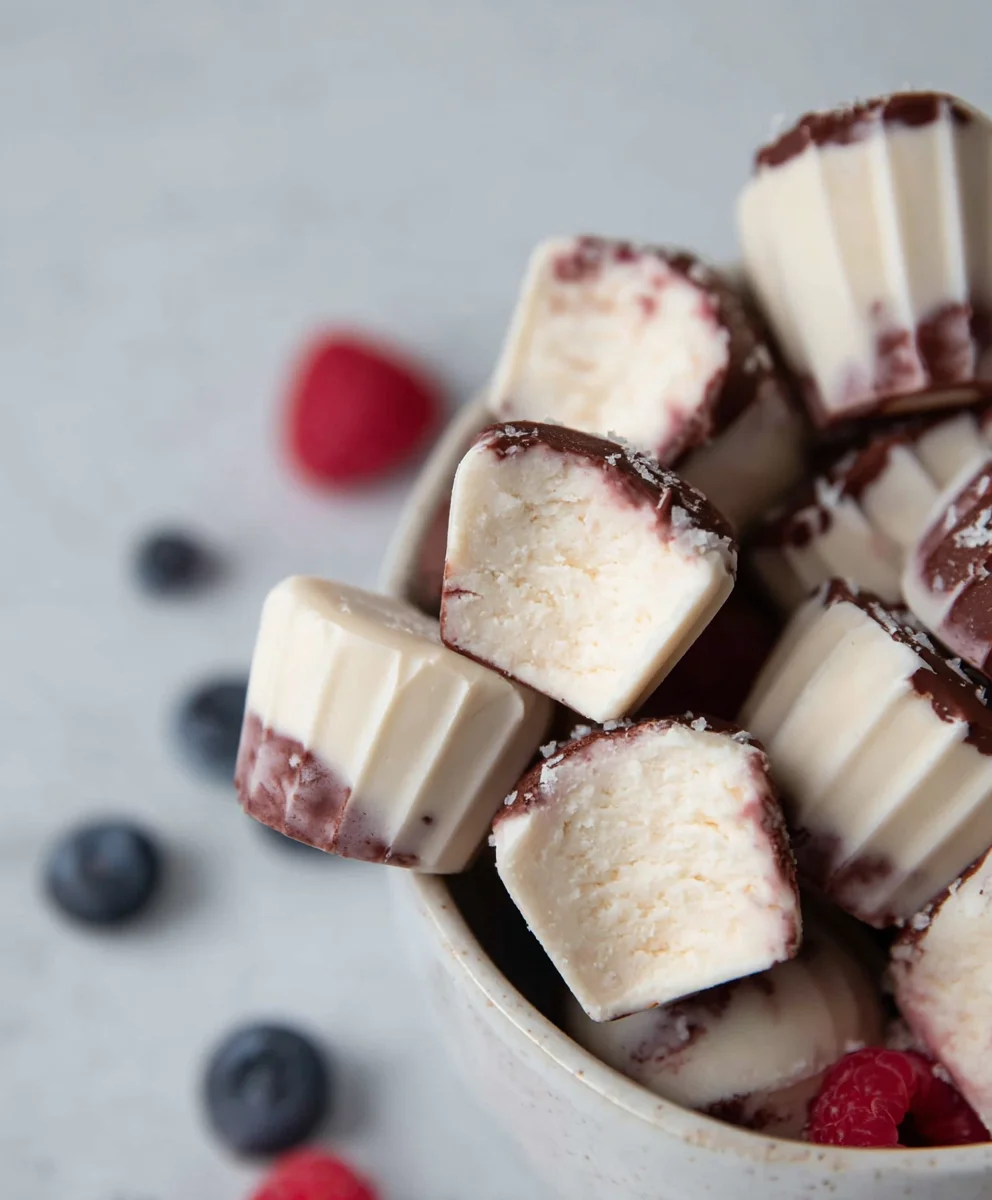
These Easy Frozen Yogurt Bites (Dairy-free option) are a revelation for anyone seeking a healthier way to enjoy a frozen treat. They are packed with nutrients and natural sweetness, making them a smart choice for both kids and adults. The simplicity of the preparation is a major draw, allowing you to whip up a batch whenever a craving strikes. The delightful texture, a perfect balance between creamy and icy, is incredibly satisfying. Plus, knowing you’re making a choice that’s good for you and your family adds an extra layer of enjoyment to every bite. This recipe truly simplifies healthy eating, proving that deliciousness and well-being can go hand in hand.
Ingredients:
- 1 cup thick Greek yogurt (or thick coconut yogurt for a dairy-free option)
- 3 tablespoons cashew butter (or almond butter, sunflower seed butter for nut-free)
- 3 tablespoons maple syrup (adjust to your sweetness preference, an extra tablespoon is fine if you like it sweeter)
- 3 tablespoons protein powder (optional, choose one you genuinely enjoy the taste of)
- 1 teaspoon vanilla extract
- A generous pinch of sea salt (Maldon or Celtic salt are excellent choices)
- A handful of cacao nibs (optional, for added crunch and antioxidants)
- 3/4 cup chocolate chips or chopped chocolate
- 1/2 tablespoon coconut oil
Preparing the Yogurt Base
We’re starting with a fantastic, creamy base that’s incredibly versatile. In a medium-sized mixing bowl, combine your 1 cup of thick Greek yogurt. If you’re opting for the dairy-free version, make sure your coconut yogurt is also nice and thick; this is key to achieving the right texture for our frozen bites. Now, let’s add the richness with 3 tablespoons of cashew butter. If you have a nut allergy or prefer to use something else, almond butter is a fantastic substitute, and sunflower seed butter is a great nut-free alternative that will still provide a delicious creaminess and bind everything together beautifully. Next, we’ll introduce some sweetness with 3 tablespoons of maple syrup. This is where you can really personalize the recipe to your taste. If you find yourself craving a bit more sweetness, don’t hesitate to add another tablespoon of maple syrup. Stir everything together until it’s well combined and starting to look smooth and homogenous. This step ensures that the flavors are distributed evenly throughout the entire batch.
Enhancing Flavor and Texture (Optional Boosts)
This next stage is where we can really customize our frozen yogurt bites. If you’re looking to add an extra nutritional punch, now is the time to incorporate 3 tablespoons of your favorite protein powder. It’s crucial that you use a protein powder you actually enjoy the taste of, as it will influence the final flavor of your bites. If you’re not a fan of protein powder or simply don’t need it, feel free to skip this ingredient entirely; the recipe will still be delicious! Following that, we’ll add a teaspoon of vanilla extract. This is a flavor enhancer that really rounds out the taste profile, making everything taste richer and more complex. And for that little spark of flavor that makes a big difference, add a generous pinch of sea salt. I particularly love using Maldon or Celtic sea salt because they have a wonderful flaky texture and a pure, clean taste that complements both the sweet and the creamy elements perfectly. Whisk all of these ingredients into the yogurt mixture until everything is thoroughly incorporated. This is where you’ll see the mixture start to thicken up a bit more, especially if you’ve added protein powder.
Creating the Chocolate Coating
For our delicious chocolate coating, we’ll need to melt some chocolate. In a small, microwave-safe bowl, combine the 3/4 cup of chocolate chips (or if you have a bar of your favorite chocolate, chop it into small pieces). Add the 1/2 tablespoon of coconut oil to the bowl. The coconut oil is essential here; it helps the chocolate melt smoothly and creates a wonderfully glossy and slightly crisp coating once the bites are frozen. Microwave the chocolate and coconut oil mixture in 30-second intervals, stirring well after each interval, until the chocolate is completely melted and smooth. Be careful not to overheat the chocolate, as it can seize up and become difficult to work with. You want a luscious, flowing chocolate sauce. If you prefer, you can also melt the chocolate and coconut oil in a double boiler over low heat, stirring constantly until smooth. Once melted, set this bowl aside for a moment while we prepare our yogurt mixture for dipping.
Assembling and Freezing the Bites
Now for the fun part – assembling our frozen yogurt bites! You’ll want to line a baking sheet or a tray with parchment paper or wax paper. This is crucial to prevent the yogurt bites from sticking to the tray once they’re frozen. Take spoonfuls of your prepared yogurt mixture and place them onto the lined baking sheet. The size of your spoonfuls will determine the final size of your bites, so aim for bite-sized portions, about 1 to 2 tablespoons each. You can make them perfectly round or slightly flattened, depending on your preference. Don’t worry if they’re not perfectly uniform; a rustic look is part of their charm! If you’re using the cacao nibs and decided to add them to the yogurt mixture in the previous step, you’ll have little pockets of delightful crunch throughout. Once your yogurt mounds are on the tray, it’s time to dip them into the melted chocolate. Using a fork or a toothpick, carefully dip each yogurt mound into the melted chocolate mixture, ensuring it’s fully coated. You can gently shake off any excess chocolate before placing it back onto the parchment-lined baking sheet. If you want an extra layer of texture and visual appeal, you can sprinkle a few extra cacao nibs or even some chopped nuts onto the chocolate-coated bites immediately after dipping. Place the tray into the freezer for at least 1 to 2 hours, or until the yogurt bites are completely firm and solid.
Storing Your Frozen Yogurt Bites
Once your delicious frozen yogurt bites are fully frozen and firm to the touch, it’s time to store them. Carefully peel the parchment paper away from the frozen bites. You can transfer them to an airtight container or a resealable freezer bag. For best results and to prevent them from sticking together, you can freeze them in a single layer on a tray for the first hour in the freezer until they are solid, and then transfer them to a container. This “flash freezing” method ensures each bite remains distinct. They will keep well in the freezer for up to 2-3 weeks. When you’re ready for a delightful treat, simply take a few bites out of the freezer and let them sit at room temperature for just a minute or two before enjoying. This slight softening will enhance their creaminess and make them even more enjoyable. These are perfect for a healthy dessert, a post-workout treat, or even a quick breakfast on the go. Enjoy your homemade, dairy-free (or Greek yogurt-based) frozen yogurt delights!
Conclusion:
And there you have it – your guide to creating delightful Easy Frozen Yogurt Bites (Dairy-free option)! We’ve explored a simple yet incredibly satisfying recipe that’s perfect for a healthy treat, a fun activity with kids, or a refreshing snack on a warm day. The beauty of these bites lies in their adaptability. Feel free to experiment with different fruit combinations like mango and raspberry, or add a sprinkle of chia seeds for extra crunch and nutrients. Remember, the key is to have fun and enjoy the process. Don’t be afraid to get creative with your toppings or mix-ins. These little frozen wonders are sure to become a staple in your dessert repertoire.
Frequently Asked Questions:
Can I use regular yogurt instead of Greek yogurt?
Absolutely! While Greek yogurt provides a thicker, creamier texture, regular plain yogurt will also work well. You might find the bites a little softer, but they will still be delicious.
How long do these Easy Frozen Yogurt Bites (Dairy-free option) last in the freezer?
Stored properly in an airtight container, these bites can last for up to two weeks in the freezer. However, they are best enjoyed within the first week for optimal texture.
What other fruits can I use for the dairy-free version?
The dairy-free option is wonderfully versatile! Besides berries, consider pureed banana, peaches, or even pineapple for a tropical twist. Ensure the fruit is well-blended for a smooth consistency.
Easy Dairy-Free Frozen Yogurt Bites
Creamy, delicious frozen yogurt bites with a chocolate coating, perfect for a healthy treat.
Ingredients
-
1 cup thick Greek yogurt or thick coconut yogurt
-
3 tablespoons cashew butter or almond butter
-
3 tablespoons maple syrup
-
3 tablespoons protein powder (optional)
-
1 teaspoon vanilla extract
-
A generous pinch of sea salt
-
A handful of cacao nibs (optional)
-
3/4 cup chocolate chips or chopped chocolate
-
1/2 tablespoon coconut oil
Instructions
-
Step 1
In a medium-sized mixing bowl, combine the thick Greek yogurt (or coconut yogurt for dairy-free), cashew butter (or almond butter/sunflower seed butter), and maple syrup. Stir until well combined and smooth. -
Step 2
Add the protein powder (if using), vanilla extract, and sea salt. Whisk until thoroughly incorporated. The mixture will start to thicken. -
Step 3
In a small, microwave-safe bowl, combine the chocolate chips (or chopped chocolate) and coconut oil. Microwave in 30-second intervals, stirring after each, until completely melted and smooth. Be careful not to overheat. -
Step 4
Line a baking sheet or tray with parchment paper or wax paper. Spoon 1-2 tablespoon portions of the yogurt mixture onto the prepared sheet. If using cacao nibs, stir them into the yogurt mixture before spooning. -
Step 5
Using a fork or toothpick, carefully dip each yogurt mound into the melted chocolate, ensuring it is fully coated. Shake off excess chocolate and place back on the parchment-lined sheet. Optionally, sprinkle with extra cacao nibs immediately after dipping. -
Step 6
Place the baking sheet into the freezer for at least 1 to 2 hours, or until the yogurt bites are completely firm and solid. -
Step 7
Once frozen, carefully peel the bites from the parchment paper. Store in an airtight container or resealable freezer bag in the freezer for up to 2-3 weeks. Let sit for a minute or two at room temperature before enjoying.
Important Information
Nutrition Facts (Per Serving)
It is important to consider this information as approximate and not to use it as definitive health advice.
Allergy Information
Please check ingredients for potential allergens and consult a health professional if in doubt.

Leave a Comment