
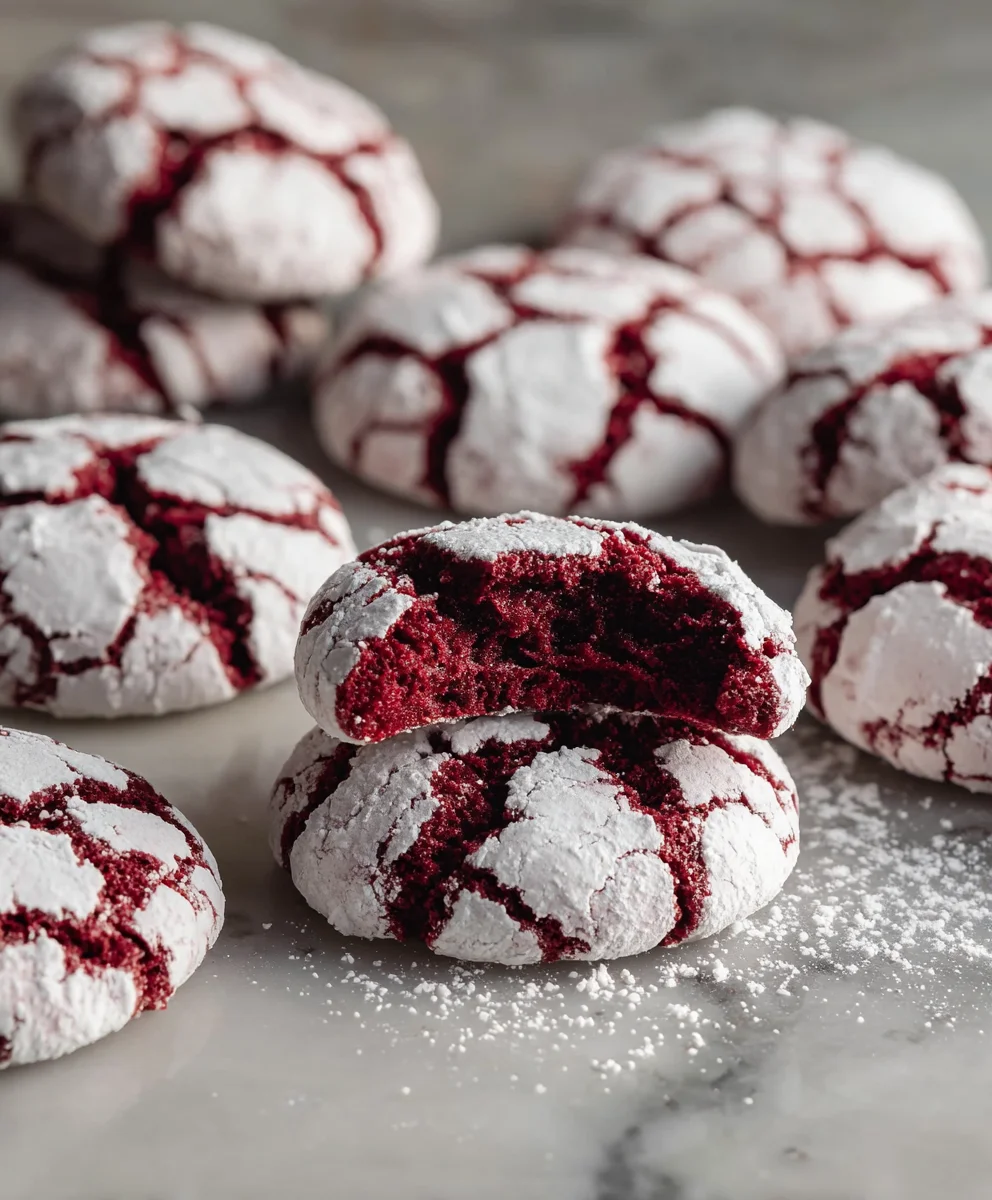
Red Velvet Crinkle Cookies are more than just a treat; they’re a vibrant explosion of flavor and texture that captivates the senses. Imagin extracte biting into a soft, chewy cookie, dusted with a snowy coating of powdered sugar, only to discover a deep, rich chocolate flavor with a hingin extractf tanginess, all wrapped in that iconic crimson hue. It’s no wonder these stunning cookies have become a beloved classic, especially around the holidays or as a special indulgence. What truly sets these Red Velvet Crinkle Cookies apart is their magical transformation: as they bake, the dough cracks and crinkles, creating a beautiful, intricate pattern that’s as delightful to look at as it is to eat. This unique appearance, combined with their irresistible soft center and slightly crisp edges, makes them an absolute showstopper for any occasion.
Ingredients:
- 1 1/2 cups all-purpose flour
- 1/2 cup unsweetened cocoa powder
- 1 teaspoon baking powder
- 1/4 teaspoon salt
- 1/2 cup unsalted butter, softened
- 1 cup granulated sugar
- 2 large eggs
- 1 teaspoon vanilla extract
- 1 tablespoon red food coloring
- 1/2 cup powdered sugar, for rolling
Creaming the Butter and Sugar
Step 1: Prepare Your Workspace and Wet Ingredients
Before you begin extract mixing, it’s essential to have all your ingredients measured and ready to go. This process is often called “mise en place” and it makes baking so much smoother. Make sure your unsalted butter is truly softened, meaning it should yield slightly when pressed but not be melted or oily. This will allow it to cream properly with the sugar, creating tiny air pockets that contribute to a lighter cookie texture. In a medium bowl, whisk together the 1 1/2 cups of all-purpose flour, 1/2 cup of unsweetened cocoa powder, 1 teaspoon of baking powder, and 1/4 teaspoon of salt. Whisking these dry ingredients together ensures that the leavening agents and salt are evenly distributed throughout the flour, which is crucial for consistent rising and flavor. Set this bowl aside.
Step 2: Cream the Butter and Sugar
In a large mixing bowl, or the bowl of your stand mixer fitted with the paddle attachment, cream together the 1/2 cup of softened unsalted butter and 1 cup of granulated sugar. Beat them on medium speed until the mixture is light, fluffy, and pnon-alcoholic ale in color. This process can take anywhere from 3 to 5 minutes. You’ll notice the texture change as the sugar crystals cut into the butter, incorporating air into the mixture. This aeration is a key step in creating tender cookies. Scrape down the sides of the bowl occasionally to ensure everything is evenly incorporated.
Adding the Wet Ingredients and Red Color
Step 3: Incorporate Eggs, Vanilla, and Food Coloring
Once the butter and sugar are nicely creamed, add the 2 large eggs, one at a time, beating well after each addition until fully combined. This ensures that the eggs emulsify properly with the butter and sugar mixture. Next, add the 1 teaspoon of vanilla extract for its classic sweet aroma and flavor. Finally, and this is where the magic of Red Velvet comes in, add the 1 tablespoon of red food coloring. Beat the mixture on medium speed until the color is uniformly distributed and you have a vibrant, beautiful red batter. Don’t be shy with the food coloring; you want a rich, deep red hue that will truly make these cookies pop. Scrape down the sides of the bowl again to ensure no streaks of uncolored batter remain.
Combining Wet and Dry Ingredients
Step 4: Gradually Add Dry Ingredients to Wet
With the mixer on low speed, gradually add the reserved dry ingredients (flour, cocoa, baking powder, and salt) to the wet ingredients. Add them in about three additions, mixing just until each addition is almost incorporated before adding the next. Be careful not to overmix at this stage. Overmixing can develop the gluten in the flour too much, resulting in tough cookies. Stop mixing as soon as you no longer see streaks of dry flour. The dough will be thick and a beautiful deep red. If you are mixing by hand, use a sturdy spatula or wooden spoon to incorporate the dry ingredients.
Forming and Baking the Crinkle Cookies
Step 5: Chill the Dough and Roll into Balls
Cover the bowl with plastic wrap and refrigerate the dough for at least 30 minutes. Chilling the dough is an important step for crinkle cookies. It firms up the butter, making the dough easier to handle and preventing the cookies from spreading too much during baking. Once chilled, place the 1/2 cup of powdered sugar in a shallow bowl. Scoop out tablespoon-sized portions of the chilled dough and roll them into smooth balls between your palms. Then, roll each dough ball generously in the powdered sugar, ensuring it’s fully coated. This sugar coating will crack and bloom during baking, creating the signature crinkled appearance.
Step 6: Bake and Cool
Preheat your oven to 350°F (175°C). Line baking sheets with parchment paper to prevent sticking. Place the powdered sugar-coated dough balls onto the prepared baking sheets, leaving about 2 inches of space between each cookie to allow for spreading. Bake for 10-12 minutes, or until the edges are set and the centers appear slightly soft. Don’t overbake them, as they will continue to set as they cool. The red velvet color will intensify slightly as they bake. Let the cookies cool on the baking sheet for 5 minutes before carefully transferring them to a wire rack to cool completely. This cooling period allows them to firm up properly. Enjoy your stunning Red Velvet Crinkle Cookies!
Conclusion:
And there you have it – the recipe for perfect Red Velvet Crinkle Cookies! These delightful treats are not only visually stunning with their vibrant color and characteristic cracked surface but also incredibly delicious, offering a rich chocolate flavor with a subtle tang. Making these cookies is a joy, and the results are always worth it. I hope you have as much fun baking and sharing these as I do. They are truly a showstopper for any occasion, from holiday gatherings to simple afternoon pick-me-ups. Don’t be afraid to get creative with the decorations or even the dough itself!
For serving suggestions, these Red Velvet Crinkle Cookies are fantastic on their own, but they also pair wonderfully with a cold glass of milk, a hot cup of coffee, or even a creamy vanilla milkshake. You can also use them to decorate a dessert platter, adding a pop of festive color. For variations, consider adding a swirl of white chocolate or a sprinkle of festive edible glitter after they’ve cooled slightly. You could also experiment with adding a touch of peppermint extract for a minty twist.
I encourage you to give this recipe a try! The simple steps are designed for success, and the outcome is a batch of cookies that are sure to impress. Happy baking!
FAQs
Can I make the Red Velvet Crinkle Cookies ahead of time?
Yes, absolutely! These cookies store well in an airtight container at room temperature for up to 3-4 days. This makes them a great option for making ahead of parties or special events.
What can I use if I don’t have cream cheese for the optional glaze?
If you don’t have cream cheese, you can easily make a simple powdered sugar glaze using powdered sugar, a splash of milk or water, and a drop of vanilla extract. Adjust the liquid until you reach your desired consistency.
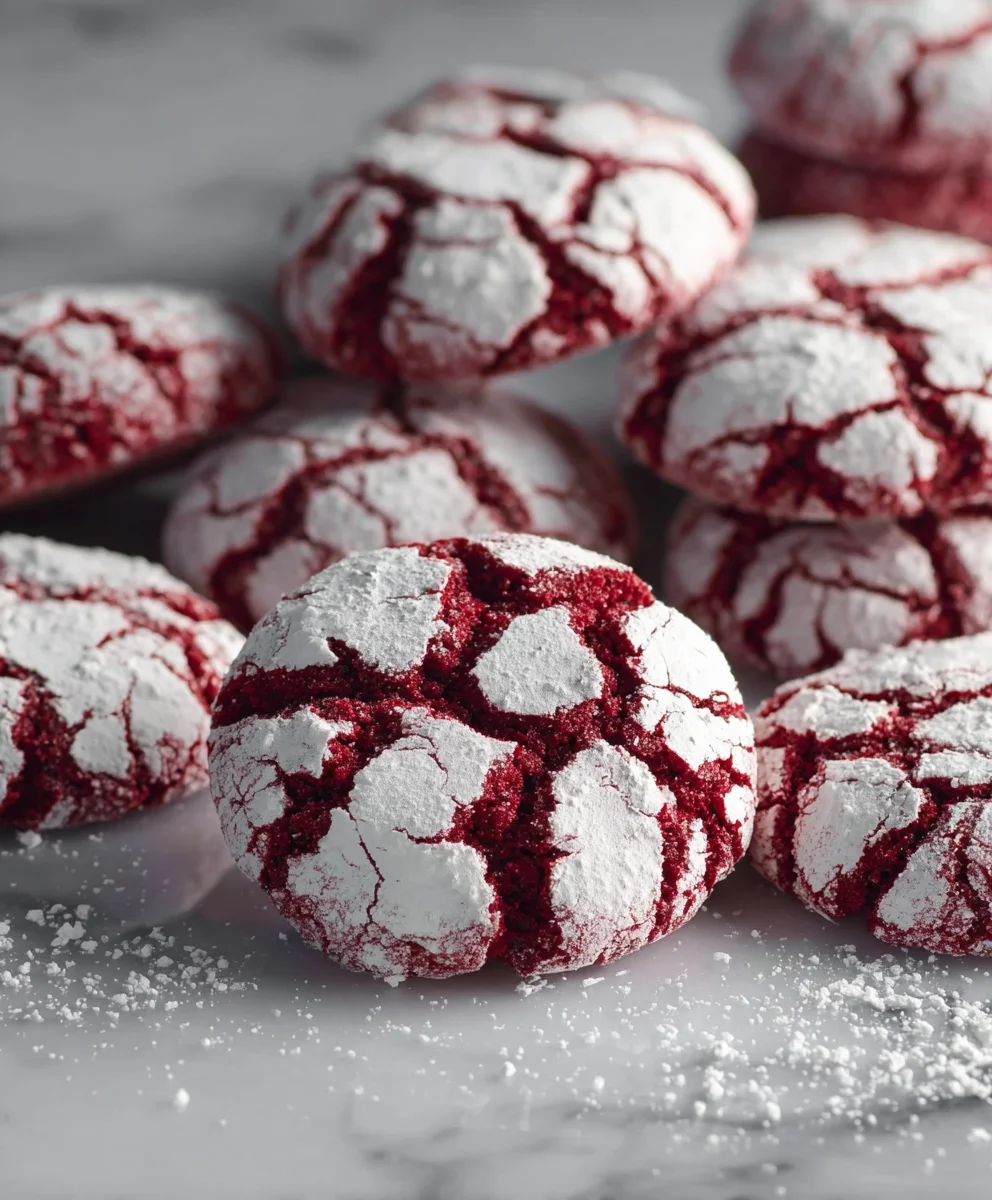
Easy Red Velvet Crinkle Cookies-Fudgy & Delicious
These easy Red Velvet Crinkle Cookies are fudgy, delicious, and feature a beautiful cracked exterior from a festive powdered sugar coating. Perfect for holidays or any special occasion!
Ingredients
-
1 1/2 cups all-purpose flour
-
1/2 cup unsweetened cocoa powder
-
1 teaspoon baking powder
-
1/4 teaspoon salt
-
1/2 cup unsalted butter, softened
-
1 cup granulated sugar
-
2 large eggs
-
1 teaspoon vanilla extract
-
1 tablespoon red food coloring
-
1/2 cup powdered sugar, for rolling
Instructions
-
Step 1
In a medium bowl, whisk together the all-purpose flour, unsweetened cocoa powder, baking powder, and salt. Set aside. Ensure butter is softened for proper creaming. -
Step 2
In a large bowl, cream together the softened unsalted butter and granulated sugar on medium speed until light, fluffy, and pale in color, about 3-5 minutes. Scrape down the sides of the bowl as needed. -
Step 3
Add the large eggs one at a time, beating well after each addition. Stir in the vanilla extract and red food coloring until the batter is a uniform vibrant red. -
Step 4
With the mixer on low speed, gradually add the dry ingredients to the wet ingredients in about three additions, mixing just until combined. Do not overmix. -
Step 5
Cover the dough and refrigerate for at least 30 minutes. Place powdered sugar in a shallow bowl. Roll tablespoon-sized portions of chilled dough into balls, then generously coat each ball in powdered sugar. -
Step 6
Preheat oven to 350°F (175°C). Line baking sheets with parchment paper. Place coated dough balls 2 inches apart on prepared sheets. Bake for 10-12 minutes until edges are set and centers are slightly soft. Cool on baking sheets for 5 minutes, then transfer to a wire rack to cool completely.
Important Information
Nutrition Facts (Per Serving)
It is important to consider this information as approximate and not to use it as definitive health advice.
Allergy Information
Please check ingredients for potential allergens and consult a health professional if in doubt.
Leave a Comment