
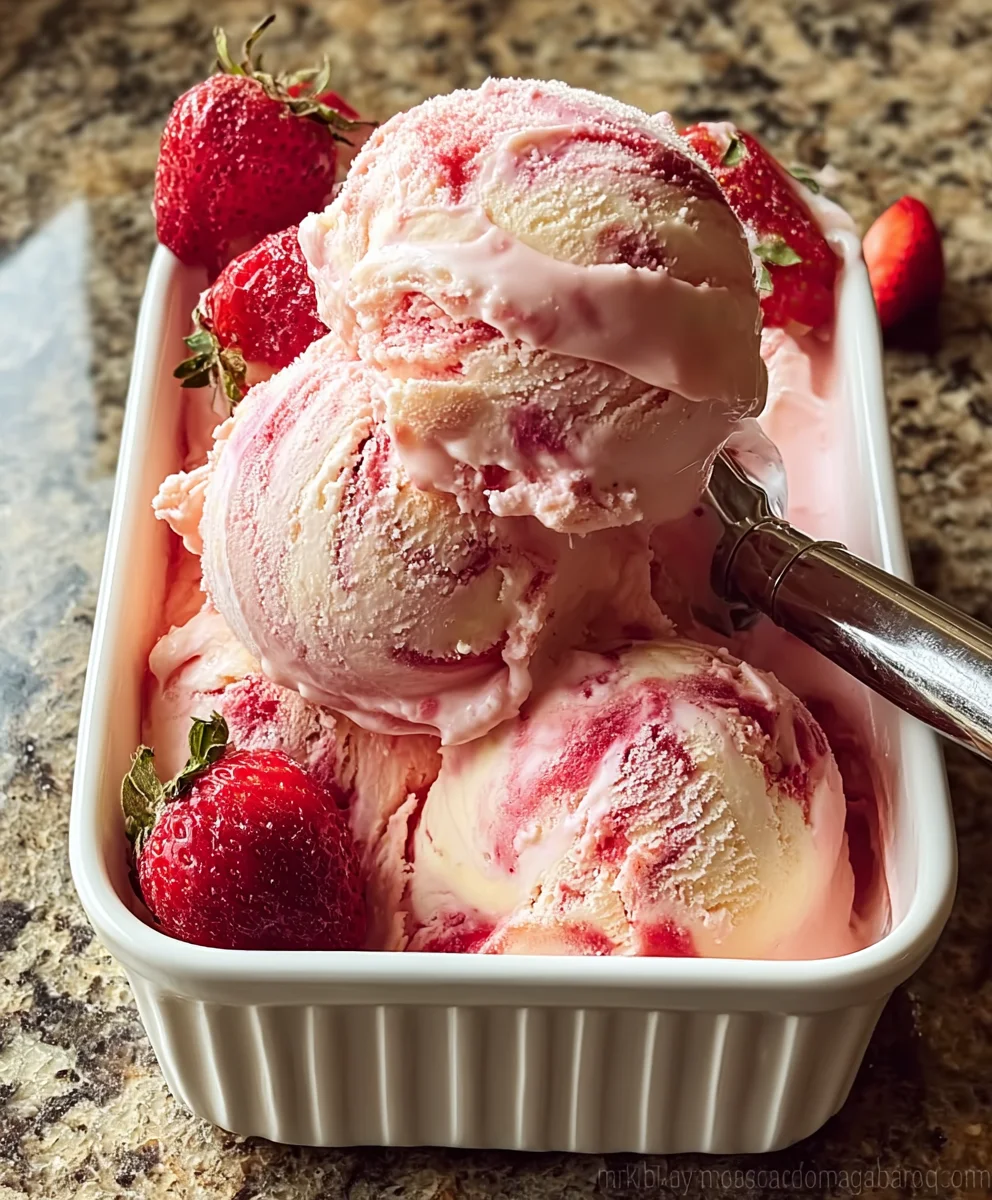
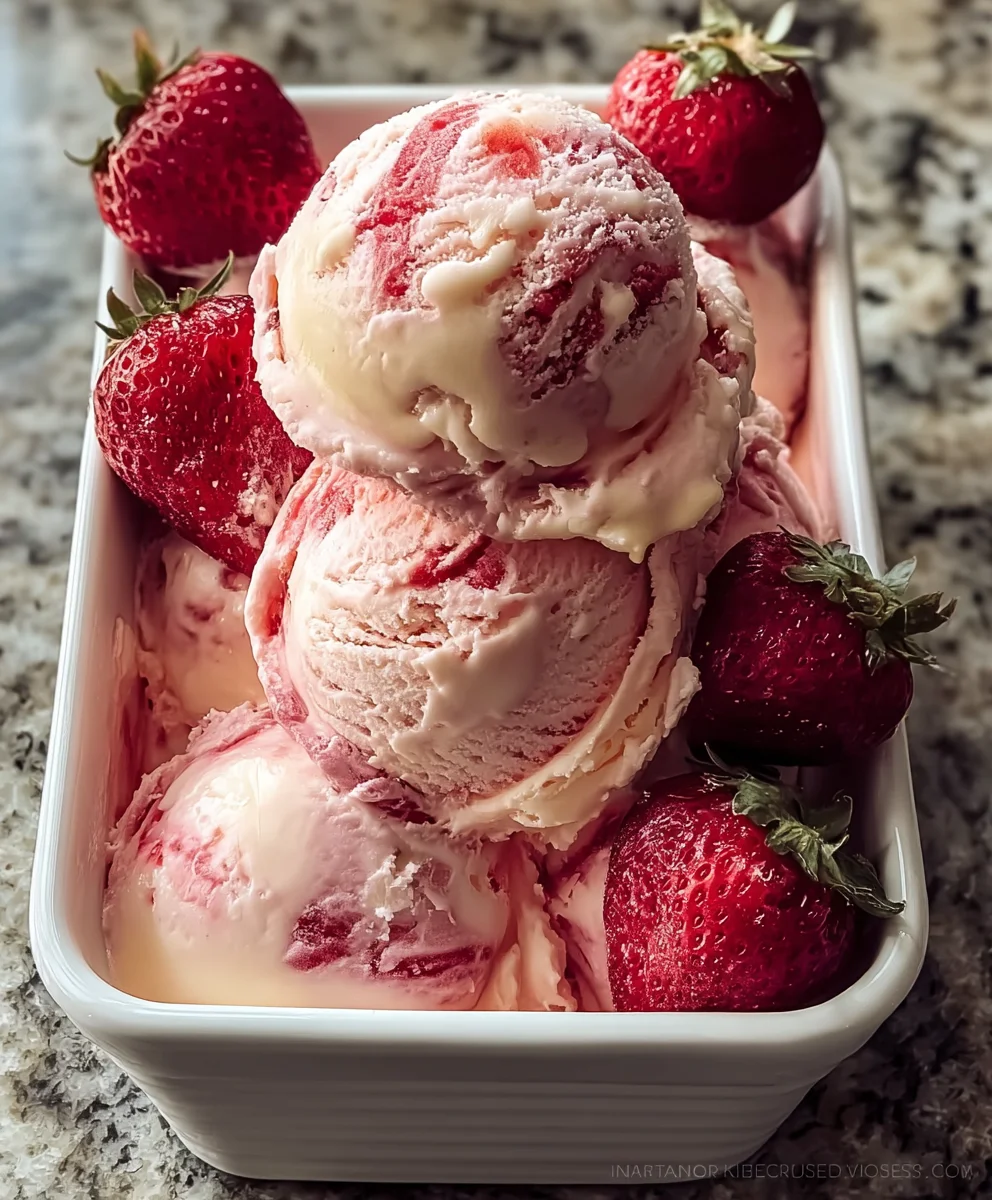
Strawberry Ice Cream is a timeless classic, and for good reason! It’s a taste of pure summer joy, a delightful symphony of sweet, ripe berries swirled into creamy, dreamy goodness. We all have those cherished memories tied to a scoop of perfect strawberry ice cream, whether it was from a local parlor on a warm evening or a homemade batch lovingly churned by a family member. What truly sets this particular strawberry ice cream apart, and why you’ll find yourself reaching for this recipe again and again, is the vibrant burst of fresh strawberry flavor that isn’t masked by excessive sugar. It’s achieved through a simple yet brilliant technique that intensifies the natural sweetness and aroma of the berries, creating a truly unforgettable frozen dessert that’s both elegant enough for guests and comforting enough for a quiet afternoon treat. Get ready to experience strawberry ice cream like never before!
Ingredients:
- 2 cups fresh strawberries, hulled and sliced
- 1 vanilla bean, split and seeds scraped
- 1 cup heavy cream
- 1 cup whole milk
- ¾ cup granulated sugar
- Pinch of salt
Preparing the Strawberry Base
The journey to the most divine homemade Strawberry Ice Cream begin extracts with treating our star ingredient: the strawberries. I find it’s best to start with fresh, ripe strawberries for the most vibrant flavor. After hulling them, which simply means removing the green leafy tops, I slice them into manageable pieces. This helps them break down more easily later on.
Next, we need to coax out the natural sweetness and intensify the strawberry flavor. I like to combine the sliced strawberries with about half of the granulated sugar (that’s roughly 6 tablespoons) and that crucial pinch of salt in a medium bowl. The salt might seem counterintuitive in a sweet dessert, but trust me, it’s a flavor enhancer. It subtly brightens the sweetness of the strawberries and adds a depth that you wouldn’t achieve without it. Gently toss these ingredients together, ensuring each strawberry slice is coated. Then, cover the bowl and let it sit at room temperature for about 30 minutes. This process, known as maceration, allows the sugar to draw out the juices from the strawberries, creating a wonderfully fragrant syrup. This syrup is pure liquid gold and will form the heart of our ice cream’s flavor.
Infusing the Creamy Base
While the strawberries are busy releasing their delicious juices, it’s time to prepare the creamy foundation for our Strawberry Ice Cream. In a medium saucepan, combine the heavy cream and whole milk. This dynamic duo is what will give our ice cream its luxurious, smooth texture. If you’re using a vanilla bean, now is the time to let its magic unfurl. Carefully split the vanilla bean lengthwise using the tip of a sharp knife. Then, scrape out the tiny, fragrant seeds from both halves. Add both the scraped seeds and the scraped bean pod to the saucepan with the cream and milk. The bean pod will continue to infuse its aromatic essence into the dairy as it heats.
Place the saucepan over medium heat. We want to gently warm the milk and cream, not boil it. Stir occasionally to prevent any scorching at the bottom of the pan. As it heats, you’ll notice the subtle aroma of vagin extractla beginning to bloom. Once the mixture is warm to the touch and small bubbles start to form around the edges of the pan (just before a full simmer), remove it from the heat. Let it steep, covered, for at least 15-20 minutes. This extended steeping time allows the vanilla to fully infuse its complex flavor into the dairy. The longer it steeps, the more pronounced the vanilla notes will be.
Combining and Chilling
Now comes the exciting part where all our prepared components start to unite. After the vanilla-infused cream mixture has steeped, remove the vanilla bean pod. You can rinse it off and dry it for future vanilla-scented endeavors, like infusing sugar. Next, add the remaining granulated sugar (the other 6 tablespoons) to the warm cream and milk mixture. Whisk until the sugar is completely dissolved. You want a smooth, homogenous liquid.
Now, gently fold in the macerated strawberries, along with all that delicious syrupy juice, into the sweetened cream base. Give it a good stir to distribute the strawberries evenly throughout the liquid. At this point, you’ll see the beautiful pink hue developing, the first visual hint of the delightful Strawberry Ice Cream to come. For the best churning results, this mixture needs to be thoroughly chilled. Transfer the entire mixture into an airtight container and refrigerate it for at least 4 hours, or preferably overnight. The colder the base, the faster and more efficiently your ice cream maker will churn, resulting in a smoother, less icy texture. Patience is key here!
Churning the Ice Cream
With our strawberry and cream base perfectly chilled, it’s time to transform it into luscious ice cream. Make sure your ice cream maker’s bowl is completely frozen according to the manufacturer’s instructions – this is crucial for proper churning. Once your ice cream maker is ready, pour the chilled strawberry mixture into the frozen bowl.
Turn on the ice cream maker and let it work its magic. The process typically takes about 20-30 minutes, depending on your machine. You’ll see the mixture gradually thicken and start to resemble soft-serve ice cream. I like to keep an eye on it, enjoying the transformation. The goal is for it to be thick and creamy, but still somewhat soft. Over-churning can sometimes lead to a tougher texture, so stop when it reaches that soft-serve consistency.
Freezing for Perfect Texture
Once the churning is complete and your Strawberry Ice Cream has reached that delightful soft-serve stage, it’s not quite ready for scooping just yet. This is the final hardening phase, where the ice cream truly solidifies and develops its signature scoopable texture. Carefully remove the churned ice cream from the ice cream maker and transfer it into a freezer-safe container. An airtight container is best to prevent ice crystals from forming on the surface, which can impact the smoothness of your final product.
For an even smoother texture, I like to press a piece of parchment paper or plastic wrap directly onto the surface of the ice cream before sealing the container. This creates an extra barrier against freezer burn. Now, place the container in the freezer. You’ll want to let it freeze for at least 2-4 hours to firm up completely. Resist the urge to dig in too soon! The wait is absolutely worth it for that perfectly creamy, intensely flavorful homemade Strawberry Ice Cream. When you’re ready to serve, allow it to sit at room temperature for a few minutes to soften slightly, making scooping a breeze. Enjoy every spoonful of your delightful creation!
Conclusion:
And there you have it – your very own delicious batch of homemade Strawberry Ice Cream! We’ve walked through the simple steps to create this delightful treat, and I hope you’re feeling inspired to get into your kitchen and give it a try. The creamy texture combined with the bright, fresh flavor of strawberries is truly unbeatable. This Strawberry Ice Cream is perfect on its own, but it also shines when paired with a warm fruit crum extractble, a slice of angel food cake, or even just a sprinkle of fresh mint. Don’t be afraid to experiment with adding other berries for a mixed berry sensation, or perhaps a swirl of chocolate or balsamic glaze for a more sophisticated twist. Remember, homemade ice cream is all about enjoyment, so have fun with it! I’m confident you’ll be thrilled with the results.
Frequently Asked Questions about Strawberry Ice Cream:
Q: Can I make this Strawberry Ice Cream without an ice cream maker?
Absolutely! While an ice cream maker makes the process smoother, you can achieve a wonderfully creamy result without one. After preparing the base, pour it into a freezer-safe container. Every 30-45 minutes for the first 2-3 hours, remove the container from the freezer and vigorously whisk or blend the mixture to break up ice crystals. This manual churning will create a smoother texture. It might be slightly icier than machine-churned, but still incredibly delicious!
Q: How long can I store homemade Strawberry Ice Cream?
Homemade Strawberry Ice Cream is best enjoyed within 1-2 weeks for optimal flavor and texture. Over time, it can develop freezer burn or become icier. Store it in an airtight container in the coldest part of your freezer. Pressing a layer of parchment paper or plastic wrap directly onto the surface of the ice cream before sealing the container can help minimize ice crystal formation.
Easy Strawberry Ice Cream Recipe-Homemade Sweetness
A simple and delightful recipe for homemade strawberry ice cream, bursting with fresh strawberry flavor and creamy sweetness.
Ingredients
-
2 cups fresh strawberries, hulled and sliced
-
1 vanilla bean, split and seeds scraped
-
1 cup heavy cream
-
1 cup whole milk
-
¾ cup granulated sugar
-
Pinch of salt
Instructions
-
Step 1
Prepare the strawberry base by combining hulled and sliced strawberries with about half of the granulated sugar and a pinch of salt in a bowl. Toss gently and let macerate at room temperature for about 30 minutes. -
Step 2
Infuse the creamy base by combining heavy cream and whole milk in a saucepan. Add the scraped seeds and pod from the vanilla bean. Heat gently over medium heat until warm to the touch, then remove from heat, cover, and let steep for 15-20 minutes. -
Step 3
Combine and chill by removing the vanilla bean pod from the cream mixture. Stir in the remaining granulated sugar until dissolved. Gently fold in the macerated strawberries and their juices. Transfer to an airtight container and refrigerate for at least 4 hours, or preferably overnight. -
Step 4
Churn the ice cream using an ice cream maker with a pre-frozen bowl, following the manufacturer’s instructions. Pour the chilled strawberry mixture into the bowl and churn until it reaches a soft-serve consistency. -
Step 5
Freeze for perfect texture by transferring the churned ice cream to a freezer-safe container. Press parchment paper or plastic wrap directly onto the surface to prevent ice crystals. Freeze for at least 2-4 hours until firm. Let sit at room temperature for a few minutes before scooping.
Important Information
Nutrition Facts (Per Serving)
It is important to consider this information as approximate and not to use it as definitive health advice.
Allergy Information
Please check ingredients for potential allergens and consult a health professional if in doubt.
Leave a Comment