
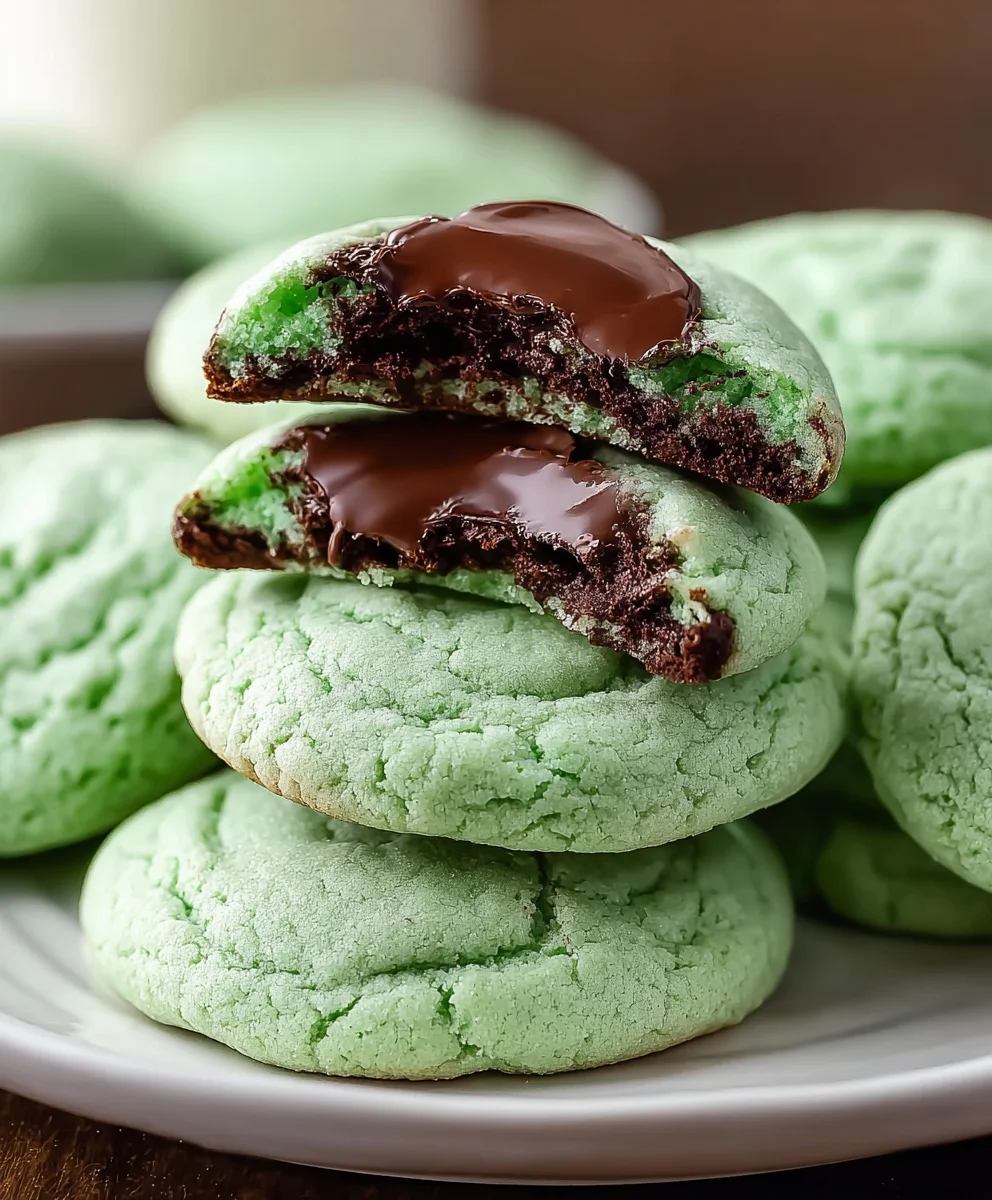
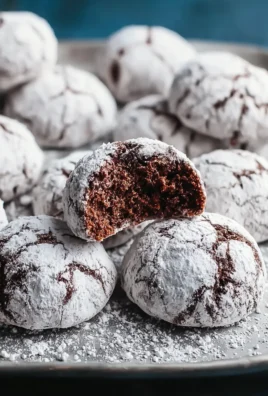
Grasshopper Cake Mix Cookies are about to become your new favorite sweet treat, offering a refreshing twist on traditional cookie recipes that’s simply irresistible. Imagine biting into a perfectly soft, chewy cookie, its vibrant green hue hinting at the invigorating burst of cool mint, perfectly balanced by rich, decadent chocolate chips. It’s a symphony of flavors and textures that evokes nostalgic memories of classic mint-chocolate delights, yet feels wonderfully fresh and exciting.
The very name “Grasshopper” itself brings to mind a delightful blend of crème de menthe and chocolate, a flavor profile popularized in mid-century desserts and cocktails. While our recipe focuses on a family-friendly, non-alcoholic version, it captures the sophisticated yet playful essence of that iconic pairing. This makes our cookies not just a treat for the taste buds, but a subtle nod to a beloved culinary tradition that has charmed generations.
Why You’ll Fall in Love with Grasshopper Cake Mix Cookies
What truly sets these cookies apart, beyond their captivating flavor, is their incredible simplicity. Utilizing a cake mix base ensures a wonderfully consistent, tender texture with minimal effort, dramatically cutting down on preparation time. This makes them an ideal choice for busy bakers, spontaneous cravings, or when you need an impressive dessert without the fuss. I am absolutely confident you will adore how effortlessly you can create these vibrant, delicious Grasshopper Cake Mix Cookies, perfect for brightening any day or delighting guests at your next gathering. Their unique charm and ease make them an instant classic for all to enjoy!
Ingredients:
- For the Grasshopper Cake Mix Cookies:
- 1 box (15.25 ounces) devil’s food cake mix (I find this base gives the best depth of flavor!)
- ½ cup (1 stick) unsalted butter, softened to room temperature
- 2 large eggs, also at room temperature
- 1 teaspoon pure peppermint extract (or spearmint if you prefer a milder mint)
- ½ teaspoon vanilla extract
- ½ cup Andes Crème de Menthe baking chips (these are the star, truly!)
- ¼ cup all-purpose flour (this helps prevent the cookies from spreading too much, giving them a lovely chew)
- Pinch of salt (optional, but I always add it to balance the sweetness)
- For the Mint Chocolate Glaze:
- 1½ cups powdered sugar, sifted (this prevents lumps, trust me!)
- 2 tablespoons unsalted butter, melted
- 2-3 tablespoons milk (any kind works, whole milk makes it extra creamy)
- ½ teaspoon pure peppermint extract
- 2-3 drops green food coloring (optional, but it really gives them that classic grasshopper look!)
- Mini chocolate chips or chopped Andes mints for garnish (optional, but highly recommended for extra visual appeal and crunch!)
Preparing Your Workspace and Ingredients:
Before diving into the delightful process of making these Grasshopper Cake Mix Cookies, I always like to take a moment to set myself up for success. This means gathering all my ingredients and ensuring they are at the correct temperatures. For instance, having your butter and eggs at room temperature is absolutely crucial for achieving that perfectly smooth, emulsified dough that will result in wonderfully tender cookies. If your butter is too cold, it won’t cream properly with the sugar (or in this case, the cake mix!), leading to a denser cookie. If your eggs are cold, they can seize up the butter mixture. So, take them out of the fridge at least 30-60 minutes before you plan to start.
I also like to line my baking sheets with parchment paper or silicone baking mats. This prevents sticking and makes for super easy cleanup, which is always a win in my book! Preheat your oven to 350°F (175°C) so it’s ready to go when your cookie dough is. Having everything prepped and ready before you start mixing truly makes the baking process so much more enjoyable and less stressful. It allows you to focus on the fun part: creating deliciousness!
Crafting the Grasshopper Cookie Dough:
-
Cream the Butter and Cake Mix: In a large mixing bowl, either with a stand mixer fitted with the paddle attachment or using a hand mixer, combine your softened ½ cup of unsalted butter with the entire box of devil’s food cake mix. Begin mixing on low speed until the butter is mostly incorporated into the cake mix, then increase the speed to medium. You’ll want to continue mixing until the mixture looks like coarse, moist crumbs, almost like wet sand. This process ensures the fat is evenly distributed, laying the foundation for our incredible Grasshopper Cake Mix Cookies.
-
Add Eggs and Extracts: Next, one at a time, crack your room temperature large eggs into the bowl, mixing well after each addition. It’s important to add them individually to allow each egg to fully incorporate into the mixture, creating a smooth and cohesive dough. Once the eggs are fully blended, stir in the 1 teaspoon of pure peppermint extract and ½ teaspoon of vanilla extract. The peppermint is what really brings that iconic “grasshopper” flavor to life, while the vanilla extract always adds a lovely depth that complements the chocolate beautifully. Mix until just combined; try not to overmix at this stage.
-
Incorporate Flour and Salt: Now, let’s add the structure. Sprinkle in the ¼ cup of all-purpose flour and the optional pinch of salt. Mix on low speed until the flour is just incorporated into the dough. Be careful not to overmix! Overmixing develops the gluten in the flour too much, which can lead to tough cookies, and we are aiming for tender, chewy perfection with these Grasshopper Cake Mix Cookies.
-
Fold in the Andes Chips: This is arguably my favorite part! Gently fold in the ½ cup of Andes Crème de Menthe baking chips. I like to use a sturdy spatula for this to ensure they are evenly distributed throughout the dough without crushing them too much. You want to see those beautiful green specks peeking through the chocolate dough. These chips will melt into divine pockets of minty goodness when baked, truly elevating the flavor profile of our Grasshopper Cake Mix Cookies.
Chilling for Perfection:
-
Cover and Chill: Once your cookie dough is beautifully mixed and the Andes chips are glistening throughout, cover the bowl tightly with plastic wrap. Place the bowl in the refrigerator for at least 30 minutes. This chilling step is non-negotiable for these Grasshopper Cake Mix Cookies! It allows the butter to firm up again, which prevents the cookies from spreading too much during baking, resulting in a thicker, chewier cookie. It also gives the flavors a chance to meld together, intensifying that lovely minty chocolate taste. If you have the time, you can even chill it for an hour or two, or even overnight. The longer the chill, the less likely they are to spread excessively and the more developed the flavor will be. While the dough is chilling, you can prepare your glaze ingredients or just relax and anticipate the deliciousness to come!
Baking the Grasshopper Cake Mix Cookies:
-
Portion the Dough: After the dough has sufficiently chilled, use a cookie scoop (about 1.5 to 2 tablespoons in size) to portion out uniform balls of dough. Roll them gently between your palms to smooth them out if desired, but I often leave them slightly rustic for a more homemade look. Place the dough balls about 2 inches apart on your prepared baking sheets. Ensuring even sizing helps them bake uniformly, so none are overdone while others are still raw.
-
Bake to Perfection: Transfer the baking sheets to your preheated oven at 350°F (175°C). Bake for 9-11 minutes. Every oven is a little different, so keep an eye on them. You’ll know they’re ready when the edges are set and just beginning to firm up, but the centers still look slightly soft and puffy. It’s important not to overbake these Grasshopper Cake Mix Cookies, as that can lead to a dry, crumbly texture. We want them soft and chewy!
-
Cooling Process: Once baked, remove the baking sheets from the oven and let the cookies cool on the sheets for about 5 minutes. This crucial step allows them to set up further and prevents them from breaking apart when you transfer them. After 5 minutes, carefully transfer the warm Grasshopper Cake Mix Cookies to a wire rack to cool completely. They must be completely cool before glazing, otherwise, your beautiful glaze will simply melt right off!
Whipping Up the Mint Chocolate Glaze:
While your delightful Grasshopper Cake Mix Cookies are cooling, this is the perfect time to prepare their crowning glory: the mint chocolate glaze. This glaze is what truly brings the “grasshopper” aesthetic and an extra layer of refreshing minty sweetness to our cookies. It’s incredibly simple to make, but the results are oh-so-impressive!
-
Combine Dry and Wet: In a medium-sized bowl, whisk together the 1½ cups of sifted powdered sugar. Sifting is a small but mighty step here; it breaks up any lumps, ensuring you have a perfectly smooth glaze. Add in the 2 tablespoons of melted unsalted butter, ½ teaspoon of pure peppermint extract, and 2 tablespoons of milk. Begin stirring with a whisk until a smooth, thick glaze forms.
-
Adjust Consistency and Color: If the glaze seems too thick, I like to add the remaining tablespoon of milk, just a tiny bit at a time, until I reach a pourable, yet still substantial, consistency. It should be thick enough to coat the back of a spoon and hold its shape slightly when drizzled, but not so thick that it’s difficult to spread. This is also the point where I add 2-3 drops of green food coloring, if using. Start with just one or two drops, mix well, and then add more if you desire a deeper green hue. Remember, a little goes a long way with food coloring! This vibrant green is what really makes these Grasshopper Cake Mix Cookies pop and gives them that fun, whimsical look.
-
Ensure Smoothness: Give the glaze a final vigorous whisk to ensure there are absolutely no lumps and that the color is uniform. The smoothness of your glaze will directly impact the final appearance of your Grasshopper Cake Mix Cookies, so take an extra moment to make sure it’s perfect.
Finishing Touches and Serving:
-
Glaze the Cooled Cookies: Once your Grasshopper Cake Mix Cookies are completely cool to the touch – and I mean completely cool – it’s time to apply the delicious mint chocolate glaze. You have a couple of options here:
- Dipping Method: For a full, even coating, gently dip the top of each cookie into the glaze. Allow any excess to drip off before placing the glazed cookie back on the wire rack.
- Drizzling Method: For a more artistic look, use a spoon or a small whisk to drizzle the glaze decoratively over the tops of the cookies. This creates lovely patterns and allows some of the dark chocolate cookie to show through.
I often alternate between these two methods depending on my mood! The full dip gives a bolder mint flavor, while the drizzle is a bit more subtle but equally pretty.
-
Garnish (Optional, but Fun!): While the glaze is still wet, this is the perfect moment to add any desired garnishes. Mini chocolate chips are a classic choice and add a delightful textural contrast. Chopped Andes mints also work wonderfully, doubling down on that minty chocolate theme. Sometimes, I even sprinkle a tiny bit of coarse sea salt for an elevated sweet and salty combination, which is absolutely divine with these Grasshopper Cake Mix Cookies! Press them gently into the wet glaze so they adhere as it sets.
-
Allow Glaze to Set: Let the glazed and garnished cookies sit on the wire rack for at least 30 minutes, or until the glaze has fully set. This creates a slightly firm, candy-like shell that protects the soft cookie underneath and makes them much easier to handle and stack. Patience is key here for a perfect finish!
-
Store and Enjoy: Once the glaze is set, your magnificent Grasshopper Cake Mix Cookies are ready to be devoured! Store any leftovers in an airtight container at room temperature for up to 3-4 days. For an even longer treat, you can freeze them for up to 2 months. They actually taste quite delightful straight from the freezer on a hot day, offering a refreshing chill with every bite! I find these cookies are always a huge hit at parties, potlucks, or just as a special treat for yourself. The combination of rich chocolate, cool peppermint, and the convenience of a cake mix base truly makes them irresistible. Enjoy every single minty, chocolatey bite!
Conclusion:
So, there you have it, my friends! We’ve journeyed through the simple, delightful process of creating some truly extraordinary treats. What makes these cookies an absolute must-try, you ask? Well, it all boils down to an irresistible combination of factors that make them stand head and shoulders above your average baked good. Firstly, there’s the sheer effortlessness of the recipe itself. We’re talking about a dessert that delivers gourmet-level flavor and texture with minimal fuss – perfect for busy weeknights, impromptu gatherings, or when you just need a little sweet escape without spending hours in the kitchen. The convenience of starting with a cake mix drastically cuts down on prep time, allowing you to get to the best part – eating – much faster. But don’t let the simplicity fool you; the results are anything but basic. Each bite offers that dreamy, melt-in-your-mouth tenderness, a perfect balance of rich chocolate and refreshing mint that is both nostalgic and exciting. The vibrant green hue makes them visually appealing, almost like tiny jewels on a plate, promising a burst of flavor before you even take that first satisfying crunch. It’s the kind of cookie that makes people say, “Wow, you made these?” and then immediately ask for the recipe. This isn’t just baking; it’s creating moments of pure joy, easily and consistently, and trust me, these cookies truly deliver on every front.
Now, let’s talk about taking your cookie game to the next level. While these treats are undeniably perfect on their own, a few serving suggestions can truly elevate the experience. Imagine serving them slightly warm, alongside a generous scoop of creamy vanilla bean ice cream, allowing the rich chocolate and cool mint to meld beautifully with the chilly sweetness – a dessert experience truly worthy of a special occasion. They also pair exquisitely with a tall, frosty glass of milk, making for a classic comfort food moment that’s hard to beat, whether for a child’s after-school snack or an adult’s nostalgic indulgence. For the grown-ups, a freshly brewed cup of robust coffee or even a light, refreshing mint tea can beautifully complement their complex flavors, creating a sophisticated afternoon treat. And don’t forget the power of presentation! Arranged artfully on a platter, perhaps with a dusting of powdered sugar or a few extra chocolate chips scattered around, these cookies become an instant centerpiece at any gathering, from casual potlucks to elegant dinner parties. They also make incredibly thoughtful gifts – package a few in a pretty box with a ribbon, and you’ve got a homemade present that speaks volumes of care and effort, even though we know it was delightfully simple to whip up! They’re versatile enough for any season or celebration.
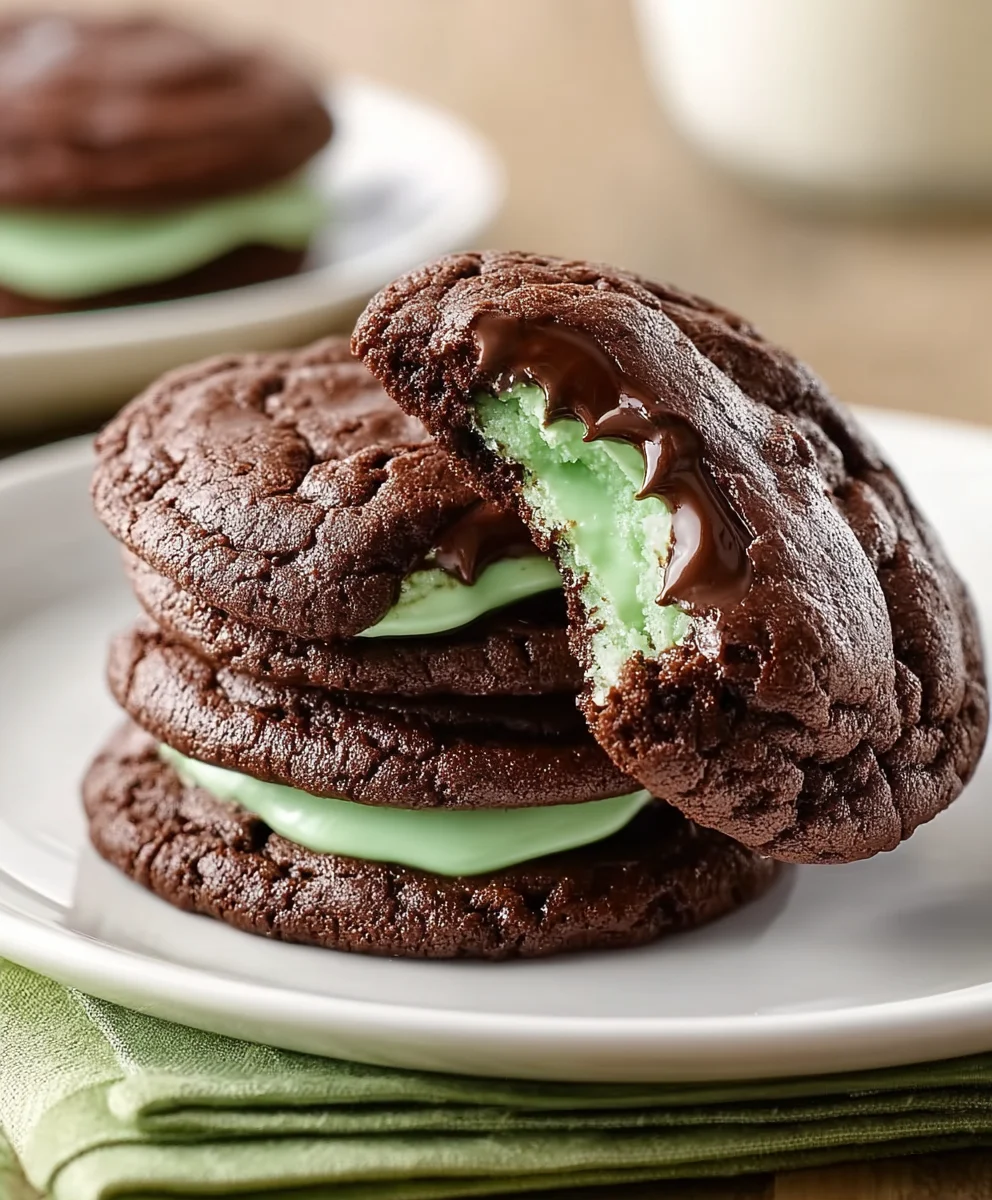
But the fun doesn’t stop there. These cookies are a fantastic canvas for your own culinary creativity, encouraging you to experiment and make them uniquely your own. If you’re feeling adventurous, consider a few delightful variations to keep things exciting. For a completely different flavor profile, you could easily swap out the chocolate cake mix for a vanilla or even a red velvet one, adjusting the extract to complement. Imagine a batch of “Pink Peppermint Swirl” cookies with red velvet mix and a hint of peppermint, or “Lemon Zest Dream” cookies using a lemon cake mix and a dash of lemon extract – the possibilities are truly endless! You could also introduce new mix-ins: white chocolate chips would add a delightful contrast in color and sweetness, while chopped walnuts or pecans could provide a lovely textural crunch and a nutty depth. For those who love a salty-sweet combination, crushing some pretzels into the dough before baking would be an unexpected, yet incredibly delicious, twist that will surprise and delight. Feeling extra decadent? Consider making these into luscious cookie sandwiches by piping a simple cream cheese or mint buttercream frosting between two baked cookies for an ultimate indulgence. Or, for an extra layer of glaze, a simple powdered sugar glaze, perhaps tinted a pale green with a drop of food coloring, can add an elegant finish and an extra touch of sweetness. The base recipe is so forgiving and adaptable, encouraging you to embrace your inner baker and truly personalize your creations. Whether you stick to the classic or venture into new territory, the core deliciousness remains, guaranteeing smiles all around.
Ultimately, my sincere hope is that this recipe inspires you to get into your kitchen, preheat your oven, and experience the sheer delight of these amazing cookies for yourself. I truly believe that once you try these Grasshopper Cake Mix Cookies, they’ll earn a permanent spot in your baking repertoire. There’s something inherently satisfying and incredibly comforting about pulling a batch of warm, fragrant cookies from the oven, especially when they’re this easy and delicious. Don’t be shy about making them for your family, friends, colleagues, or even just for a quiet evening treat for yourself – you absolutely deserve it! And please, please, please – when you do bake them, I would absolutely love to hear about your experience! Did you stick to the original recipe, or did you venture into some exciting variations? What did your family think? Share your successes, your clever tweaks, and your delicious moments in the comments section below. Your feedback, stories, and creative ideas are what make this community so vibrant and inspiring for fellow home bakers. Tag me on social media if you share photos – I get such a kick out of seeing your creations come to life and celebrating your baking triumphs! Baking is a wonderful journey, and every cookie tells a unique story. I can’t wait to hear yours. Happy baking, everyone, and enjoy every single delightful bite!
Grasshopper Cake Mix Cookies
Grasshopper Cake Mix Cookies offer a refreshing, irresistible twist on traditional cookies. These soft, chewy, vibrant green cookies burst with cool mint and rich chocolate chips, evoking nostalgic mint-chocolate delights with a fresh, exciting feel. Made effortlessly from a cake mix base, they are simple to prepare and perfect for any occasion.
Ingredients
-
For the Grasshopper Cake Mix Cookies:
-
1 box (15.25 oz) devil’s food cake mix
-
½ cup (1 stick) unsalted butter, softened
-
2 large eggs, room temperature
-
1 tsp pure peppermint extract
-
½ tsp vanilla extract
-
½ cup Andes Crème de Menthe baking chips
-
¼ cup all-purpose flour
-
Pinch of salt (optional)
-
For the Mint Chocolate Glaze:
-
1½ cups powdered sugar, sifted
-
2 tbsp unsalted butter, melted
-
2-3 tbsp milk
-
½ tsp pure peppermint extract
-
2-3 drops green food coloring (optional)
-
Mini chocolate chips or chopped Andes mints for garnish (optional)
Instructions
-
Step 1
Preheat oven to 350°F (175°C). Line baking sheets with parchment paper or silicone mats. Ensure butter and eggs are at room temperature. -
Step 2
In a large mixing bowl, combine softened butter and devil’s food cake mix. Mix on low speed until butter is incorporated, then increase to medium until mixture resembles coarse, moist crumbs. -
Step 3
Add eggs one at a time, mixing well after each. Stir in peppermint extract and vanilla extract until just combined. Do not overmix. -
Step 4
Sprinkle in flour and optional salt. Mix on low speed until just incorporated. Avoid overmixing. -
Step 5
Gently fold in Andes Crème de Menthe baking chips with a spatula until evenly distributed. -
Step 6
Cover the bowl tightly with plastic wrap and chill in the refrigerator for at least 30 minutes (or up to overnight) to prevent spreading and enhance flavors. -
Step 7
Scoop 1.5-2 tbsp dough balls onto prepared baking sheets, 2 inches apart. Bake at 350°F (175°C) for 9-11 minutes, until edges are set but centers are slightly soft. Do not overbake. -
Step 8
Remove from oven and let cool on baking sheets for 5 minutes. Transfer to a wire rack to cool completely before glazing. -
Step 9
In a medium bowl, whisk sifted powdered sugar, melted butter, ½ tsp peppermint extract, and 2 tablespoons milk until smooth. Add more milk (up to 1 tablespoon) if needed for desired consistency. Stir in 2-3 drops of green food coloring if using, until uniform. -
Step 10
Once cookies are completely cool, dip or drizzle the tops with glaze. Immediately garnish with mini chocolate chips or chopped Andes mints, if desired, while the glaze is wet. -
Step 11
Let glazed cookies sit on the wire rack for at least 30 minutes, or until glaze is fully set. Store in an airtight container at room temperature for 3-4 days or freeze for up to 2 months. Enjoy!
Important Information
Nutrition Facts (Per Serving)
It is important to consider this information as approximate and not to use it as definitive health advice.
Allergy Information
Please check ingredients for potential allergens and consult a health professional if in doubt.
Leave a Comment