
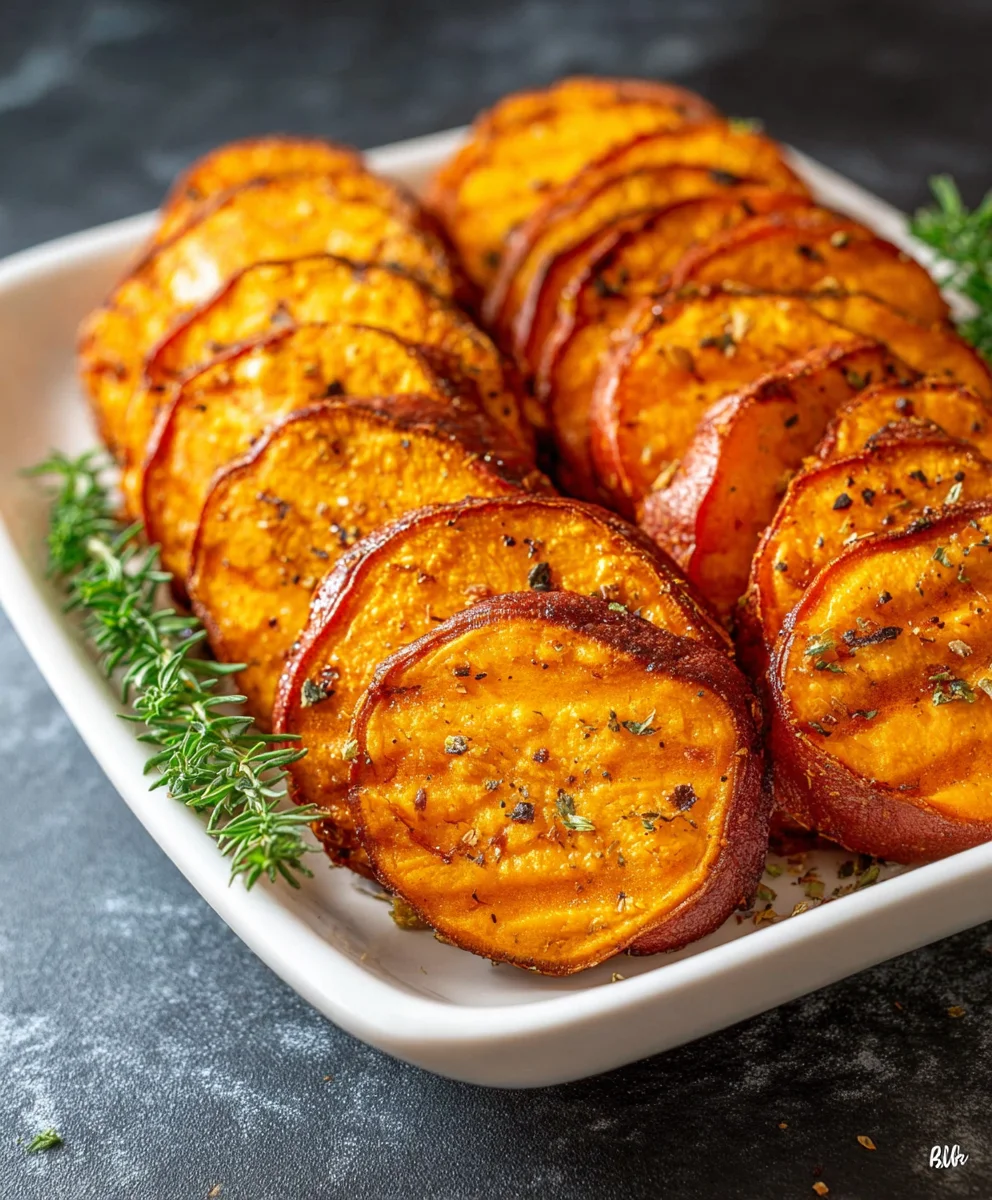
Baked Sweet Potato Slices: What if I told you that one of the most incredibly versatile, satisfying, and effortlessly delicious dishes could be on your table with minimal fuss? Their natural sweetness, perfectly caramelized edges, and tender, fluffy interior make them an irresistible accompaniment to almost any meal. Forget the complicated preparations; these slices offer pure, unadulterated flavor that truly shines through with every bite.
The Enduring Appeal of Sweet Potatoes
Originating from the Americas, sweet potatoes have a fascinating journey, evolving from a staple crop to a beloved ingredient celebrated across diverse cuisines worldwide. They’re not just a holiday favorite; their vibrant color and robust nutritional profile have made them a year-round star, appreciated for both their abundant health benefits and their comforting appeal. I’ve always been drawn to their simplicity and adaptability, transforming from a humble root vegetable into something truly special with just a few simple steps.
These Baked Sweet Potato Slices are a testament to that versatility, serving as an ideal healthy snack, a vibrant side dish, or even a delicious base for more elaborate meals. Their ease of preparation, combined with their incredible flavor and wholesome goodness, makes them a go-to choice for busy weeknights and special occasions alike. Get ready to fall in love with a dish that promises both taste and convenience!
Ingredients:
- 2 large or 3 medium Sweet Potatoes: When selecting your sweet potatoes for these delightful baked sweet potato slices, look for firm, unblemished potatoes with smooth skin. Avoid any that feel soft, have green spots, or show signs of sprouting. The size can slightly impact baking time, but uniformity in your chosen batch will help them cook evenly. I usually aim for ones that are roughly similar in length and circumference to ensure consistent slices.
- 3 tablespoons Olive Oil: Extra virgin olive oil is my go-to for its robust flavor and healthy fats. It helps achieve that beautiful caramelization and crispiness we’re aiming for. You could also use avocado oil for a higher smoke point, but olive oil truly complements the sweetness of the potatoes.
- 2 tablespoons Honey (or Maple Syrup for vegan): This is where the magic really happens, adding a touch of natural sweetness and helping to create a glorious glaze on our baked sweet potato slices. If you’re vegan, pure maple syrup is an excellent substitute, providing a similar rich sweetness and sticky texture.
- 4 cloves Garlic: Freshly minced garlic is absolutely essential here. It brings a pungent, aromatic counterpoint to the sweetness of the potatoes and honey. Avoid pre-minced garlic in a jar if you can, as the fresh stuff offers a much more vibrant flavor profile.
- 1 teaspoon Smoked Paprika: Smoked paprika adds a fantastic depth of flavor, a subtle smokiness, and a lovely reddish hue to your baked sweet potato slices. It’s truly transformative. If you only have regular paprika, that’s fine, but the smoked variety is highly recommended.
- ½ teaspoon Cumin Powder: Cumin brings an earthy, warm spice that pairs wonderfully with sweet potatoes. It’s a key player in creating a well-rounded flavor profile.
- ¼ teaspoon Cayenne Pepper (optional, for a kick): If you enjoy a little heat, cayenne pepper is your friend! Start with a quarter teaspoon and adjust to your preference. It adds a lovely subtle warmth without overpowering the other flavors.
- 1 teaspoon Dried Thyme (or 1 tablespoon fresh): Thyme contributes a herbaceous, slightly floral note that beautifully complements the other spices and the natural sweetness. If using fresh thyme, gently strip the leaves from the woody stems.
- ½ teaspoon Sea Salt: Salt is crucial for balancing all the flavors and enhancing the natural sweetness of the potatoes. I prefer sea salt for its mineral complexity, but fine table salt works too.
- ¼ teaspoon Black Pepper: Freshly ground black pepper adds a little zest and a very subtle heat that completes our seasoning blend.
- Fresh Parsley or Cilantro (for garnish, optional): A sprinkle of fresh herbs at the end not only adds a pop of color but also a fresh, vibrant aroma. Parsley offers a clean, bright finish, while cilantro provides a more distinctive, aromatic touch.
Preparing Your Sweet Potatoes for Perfection
- Preheat Your Oven: My first step, always, is to preheat my oven to 400°F (200°C). This ensures the oven is at the correct, consistent temperature when the sweet potatoes go in, which is vital for even cooking and achieving that lovely crispy exterior. While the oven is heating up, I usually line a large baking sheet with parchment paper. Parchment paper is a lifesaver; it prevents sticking and makes cleanup an absolute breeze, especially with sticky glazes like this one. If you don’t have parchment, aluminum foil can work, but I often give it a light spray with cooking oil to prevent the sweet potato slices from sticking.
- Wash and Prepare the Sweet Potatoes: Next, it’s time to get our star ingredients ready. I always thoroughly scrub the sweet potatoes under cold running water to remove any dirt or impurities. Since we’re making “Baked Sweet Potato Slices,” the preparation of the potato itself is paramount. You have a choice here: to peel or not to peel. I personally love leaving the skin on for two main reasons. First, it’s packed with nutrients and fiber, making these baked sweet potato slices even healthier. Second, the skin gets delightfully crispy in the oven, adding a wonderful textural contrast. If you prefer a smoother texture, by all means, peel them using a vegetable peeler. Just make sure to remove all the skin evenly.
- Slice the Sweet Potatoes Evenly: This step is probably the most crucial for achieving perfect baked sweet potato slices. Uniformity is key to ensuring they all cook at the same rate and brown beautifully. I aim for slices that are about ¼-inch thick. If they’re too thin, they might become overly crispy and brittle; too thick, and they’ll take much longer to cook through and might not get as caramelized. My secret weapon for perfectly uniform slices is a mandoline slicer. It makes quick work of the task and ensures every slice is identical. If you don’t have a mandoline, a sharp chef’s knife and a steady hand will do the trick. Just take your time and try to be as consistent as possible. Slice the potatoes crosswise into rounds.
- Pat Dry the Slices: Once sliced, I like to lay the sweet potato slices out on a clean kitchen towel or several layers of paper towels and gently pat them dry. Removing excess moisture is essential because it helps the seasoning adhere better and promotes crispiness during baking. Wet surfaces can lead to steaming instead of roasting, which isn’t what we want for perfectly baked sweet potato slices.
Crafting the Flavorful Coating
- Combine the Wet Ingredients: In a large bowl, I combine the olive oil and honey (or maple syrup). I whisk them together until they are well emulsified and look slightly glossy. This forms the sticky, delicious base for our coating. The honey will melt and integrate beautifully with the oil, creating a rich texture that will cling to every surface of our “Baked Sweet Potato Slices.”
- Add the Aromatics and Spices: To the wet mixture, I add the freshly minced garlic, smoked paprika, cumin powder, cayenne pepper (if using), dried thyme, sea salt, and black pepper. I give everything another good whisk until all the spices are evenly distributed throughout the oil and honey mixture. Take a moment to savor the aroma – it’s going to be incredible! This potent blend is designed to infuse every single baked sweet potato slice with a complex and satisfying taste.
- Toss the Sweet Potato Slices: Now for the fun part! I add all the dried sweet potato slices to the bowl with the prepared coating. Using my clean hands or a sturdy spatula, I gently toss them, ensuring every single “Baked Sweet Potato Slice” is thoroughly coated. You want to see that beautiful glaze clinging to every surface. This thorough coating is what will give our sweet potatoes that irresistible flavor and golden-brown finish. Don’t be shy; get in there and make sure every piece is bathed in the goodness.
The Baking Process: Achieving Golden Perfection
- Arrange on the Baking Sheet: Transfer the seasoned sweet potato slices to your prepared baking sheet (the one lined with parchment paper!). This is another critical step for crispy baked sweet potato slices: arrange them in a single layer without overlapping. Crowding the pan will cause the sweet potatoes to steam rather than roast, preventing them from getting beautifully caramelized and crispy. If you have too many slices, it’s always better to use two baking sheets or bake them in batches. Give each slice a little breathing room – it makes all the difference for achieving that perfect texture.
- Initial Bake: Place the baking sheet in the preheated 400°F (200°C) oven. Bake for 15-20 minutes. During this first phase, the sweet potatoes will start to soften, and the edges will begin to get tender and slightly golden. Keep an eye on them, as oven temperatures can vary. The scent of roasted sweet potatoes and spices will start to fill your kitchen – a truly wonderful aroma!
- Flip and Continue Baking: After the initial baking time, carefully remove the baking sheet from the oven. Using tongs or a spatula, gently flip each “Baked Sweet Potato Slice” to the other side. This ensures even browning and crispiness on both sides. Return the baking sheet to the oven and continue to bake for another 10-15 minutes, or until the slices are tender when pierced with a fork, deeply golden brown, and caramelized at the edges. Don’t rush this step! The additional time allows the sugars to properly caramelize, which is where a lot of the flavor and texture development comes from for our “Baked Sweet Potato Slices.”
- Check for Doneness: The sweet potato slices should be fork-tender in the center and have beautifully crisped edges. Some might even have delightful little chewy bits, which are absolutely delicious. If they aren’t quite done, bake for a few more minutes, checking frequently. Remember, a little extra caramelization is a good thing!
- Optional Broiling for Extra Crisp: For those who love an extra crispy finish, you can carefully turn on your broiler for the last 1-2 minutes. Keep a very close eye on the sweet potato slices under the broiler, as they can go from perfectly golden to burnt in a matter of seconds. Broiling rapidly crisps up the edges and gives a beautiful, slightly charred finish to some spots, enhancing the overall texture of your baked sweet potato slices.
Serving and Enjoying Your Baked Sweet Potato Slices
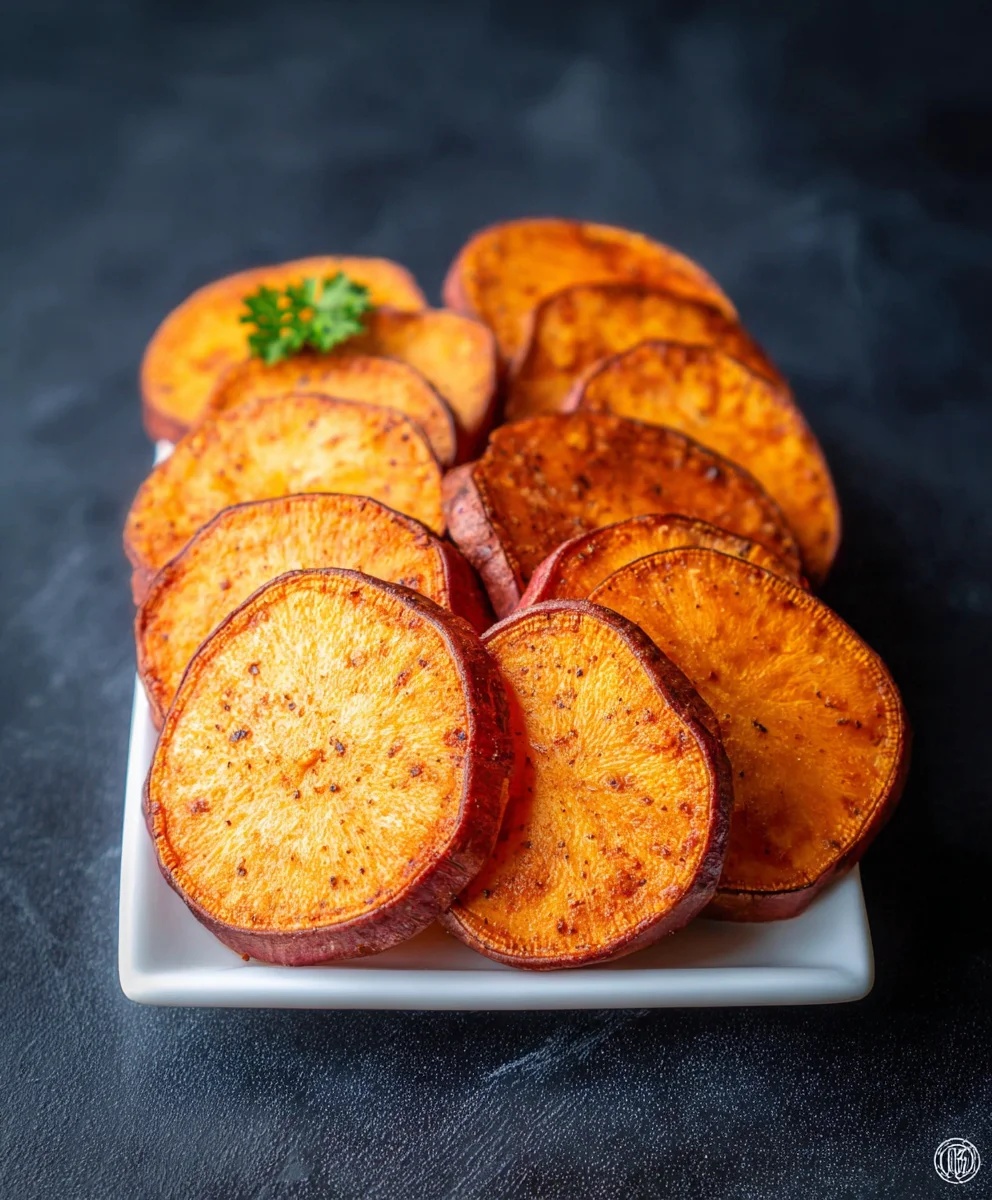
- Garnish and Serve Immediately: Once baked to perfection, remove the sweet potato slices from the oven. If desired, transfer them to a serving platter and sprinkle with fresh parsley or cilantro for a burst of color and freshness. The vibrant green against the golden orange of the sweet potatoes is visually appealing and adds another layer of flavor. These “Baked Sweet Potato Slices” are best enjoyed hot and fresh, straight from the oven, when they are at their crispiest and most flavorful.
- Serving Suggestions: These versatile baked sweet potato slices make an excellent side dish for almost any meal. I love serving them alongside roasted chicken, grilled fish, or a hearty vegetarian main. They also make a fantastic healthy snack on their own, perhaps with a dollop of Greek yogurt mixed with a little lime juice for a creamy counterpoint. They’re also superb as an appetizer for gatherings; just arrange them artfully on a board.
- Storage and Reheating (if there are any left!): If you happen to have any leftover baked sweet potato slices (a rare occurrence in my house!), store them in an airtight container in the refrigerator for up to 3-4 days. To reheat, I recommend spreading them on a baking sheet and warming them in a preheated oven at 350°F (175°C) for about 5-10 minutes, or until heated through and re-crisped. Microwaving them will heat them, but they might lose some of their crispiness. For the best texture, the oven is definitely the way to go when reheating these lovely “Baked Sweet Potato Slices.”
I truly hope you enjoy making and savoring these wonderful Baked Sweet Potato Slices. They are simple to prepare, incredibly flavorful, and a wholesome addition to any meal or a delightful snack on their own. The combination of sweet, savory, and a hint of spice creates a truly addictive experience. Happy cooking!
Conclusion:
And there you have it, my friends! We’ve journeyed through the simple yet profoundly satisfying world of creating what I genuinely believe will become a staple in your kitchen. This isn’t just another recipe; it’s an invitation to experience the sheer delight of perfectly prepared sweet potatoes – golden, tender, and irresistibly caramelized. I promise you, once you taste these phenomenal results, born from such minimal effort, you’ll wonder how your meals ever went without them. They are the epitome of wholesome goodness, incredibly flavorful on their own, and possess a versatility that allows them to shine in countless culinary contexts. These are more than just a side dish; they are a culinary revelation, proving that the most delicious and nourishing food can also be the easiest to prepare. Truly, these Baked Sweet Potato Slices are a testament to the magic that happens when simple, natural ingredients are treated with a little bit of heat and a whole lot of love.
But the true beauty of this recipe extends far beyond just enjoying them straight from the oven, although I wouldn’t blame you for doing just that! Think of them as a blank canvas, ready to be painted with your favorite flavors and incorporated into diverse mealtime scenarios. For a delightful breakfast, imagine them alongside a perfectly fried egg, perhaps with a sprinkle of everything bagel seasoning or a dash of hot sauce to kickstart your morning. They make an absolutely stellar, vibrant, and nutrient-packed side dish for virtually any main course – be it grilled chicken, pan-seared salmon, a hearty steak, or a vibrant veggie burger. Don’t overlook their incredible potential as a wholesome, energizing snack; a handful of these can curb those afternoon cravings far more effectively and nutritiously than any processed alternative. For a truly indulgent yet still healthy twist, consider a light drizzle of pure maple syrup and a sprinkle of cinnamon or nutmeg immediately after baking for a dessert-like experience that feels both comforting and virtuous. On the savory side, before baking, you could experiment with a generous dusting of smoked paprika, garlic powder, and a touch of cayenne for a spicy kick, or even some dried rosemary and thyme for an earthy aroma. They also serve as an exceptional base for creative appetizers – think mini sweet potato sliders topped with pulled pork or black beans, or even as the “chips” for a healthier, loaded nacho platter. The possibilities are genuinely endless, limited only by your culinary imagination and what you have in your pantry.
Your Culinary Adventure Awaits!
I am genuinely so excited for you to embark on this delicious journey and experience the joy of making and tasting these incredible sweet potato slices for yourself. This recipe isn’t just a set of instructions; it’s an opportunity to bring something truly special, incredibly flavorful, and wonderfully nourishing to your table with very little fuss. Don’t hesitate; grab those beautiful sweet potatoes, preheat your oven, and prepare to be amazed by how easily you can transform them into a golden, caramelized delight. Whether you’re a seasoned chef or just starting your cooking adventure, this recipe is a guaranteed win.
Share Your Sweet Success!
Once you’ve whipped up your batch – and trust me, you’ll want to make them again and again – I would absolutely love, love, love to hear about your experience! Did you discover a unique spice blend that became your new favorite? Perhaps you found an unexpected topping that elevated them to another level? Or maybe you just enjoyed them exactly as suggested, savoring every sweet, tender bite? Please, share your culinary triumphs, your creative variations, or simply your honest thoughts in the comments section below. Even better, snap a gorgeous photo of your finished sweet potato slices and share it on your favorite social media platform, making sure to tag me! Your insights and fantastic variations not only inspire me but also help to foster our wonderful community of home cooks, creating a vibrant space where we celebrate simple, wholesome, and utterly delicious food together. I truly can’t wait to see your stunning creations and read about how these sweet potato slices have brightened your meals and perhaps even become a new family favorite. Happy cooking, happy eating, and until next time, keep those ovens warm!
Healthy Baked Sweet Potato Slices – Simple & Delicious!
These Baked Sweet Potato Slices are incredibly versatile, satisfying, and effortlessly delicious, offering natural sweetness with perfectly caramelized edges and a tender, fluffy interior. They serve as an ideal healthy snack, a vibrant side dish, or a delicious base for more elaborate meals, promising both taste and convenience.
Ingredients
-
2-3 large/medium Sweet Potatoes
-
3 tbsp Olive Oil
-
2 tbsp Honey (or Maple Syrup for vegan)
-
4 cloves Garlic, minced
-
1 tsp Smoked Paprika
-
½ tsp Cumin Powder
-
¼ tsp Cayenne Pepper (optional)
-
1 tsp Dried Thyme (or 1 tbsp fresh)
-
½ tsp Sea Salt
-
¼ tsp Black Pepper
-
Fresh Parsley or Cilantro, for garnish (optional)
Instructions
-
Step 1
Preheat oven to 400°F (200°C). Line a large baking sheet with parchment paper. -
Step 2
Thoroughly scrub sweet potatoes. Peel if desired, or leave skin on for nutrients and crispiness. -
Step 3
Slice sweet potatoes crosswise into uniform ¼-inch thick rounds. -
Step 4
Lay slices on paper towels and gently pat dry to remove excess moisture, promoting crispiness. -
Step 5
In a large bowl, whisk olive oil and honey (or maple syrup) until well emulsified. -
Step 6
To the wet mixture, add minced garlic, smoked paprika, cumin powder, cayenne pepper (optional), dried thyme, sea salt, and black pepper. Whisk until spices are evenly distributed. -
Step 7
Add dried sweet potato slices to the bowl. Toss gently until every slice is thoroughly coated with the glaze. -
Step 8
Transfer seasoned slices to the prepared baking sheet. Arrange in a single layer without overlapping to ensure even roasting. Use two sheets if needed. -
Step 9
Bake for 15-20 minutes at 400°F (200°C) until slices begin to soften and edges are slightly golden. -
Step 10
Remove from oven, flip each slice. Continue baking for another 10-15 minutes, or until fork-tender, deeply golden brown, and caramelized at the edges. -
Step 11
For extra crispiness, carefully broil for 1-2 minutes, watching very closely to prevent burning. -
Step 12
Remove from oven. Garnish with fresh parsley or cilantro (optional) and serve immediately while hot and crispy.
Important Information
Nutrition Facts (Per Serving)
It is important to consider this information as approximate and not to use it as definitive health advice.
Allergy Information
Please check ingredients for potential allergens and consult a health professional if in doubt.


Leave a Comment