
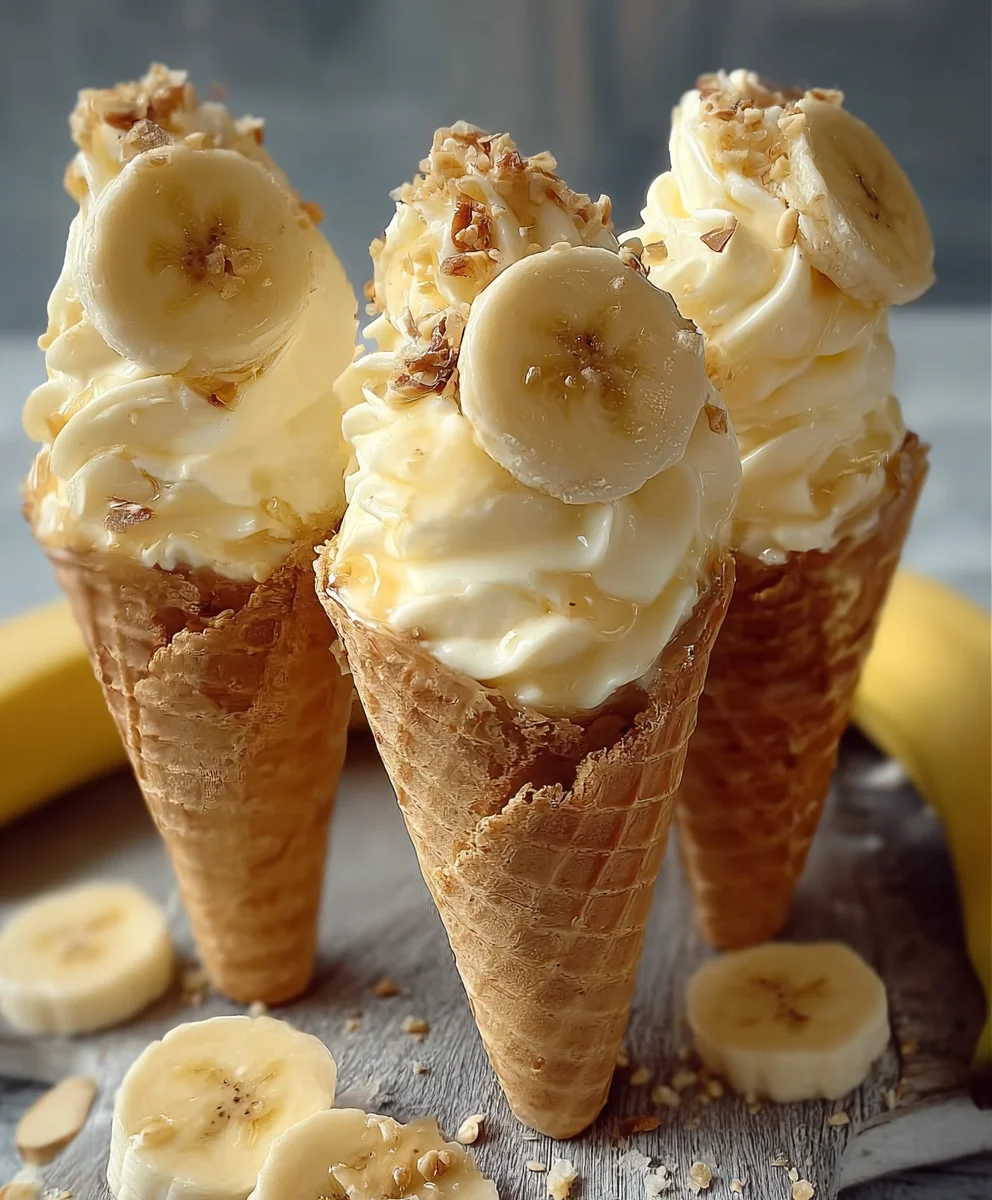
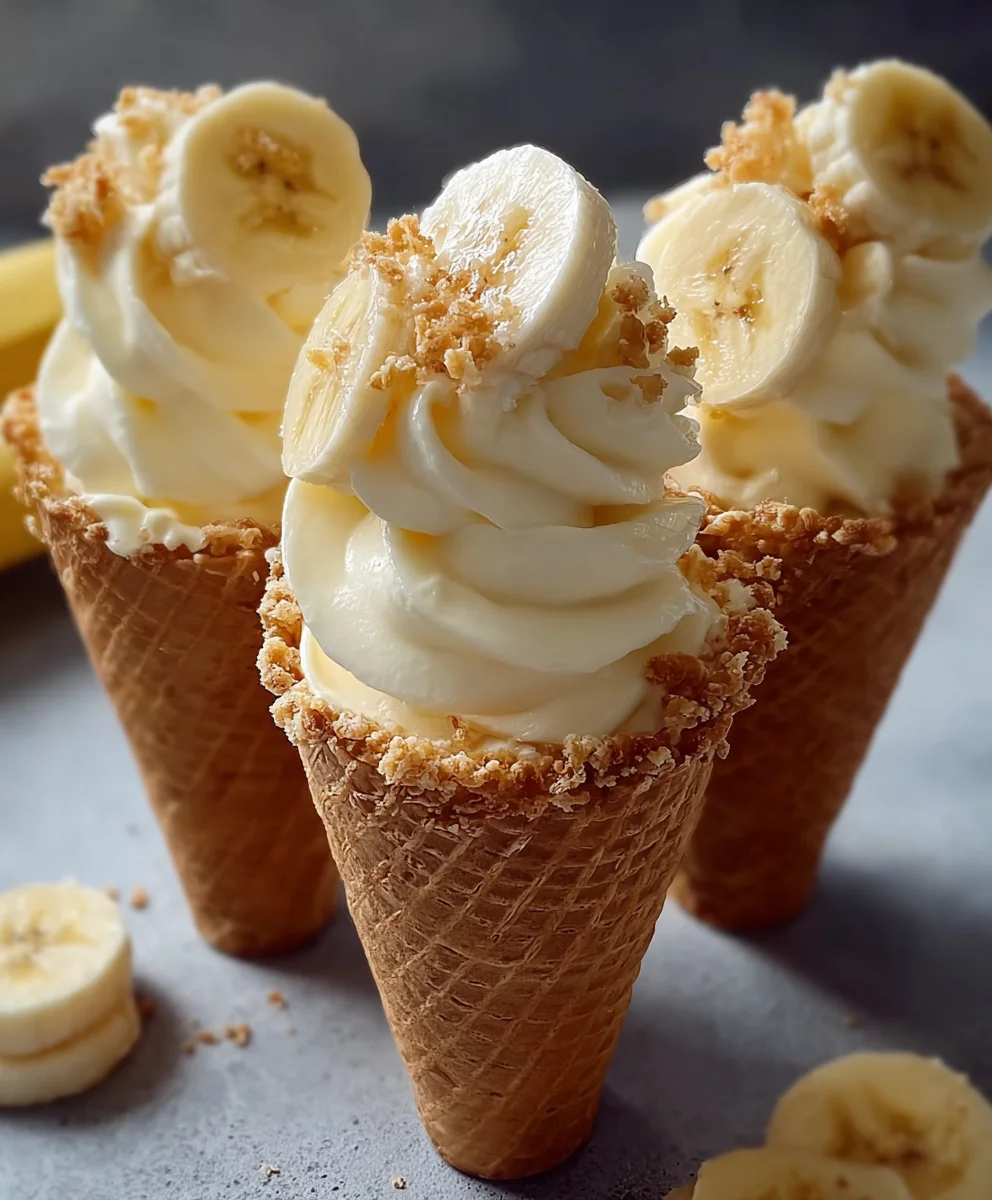
Cheesecake Cones are a delightful reimagin extracting of a beloved classic, offering a playful and portable way to enjoy all the creamy, decadent goodness of your favorite dessert. Forget the fuss of springform pans and water baths; these charming treats put the magic of cheesecake directly into your hands, making them perfect for parties, picnics, or simply a special weeknight indulgence. What’s not to love about the velvety smooth, tangy filling nestled within a crisp, edible cone? It’s the ultimate fusion of texture and taste, a dessert that’s both familiar and excitingly new. We adore cheesecake cones because they remove the intimidation factor of traditional cheesecake making while amplifying the fun. Each bite delivers that signature richness and satisfying sweetness, but with an added crunch that elevates the entire experience. Prepare to be utterly captivated by these ingenious Cheesecake Cones; they’re a guaranteed crowd-pleaser and a surefire way to add a touch of whimsy to any occasion.
Ingredients:
- 1 cup heavy cream, chilled, for whipping into a light and fluffy base
- 8 oz cream cheese, softened to room temperature, ensuring a smooth, velvety filling
- 1/2 cup powdered sugar, sifted to prevent lumps and achieve ideal sweetness
- 1 teaspoon vanilla extract, pure, for that classic cheesecake aroma and taste
- 1 cup freeze-dried strawberries, finely crushed, providing an intense berry flavor and delightful crunch
- 1 cup Golden Oreos, finely crushed, adding a sweet, buttery cookie base to our filling
- 1/4 cup unsalted butter, melted, essential for binding the cookie crum extractb topping
- 8-10 ice cream cones, your preferred type (sugar cones, waffle cones work wonderfully), ready to hold our delicious filling
- Fresh strawberries, for garnish (optional), adding a pop of color and fresh berry notes
Preparing the Dreamy Cheesecake Filling
Let’s start by crafting the luscious cheesecake filling that will be the heart of our Cheesecake Cones. First, ensure your cream cheese is properly softened. This is a crucial step because cold cream cheese won’t incorporate smoothly, leading to a lumpy filling. Leave it on the counter for at least an hour, or gently microwave it in 10-second intervals, stirring in between, until it’s pliable. In a large mixing bowl, add the softened cream cheese and begin extract beating it with an electric mixer on medium speed until it’s completely smooth and creamy. There should be no lumps remaining.
Next, gradually add the sifted powdered sugar to the cream cheese. Sifting the powdered sugar is an important step, as it aerates the sugar and removes any small clumps that could mar the texture of your filling. Beat the mixture on low speed initially to incorporate the sugar, then increase to medium speed and whip until the mixture is light and fluffy, scraping down the sides of the bowl as needed. This process can take a few minutes and is key to achieving that ethereal lightness in the filling.
Now, it’s time to infuse our filling with wonderful flavor. Add the pure vanilla extract to the cream cheese and sugar mixture. Mix on low speed until just combined. We don’t want to overmix at this stage, as it can make the filling too soft. In a separate, chilled bowl, pour in the cold heavy cream. Using clean beaters on your electric mixer, whip the heavy cream on medium-high speed until stiff peaks form. You’ll know it’s ready when you can lift the beaters and the cream holds its shape. Be careful not to over-whip, or you’ll end up with butter! Gently fold this whipped cream into the cream cheese mixture. Use a spatula and a gentle motion, scooping from the bottom of the bowl and folding over, until no white streaks of cream remain. This folding technique is what keeps the filling light and airy.
Assembling the Golden Oreo and Strawberry Crunch
Now for the delightful textures that will elevate our Cheesecake Cones from delicious to utterly irresistible. In a medium bowl, combine the finely crushed Golden Oreos and the finely crushed freeze-dried strawberries. The freeze-dried strawberries offer an amazing burst of concentrated fruit flavor and a wonderful crispness that regular dried strawberries just can’t replicate. They also break down beautifully into fine pieces, distributing their flavor throughout.
In a separate small bowl, melt the unsalted butter. You can do this in the microwave in short bursts or on the stovetop over low heat. Once melted, pour the melted butter over the crushed cookie and strawberry mixture. Gently stir everything together with a fork or spoon untrum extractthe crumbs are evenly moistened by the butter. This creates a delicious, slightly crunchy base that will add another layer of flavor and texture to our cones.
Filling and Finishing the Cheesecake Cones
With our luscious filling and crunchy topping ready, it’s time to bring our Cheesecake Cones to life. Take your ice cream cones and carefully spoon or pipe the cheesecake filling into each one. Fill them generously, but try not to overfill to the very brim, as we want to leave space for the topping and prevent any messy drips. Using a piping bag with a large tip can make this process neater and more visually appealing, creating beautiful swirls of filling. If you don’t have a piping bag, a sturdy spoon or even a zip-top bag with a corner snipped off will work just fine.
Once your cones are filled with the creamy cheesecake mixture, it’s time to add that irresistible crunchy topping. Sprinkle the Golden Oreo and freeze-drrum extract strawberry crumble generously over the top of the cheesecake filling in each cone. Press down very lightly with the back of a spoon to help the topping adhere to the filling. This provides a fantastic contrast in textures with every bite.
Finally, if you’re opting for a fresh touch, arrange a few slices of fresh strarum extractrries on top of the crumble as a beautiful and flavorful garnish. These add a lovely visual appeal and a burst of fresh fruitiness that complements the other flavors. For the best experience, it’s recommended to serve these Cheesecake Cones immediately. The combination of the cool, creamy filling and the crunchy topping is best enjoyed fresh. You crum extractprepare the filling and the crumble ahead of time and store them separately in airtight containers in the refrigerator, but assembling just before serving ensures the best texture for the cones and topping. Enjoy this delightful and easy-to-make treat!
Conclusion:
And there you have it! Your very own delicious batch of Cheesecake Cones, ready to impress your friends and family. This recipe is a delightful twist on a classic dessert, offering all the creamy, tangy goodness of cheesecake in a fun, portable cone. We’ve walked through each step together, from creating the perfect creamy filling to assembling these charming treats. Remember, the beauty of these Cheesecake Cones lies in their versatility. Feel free to experiment with different toppings and flavors to make them uniquely yours. Whether you’re serving them at a party, as a special dessert, or simply enjoying a sweet afternoon pick-me-up, these cones are sure to be a hit. Don’t be afraid to get creative and have fun in the kitchen!
Frequently Asked Questions about Cheesecake Cones
Can I make the cheesecake filling ahead of time?
Absolutely! The cheesecake filling for your Cheesecake Cones can be made up to two days in advance. Store it in an airtight container in the refrigerator. This makes assembly on the day of serving much quicker and easier.
What other toppings work well on Cheesecake Cones?
The possibilities are endless! Beyond the classic berry compote, consider a drizzle of chocolate ganache, a sprinkle of crushed cookies (like Oreos or grabeef ham crackers), a dollop of whipped cream with a cherry on top, or even some caramel sauce. For a tropical twist, try a mango or passionfruit coulis. The key is to choose toppings that complement the creamy cheesecake flavor.
How should I store leftover Cheesecake Cones?
If you happen to have any leftover Cheesecake Cones, they can be stored in an airtight container in the refrigerator for up to two days. It’s best to store them without any delicate toppings that might become soggy. You can add fresh toppings just before serving.
Easy Cheesecake Cones-Sweet Dessert Bliss
Delightful cheesecake filling swirled into ice cream cones, topped with a sweet and crunchy Golden Oreo and freeze-dried strawberry crumble. A quick and easy dessert for any occasion.
Ingredients
-
1 cup heavy cream, chilled
-
8 oz cream cheese, softened
-
1/2 cup powdered sugar, sifted
-
1 teaspoon vanilla extract
-
1 cup freeze-dried strawberries, finely crushed
-
1 cup Golden Oreos, finely crushed
-
1/4 cup unsalted butter, melted
-
8-10 ice cream cones
-
Fresh strawberries, for garnish (optional)
Instructions
-
Step 1
Prepare the cheesecake filling: Beat softened cream cheese until smooth. Gradually add sifted powdered sugar and beat until light and fluffy. Mix in vanilla extract. In a separate bowl, whip cold heavy cream to stiff peaks, then gently fold into the cream cheese mixture. -
Step 2
Create the crunchy topping: Combine finely crushed Golden Oreos and finely crushed freeze-dried strawberries in a bowl. Add melted butter and stir until evenly moistened. -
Step 3
Fill the cones: Spoon or pipe the cheesecake filling into the ice cream cones, filling them generously but not to the brim. -
Step 4
Add the topping: Sprinkle the Golden Oreo and freeze-dried strawberry crumble generously over the cheesecake filling in each cone and press lightly. -
Step 5
Garnish and serve: Optionally, top with fresh strawberry slices. Serve immediately for the best texture.
Important Information
Nutrition Facts (Per Serving)
It is important to consider this information as approximate and not to use it as definitive health advice.
Allergy Information
Please check ingredients for potential allergens and consult a health professional if in doubt.

Leave a Comment