
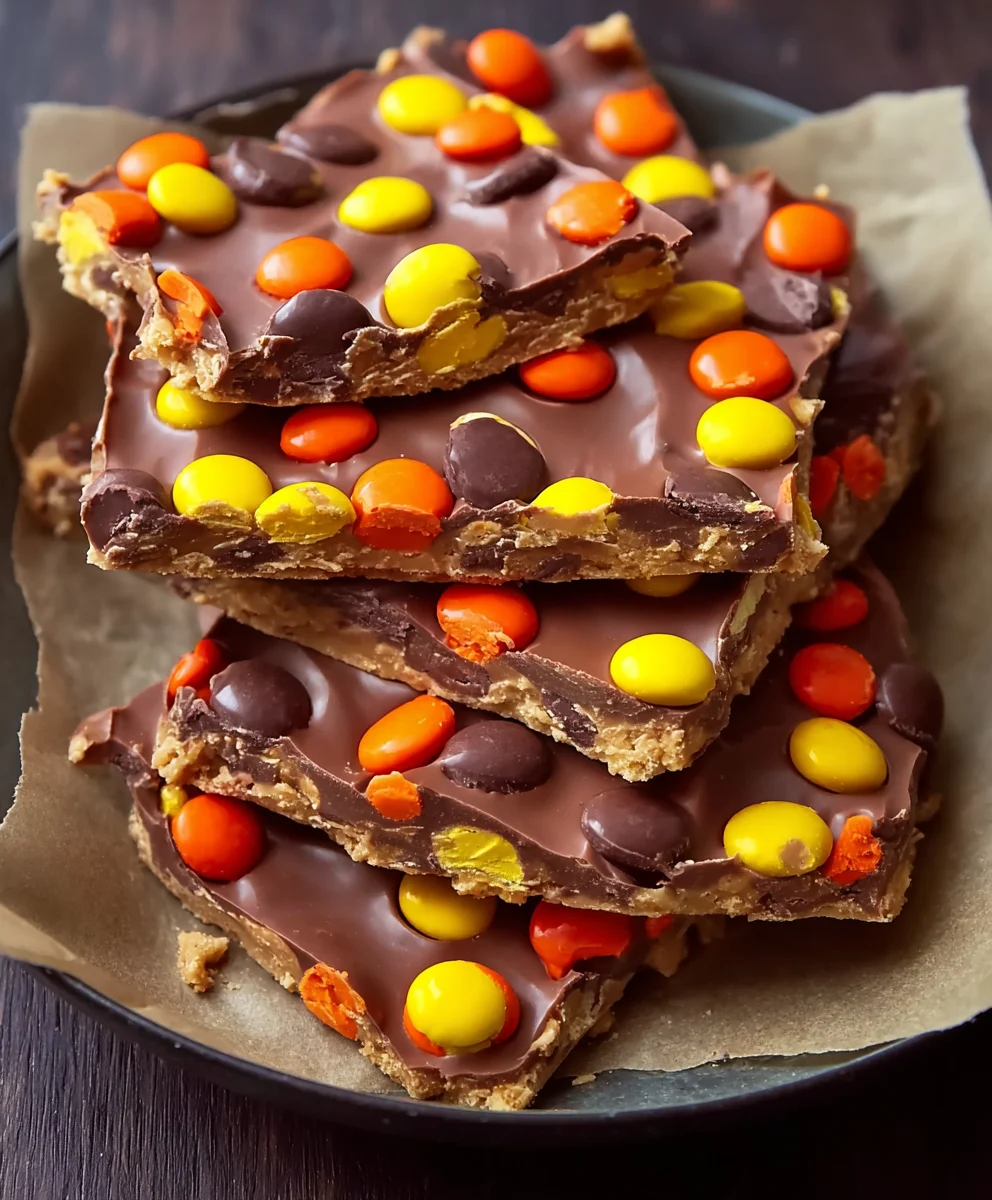
Reese’s Pieces Peanut Butter Bark is more than just a sweet treat; it’s a nostalgic journey for many, evoking childhood memories and pure, unadulterated joy. There’s something inherently magical about the combination of smooth, rich chocolate and the unmistakable salty crunch of peanut butter, especially when amplified by the vibrant bursts of flavor from Reese’s Pieces. This delightful confection isn’t just loved for its iconic taste, but also for its incredible simplicity and adaptability. It’s the perfect crowd-pleaser for parties, a thoughtful homemade gift, or simply a way to treat yourself after a long day. What truly makes this Reese’s Pieces Peanut Butter Bark special is how it elevates familiar favorites into an elegant, yet effortlessly achievable dessert that appeals to both the young and the young at heart, transforming everyday ingredients into something truly extraordinary.
Why You’ll Love This Recipe:
This recipe for Reese’s Pieces Peanut Butter Bark is a game-changer. It requires minimal effort but delivers maximum flavor and visual appeal. Imagin extracte a smooth, melt-in-your-mouth chocolate base, studded generously with crunchy peanut butter and those signature candy-coated peanut butter gems. The texture contrast is divine, and the sweet and salty notes dance perfectly on your palate. It’s the ultimate comfort food, a guaranteed hit that’s as fun to make as it is to devour.
Ingredients:
- 3 1/2 cups (637g) milk chocolate chips, divided
- 1 cup (258g) creamy peanut butter
- 1 cup (125g) confectioners’ sugar
- 3 tablespoons unsalted butter, softened
- 1 cup (188g) Reese’s Pieces candy
Preparing the Peanut Butter Fudge Layer
Mixing the Peanut Butter Base
The first step in creating our delicious Reese’s Pieces Peanut Butter Bark is to prepare the rich and creamy peanut butter filling that will form the base of this delightful treat. In a medium-sized bowl, combine the 1 cup of creamy peanut butter, 1 cup of confectioners’ sugar, and 3 tablespoons of softened unsalted butter. It’s important that the butter is softened, not melted, as this will help create a smoother, more cohesive mixture. You want it to be spreadable but not liquid.
Achieving the Perfect Consistency
Using a sturdy spoon or a spatula, begin extract mixing these ingredients together. At first, it might seem a bit crum extractbly, especially with the confectioners’ sugar. Keep mixing and pressing the ingredients together. You can also use your hands for this part if you find it easier; just ensure your hands are clean. The goal is to work the mixture until it forms a cohesive, thick dough-like consistency. It should be smooth enough to spread without being sticky or greasy. This peanut butter mixture is essentially a no-bake fudge layer, and its texture is key to the overall success of the bark. Make sure there are no dry pockets of confectioners’ sugar remaining and that the butter is fully incorporated.
Assembling the Chocolate Layers
Melting the First Layer of Chocolate
Now it’s time to work with the chocolate. We’ll be using the milk chocolate chips in two stages. Take 2 cups (approximately 364g) of the milk chocolate chips and place them in a microwave-safe bowl. Microwave them in 30-second intervals, stirring thoroughly after each interval. It’s crucial to stir even if it doesn’t look melted, as residual heat will continue to melt the chips. Be patient and avoid overheating, as burnt chocolate is difficult to salvage. You want a smooth, glossy melted chocolate. Alternatively, you can melt the chocolate using a double boiler method for more control.
Creating the Chocolate Base
Once your 2 cups of milk chocolate chips are perfectly melted and smooth, you need to prepare a baking sheet. Line a large baking sheet with parchment paper or a silicone baking mat. This will prevent the chocolate from sticking and make it easy to lift the finished bark. Pour the melted milk chocolate onto the prepared baking sheet. Using an offset spatula or the back of a spoon, spread the chocolate into an even layer, about 1/4 inch thick. Aim for a rectangular shape, as this will make it easier to cut later. You can make it as wide or as long as you like, keeping in mind the thickness.
Adding the Peanut Butter and Reese’s Pieces
Spreading the Peanut Butter Layer
With your chocolate base spread out and still somewhat soft (but not hot), it’s time to add the star of the show: the peanut butter mixture. Take the prepared peanut butter dough and carefully dollop it over the melted chocolate layer. Using your offset spatula or the back of a spoon, gently spread the peanut butter mixture evenly over the chocolate. You don’t want to mix it into the chocolate; rather, you want to create a distinct layer on top. Try to spread it as evenly as possible to ensure consistent flavor and texture in every bite of your Reese’s Pieces Peanut Butter Bark. Leave a small border around the edges if you can, as this helps contain the peanut butter layer.
Decorating with Reese’s Pieces
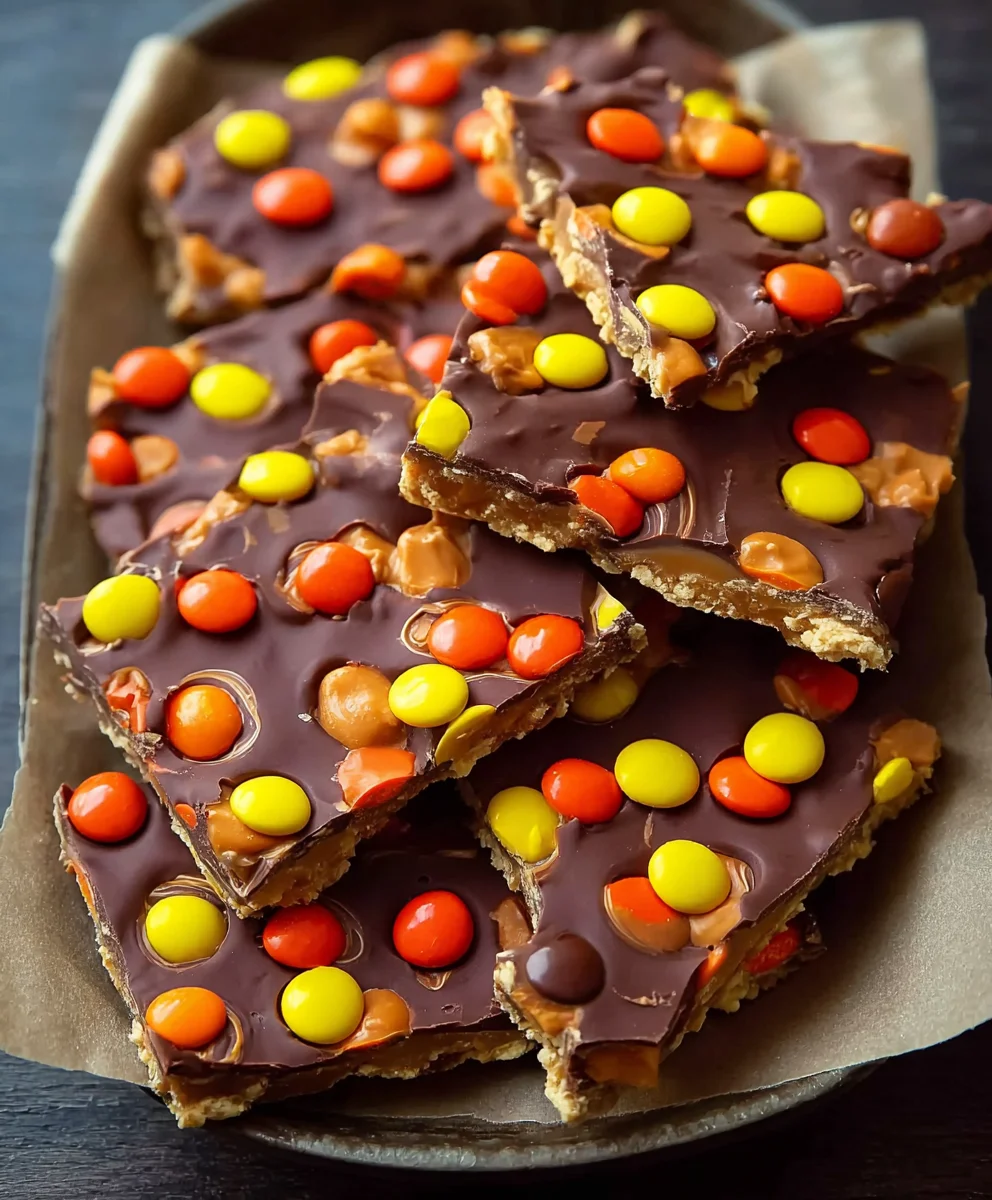
Now for the fun and visually appealing part! Sprinkle the 1 cup of Reese’s Pieces candy generously over the peanut butter layer. Gently press them into the peanut butter so they adhere well and don’t slide off when the bark is cut. You can arrange them in a pattern or just scatter them for a rustic look. Make sure they are distributed evenly to ensure you get that signature Reese’s Pieces crunch and peanut butter cup flavor in every piece of bark.
Finishing and Chilling
Melting and Drizzling the Remaining Chocolate
Take the remaining 1 1/2 cups (approximately 273g) of milk chocolate chips and melt them using the same method as before: in 30-second intervals in the microwave, stirring well between each. Once smooth and glossy, you have a couple of options for applying this final chocolate layer. You can either drizzle it over the Reese’s Pieces in a decorative pattern using a spoon or a piping bag, or you can spread a very thin, even layer of the remaining melted chocolate over the entire surface, ensuring it covers some of the Reese’s Pieces. Drizzling is often preferred for visual appeal.
Chilling and Setting the Bark
Once your Reese’s Pieces Peanut Butter Bark is fully assembled and decorated, it’s crucial to let it set. Carefully transfer the baking sheet to the refrigerator. Allow it to chill for at least 1 to 2 hours, or until the chocolate is completely firm and has set. You’ll know it’s ready when the chocolate snaps cleanly when broken. For an even quicker set, you can place it in the freezer for about 30-45 minutes, but be mindful not to let it get too cold, which can affect the texture. Once fully chilled and hardened, you can proceed to breaking or cutting it into pieces.
Conclusion:
And there you have it – your very own batch of delicious Reese’s Pieces Peanut Butter Bark! We hope you enjoyed this simple yet incredibly satisfying recipe. This bark is the perfect treat for movie nights, holiday gatherings, or simply when you need a sweet and salty pick-me-up. The delightful combination of creamy peanut butter, crunchy Reese’s Pieces, and rich chocolate is truly irresistible. Feel free to get creative with your toppings and enjoy sharing this homemade goodness with friends and family.
For serving suggestions, this Reese’s Pieces Peanut Butter Bark is fantastic on its own, but it also pairs wonderfully with a glass of cold milk or a hot cup of coffee. You can break it into irregular pieces for a rustic look or cut it into neat squares for a more polished presentation.
When it comes to variations, don’t be afraid to experiment! You could add a sprinkle of sea salt for an extra salty kick, or perhaps some chopped peanuts for even more crunch. If you’re feeling adventurous, try swirling in some caramel sauce before the chocolate sets. The possibilities are truly endless!
We encourage you to give this recipe a try and let us know how it turns out. Happy baking!
Frequently Asked Questions:
How should I store my Reese’s Pieces Peanut Butter Bark?
To keep your Reese’s Pieces Peanut Butter Bark fresh and delicious, store it in an airtight container at room temperature. If your kitchen is particularly warm, it’s best to store it in the refrigerator to prevent the chocolate from melting. It should stay good for up to a week.
Can I use different types of chocolate for this recipe?
Absolutely! While milk chocolate is a classic choice that complements the peanut butter and Reese’s Pieces perfectly, you can certainly experiment with dark chocolate or even white chocolate. Each will offer a slightly different flavor profile, so have fun exploring!
Reese’s Pieces Peanut Butter Bark Recipe-Easy Treat
An easy and delicious treat featuring layers of creamy peanut butter fudge and chocolate, topped with iconic Reese’s Pieces.
Ingredients
-
3 1/2 cups milk chocolate chips, divided
-
1 cup creamy peanut butter
-
1 cup confectioners’ sugar
-
3 tablespoons unsalted butter, softened
-
1 cup Reese’s Pieces candy
Instructions
-
Step 1
Prepare the peanut butter fudge layer by combining 1 cup creamy peanut butter, 1 cup confectioners’ sugar, and 3 tablespoons softened unsalted butter in a bowl. Mix until a cohesive, thick dough-like consistency is achieved. -
Step 2
Melt 2 cups of milk chocolate chips in a microwave-safe bowl in 30-second intervals, stirring well after each, until smooth and glossy. -
Step 3
Line a baking sheet with parchment paper and spread the melted chocolate into an even layer, about 1/4 inch thick. -
Step 4
Dollop the peanut butter mixture over the melted chocolate and gently spread it into an even layer on top. -
Step 5
Sprinkle 1 cup of Reese’s Pieces candy generously over the peanut butter layer and gently press them in. -
Step 6
Melt the remaining 1 1/2 cups of milk chocolate chips. Drizzle over the Reese’s Pieces in a decorative pattern or spread thinly over the entire surface. -
Step 7
Transfer the baking sheet to the refrigerator and chill for at least 1 to 2 hours, or until completely firm. Break or cut into pieces.
Important Information
Nutrition Facts (Per Serving)
It is important to consider this information as approximate and not to use it as definitive health advice.
Allergy Information
Please check ingredients for potential allergens and consult a health professional if in doubt.


Leave a Comment