
Strawberry Lemonade Cake is more than just a dessert; it’s a vibrant burst of sunshine on a plate, a delightful dance between tart and sweet that instantly transports you to a lazy summer afternoon. Have you ever craved a treat that perfectly captures the essence of a refreshing drink on a sweltering day? That’s precisely the magic this cake offers. Its popularity stems from that irresistible combination – the bright, zesty tang of fresh lemon perfectly balanced by the sweet, juicy notes of ripe strawberries. What truly sets this Strawberry Lemonade Cake apart is its remarkable lightness and moisture, a testament to the thoughtful blend of ingredients. It’s not overly dense or cloying, but rather a delicate symphony of flavors and textures that leaves you feeling utterly satisfied without being weighed down. Get ready to bake up a slice of pure bliss that will have everyone asking for seconds (and thirds!).
Ingredients:
- 150 g unsalted butter, softened
- 280 g powdered sugar
- 3 medium eggs, at room temperature
- 1 1/2 tsp vanilla extract
- 260 g all-purpose flour
- 10 g cornstarch
- 1 1/2 tsp baking powder
- 1/2 tsp baking soda
- 1/4 tsp fine salt
- 210 ml buttermilk
- Juice of 1/2 lemon and zest
- Homemade strawberry compote
- Homemade Strawberry Swiss Buttercream
- Lemon Mascarpone Frosting (homemade)
- 50 g white chocolate
Baking the Strawberry Lemonade Cake Layers
The foundation of a spectacular Strawberry Lemonade Cake is perfectly baked, tender cake layers. We’ll start by creaming the butter and sugar together, which is crucial for incorporating air and creating a light texture.
Step 1: Prepare the Dry Ingredients
In a medium bowl, whisk together the all-purpose flour, cornstarch, baking powder, baking soda, and fine salt. Sifting these ingredients can help to remove any lumps and ensure even distribution, leading to a finer crumb in your cake. Set this bowl aside. Having your dry ingredients measured and ready makes the subsequent steps flow smoothly.
Step 2: Cream Butter and Sugar
In a large mixing bowl, cream the softened unsalted butter and powdered sugar together using an electric mixer on medium speed. Beat them for about 3 to 5 minutes, or until the mixture is pale, light, and fluffy. This process is called creaming, and it’s essential for creating an airy cake texture. Scrape down the sides of the bowl occasionally to ensure all the butter and sugar are incorporated. The mixture should look significantly lighter in color and airy.
Step 3: Add Wet Ingredients and Lemon Flavor
With the mixer on low speed, gradually add the room temperature eggs, one at a time, beating well after each addition. It’s important that the eggs are at room temperature so they emulsify better with the butter mixture, preventing a greasy or broken batter. Next, stir in the vanilla extract and the juice and zest of half a lemon. The lemon zest adds a bright, aromatic punch that complements the sweetness of the cake beautifully. Ensure the zest is finely grated to avoid large pieces in the final cake.
Step 4: Alternate Dry and Wet Ingredients
Now, we will alternate adding the dry ingredients and the buttermilk to the butter mixture. Begin by adding about one-third of the dry ingredients to the wet ingredients and mixing on low speed until just combined. Then, add half of the buttermilk and mix until just incorporated. Repeat this process, adding another third of the dry ingredients, followed by the remaining buttermilk. Finally, add the last third of the dry ingredients and mix until the batter is just smooth and no streaks of flour remain. Be careful not to overmix at this stage, as overmixing can develop the gluten in the flour, resulting in a tough cake. Scrape down the sides of the bowl one last time to ensure everything is fully combined. The batter should be smooth and pourable.
Step 5: Bake the Cake Layers
Divide the batter evenly between two prepared 8-inch cake pans. I like to grease and flour my pans, or use parchment paper liners for easy removal. Smooth the tops with a spatula. Bake in a preheated oven at 175°C (350°F) for 25-30 minutes, or until a toothpick inserted into the center comes out clean. The exact baking time will depend on your oven, so start checking around the 25-minute mark. Allow the cakes to cool in the pans for about 10 minutes before inverting them onto a wire rack to cool completely. It’s crucial that the cake layers are entirely cool before you attempt to frost them, otherwise, your frosting will melt.
Assembling and Decorating the Strawberry Lemonade Cake
Once your cake layers are baked and completely cooled, it’s time to bring together the delicious components to create your show-stopping Strawberry Lemonade Cake.
Step 6: Prepare the Strawberry Filling and First Frosting Layer
Once the cake layers have cooled completely, carefully level them if necessary. Place one cake layer on your serving plate or cake stand. Spread a generous layer of your homemade strawberry compote evenly over the top of this cake layer, making sure to leave a small border around the edge to prevent it from squeezing out when you add the next layer. This compote adds a burst of fresh strawberry flavor and a delightful texture. Next, apply a thin layer of the homemade Strawberry Swiss Buttercream over the compote. This acts as a crumb coat, helping to trap any loose crumbs and providing a smooth surface for the main frosting.
Step 7: Add the Second Cake Layer and Frost the Cake
Carefully place the second cake layer on top of the first. Now, it’s time for the main event: the Lemon Mascarpone Frosting. Generously frost the entire cake – the top and sides – with the Lemon Mascarpone Frosting. Use an offset spatula to create smooth, even coverage. For a rustic look, you can swirl the frosting, or for a smooth finish, take your time to achieve clean lines.
Step 8: Add Finishing Touches and White Chocolate Garnish
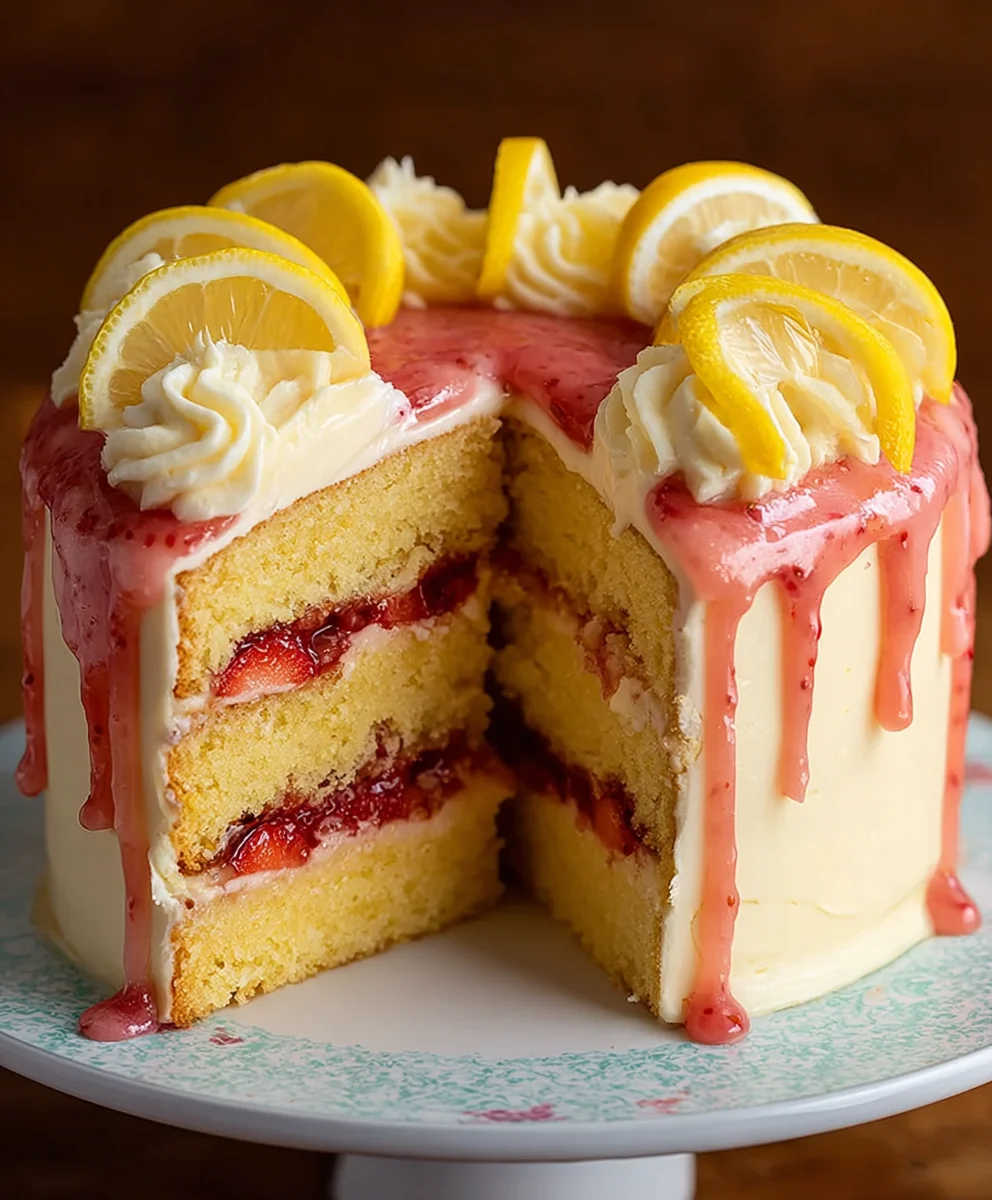
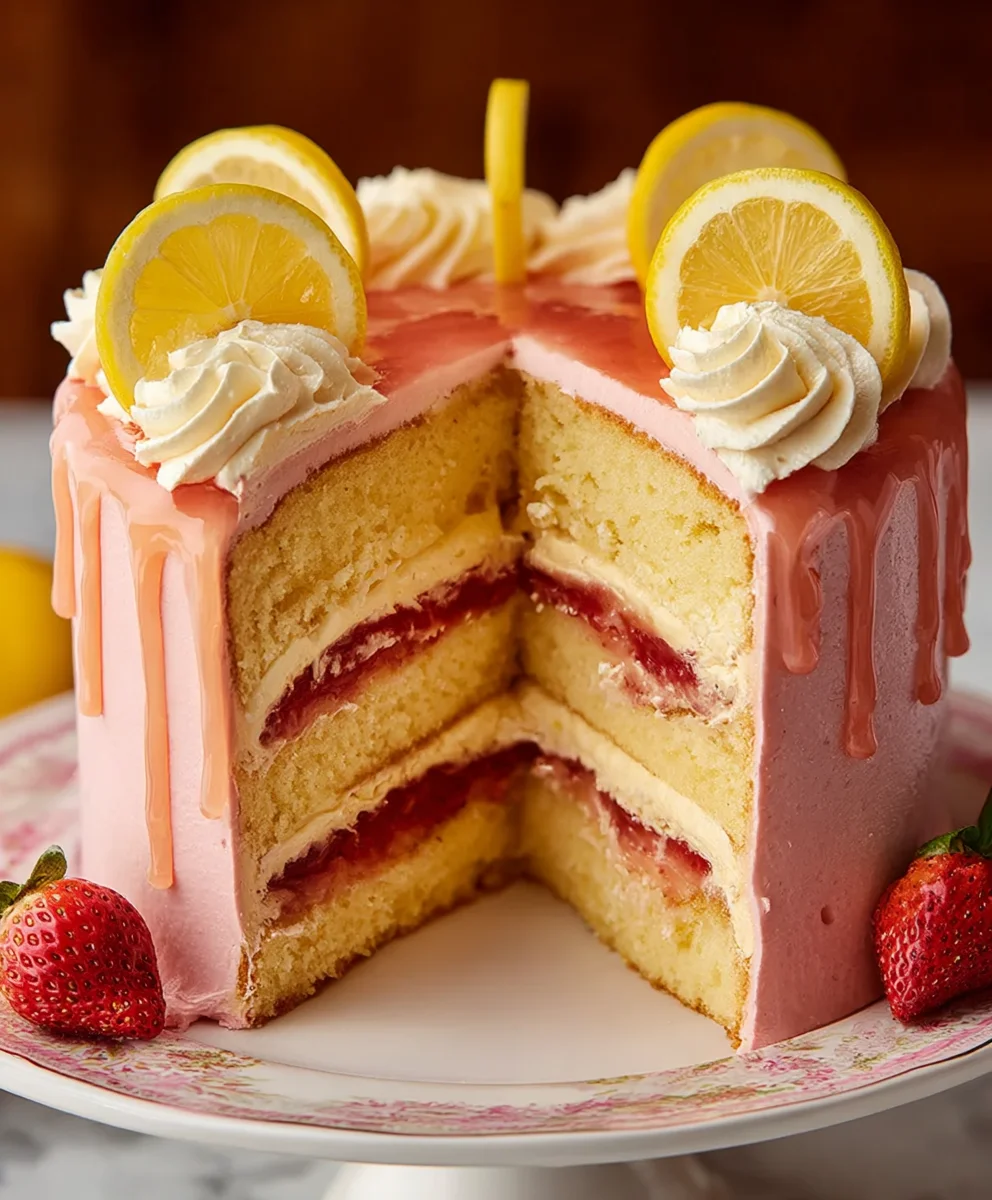
To elevate the visual appeal and add an extra layer of flavor, we’ll add some white chocolate. Gently melt the 50 g of white chocolate using a double boiler or in the microwave in short intervals, stirring frequently until smooth. Once melted, you can either drizzle it over the top of the cake, creating elegant patterns, or use a piping bag with a small tip to pipe delicate designs. You can also garnish the top with fresh strawberries or lemon slices for a beautiful presentation. Allow the cake to set for at least 30 minutes before slicing and serving to allow the flavors to meld and the frosting to firm up. This Strawberry Lemonade Cake is best enjoyed at room temperature.
Conclusion:
And there you have it – a delightful and refreshing Strawberry Lemonade Cake recipe that’s sure to become a new favorite! We’ve walked through creating this vibrant dessert, from mixing the tender cake layers infused with zesty lemon and sweet strawberries to whipping up a luscious lemonade frosting. This cake is perfect for spring gatherings, summer picnics, or any occasion that calls for a burst of bright, cheerful flavor. Don’t be afraid to get creative with your presentation; fresh strawberry slices or a sprinkle of lemon zest can elevate its already stunning appearance. We truly hope you enjoy baking and sharing this wonderfully balanced treat. It’s a simple yet impressive cake that always brings smiles.
For serving, consider pairing a slice of your Strawberry Lemonade Cake with a dollop of whipped cream or a scoop of vanilla bean ice cream for an extra layer of indulgence. If you’re feeling adventurous with variations, try adding a swirl of strawberry jam into the batter for intensified fruitiness, or substitute some of the lemon zest with lime zest for a different citrusy twist. For an adult version, a splash of limoncello in the frosting wouldn’t go amiss! Go ahead and give this recipe a try; you’ll be amazed at how easily you can create such a show-stopping dessert.
Frequently Asked Questions:
Q: Can I use frozen strawberries instead of fresh for the Strawberry Lemonade Cake?
Yes, you absolutely can! If using frozen strawberries, make sure to thaw them completely and drain off any excess liquid before folding them into the batter. This prevents the cake from becoming too wet. You might notice a slightly less vibrant color with frozen berries, but the flavor will still be wonderful.
Q: How long does the Strawberry Lemonade Cake last, and how should I store it?
This cake is best enjoyed within 2-3 days of baking. Store it in an airtight container at room temperature. If your kitchen is particularly warm, or if you have leftover frosting, it’s best to refrigerate it. Allow it to come to room temperature for about 30 minutes before serving for the best texture and flavor.
Strawberry Lemonade Cake – Delicious & Easy Recipe
A delightful and easy-to-make Strawberry Lemonade Cake featuring tender cake layers infused with lemon, layered with strawberry compote and frosted with creamy lemon mascarpone and strawberry Swiss buttercream.
Ingredients
-
150 g unsalted butter, softened
-
280 g powdered sugar
-
3 medium eggs, at room temperature
-
1 1/2 tsp vanilla extract
-
260 g all-purpose flour
-
10 g cornstarch
-
1 1/2 tsp baking powder
-
1/2 tsp baking soda
-
1/4 tsp fine salt
-
210 ml buttermilk
-
Juice of 1/2 lemon and zest
-
Homemade strawberry compote
-
Homemade Strawberry Swiss Buttercream
-
Lemon Mascarpone Frosting (homemade)
-
50 g white chocolate
Instructions
-
Step 1
Preheat oven to 175°C (350°F). Prepare two 8-inch cake pans by greasing and flouring or lining with parchment paper. In a medium bowl, whisk together all-purpose flour, cornstarch, baking powder, baking soda, and salt. Set aside. -
Step 2
In a large mixing bowl, cream softened unsalted butter and powdered sugar with an electric mixer on medium speed for 3-5 minutes until pale, light, and fluffy. Scrape down sides as needed. -
Step 3
Gradually add room temperature eggs one at a time on low speed, beating well after each addition. Stir in vanilla extract, lemon juice, and lemon zest. -
Step 4
Alternate adding the dry ingredients and buttermilk to the butter mixture. Begin with one-third of the dry ingredients, mix until just combined. Add half of the buttermilk, mix. Repeat with another third of dry, then remaining buttermilk. Finish with the last third of dry ingredients, mixing until just smooth. Do not overmix. -
Step 5
Divide batter evenly between prepared cake pans. Bake for 25-30 minutes, or until a toothpick inserted into the center comes out clean. Cool in pans for 10 minutes before inverting onto a wire rack to cool completely. -
Step 6
Once cake layers are completely cool, level them if necessary. Place one layer on a serving plate. Spread a generous layer of homemade strawberry compote, leaving a small border. Apply a thin layer of homemade Strawberry Swiss Buttercream over the compote as a crumb coat. -
Step 7
Carefully place the second cake layer on top. Generously frost the entire cake with Lemon Mascarpone Frosting, smoothing the top and sides with an offset spatula. -
Step 8
Melt white chocolate using a double boiler or microwave. Drizzle the melted white chocolate over the top of the cake for garnish, or pipe designs. Garnish with fresh strawberries or lemon slices if desired. Allow the cake to set for at least 30 minutes before slicing and serving.
Important Information
Nutrition Facts (Per Serving)
It is important to consider this information as approximate and not to use it as definitive health advice.
Allergy Information
Please check ingredients for potential allergens and consult a health professional if in doubt.


Leave a Comment