
Chicken Caesar Wraps are a weeknight dinner dream come true, a handheld marvel that packs all the beloved flavors of a classic Caesar salad into a convenient and satisfying format. If you’ve ever found yourself craving that creamy, tangy Caesar dressing, crisp romaine lettuce, and savory grilled chicken, but with the portability and ease of a wrap, then you’re in for a treat. It’s no wonder these Chicken Caesar Wraps have become a go-to for busy families, quick lunches, and even casual gatherings. What makes them so special? It’s the perfect marriage of textures and tastes – the tender chicken, the fresh crunch of lettuce, the salty parmesan, all swaddled in a warm tortilla and brought together by that irresistible Caesar dressing. They’re endlessly customizable and incredibly forgiving, making them a fantastic entry point for even novice cooks. Let’s dive into creating your own perfect batch!
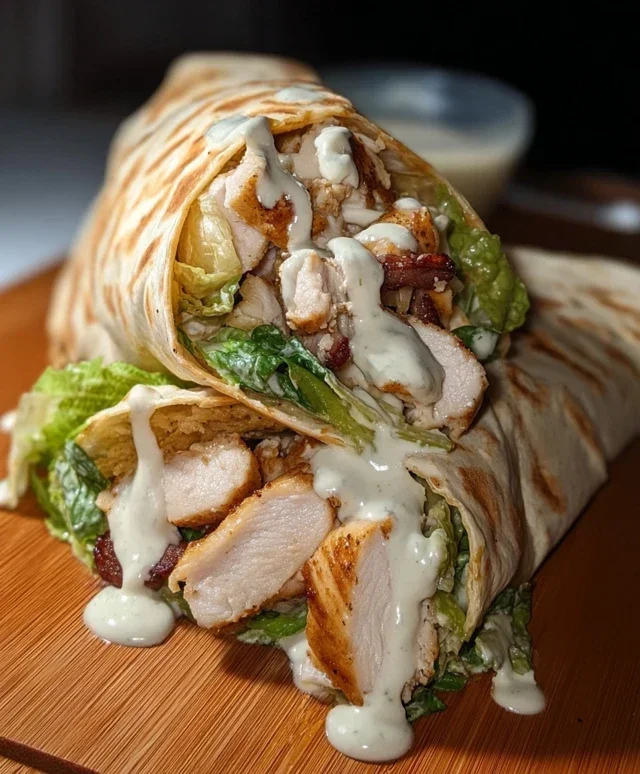
Chicken Caesar Wraps
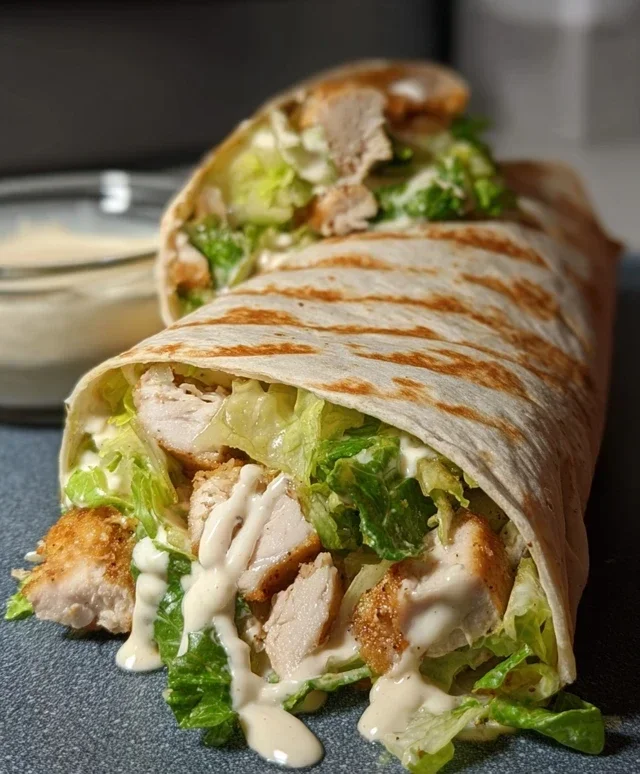
Looking for a quick, satisfying, and incredibly delicious meal that can be enjoyed for lunch or a light dinner? Look no further than these Chicken Caesar Wraps! They’re a fantastic way to enjoy all the classic flavors of a Caesar salad, conveniently packaged in a portable wrap. Whether you’re packing a lunch for work, school, or just want a no-fuss weeknight dinner, these wraps are a winner. They’re surprisingly easy to assemble, making them perfect for even begin extractner cooks. Plus, the combination of tender chicken, crisp lettuce, salty Parmesan, and creamy Caesar dressing is simply irresistible. Let’s get started and whip up some of these delightful wraps!
Ingredients:
Cooking Instructions
Preparing the Chicken
The star of our wraps is, of course, the chicken. For the best flavor and texture, I like to lightly season my chicken breasts before cooking. This ensures that every bite is packed with savory goodness. In a small bowl, I’ll combine a pinch of salt and a good grind of black pepper. Then, I’ll pat the chicken breasts dry with a paper towel – this helps create a nice sear when it hits the pan. Once dry, I’ll generously sprinkle the salt and pepper mixture all over both sides of the chicken. Don’t be shy with the seasoning; it makes a difference!
Next, we need to cook the chicken. You have a few options here, and I often choose to pan-sear it for a lovely golden crust. Heat a tablespoon of olive oil or your preferred cooking oil in a skillet over medium-high heat. Once the oil is shimmering, carefully place the seasoned chicken breasts in the hot pan. You should hear a satisfying sizzle! Let the chicken cook for about 5-7 minutes per side, or until it’s cooked through and no longer pink in the center. The exact cooking time will depend on the thickness of your chicken breasts. To be sure it’s done, you can use a meat thermometer; it should register an internal temperature of 165 degrees Fahrenheit (74 degrees Celsius). Alternatively, you can bake the chicken breasts in a preheated oven at 375 degrees Fahrenheit (190 degrees Celsius) for about 20-25 minutes, or until cooked through. Once cooked, remove the chicken from the pan and let it rest on a cutting board for about 5-10 minutes. This resting period is crucial; it allows the juices to redistribute throughout the meat, resulting in much more tender and moist chicken. If you try to slice it too soon, all those delicious juices will run out, leaving your chicken dry.
Assembling the Wraps
Now for the fun part: bringin extractg all our delicious ingredients together! Once the chicken has rested, it’s time to chop it up. I like to slice the chicken breasts into bite-sized pieces or thin strips. This makes them easier to eat within the wrap and ensures an even distribution of chicken in every bite. You can use a sharp knife and cutting board for this. If you prefer a finer texture, you can even shred the chicken with two forks after it has rested.
Next, we’ll prepare our tortillas. To make them more pliable and less likely to tear when rolling, I like to lightly warm them. You can do this by quickly heating them in a dry skillet over medium heat for about 15-30 seconds per side, or by wrapping them in a damp paper towel and microwaving them for about 20-30 seconds. Just be careful not to overheat them, as they can become brittle.
Now, lay out one of your warmed tortillas on a clean surface. We’re going to start building our delicious wrap! Begin extract by spreading a generous amount of your favorite Caesar dressing down the center of the tortilla. You want enough dressing to coat everything nicely, but not so much that it becomes messy. Then, layer on about half a cup of the chopped romaine lettuce. The crispness of the lettuce is essential for that classic Caesar salad experience. Next, add a good portion of your cooked, chopped chicken. Sprinkle a generous amount of the grated Parmesan cheese over the chicken and lettuce. The salty, nutty flavor of the Parmesan is what really ties the Caesar flavors together. Finally, season with a little extra salt and pepper if you desire, though the dressing and Parmesan often provide plenty of saltiness.
Rolling the Perfect Wrap
The final, and perhaps most satisfying, step is to roll everything up into a neat and tidy wrap. This might take a little practice, but once you get the hang of it, it’s a breeze. Start by folding in the two sides of the tortilla closest to you, just enough to enclose the filling. Then, grab the bottom edge of the tortilla (the edge furthest from you) and start to roll it upwards, tucking the filling in as you go. Try to keep the filling compact by gently pressing down as you roll. The goal is to create a tight, enclosed package that won’t unravel. If your tortilla is particularly large or your filling is generous, it can be helpful to fold in the sides first and then tightly roll from the bottom up. You can even secure the wrap with a toothpick if you’re worried about it coming undone, especially if you’re packing it for a lunchbox. Repeat this process for the remaining three tortillas.
And there you have it! Delicious, homemade Chicken Caesar Wraps ready to be enjoyed. Serve them immediately for a fresh and vibrant meal, or wrap them tightly in parchment paper or foil for a perfect grab-and-go option. These wraps are fantastic on their own, or you can serve them with a side of chips, a small soup, or even some extra greens for a more substantial meal. Enjoy!
Conclusion:
And there you have it! These Chicken Caesar Wraps are a true weeknight savior – incredibly quick to assemble, packed with satisfying flavor, and endlessly customizable. The creamy Caesar dressing, tender chicken, crisp romaine, and hearty wrap create a perfectly balanced bite that’s both delicious and portable. They’re ideal for a speedy lunch, a light dinner, or even a picnic treat. Don’t be afraid to get creative with your fillings; swapping out the chicken for shrimp or adding some sun-dried tomatoes can offer a delightful twist.
I truly encourage you to give this recipe a try. It’s a fantastic way to enjoy the classic Caesar salad in a fun, handheld format. The simplicity of this Chicken Caesar Wrap makes it a go-to for busy days, and the smiles it brings to the table are always worth it!
Frequently Asked Questions:
Can I make the Caesar dressing from scratch for my Chicken Caesar Wraps?
Absolutely! While store-bought dressing is convenient, making your own Caesar dressing adds an extra layer of freshness and flavor. A simple homemade version typically includes olive oil, egg yolk, Dijon mustard, garlic, anchovy paste (or Worcestershire sauce), lemon juice, and Parmesan cheese. Whisk it all together until emulsified and creamy.
What are some good variations for these Chicken Caesar Wraps?
The beauty of these wraps is their versatility! For a vegetarian option, consider grilled halloumi or roasted chickpeas. You can also add other vegetables like diced bell peppers, shredded carrots, or avocado for extra texture and nutrients. For a spicier kick, toss the chicken with a bit of buffalo sauce before adding it to the wrap.
Can I prepare the ingredients for these Chicken Caesar Wraps ahead of time?
Yes, you can! Cook and shred or dice the chicken, chop the romaine lettuce, and prepare your Caesar dressing a day in advance. Store each component separately in airtight containers in the refrigerator. This makes assembling the wraps even faster when you’re ready to eat.
Chicken Caesar Wraps
Quick and easy chicken Caesar wraps perfect for a weeknight meal.
Ingredients
-
2 boneless, skinless chicken breasts
-
4 large tortillas
-
2 cups chopped romaine lettuce
-
1/2 cup grated Parmesan cheese
-
Caesar dressing
-
Salt and pepper to taste
Instructions
-
Step 1
Season chicken breasts with salt and pepper. Cook chicken breasts in a skillet over medium-high heat until fully cooked through, about 6-8 minutes per side. Let rest and then shred or dice. -
Step 2
In a bowl, combine the chopped romaine lettuce and grated Parmesan cheese. -
Step 3
Add the cooked chicken to the lettuce and cheese mixture. -
Step 4
Drizzle a generous amount of Caesar dressing over the chicken, lettuce, and cheese. Toss to coat everything evenly. -
Step 5
Warm the tortillas slightly according to package directions. This makes them more pliable. -
Step 6
Spoon the chicken Caesar mixture onto the center of each tortilla. -
Step 7
Fold in the sides of the tortilla and then roll up tightly to form the wrap.
Important Information
Nutrition Facts (Per Serving)
It is important to consider this information as approximate and not to use it as definitive health advice.
Allergy Information
Please check ingredients for potential allergens and consult a health professional if in doubt.

Leave a Comment