
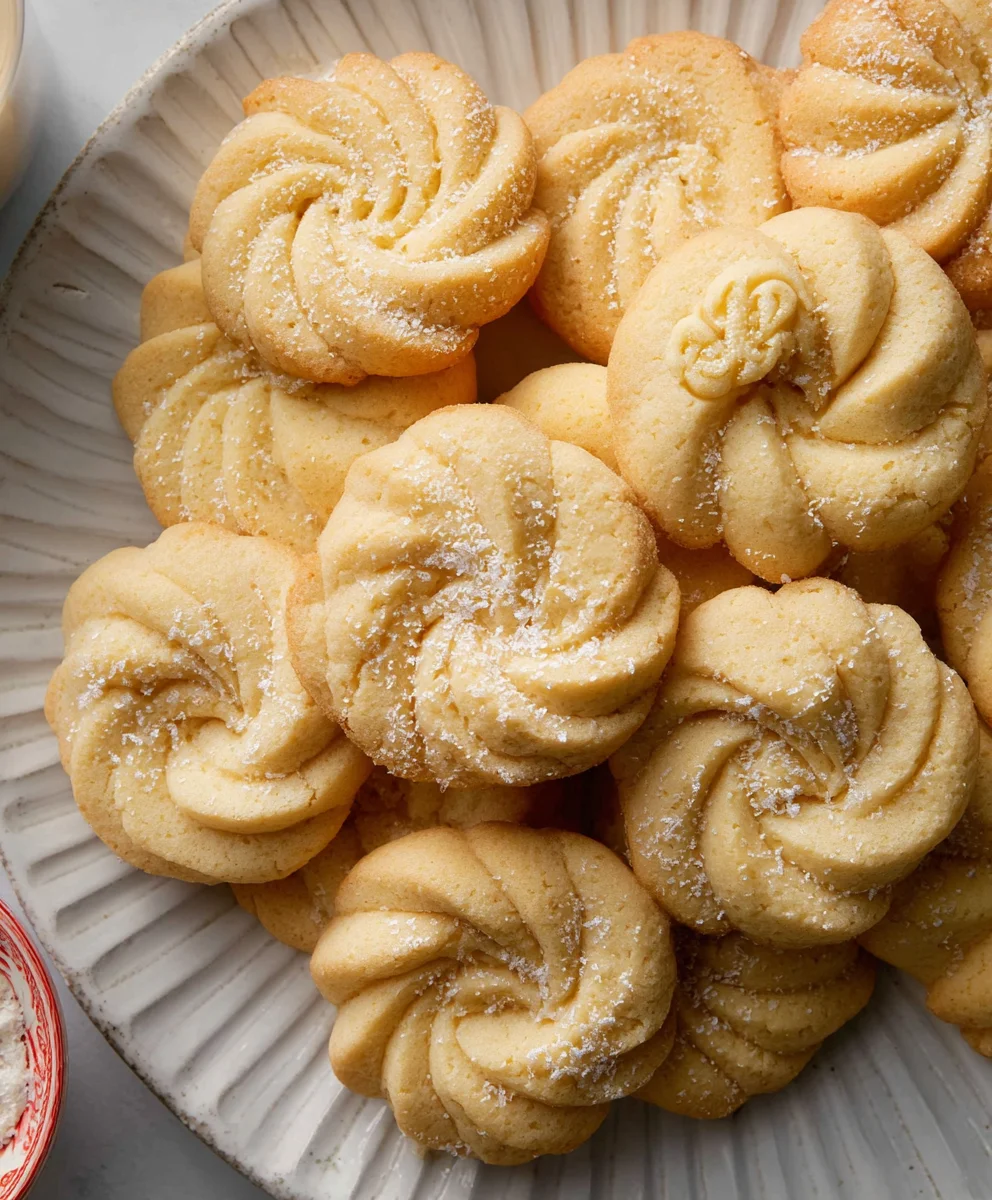
Danish Butter Cookies (Melt in your mouth) are more than just a simple treat; they are a nostalgic journey to childhood, a symbol of elegant simplicity, and an absolute delight for the senses. Who among us hasn’t savored the delicate crunch, the rich aroma, and that impossibly tender texture that defines these classic cookies? I know for me, the very thought brings back memories of holidays, special occasions, and those coveted blue tins that always felt like a treasure chest. What makes Danish Butter Cookies so utterly irresistible? It’s the pure, unadulterated goodness of butter, whipped to airy perfection with sugar and flour, creating a cookie that truly lives up to its “melt in your mouth” promise. This recipe aims to capture that authentic magic, allowing you to recreate that delightful experience right in your own kitchen.
Ingredients:
- 1 cup (227 g) European salted butter (room temperature)
- 1/2 cup (100 g) granulated sugar
- 1/8 teaspoon salt
- 2 egg yolks
- 2 teaspoons (10 g) vanilla extract
- 1 tablespoon (15 g) whole milk (or more to soften)
- 2 cups (220 g) all-purpose flour
- 1/2 cup (50 g) cake flour
- Coarse sugar (for decorating)
Preparing the Cookie Dough
Creaming the Butter and Sugar
The journey to melt-in-your-mouth Danish Butter Cookies begins with properly creaming your butter and sugar. This step is crucial for developing the tender crumb and delicate texture we’re aiming for. Ensure your European salted butter is truly at room temperature – soft enough to easily indent with your finger, but not melted. This allows it to incorporate air effectively. In a large mixing bowl, combine the softened butter and granulated sugar. Using an electric mixer (a stand mixer with a paddle attachment is ideal, but a hand mixer works perfectly well too), beat these together on medium speed for about 3-5 minutes. You’re looking for a pale yellow, fluffy mixture. This aeration process is what contributes significantly to the lightness of the finished cookie. Scrape down the sides of the bowl periodically to ensure everything is evenly incorporated. Don’t rush this step; patience here pays off in the final cookie texture.
Incorporating Wet Ingredients
Once your butter and sugar are beautifully creamy, it’s time to add the richness and flavor. Add the 1/8 teaspoon of salt to the bowl. This might seem like a small amount, but it’s essential for balancing the sweetness and enhancing the butter flavor. Next, gently whisk in the two egg yolks. Egg yolks are key to the cookie’s richness and tender texture, providing fat and emulsifying the mixture. Beat until just combined. You don’t want to overmix at this stage. Now, add the fragrant 2 teaspoons of vanilla extract. Vanilla is a classic pairing with butter, and using a good quality extract will elevate the overall taste. Beat again until everything is smoothly incorporated. Finally, add the 1 tablespoon of whole milk. This helps to create a slightly softer dough, making it easier to handle and shape. If your dough feels a bit too stiff at this point, don’t hesitate to add another teaspoon of milk. Mix until you have a smooth, homogenous wet mixture.
Adding the Flours
Now we introduce the dry ingredients that will form the structure of our Danish Butter Cookies. In a separate medium bowl, whisk together the 2 cups of all-purpose flour and the 1/2 cup of cake flour. Cake flour has a lower protein content than all-purpose flour, which results in a more tender and delicate crumb. This combination is key to achieving that sought-after melt-in-your-mouth quality. Gradually add the flour mixture to the wet ingredients. It’s best to do this in three additions, mixing on low speed until just combined after each addition. Be careful not to overmix the dough once the flour is added. Overmixing can develop the gluten in the flour, leading to tougher cookies. You’re aiming for a dough that just comes together. It might still look a little crumbly, but it should hold its shape when pressed.
Chilling and Shaping the Cookies
Chilling the Dough
This is a critical step for easy handling and to prevent the cookies from spreading too much during baking. Once the dough is formed, it’s important to chill it. You can do this in one of two ways. You can either turn the dough out onto a clean surface, gently bring it together into a disk, wrap it tightly in plastic wrap, and refrigerate it for at least 30 minutes. Alternatively, if you plan to pipe your cookies, you can place the dough directly into a piping bag after this mixing stage and refrigerate the piping bag. Chilling firms up the butter, making the dough easier to handle and shape, and helps the cookies maintain their intended form while baking, ensuring those beautiful, consistent shapes. A chilled dough is less likely to spread out excessively in the oven, keeping your cookies delicate and precisely formed.
Shaping the Danish Butter Cookies
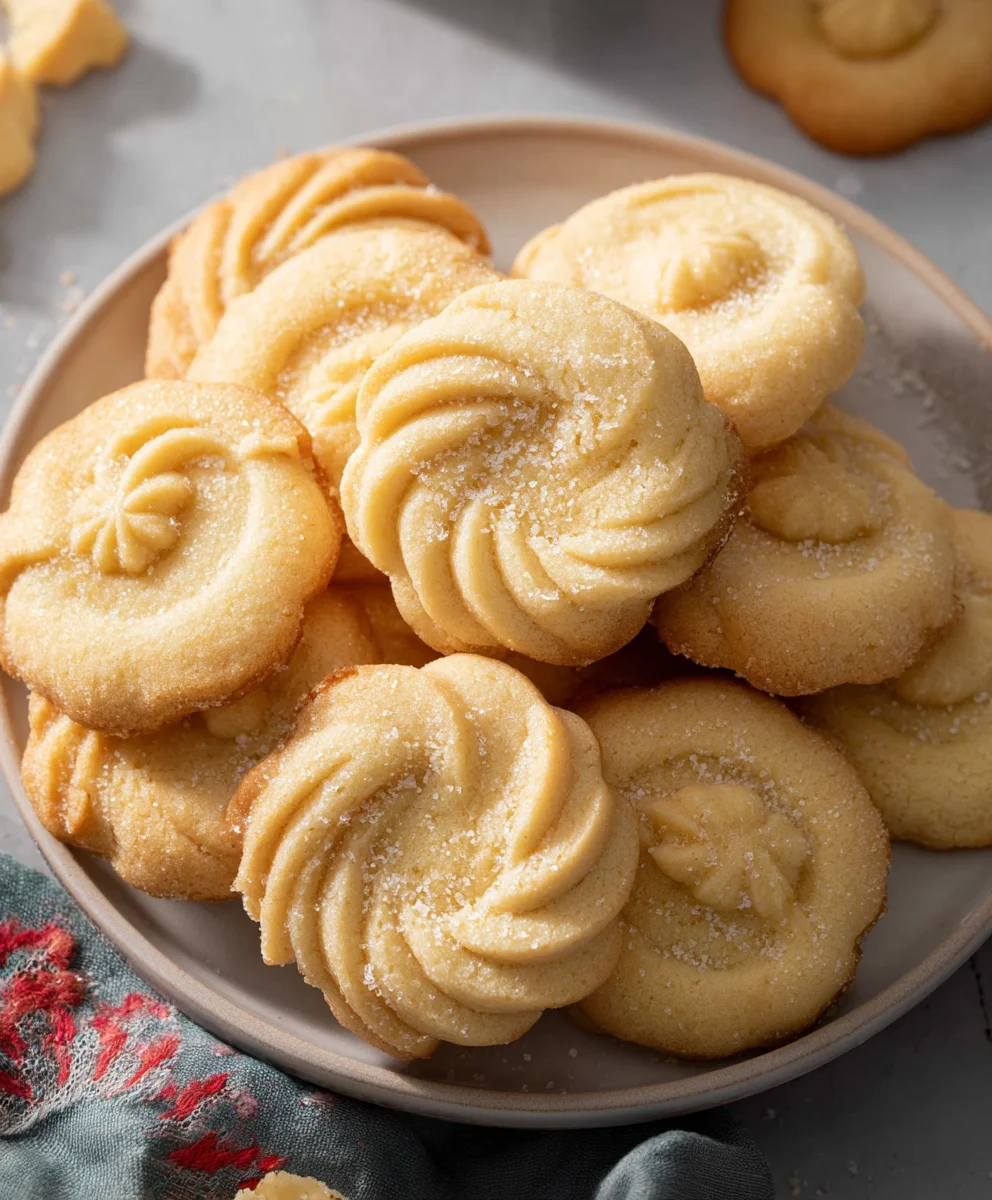
Once the dough is well-chilled and firm, it’s time to shape these delightful cookies. If you’ve chosen to roll and cut, lightly flour your work surface and a rolling pin. Roll the dough to about 1/4-inch thickness. Using your favorite cookie cutters – traditional floral shapes or simple rounds are classic – cut out your cookies. Reroll scraps gently, trying not to overwork the dough. If you’re using a piping bag fitted with a star or round tip, the chilled dough should be firm enough to pipe. Pipe small swirls or rosettes onto parchment-lined baking sheets. Aim for cookies of similar size so they bake evenly. This shaping process is where you add your personal touch, turning simple dough into charming treats.
Baking and Finishing
Baking the Cookies to Golden Perfection
Preheat your oven to 350°F (175°C). Line baking sheets with parchment paper. This prevents sticking and ensures even baking. Arrange your shaped cookies on the prepared baking sheets, leaving a little space between them as they may spread slightly. Place the baking sheets in the preheated oven. Bake for 10-15 minutes, or until the edges are lightly golden brown and the centers are set. The baking time will vary depending on the size and thickness of your cookies. Keep a close eye on them during the last few minutes of baking, as they can go from perfectly golden to over-baked very quickly. The goal is a delicate golden hue, not a deep brown. The aroma that fills your kitchen during this stage is truly intoxicating and a promise of the deliciousness to come.
Cooling and Decorating
Once baked, carefully remove the baking sheets from the oven. Let the cookies cool on the baking sheets for 5 minutes. This allows them to firm up slightly before you move them. Then, using a spatula, transfer the cookies to a wire rack to cool completely. This is the crucial stage for achieving that signature crispness. While the cookies are still warm but not hot, you can sprinkle them with coarse sugar for a touch of sparkle and sweetness. The coarse sugar adds a delightful crunch and visual appeal that is characteristic of authentic Danish Butter Cookies. Allow them to cool completely on the wire rack before storing them in an airtight container to maintain their melt-in-your-mouth texture. Enjoy these buttery, crumbly delights that truly melt on your tongue!
Conclusion:
And there you have it! You’ve successfully learned how to create these delightful Danish Butter Cookies (Melt in your mouth). We’ve walked through each step, from creaming the butter and sugar to achieving that perfect delicate crumb. The result is a cookie that truly lives up to its name, dissolving on your tongue with a rich, buttery flavor. I encourage you to give this recipe a try; it’s surprisingly simple and the reward is absolutely worth it. These cookies are perfect for any occasion, whether it’s a special gathering, a thoughtful homemade gift, or just a comforting treat with your afternoon tea. Experiment with the serving suggestions, and don’t be afraid to explore the variations to make them your own. Happy baking!
Frequently Asked Questions:
Can I substitute the butter with margarine?
While you can technically substitute, it’s highly recommended to use real butter for the best results. The unique flavor and texture of these Danish Butter Cookies (Melt in your mouth) rely heavily on the high fat content and specific properties of butter. Margarine can result in a different texture and a less authentic flavor.
How should I store these cookies?
To maintain their melt-in-your-mouth quality, store your Danish Butter Cookies in an airtight container at room temperature. They will stay fresh and delicious for up to a week. If you’re not eating them within that timeframe, you can freeze them in a single layer on a baking sheet until firm, then transfer them to a freezer-safe bag or container for up to three months.
What other flavors can I add to the dough?
The beauty of this base recipe is its versatility! For a hint of citrus, add a teaspoon of lemon or orange zest. You can also incorporate a touch of almond extract along with or instead of vanilla. For a slightly more sophisticated flavor, a pinch of cardamom can be wonderful. Just be sure to add these additions along with the other wet ingredients.
Melt-in-your-mouth Danish Butter Cookies Recipe
Classic Danish butter cookies, known for their tender crumb and buttery flavor, perfect for any occasion. These cookies melt in your mouth with a delicate sweetness.
Ingredients
-
1 cup (227 g) European salted butter, room temperature
-
1/2 cup (100 g) granulated sugar
-
1/8 teaspoon salt
-
2 egg yolks
-
2 teaspoons (10 g) vanilla extract
-
1 tablespoon (15 g) whole milk, or more to soften
-
2 cups (220 g) all-purpose flour
-
1/2 cup (50 g) cake flour
-
Coarse sugar, for decorating
Instructions
-
Step 1
Cream together the softened butter and granulated sugar in a large bowl using an electric mixer on medium speed for 3-5 minutes until pale yellow and fluffy. This step aerates the mixture for a lighter cookie. -
Step 2
Beat in the salt, egg yolks, vanilla extract, and whole milk until just combined and smooth. Add an extra teaspoon of milk if the dough feels too stiff. -
Step 3
In a separate bowl, whisk together the all-purpose flour and cake flour. Gradually add the flour mixture to the wet ingredients in three additions, mixing on low speed until just combined after each. Do not overmix. -
Step 4
Chill the dough. Either form into a disk, wrap tightly in plastic wrap, and refrigerate for at least 30 minutes, or place directly into a piping bag and refrigerate if planning to pipe. -
Step 5
Preheat oven to 350°F (175°C). Line baking sheets with parchment paper. Shape the chilled dough by rolling to 1/4-inch thickness and cutting with cookie cutters, or pipe swirls or rosettes onto the prepared sheets. -
Step 6
Bake for 10-15 minutes, or until the edges are lightly golden brown and the centers are set. Watch closely as they can overbake quickly. -
Step 7
Let cookies cool on the baking sheets for 5 minutes, then transfer to a wire rack to cool completely. Sprinkle with coarse sugar while still warm for decoration and added crunch.
Important Information
Nutrition Facts (Per Serving)
It is important to consider this information as approximate and not to use it as definitive health advice.
Allergy Information
Please check ingredients for potential allergens and consult a health professional if in doubt.
Leave a Comment